Survey and Alignment Concept for Construction of SPIRAL

- Slides: 1

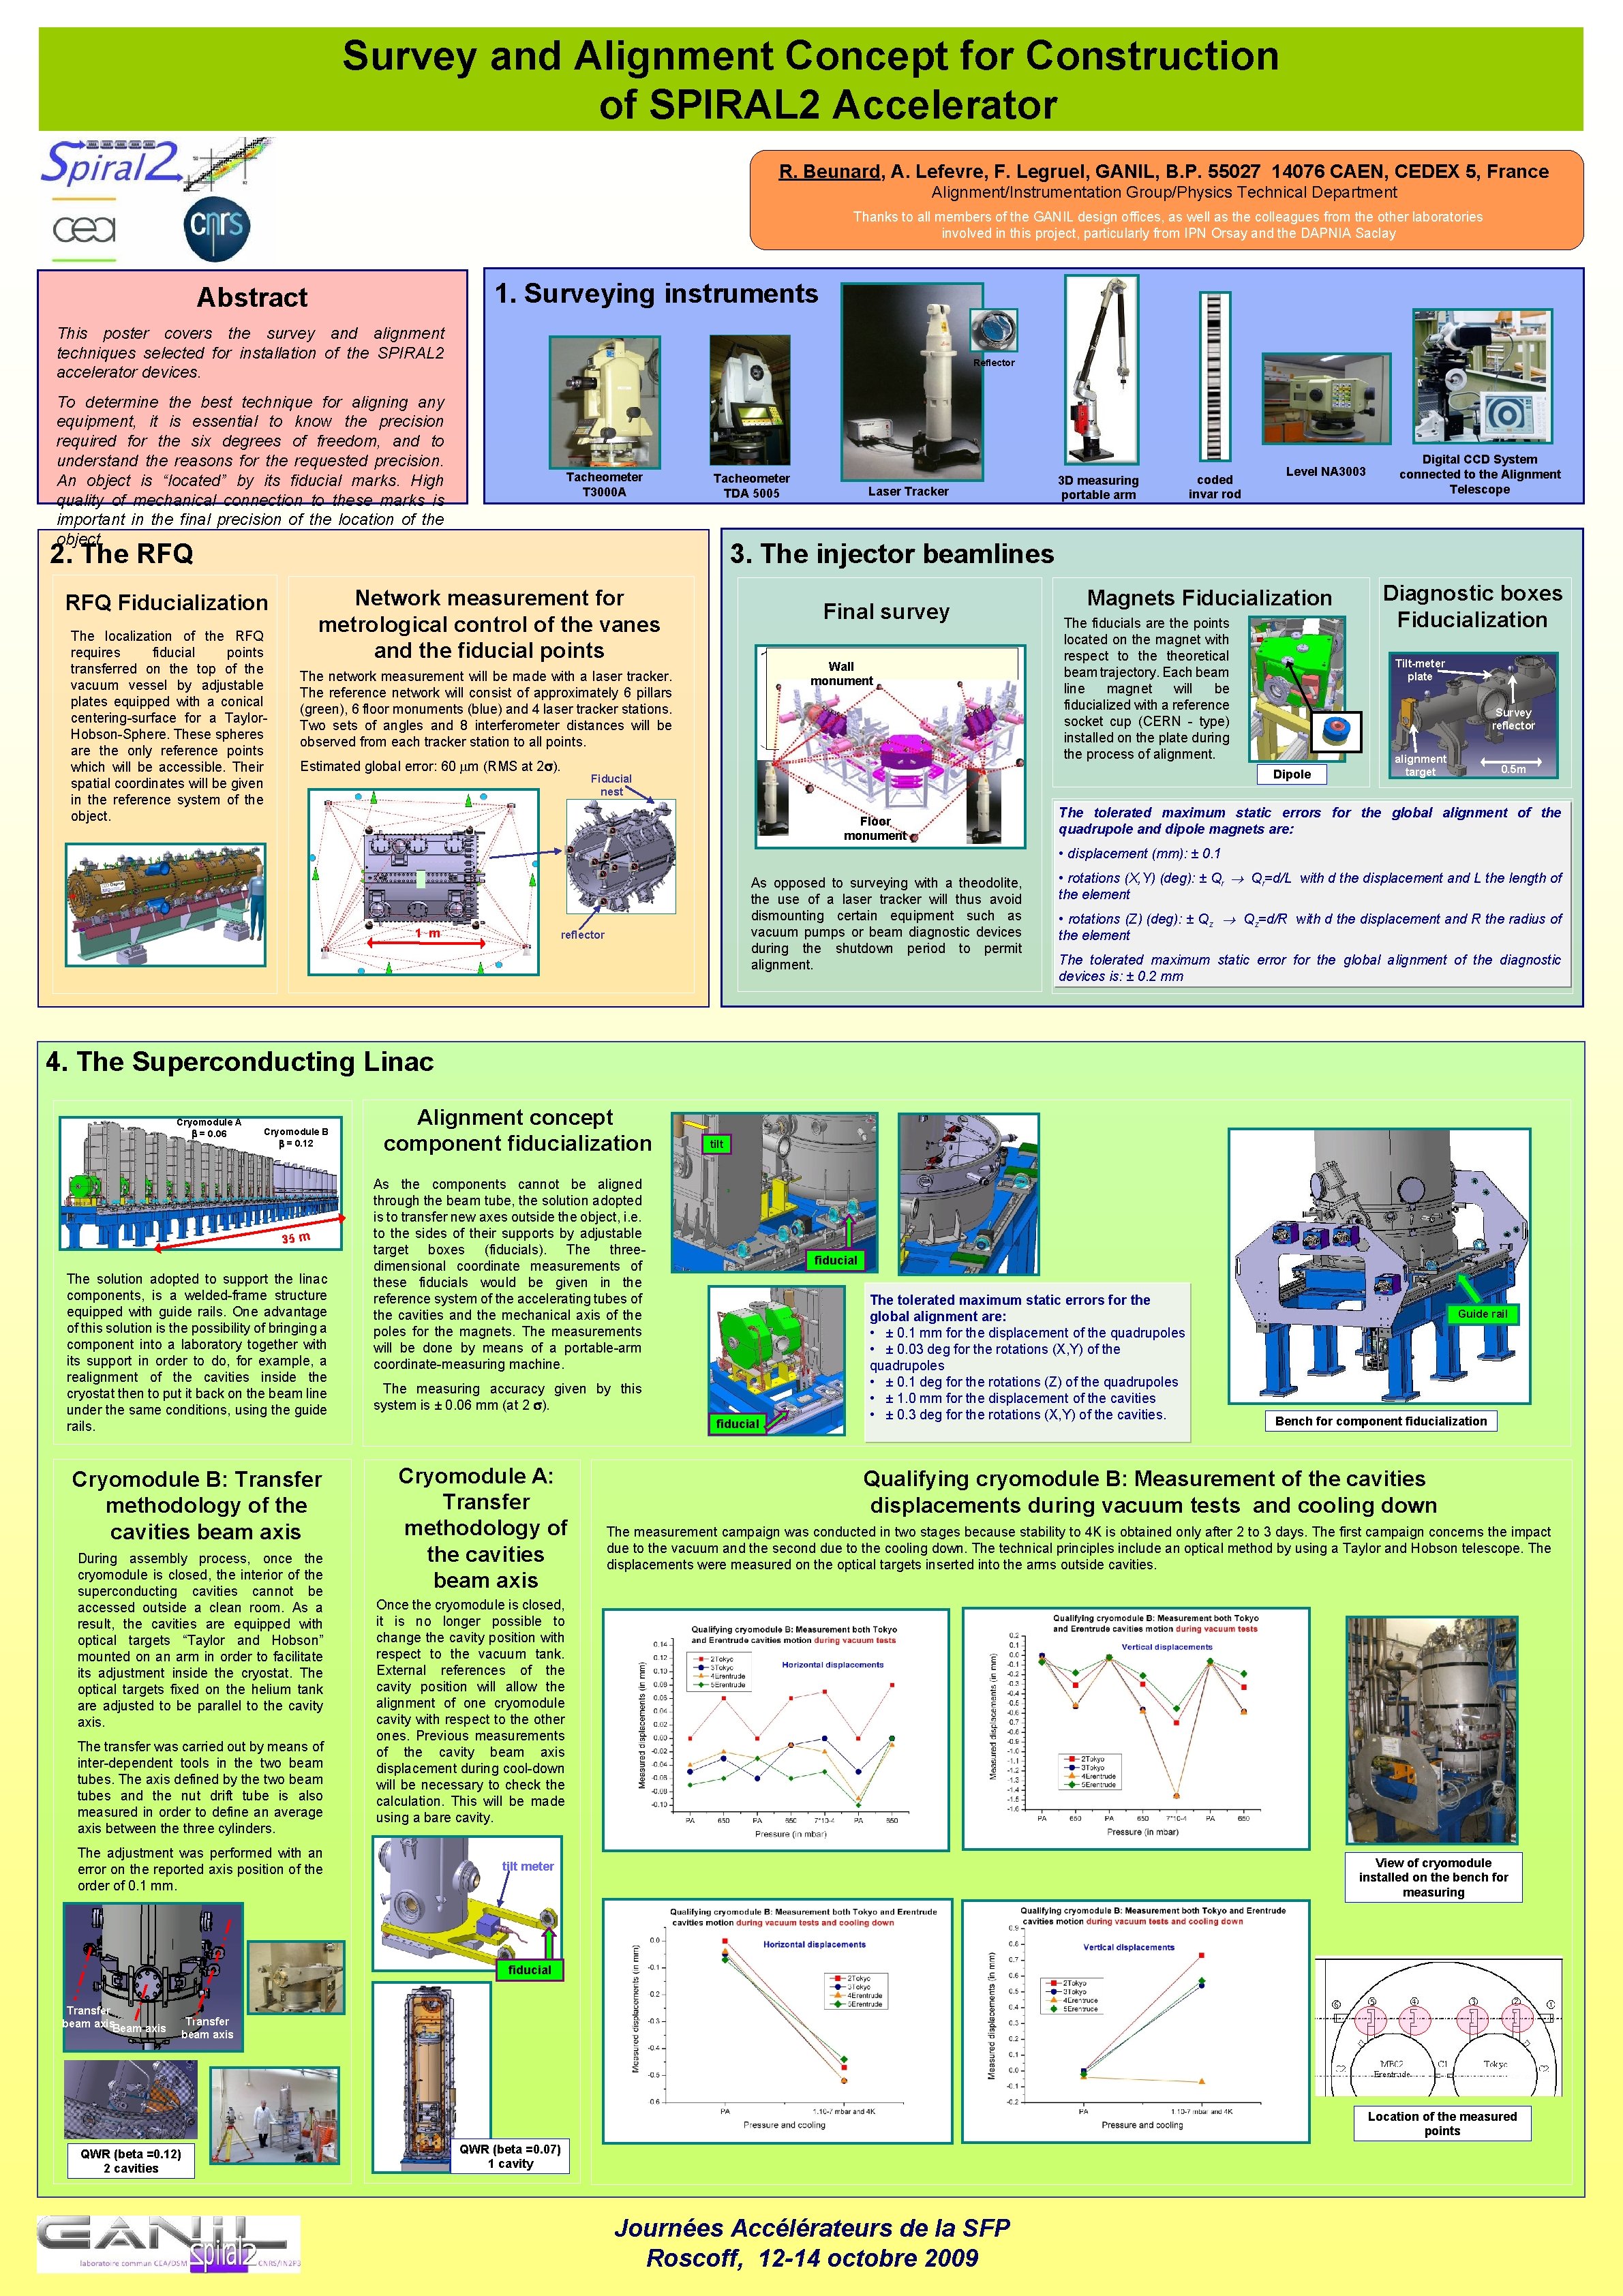
Survey and Alignment Concept for Construction of SPIRAL 2 Accelerator R. Beunard, A. Lefevre, F. Legruel, GANIL, B. P. 55027 14076 CAEN, CEDEX 5, France Alignment/Instrumentation Group/Physics Technical Department Thanks to all members of the GANIL design offices, as well as the colleagues from the other laboratories involved in this project, particularly from IPN Orsay and the DAPNIA Saclay 1. Surveying instruments Abstract This poster covers the survey and alignment techniques selected for installation of the SPIRAL 2 accelerator devices. Reflector To determine the best technique for aligning any equipment, it is essential to know the precision required for the six degrees of freedom, and to understand the reasons for the requested precision. An object is “located” by its fiducial marks. High quality of mechanical connection to these marks is important in the final precision of the location of the object. Tacheometer T 3000 A Tacheometer TDA 5005 2. The RFQ The localization of the RFQ requires fiducial points transferred on the top of the vacuum vessel by adjustable plates equipped with a conical centering-surface for a Taylor. Hobson-Sphere. These spheres are the only reference points which will be accessible. Their spatial coordinates will be given in the reference system of the object. coded invar rod Level NA 3003 3. The injector beamlines Network measurement for metrological control of the vanes and the fiducial points RFQ Fiducialization Laser Tracker 3 D measuring portable arm Digital CCD System connected to the Alignment Telescope Final survey Wall monument The network measurement will be made with a laser tracker. The reference network will consist of approximately 6 pillars (green), 6 floor monuments (blue) and 4 laser tracker stations. Two sets of angles and 8 interferometer distances will be observed from each tracker station to all points. Estimated global error: 60 m (RMS at 2 ). Magnets Fiducialization The fiducials are the points located on the magnet with respect to theoretical beam trajectory. Each beam line magnet will be fiducialized with a reference socket cup (CERN - type) installed on the plate during the process of alignment. Tilt-meter plate Survey reflector Dipole Fiducial nest Floor monument Diagnostic boxes Fiducialization alignment target 0. 5 m The tolerated maximum static errors for the global alignment of the quadrupole and dipole magnets are: • displacement (mm): ± 0. 1 1 m As opposed to surveying with a theodolite, the use of a laser tracker will thus avoid dismounting certain equipment such as vacuum pumps or beam diagnostic devices during the shutdown period to permit alignment. reflector • rotations (X, Y) (deg): ± Qr Qr=d/L with d the displacement and L the length of the element • rotations (Z) (deg): ± Qz Qz=d/R with d the displacement and R the radius of the element The tolerated maximum static error for the global alignment of the diagnostic devices is: ± 0. 2 mm 4. The Superconducting Linac Cryomodule A = 0. 06 Cryomodule B = 0. 12 35 m The solution adopted to support the linac components, is a welded-frame structure equipped with guide rails. One advantage of this solution is the possibility of bringing a component into a laboratory together with its support in order to do, for example, a realignment of the cavities inside the cryostat then to put it back on the beam line under the same conditions, using the guide rails. Cryomodule B: Transfer methodology of the cavities beam axis During assembly process, once the cryomodule is closed, the interior of the superconducting cavities cannot be accessed outside a clean room. As a result, the cavities are equipped with optical targets “Taylor and Hobson” mounted on an arm in order to facilitate its adjustment inside the cryostat. The optical targets fixed on the helium tank are adjusted to be parallel to the cavity axis. The transfer was carried out by means of inter-dependent tools in the two beam tubes. The axis defined by the two beam tubes and the nut drift tube is also measured in order to define an average axis between the three cylinders. The adjustment was performed with an error on the reported axis position of the order of 0. 1 mm. Alignment concept component fiducialization tilt As the components cannot be aligned through the beam tube, the solution adopted is to transfer new axes outside the object, i. e. to the sides of their supports by adjustable target boxes (fiducials). The threedimensional coordinate measurements of these fiducials would be given in the reference system of the accelerating tubes of the cavities and the mechanical axis of the poles for the magnets. The measurements will be done by means of a portable-arm coordinate-measuring machine. fiducial The measuring accuracy given by this system is ± 0. 06 mm (at 2 ). fiducial Cryomodule A: Transfer methodology of the cavities beam axis The tolerated maximum static errors for the global alignment are: • ± 0. 1 mm for the displacement of the quadrupoles • ± 0. 03 deg for the rotations (X, Y) of the quadrupoles • ± 0. 1 deg for the rotations (Z) of the quadrupoles • ± 1. 0 mm for the displacement of the cavities • ± 0. 3 deg for the rotations (X, Y) of the cavities. Guide rail Bench for component fiducialization Qualifying cryomodule B: Measurement of the cavities displacements during vacuum tests and cooling down The measurement campaign was conducted in two stages because stability to 4 K is obtained only after 2 to 3 days. The first campaign concerns the impact due to the vacuum and the second due to the cooling down. The technical principles include an optical method by using a Taylor and Hobson telescope. The displacements were measured on the optical targets inserted into the arms outside cavities. Once the cryomodule is closed, it is no longer possible to change the cavity position with respect to the vacuum tank. External references of the cavity position will allow the alignment of one cryomodule cavity with respect to the other ones. Previous measurements of the cavity beam axis displacement during cool-down will be necessary to check the calculation. This will be made using a bare cavity. View of cryomodule installed on the bench for measuring tilt meter fiducial Transfer beam axis. Beam axis Transfer beam axis Location of the measured points QWR (beta =0. 12) 2 cavities QWR (beta =0. 07) 1 cavity Journées Accélérateurs de la SFP Roscoff, 12 -14 octobre 2009