Superflow Superflow 350 Regulator KIRBY MORGAN DIVE SYSTEMS

Superflow & Superflow 350 Regulator

KIRBY MORGAN DIVE SYSTEMS INCORPORATED MAINTENANCE AND REPAIR TECHNICIAN TRAINING Only selected Dive Lab trained Technicians are authorized to teach the Technicians Course. Only Dive Lab authorized Technicians may teach the KMDSI Operator/User Course curriculum must be presented within the guidelines set up in the repair technician’s guide and slide show. Kirby Morgan, Super. Lite, Band Mask, KMB Band Mask, EXO, Super. Mask, Super. Flow, and Rex are all registered trademarks of Kirby Morgan Dive Systems, Inc. Use of these terms to describe products that are not manufactured by KMDSI is not permitted without written permission from KMDSI. © Copyright 1970 2009 Kirby Morgan Dive Systems, Inc. All rights reserved. This manual is made available for the express use of owner of this Kirby Morgan product. No part of this manual may be reproduced, stored in any retrieval system, or transmitted, or used in any form or by any means, whether graphic, electronic, mechanical, photocopy, or otherwise by technology known or unknown, without the prior written permission of Kirby Morgan Dive Systems, Inc. THIS SLIDE SHOW IS FOR THE USE OF KIRBY MORGAN CUSTOMERS AND USERS OF KIRBY MORGAN DIVING EQUIPMENT ONLY. IT IS FREE OF CHARGE FROM OUR WEB SITES FOR THAT USE ONLY UNTIL FURTHER NOTICE. This material may not be reproduced for resale or given to unauthorized organizations or persons. THIS MATERIAL MAY NOT BE CHANGED OR MODIFIED WITHOUT WRITTEN PERMISSION. Prepared by Dive Lab®, Inc. 1415 Moylan Road, Panama City Beach, FL 32407 USA Telephone: (850) 235 -2715 Web Site: www. divelab. com E-Mail: divelab@aol. . com Document #Tech. Trn. G 03101

Superflow & Superflow 350 Regulator • Regulator systems on all KM helmets are simple and highly reliable • Superflow regulator is the most popular helmet regulator • Design is over 40 years old and still outperforms newer designs

Superflow & Superflow 350 Regulator • Regulator must receive regular maintenance to assure the best performance possible • Breathing resistance will increase if demand regulator is not maintained or adjusted properly • If regulator is damaged, there is always a backup supply of steady flow gas available from the defogger valve

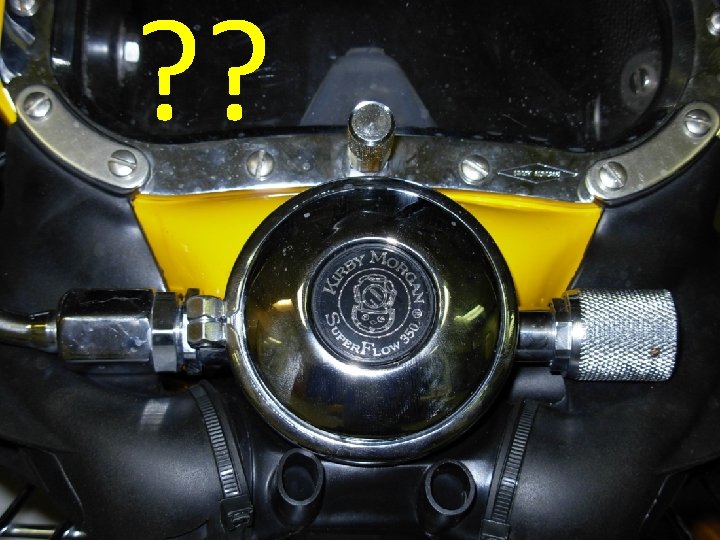
Superflow & Superflow 350 Regulator • Two different surperflow regulators Superflow 350 • Original Superflow • New Superflow 350 • Both look the same Original Superflow

Superflow & Superflow 350 Regulator • Superflow, small bore ¾” is used on the SL 17 A/B, and older KMB 18/28 Band Masks • Superflow 350, big bore is used on the SL 17 K, 17 C , 27, KM 37, and newer KMB 18/28 Band Masks

Superflow & Superflow 350 Regulator Original Superflow • Differences in the standard Small Bore Demand Regulator body and the Big bore Superflow 350
 17 A, B, C (older Band Mask")
Superflow & Superflow 350 Regulator Superflow (original) 17 A, B, C (older Band Mask 18/28) Extra Spring & Brass washer on inlet side Whisker flange soldered on Superflow 350 SL 27, KM 37, Newer KMB 18/28 Band Mask (17 C After 2005) Removable whisker flange

Superflow & Superflow 350 Regulator • Tri/quad valve fit both • New whisker Wings fit both

Superflow & Superflow 350 Regulator • Adjustments are the same for both • Internal parts are the same (except for the extra spring & Brass washer, original Superflow) • Very little difference in performance

Regulator Diaphragm & Cover • Remove regulator clamp by removing the clamp screw, remove cover and diaphragm • Clean diaphragm with a proper solution and wipe dry • Check for a good bond between the metal disc and the silicone, Replace diaphragm if any doubt exists

Superflow & Superflow 350 Regulator • Carefully inspect the Diaphragm for cuts, tears, and deterioration • If any damage is found, replace the Diaphragm • Pull and stretch diaphragm

Superflow & Superflow 350 Regulator • Proper cleaning, inspection, and need for sterilization between different divers • The use of a different Diaphragm can cause interference with the Roller Lever and affect Regulator adjustment and performance

Regulator Cover • Regulator cover should not have excessive dents or deterioration • Minor dents & scratches are acceptable

Superflow & Superflow 350 Regulator • Carefully check the Regulator Exhaust Valve for warping, distortion, stiffness and any signs of damage

Superflow & Superflow 350 Regulator • Poke at the Flapper Valve from inside the Regulator to check for stiffness of the Valve • Flapper valve should be clear and flexible

Superflow & Superflow 350 Regulator • Check the Regulator Body for corrosion and contamination

Superflow & Superflow 350 Regulator • Check for bent Valve Seat Spokes • The Spokes should not be bent or deformed • Guidance O & M Manual

Superflow & Superflow 350 Regulator

Superflow & Superflow 350 Regulator • keep the seating surface free of contaminates and do not lubricate valve

Superflow & Superflow 350 Regulator • Attach a breathing quality air source to the Umbilical Adapter or EGS valve and set the supply pressure to between 135 150 psig (9. 31 10. 34 bar)
 •")
Superflow & Superflow 350 Regulator special tools • Inlet valve holder (#525 616) • Regulator adjustment wrench ( #525 611) • Socket wrench (#525 612) • Castle wrench (#525 618) • Regulator mount socket (#525 625) Super. Flow/Super. Flow 350 Regulator Tool Kit #525 -620
 all the way")
Superflow & Superflow 350 Adjustments • Screw Bias adjustment knob (clockwise) all the way in • Pressurize regulator to between 135 150 p. s. i. g. of supply pressure • Screw Bias adjustment knob out (counterclockwise) until the regulator starts to free flow, then screw the adjustment knob in (clockwise) until the free flow just stops • Depress the lever several times to ensure the free flow has stopped

Superflow & Superflow 350 Adjustments • If the free flow does not stop, the adjustment nut is too tight • If the roller lever is sloppy (loose) the adjustment nut is too loose • Insert inlet valve holding tool into balance hole on inlet tube. Push forward on the tool to stop the inlet valve stem from turning • Adjust the nut until there is 1/16 inch (1. 5 mm) to 1/8 inch (3. 0 mm) of free play at the end of the lever

Superflow & Superflow 350 Adjustments

Superflow & Superflow 350 Adjustments 1/16 to 1/8 in. of play in roller lever Correct Height

Superflow & Superflow 350 Adjustments • Bending the Lever should only be done after all other adjustments have been made • It is rare that a Lever should have to be bent • Usually Levers only require bending because of damage inflicted during adjustment by persons not knowledgeable in proper adjustment procedures

Superflow & Superflow 350 Adjustments Lever too high • After adjustments are completed • 1/16” to 1/8” free play in lever • Bending the lever down is required

Superflow & Superflow 350 Adjustments Spoon end of wrench is used to bend lever down Spoon is in position

Superflow & Superflow 350 Adjustments • Lever can only be bent down while lever is installed in regulator • Bend lever in small increments

Superflow & Superflow 350 Adjustments If lever is too low • Adjustments are complete • 1/16” to 1/8” free play in lever • Bending the lever up is required

Superflow & Superflow 350 Adjustments Bending the Lever up • Lever has to be removed from regulator in order to bend it up • Bending the lever up while in the regulator will deform the lever

Superflow & Superflow 350 Adjustments 1/16 to 1/8 in. of play in roller lever Just see the tops of the roller lever Correct Height

Superflow & Superflow 350 Regulator • When inspection and or adjustments are complete, install diaphragm, cover, and clamp

Superflow & Superflow 350 Regulator • Regulator is adjusted and ready for use

Summary Always refer to Operations & maintenance manual for adjustment procedures • 2 different models • Inspection • Adjustments
- Slides: 37