Stencil Scan Process Control Inspection Assembly Programming Reverse
™ Stencil. Scan
Process Control & Inspection, Assembly Programming, Reverse Engineering Products for the Electronics Industry
Agenda COMPANY OVERVIEW § Introduction § Product Philosophy TECHNOLOGY § Flatbed Scanners § Process Control § Hardware Configuration Stencil Inspection and Data Creation Products § Stencil. Scan Lite SUMMARY

“Applying Low Cost, Multi-Purpose Vision Systems to the Electronics Manufacturing Industry” versus High Cost – Single Function
Introduction § Scan. CAD Founded in 1990 - Global Sales & Support Network Smart Sonic – OEM Partner since 2001 § Over 900 Customers in 46 Countries - First Systems Installed in 1987 § Vision Systems - PC- Based Low Cost, Easy to Use, Multi purpose
Product Philosophy § Newest Technology • Consumer driven scanner hardware platform • Customer investment protected since 1987 – upgrade path § Applications • From board design to fabrication, assembly and test • Process control for stencils, screens, artwork, printed & dispensed materials • Niche applications… no reason to reinvent the wheel. . ! § Flexible • Many applications on one system • In line or off line configurations § Low Cost • Best price/performance ratio in the industry • Prices range from about US$3 K to $80 K § Easy-to-use • Golden board or CAD programming in minutes • 80 -20 rule providing low false call rates
Inspection vs. Measurement Inspection System Measurement System Check 100% of Part Output is Pass/Fail Low Cost Scanner Based Overlay CAD and Image Fast Multi-Purpose Can Measure, but Not as Accurate Sample Portions of Part Output is Measurement Higher Cost Highly Accurate/Granite base Point to Point Measurement Not as Fast Single Purpose Can Inspect 100%, but Very Slow No system available that can do both…. . inspect 100% and perform very accurate measurement at a price the market is willing to pay. Systems are complimentary…. . many customers have both.
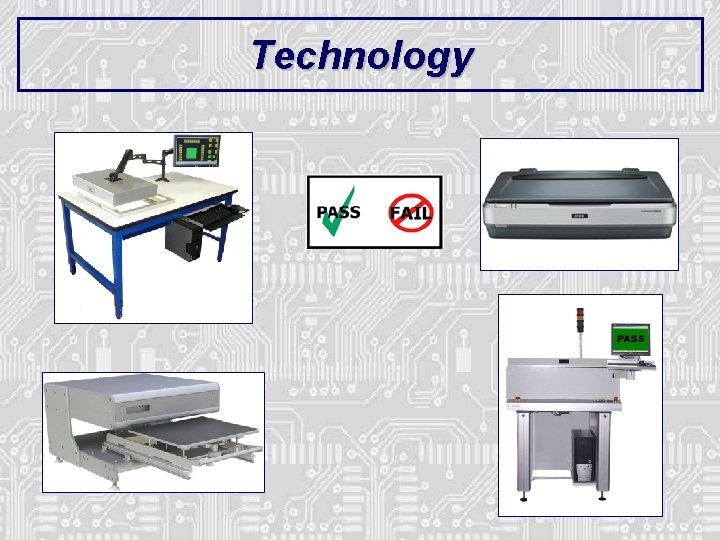
Technology
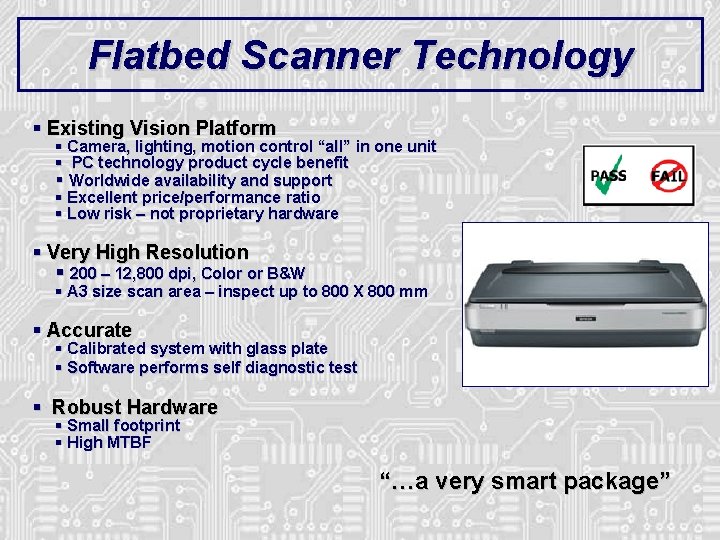
Flatbed Scanner Technology § Existing Vision Platform § Camera, lighting, motion control “all” in one unit § PC technology product cycle benefit § Worldwide availability and support § Excellent price/performance ratio § Low risk – not proprietary hardware § Very High Resolution § 200 – 12, 800 dpi, Color or B&W § A 3 size scan area – inspect up to 800 X 800 mm § Accurate § Calibrated system with glass plate § Software performs self diagnostic test § Robust Hardware § Small footprint § High MTBF “…a very smart package”
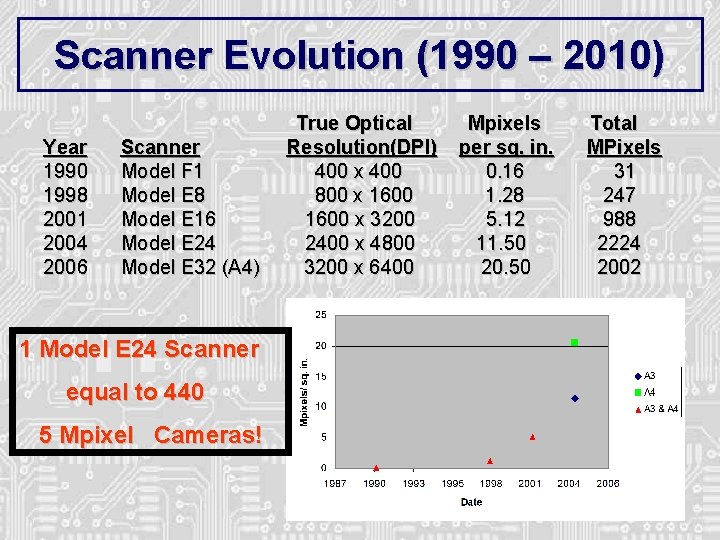
Scanner Evolution (1990 – 2010) Year 1990 1998 2001 2004 2006 Scanner Model F 1 Model E 8 Model E 16 Model E 24 Model E 32 (A 4) 1 Model E 24 Scanner equal to 440 5 Mpixel Cameras! True Optical Resolution(DPI) 400 x 400 800 x 1600 x 3200 2400 x 4800 3200 x 6400 Mpixels per sq. in. 0. 16 1. 28 5. 12 11. 50 20. 50 Total MPixels 31 247 988 2224 2002
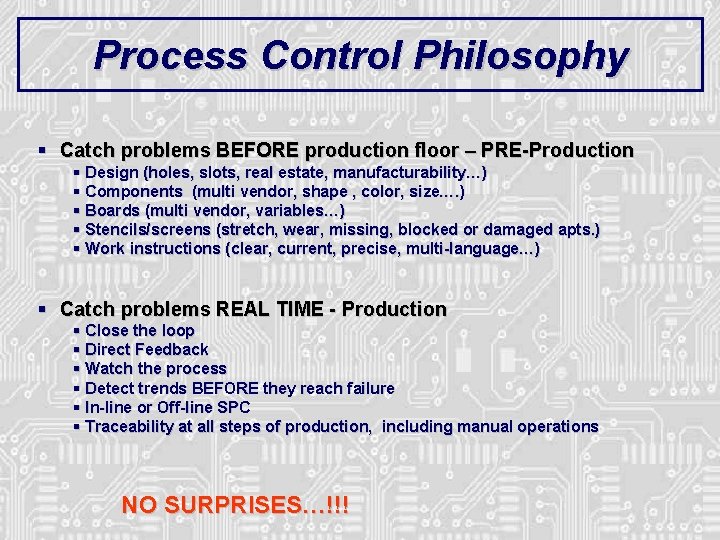
Process Control Philosophy § Catch problems BEFORE production floor – PRE-Production § Design (holes, slots, real estate, manufacturability…) § Components (multi vendor, shape , color, size…. ) § Boards (multi vendor, variables…) § Stencils/screens (stretch, wear, missing, blocked or damaged apts. ) § Work instructions (clear, current, precise, multi-language…) § Catch problems REAL TIME - Production § Close the loop § Direct Feedback § Watch the process § Detect trends BEFORE they reach failure § In-line or Off-line SPC § Traceability at all steps of production, including manual operations NO SURPRISES…!!!
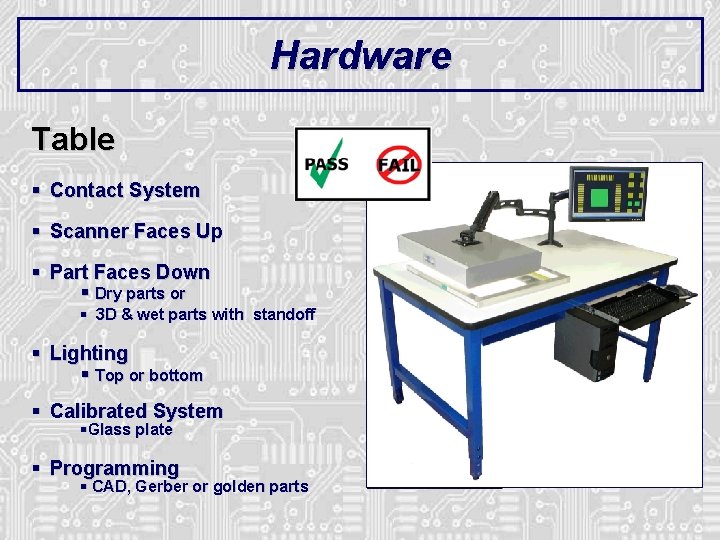
Hardware Table § Contact System § Scanner Faces Up § Part Faces Down § Dry parts or § 3 D & wet parts with standoff § Lighting § Top or bottom § Calibrated System §Glass plate § Programming § CAD, Gerber or golden parts
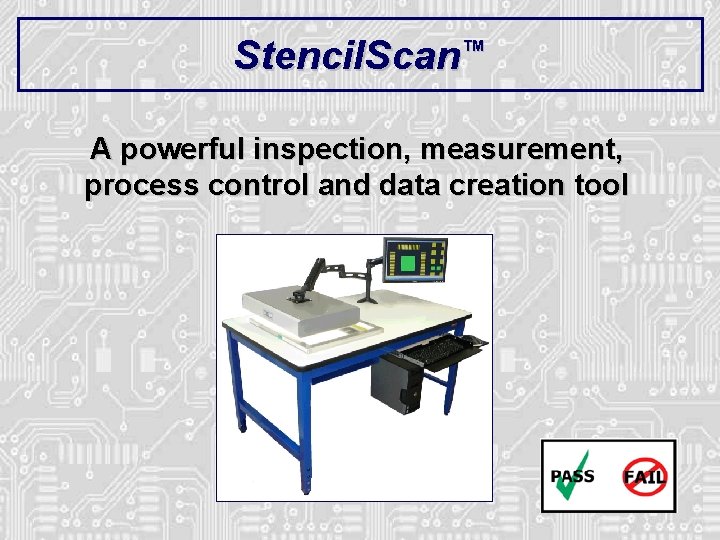
Stencil. Scan™ A powerful inspection, measurement, process control and data creation tool
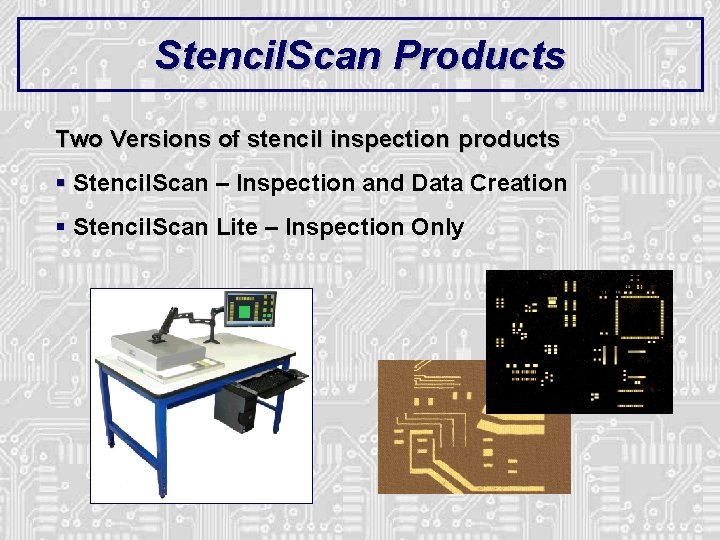
Stencil. Scan Products Two Versions of stencil inspection products § Stencil. Scan – Inspection and Data Creation § Stencil. Scan Lite – Inspection Only
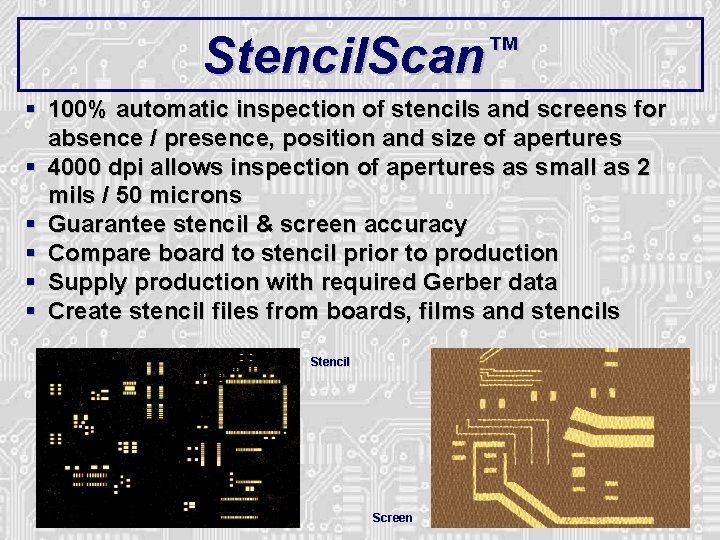
Stencil. Scan™ § 100% automatic inspection of stencils and screens for absence / presence, position and size of apertures § 4000 dpi allows inspection of apertures as small as 2 mils / 50 microns § Guarantee stencil & screen accuracy § Compare board to stencil prior to production § Supply production with required Gerber data § Create stencil files from boards, films and stencils Stencil Screen
Why Smart Sonic Inspection Systems? § Systems are the standard in the industry for stencil/screen/film/PCB inspection – it’s the leading system in the world! § Inspection is needed- It is not acceptable to ship or use defective film/PCB’s/stencils! § Stencil. Scan Lite is the lowest complete stencil/screen inspection system in the industry § 100 % inspection of stencils/screens/film/PCB versus both the original customer Gerber data and the modified Gerber cut file or a Golden Part § No limits to the maximum part size § Inspect very small features, half or partial etch features and other complex shapes § Also create or modify Gerber data to match PCB with full Stencil. Scan § Inspection of stencils/screens/film/PCB in any material including disposable plastic or paper stencils, diazo, glass, chrome, electroform, stainless, etc § Systems are very easy to use and based on a standard PC platform
Stencil. Scan™ Inspection Process In seven quick and easy steps! 1. 2. 3. 4. 5. 6. 7. Import Gerber file Scan stencil or screen at appropriate dpi Super-impose scanned image and Gerber Fine align scanned image and Gerber Inspect automatically Review errors Print certification report
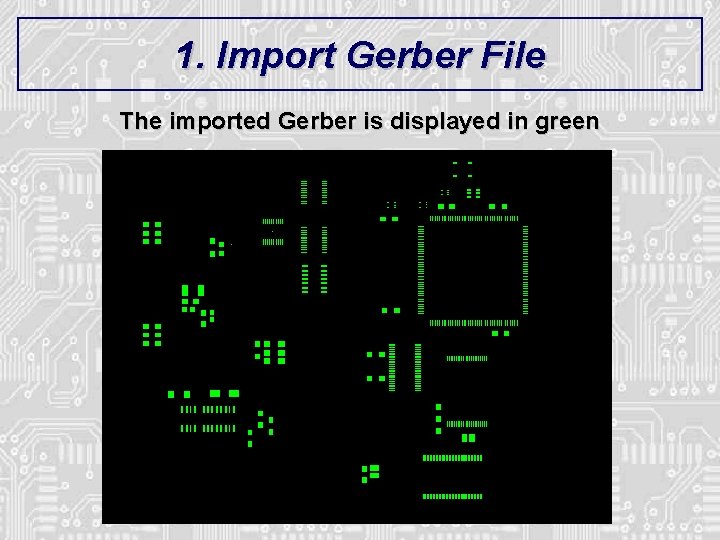
1. Import Gerber File The imported Gerber is displayed in green
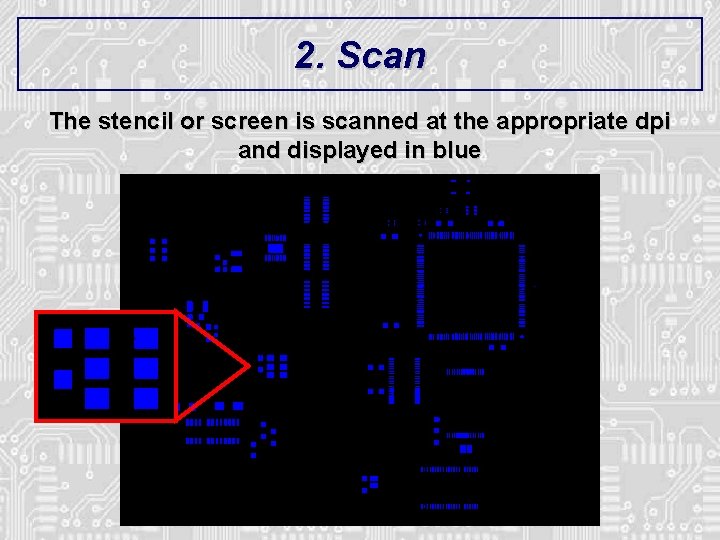
2. Scan The stencil or screen is scanned at the appropriate dpi and displayed in blue
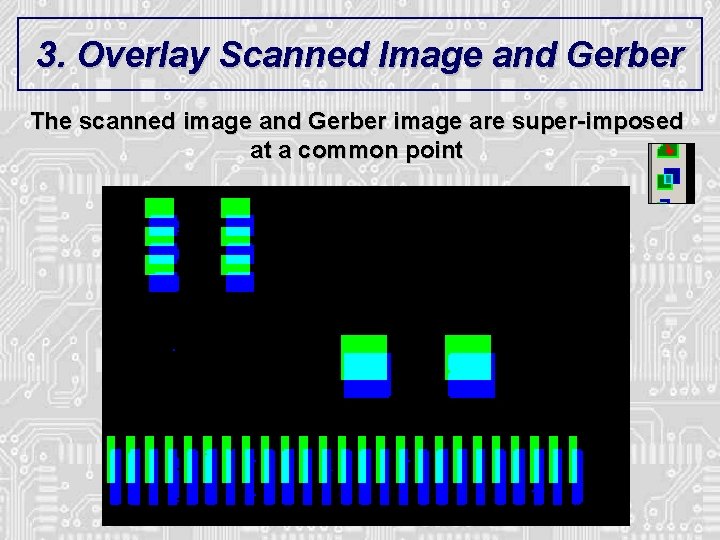
3. Overlay Scanned Image and Gerber The scanned image and Gerber image are super-imposed at a common point
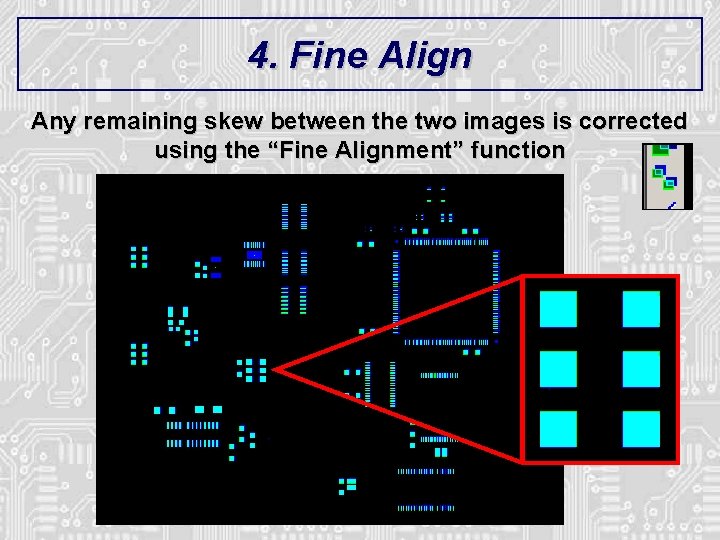
4. Fine Align Any remaining skew between the two images is corrected using the “Fine Alignment” function
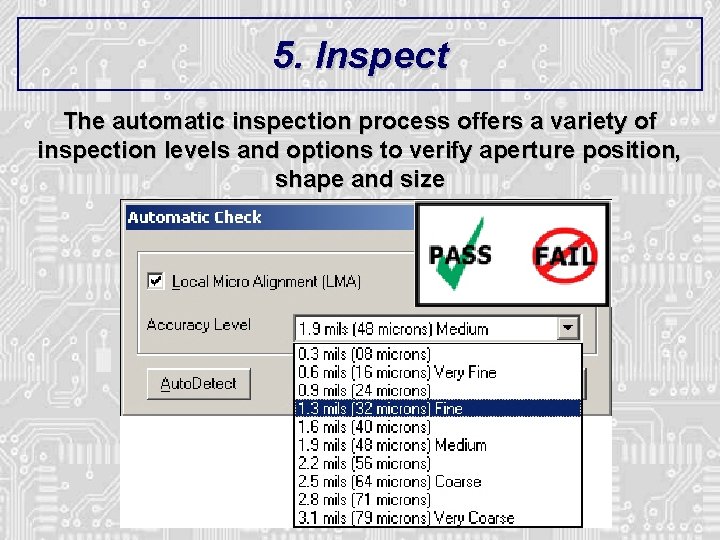
5. Inspect The automatic inspection process offers a variety of inspection levels and options to verify aperture position, shape and size
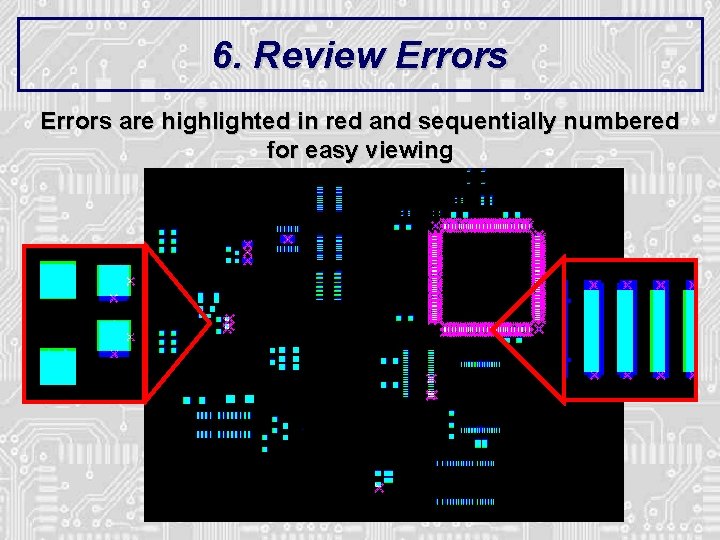
6. Review Errors are highlighted in red and sequentially numbered for easy viewing
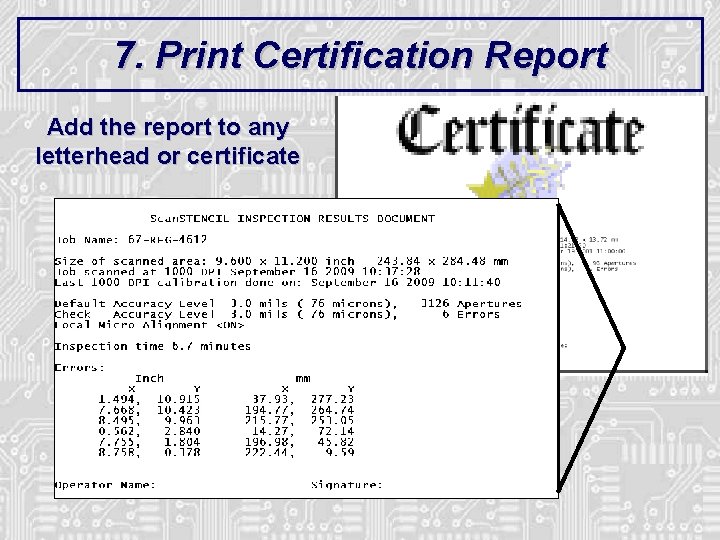
7. Print Certification Report Add the report to any letterhead or certificate
Examples:
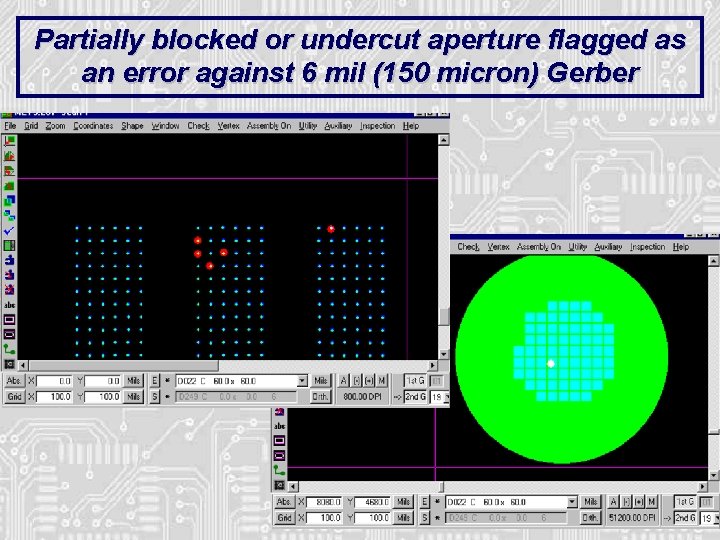
Partially blocked or undercut aperture flagged as an error against 6 mil (150 micron) Gerber
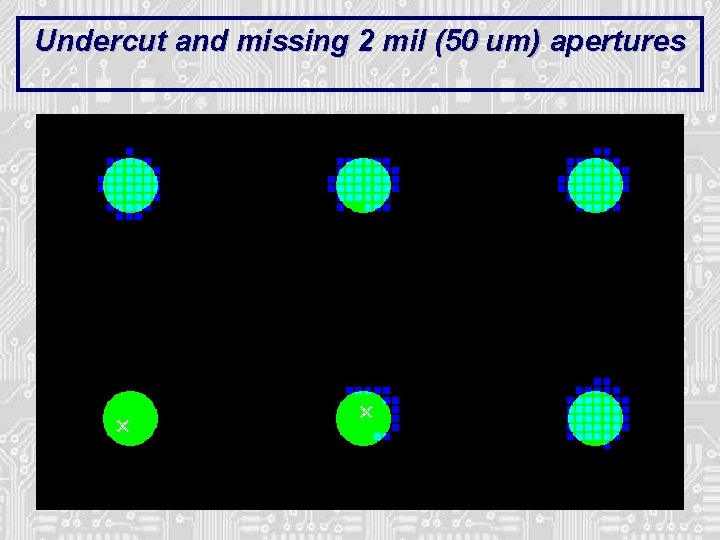
Undercut and missing 2 mil (50 um) apertures
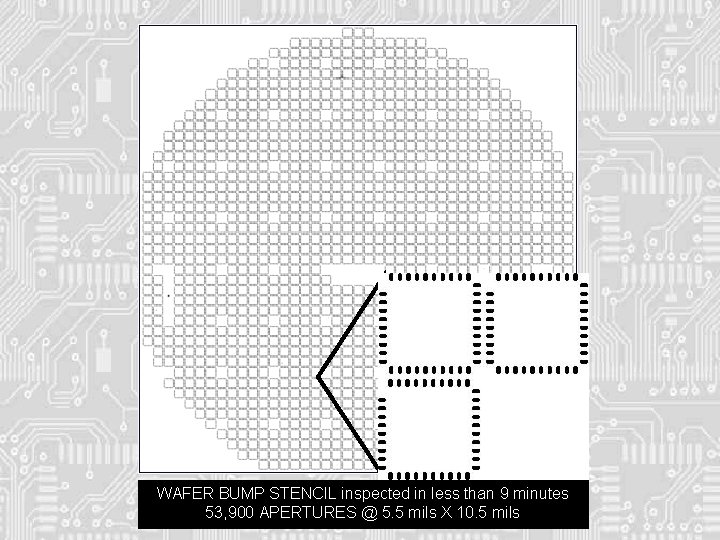
WAFER BUMP STENCIL inspected in less than 9 minutes 53, 900 APERTURES @ 5. 5 mils X 10. 5 mils
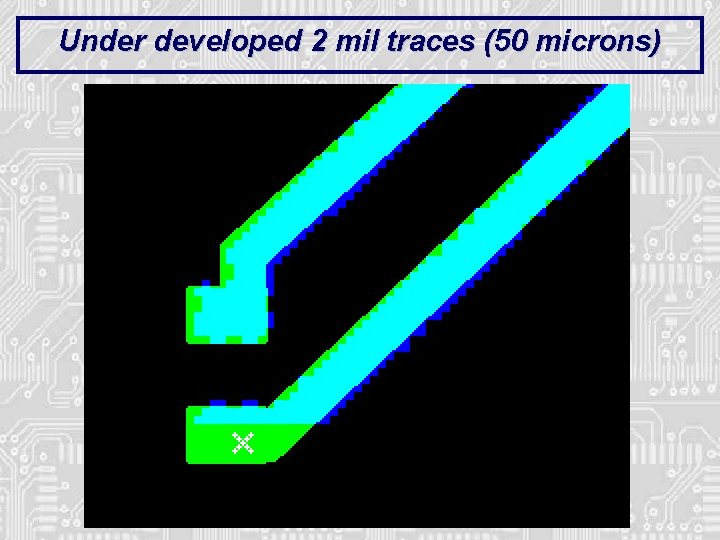
Under developed 2 mil traces (50 microns)
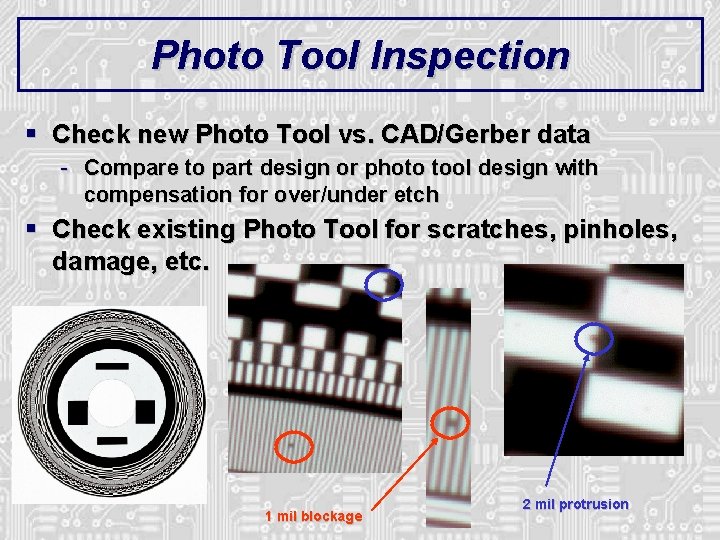
Photo Tool Inspection § Check new Photo Tool vs. CAD/Gerber data - Compare to part design or photo tool design with compensation for over/under etch § Check existing Photo Tool for scratches, pinholes, damage, etc. 1 mil blockage 2 mil protrusion
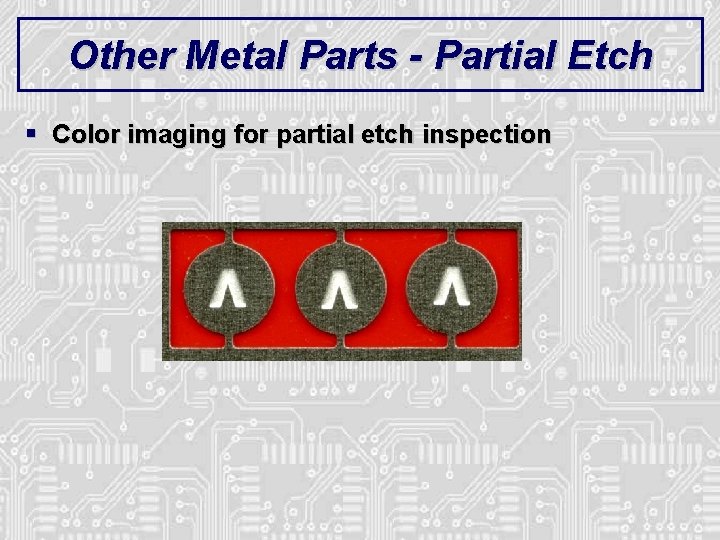
Other Metal Parts - Partial Etch § Color imaging for partial etch inspection
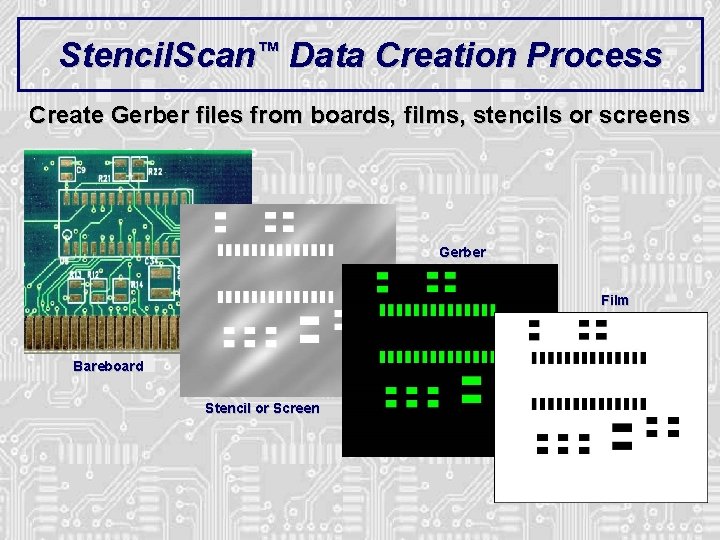
Stencil. Scan™ Data Creation Process Create Gerber files from boards, films, stencils or screens Gerber Film Bareboard Stencil or Screen
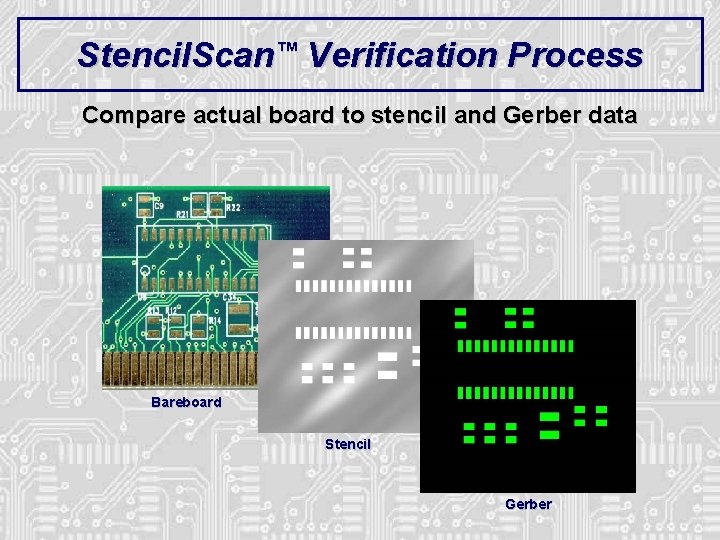
Stencil. Scan™ Verification Process Compare actual board to stencil and Gerber data Bareboard Stencil Gerber
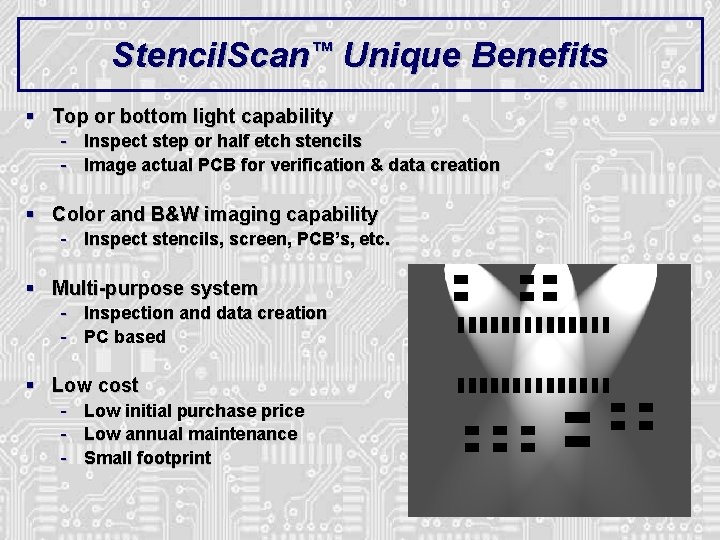
Stencil. Scan™ Unique Benefits § Top or bottom light capability - Inspect step or half etch stencils - Image actual PCB for verification & data creation § Color and B&W imaging capability - Inspect stencils, screen, PCB’s, etc. § Multi-purpose system - Inspection and data creation - PC based § Low cost - Low initial purchase price - Low annual maintenance - Small footprint
SMT Magazine Article § GOOD NEWS: Scan. INSPECT VPI ROI ARTICLE: § “Using Stencil Design to Reduce SMT Defects” - SMT Magazine, April 2006 § http: //smt. pennnet. com/Articles/Article_Display. cfm? Section=ARTCL&ARTICLE_ID=2529 12&VERSION_NUM=2&p=35 § Case Study of benefits of making a STENCIL that matches the PCB § 125, 000 units over three weeks to obtain the data § Board measurements made using CMM at 6 reference points § Modify Gerber data to match board § Stencil made to PCB instead of Gerber § 43% solder paste defect reduction…. . !!!
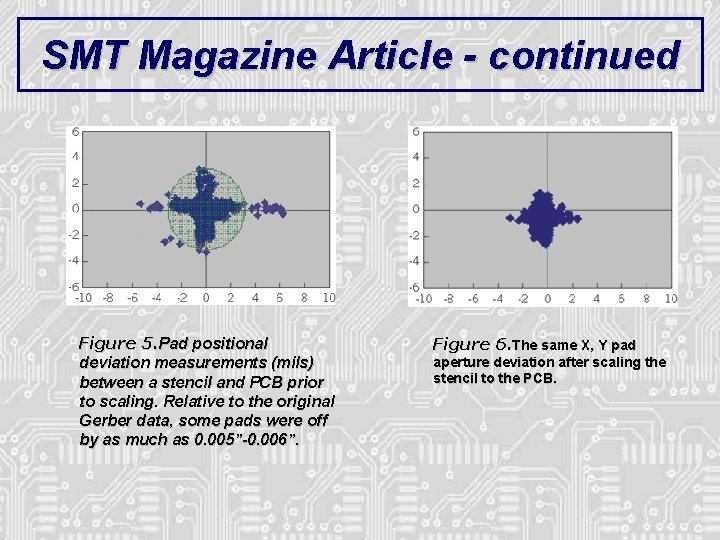
SMT Magazine Article - continued Figure 5. Pad positional deviation measurements (mils) between a stencil and PCB prior to scaling. Relative to the original Gerber data, some pads were off by as much as 0. 005”-0. 006”. Figure 6. The same X, Y pad aperture deviation after scaling the stencil to the PCB.
Summary
Smart Sonic™ Process Control Tools § Catch problems BEFORE production floor – “Virtual problem” § Catch problems REAL TIME – before failure – “Close the loop” § Eliminate REWORK § Environmentally friendly § Maximize existing capital investment § Reduce operator, engineer & management stress Eliminate SURPRISES…!!!
Smart Sonic Systems § § § Proven Economical Easy to use Off-line In-line Accurate Flexible Multi-purpose Powerful Upgradeable Environment - 900+ Systems Installed in 46 Countries - Low Cost Systems - Quick ROI - User Friendly, PC Based - Small Footprint Desk or Desktop - Small Footprint Conveyor - Calibrated System - Many Inputs / Outputs - All Software on Same Platform - 50 micron (2 mil) Features - Annual Releases Since 1990 - Minimize Scrap and Rework
SMART SONIC CORPORATION 837 E. 79 Street · Cleveland, Ohio 44103 · U. S. A. TEL: +1 -818 -610 -7900 · FAX: +1 -216 -881 -8950 E-mail: smt@Smart. Sonic. com · Web Site: www. Smart. Sonic. com
- Slides: 40