SKETCHING UNIT III ESSENTIAL STANDARD 3 00 APPLY
- Slides: 35

SKETCHING UNIT III

ESSENTIAL STANDARD: 3. 00 APPLY SKETCHING SKILLS AND TECHNIQUES (ARCHITECTURE AND ENGINEERING) INDICATOR: 3. 01 APPLY ROUGH SCKETCHING (LETTER FOR CLARITY, UPPERCASE CAPS) INDICATOR 3. 02 APPLY 2 D SKETCHING – SINGLE AND MULTI VIEW INDICATOR 3. 03 APPLY 3 D SKETCHING – PICTORALS (ISOMETRIC, OBLIQUE)

INTRODUCTION • This unit will cover the purpose of sketching, materials needed for sketching, techniques for sketching, importance of proportions, the types of sketches and differences between isometric, oblique and perspective sketches.

PURPOSE OF A SKETCH • Quickly & easily get an idea on paper • Design sketches • Freehand technical sketches • Technical illustrations

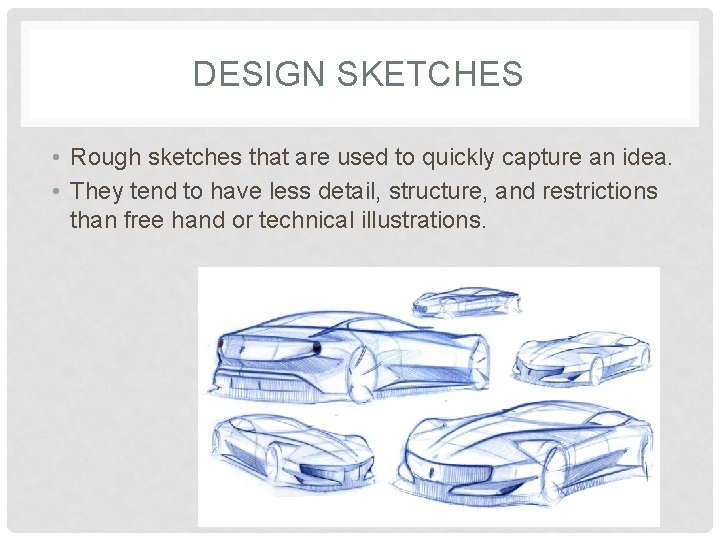
DESIGN SKETCHES • Rough sketches that are used to quickly capture an idea. • They tend to have less detail, structure, and restrictions than free hand or technical illustrations.

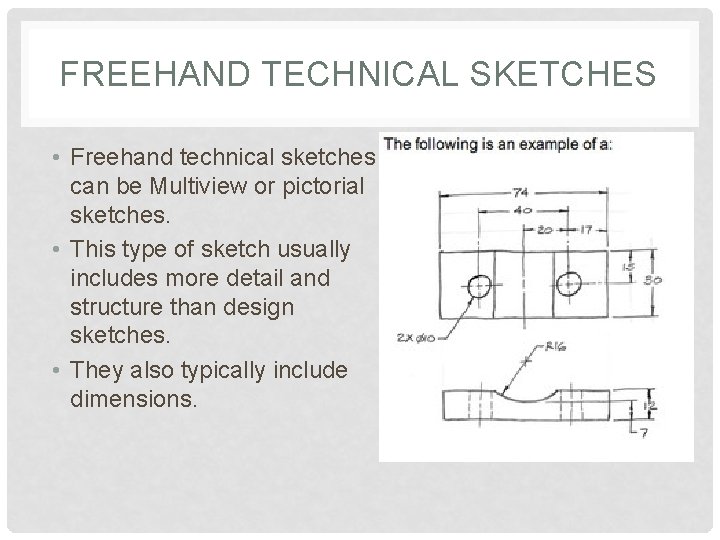
FREEHAND TECHNICAL SKETCHES • Freehand technical sketches can be Multiview or pictorial sketches. • This type of sketch usually includes more detail and structure than design sketches. • They also typically include dimensions.

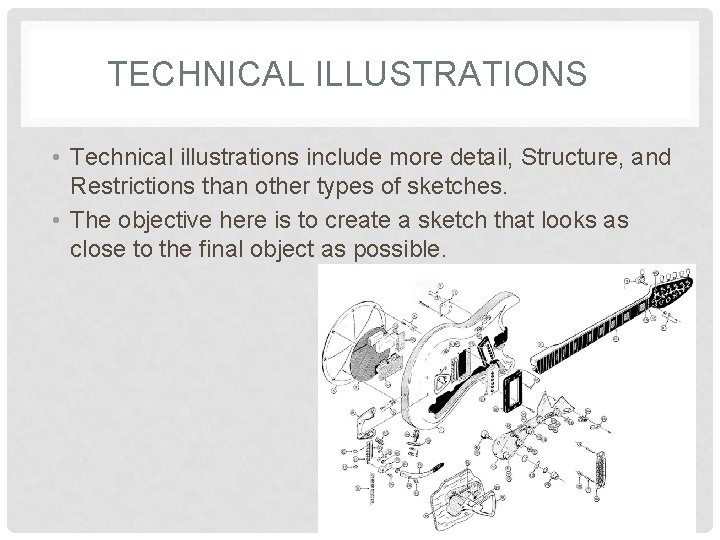
TECHNICAL ILLUSTRATIONS • Technical illustrations include more detail, Structure, and Restrictions than other types of sketches. • The objective here is to create a sketch that looks as close to the final object as possible.

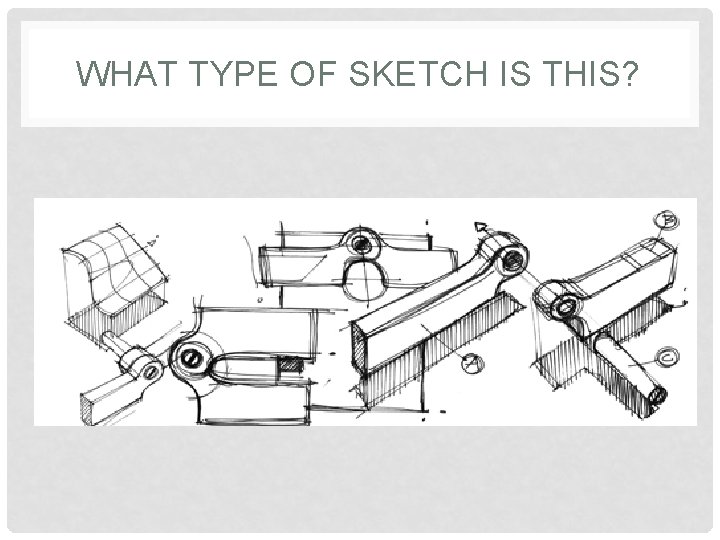
WHAT TYPE OF SKETCH IS THIS?

SKETCHING MATERIALS • Paper • Plain • Grid • Pencil • Soft lead

REQUIRED CONSISTENCIES • Clarity • Proportion

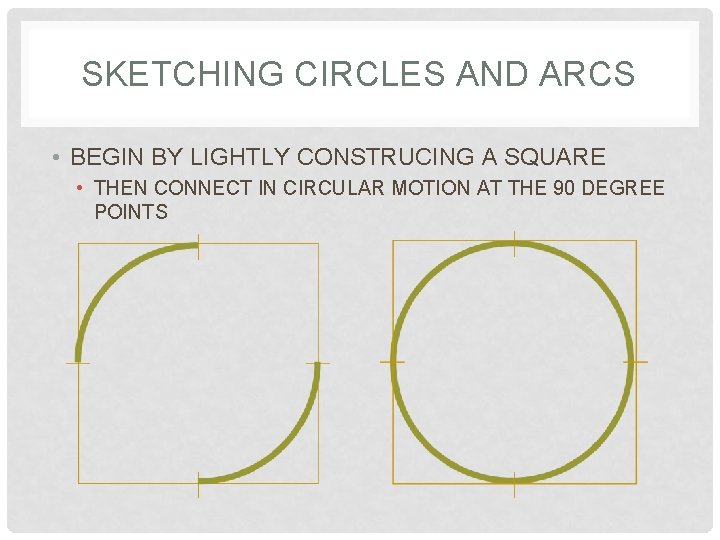
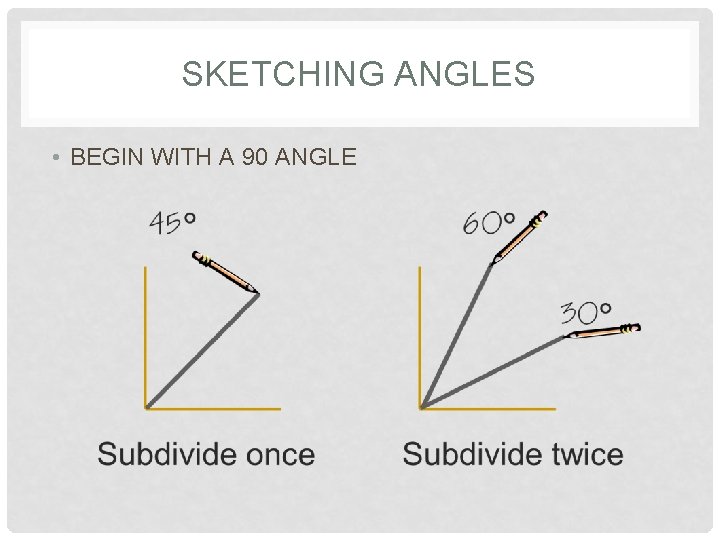
TECHNIQUES • STRAIGHT LINES • VERTICLE • HORIZONTAL • CIRCLES • START WITH A SQUARE – FIND THE MIDPOINTS OF EACH SIDE, AND CONNECT THE MIDPOINTS WITH ARCS. • ANGLES • 30, 45, 60 DEGREE ANGLES.

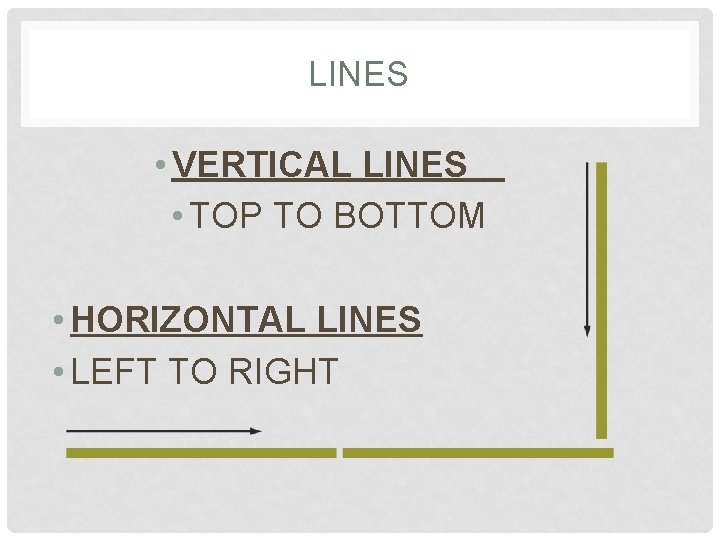
LINES • VERTICAL LINES • TOP TO BOTTOM • HORIZONTAL LINES • LEFT TO RIGHT

SKETCHING CIRCLES AND ARCS • BEGIN BY LIGHTLY CONSTRUCING A SQUARE • THEN CONNECT IN CIRCULAR MOTION AT THE 90 DEGREE POINTS

SKETCHING ANGLES • BEGIN WITH A 90 ANGLE

SKETCHING • CLASSES OF SKETCHES • SINGLE-VIEW • MULTI-VIEW • PICTORALS

SINGLE-VIEW SKETCHING • TECHNICAL PURPOSES • FRONT VIEW • HAS THE MOST DESCRIPTIVE FEATURES ON IT.

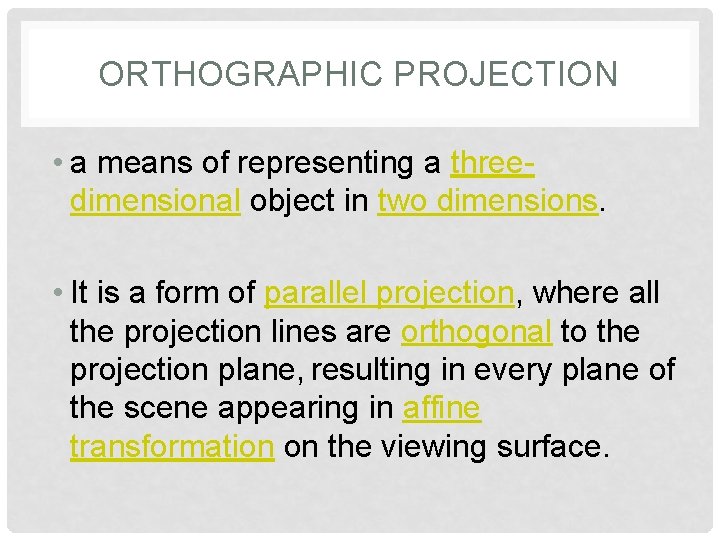
ORTHOGRAPHIC PROJECTION • a means of representing a threedimensional object in two dimensions. • It is a form of parallel projection, where all the projection lines are orthogonal to the projection plane, resulting in every plane of the scene appearing in affine transformation on the viewing surface.

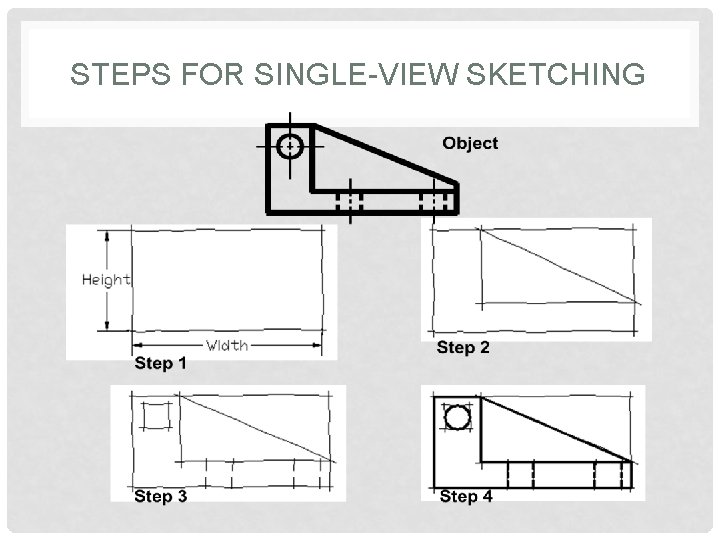
STEPS FOR SINGLE-VIEW SKETCHING

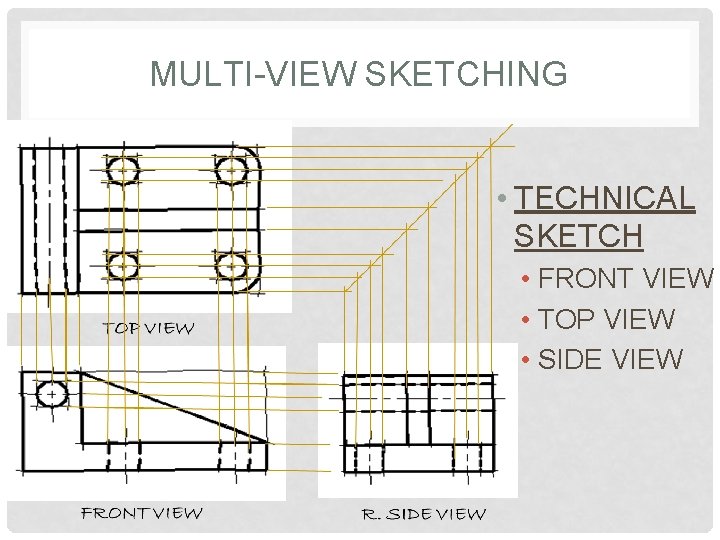
MULTI-VIEW SKETCHING • TECHNICAL SKETCH • FRONT VIEW • TOP VIEW • SIDE VIEW

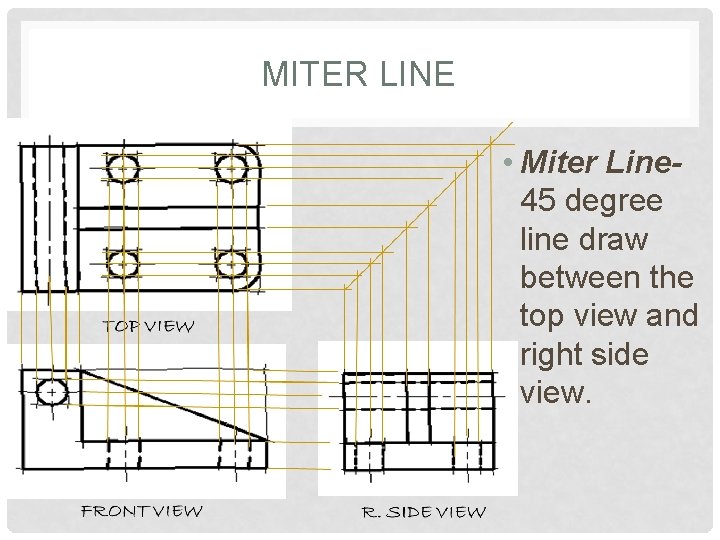
MITER LINE • Miter Line 45 degree line draw between the top view and right side view.

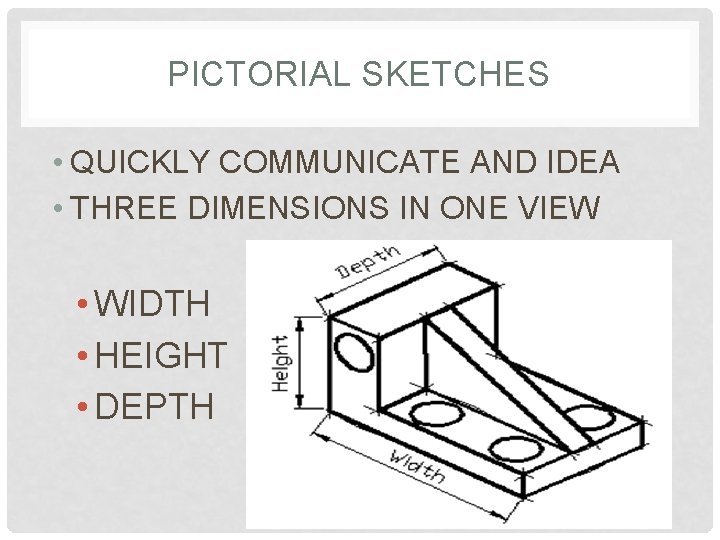
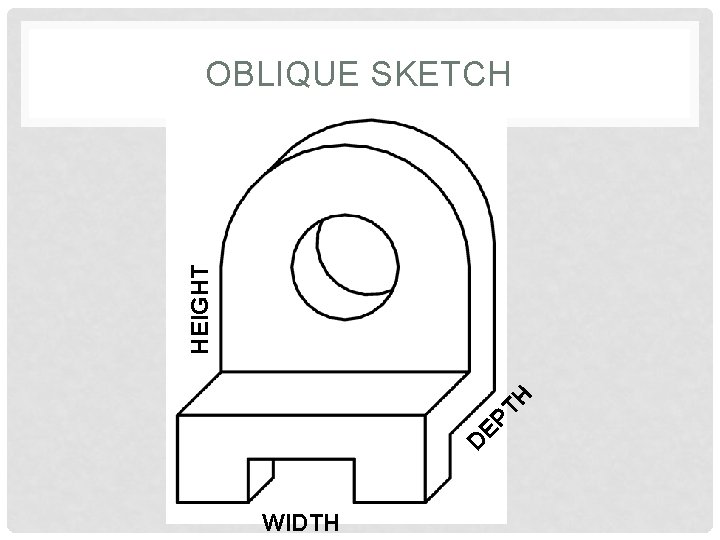
PICTORIAL SKETCHES • QUICKLY COMMUNICATE AND IDEA • THREE DIMENSIONS IN ONE VIEW • WIDTH • HEIGHT • DEPTH

PICTORIAL SKETCHES • THREE (3) TYPES • ISOMETRIC • OBLIQUE • PERSPECTIVE

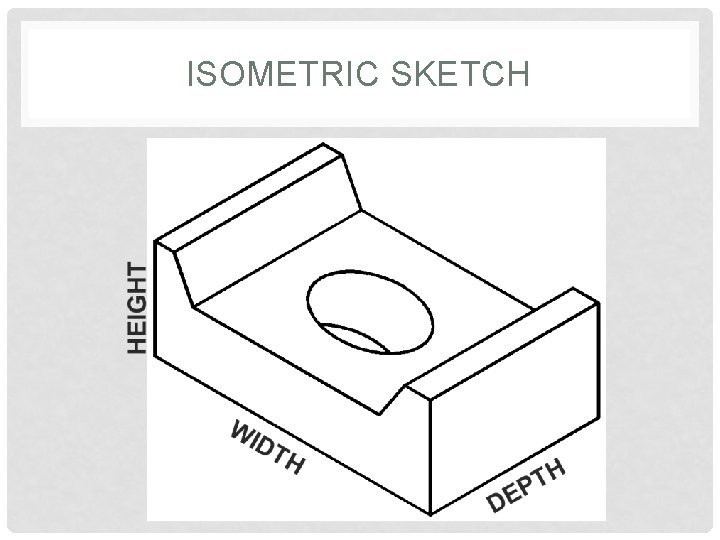
ISOMETRIC SKETCH

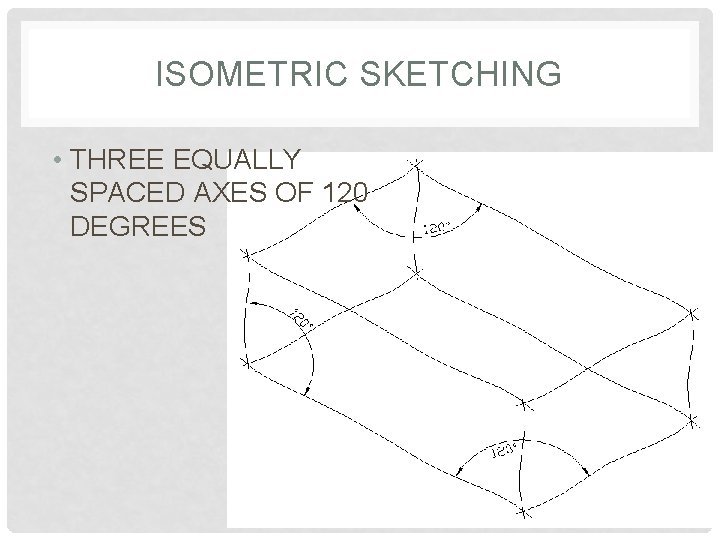
ISOMETRIC SKETCHING • THREE EQUALLY SPACED AXES OF 120 DEGREES

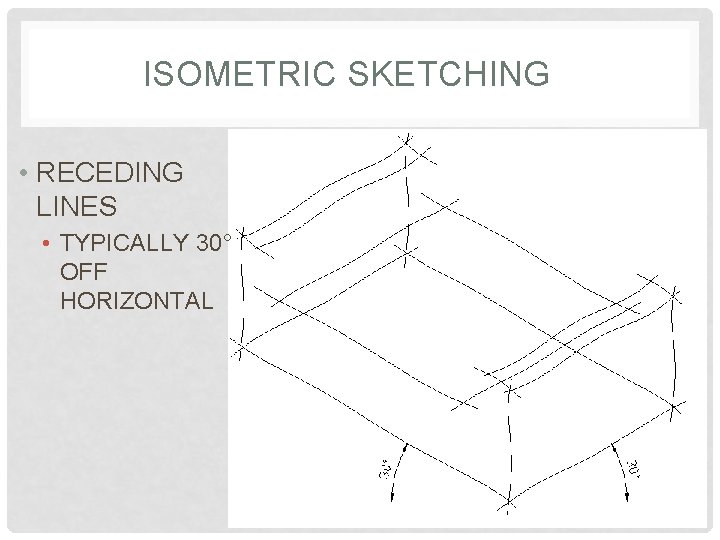
ISOMETRIC SKETCHING • RECEDING LINES • TYPICALLY 30° OFF HORIZONTAL

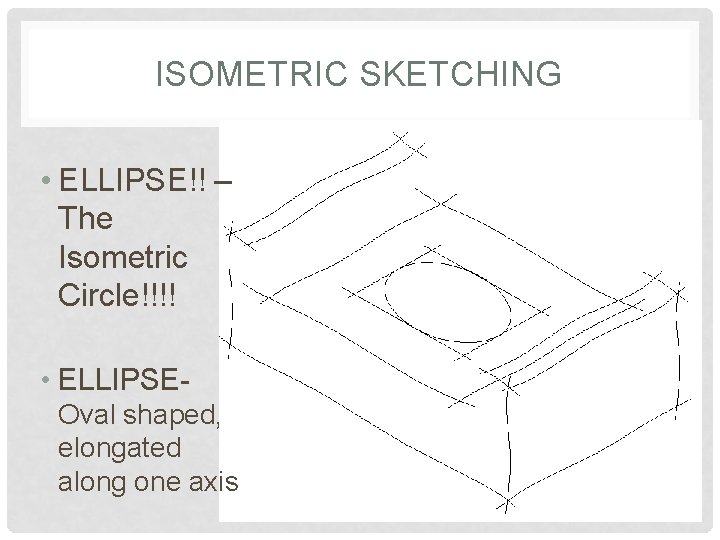
ISOMETRIC SKETCHING • ELLIPSE!! – The Isometric Circle!!!! • ELLIPSE- Oval shaped, elongated along one axis

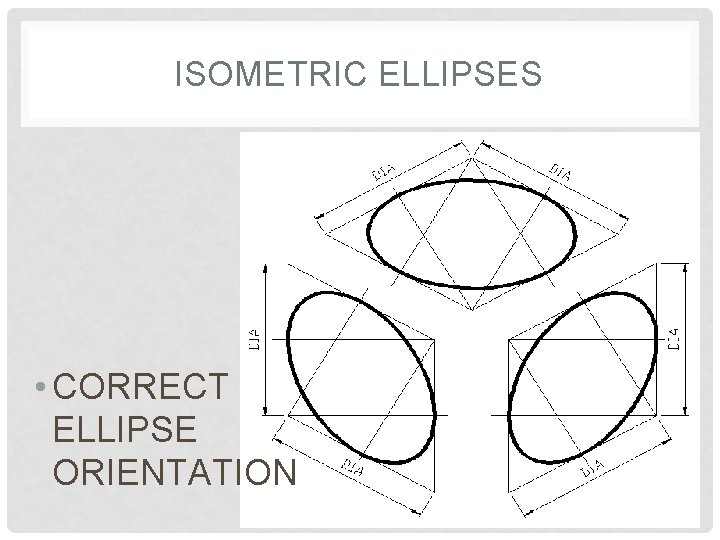
ISOMETRIC ELLIPSES • CORRECT ELLIPSE ORIENTATION

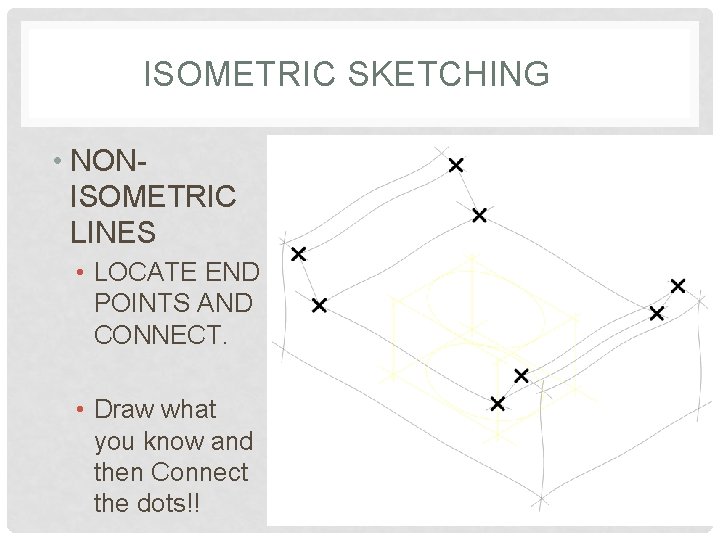
ISOMETRIC SKETCHING • NONISOMETRIC LINES • LOCATE END POINTS AND CONNECT. • Draw what you know and then Connect the dots!!

D EP T H HEIGHT OBLIQUE SKETCH WIDTH

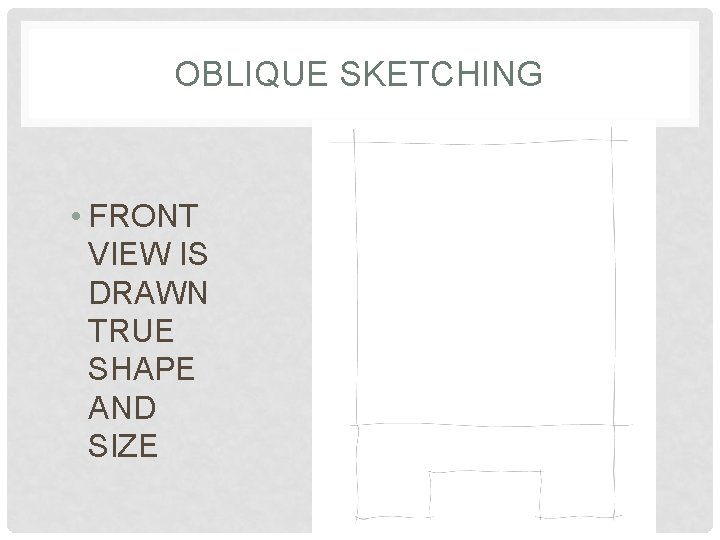
OBLIQUE SKETCHING • FRONT VIEW IS DRAWN TRUE SHAPE AND SIZE

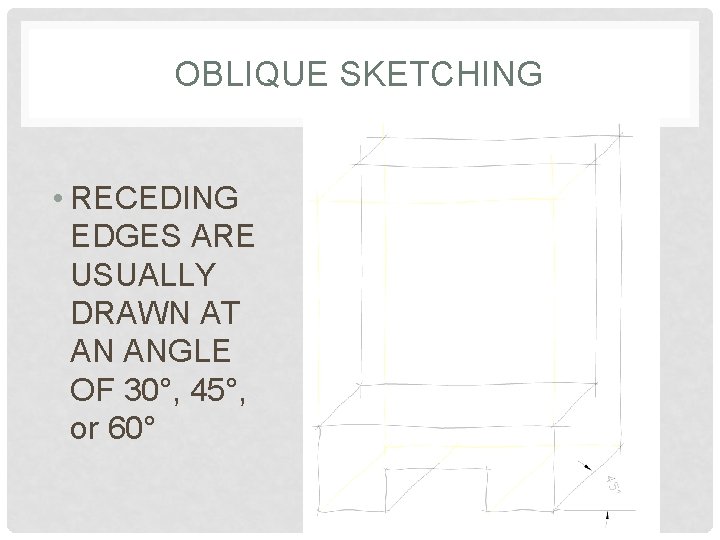
OBLIQUE SKETCHING • RECEDING EDGES ARE USUALLY DRAWN AT AN ANGLE OF 30°, 45°, or 60°

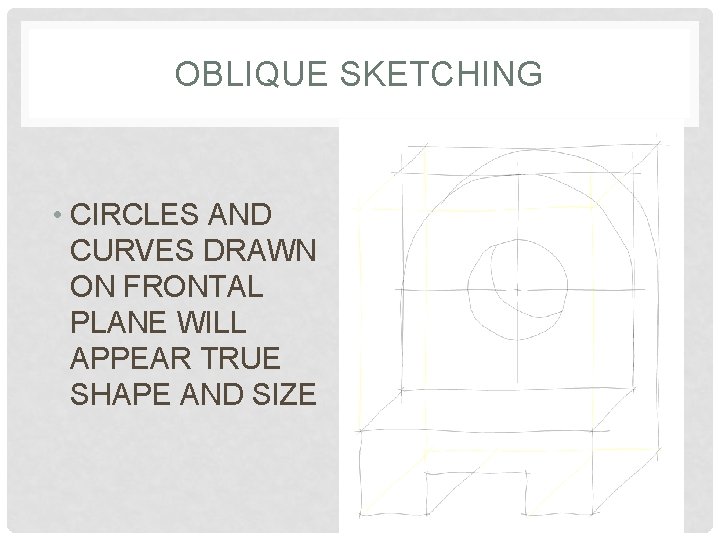
OBLIQUE SKETCHING • CIRCLES AND CURVES DRAWN ON FRONTAL PLANE WILL APPEAR TRUE SHAPE AND SIZE

OBLIQUE SKETCHING • Cavalier Oblique Sketch – an oblique sketch where the receding lines are drawn to true length. • Cabinet Oblique sketch- an oblique sketch where the receding line are drawn at ½ of there true length.

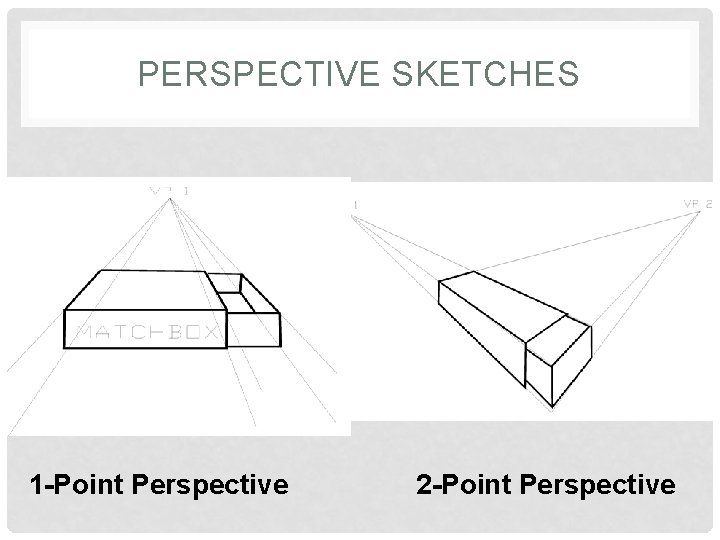
PERSPECTIVE SKETCHES 1 -Point Perspective 2 -Point Perspective

PERSPECTIVE SKETCHES • OBJECTS APPEAR AS THE EYE WOULD SEE THEM • MOST REALISTIC TYPE OF PICTORIAL SKETCH • MOST DIFFICULT PICTORAL SKETCH TO DRAW