Shawlands Academy Department Of Technical Education Graphic Communication


- Slides: 13

Shawlands Academy Department Of Technical Education Graphic Communication

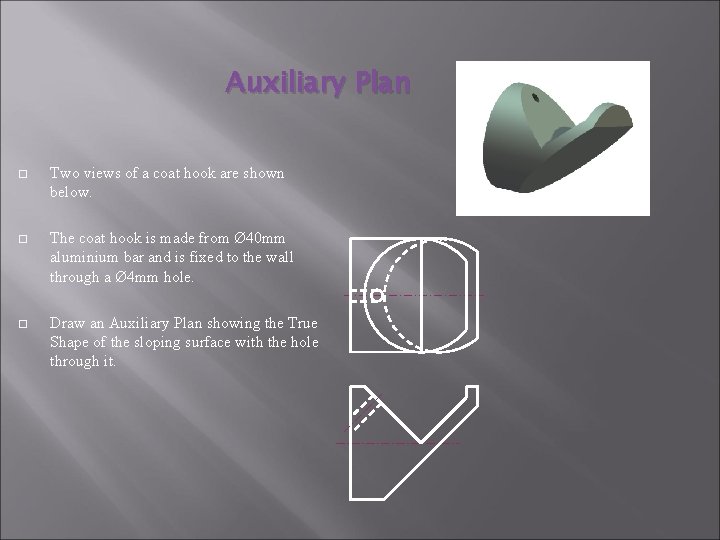
Auxiliary Plan Two views of a coat hook are shown below. The coat hook is made from Ø 40 mm aluminium bar and is fixed to the wall through a Ø 4 mm hole. Draw an Auxiliary Plan showing the True Shape of the sloping surface with the hole through it.

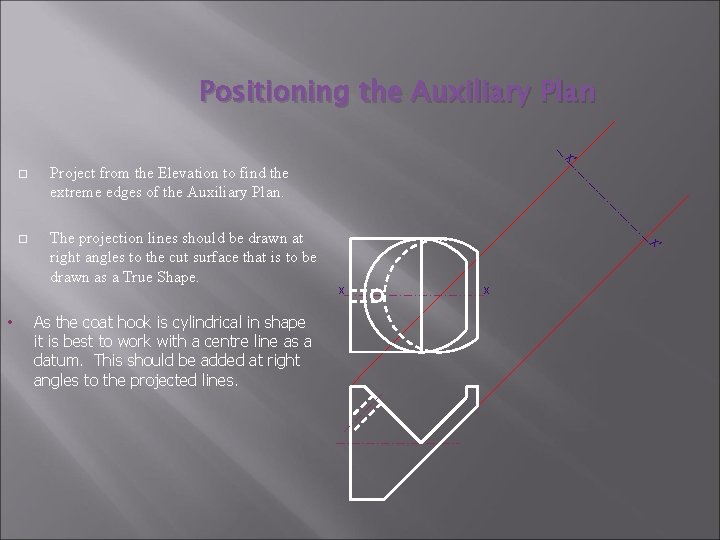
Positioning the Auxiliary Plan X’ Project from the Elevation to find the extreme edges of the Auxiliary Plan. The projection lines should be drawn at right angles to the cut surface that is to be drawn as a True Shape. As the coat hook is cylindrical in shape it is best to work with a centre line as a datum. This should be added at right angles to the projected lines. X’ • X X

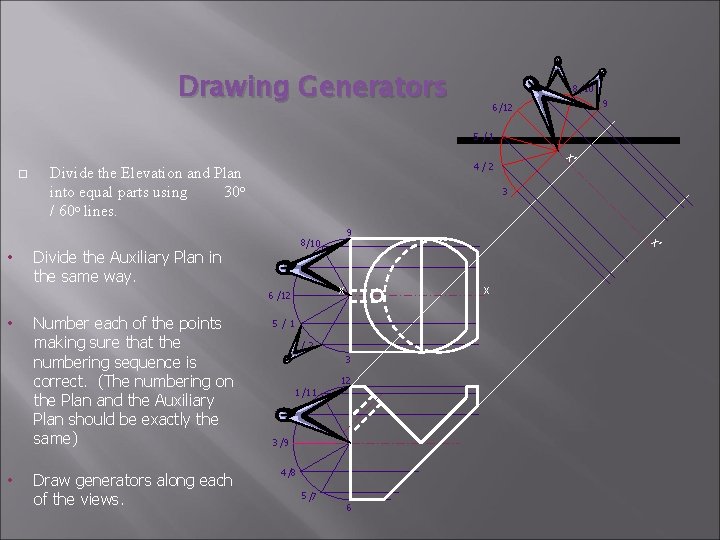
Drawing Generators 7/11 8 /10 9 6 /12 5 /1 4/2 Divide the Elevation and Plan into equal parts using 30 o / 60 o lines. Divide the Auxiliary Plan in the same way. 3 7/11 • Number each of the points making sure that the numbering sequence is correct. (The numbering on the Plan and the Auxiliary Plan should be exactly the same) Draw generators along each of the views. X X 6 /12 • 9 8/10 X’ • X’ 5/1 4/ 2 3 1 /11 12 2 /10 3 /9 4 /8 5 /7 6

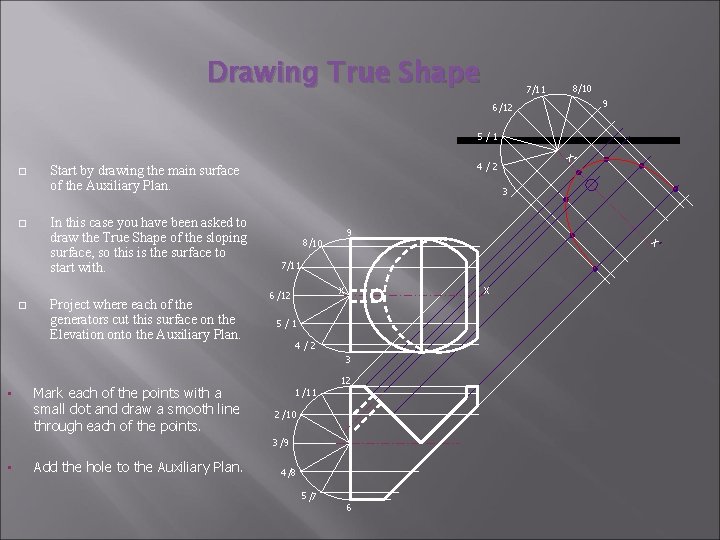
Drawing True Shape 7/11 8/10 9 6 /12 5/1 Project where each of the generators cut this surface on the Elevation onto the Auxiliary Plan. 3 9 8/10 X’ 4/2 Start by drawing the main surface of the Auxiliary Plan. In this case you have been asked to draw the True Shape of the sloping surface, so this is the surface to start with. 7/11 X X 6 /12 5/1 4/2 3 • Mark each of the points with a small dot and draw a smooth line through each of the points. 1 /11 12 2 /10 3 /9 • Add the hole to the Auxiliary Plan. X’ 4 /8 5 /7 6

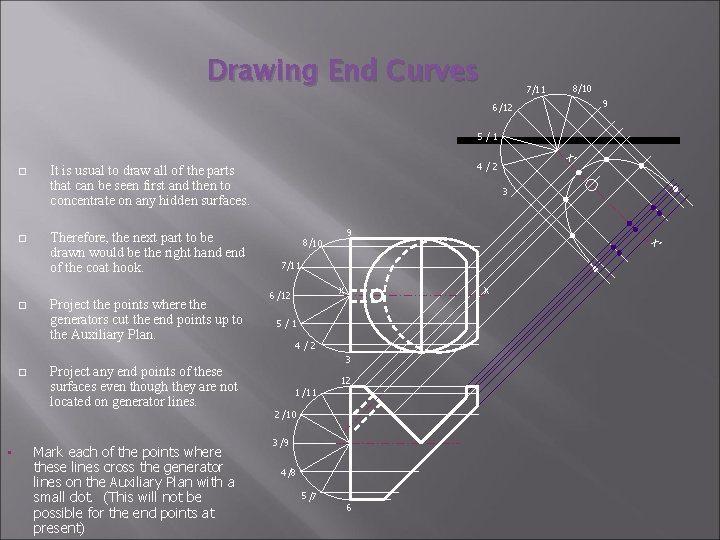
Drawing End Curves 7/11 8/10 9 6 /12 5/1 • 4/2 It is usual to draw all of the parts that can be seen first and then to concentrate on any hidden surfaces. Therefore, the next part to be drawn would be the right hand end of the coat hook. Project the points where the generators cut the end points up to the Auxiliary Plan. Project any end points of these surfaces even though they are not located on generator lines. Mark each of the points where these lines cross the generator lines on the Auxiliary Plan with a small dot. (This will not be possible for the end points at present) 3 9 8/10 X’ X’ 7/11 X X 6 /12 5/1 4/2 3 1 /11 12 2 /10 3 /9 4 /8 5 /7 6

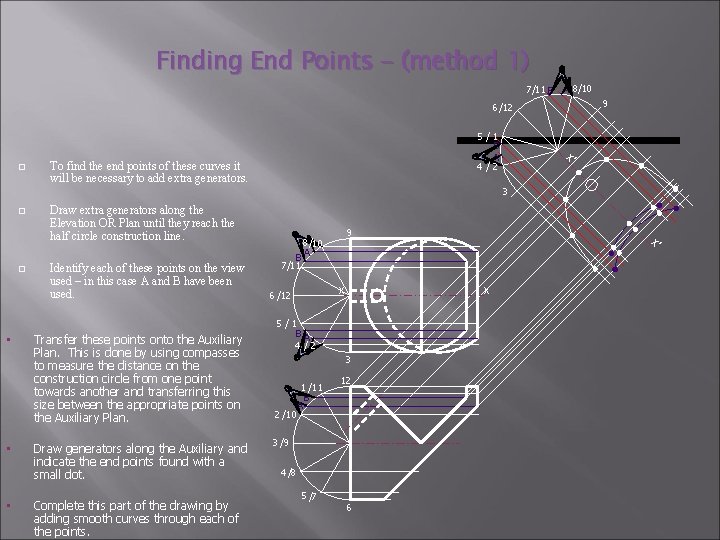
Finding End Points - (method 1) 7/11 B A 8/10 9 6 /12 To find the end points of these curves it will be necessary to add extra generators. X’ 5/1 B A 4/2 3 • • • Identify each of these points on the view used – in this case A and B have been used. Transfer these points onto the Auxiliary Plan. This is done by using compasses to measure the distance on the construction circle from one point towards another and transferring this size between the appropriate points on the Auxiliary Plan. Draw generators along the Auxiliary and indicate the end points found with a small dot. Complete this part of the drawing by adding smooth curves through each of the points. B 7/11 9 8/10 A X’ Draw extra generators along the Elevation OR Plan until they reach the half circle construction line. X X 6 /12 5/1 BA 4/2 3 2 /10 1 /11 B A 12 3 /9 4 /8 5 /7 6

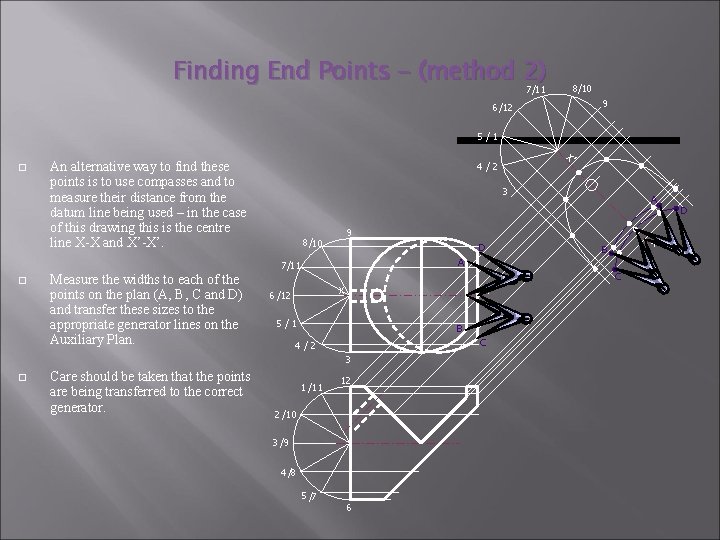
Finding End Points - (method 2) 7/11 8/10 9 6 /12 5/1 An alternative way to find these points is to use compasses and to measure their distance from the datum line being used – in the case of this drawing this is the centre line X-X and X’-X’. 4/2 3 D A C X X 6 /12 5/1 B C 4/2 3 Care should be taken that the points are being transferred to the correct generator. B X’ Measure the widths to each of the points on the plan (A, B, C and D) and transfer these sizes to the appropriate generator lines on the Auxiliary Plan. A 9 8/10 7/11 X’ 1 /11 12 2 /10 3 /9 4 /8 5 /7 6 D

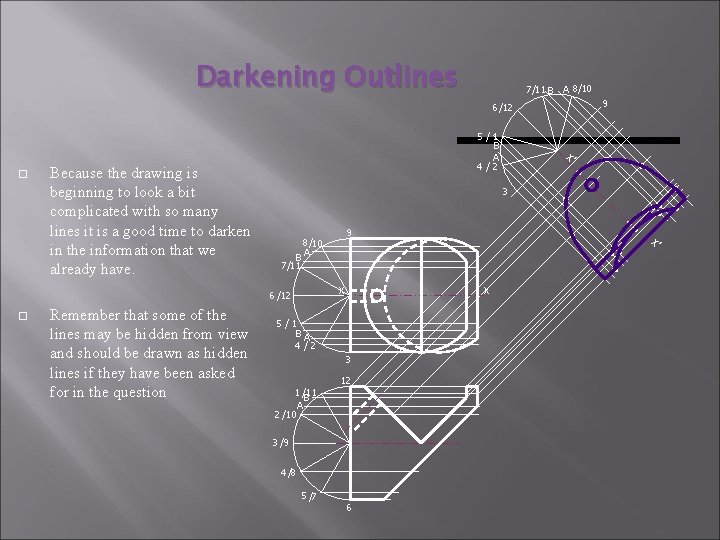
Darkening Outlines 7/11 B A 8/10 9 6 /12 3 B 7/11 Remember that some of the lines may be hidden from view and should be drawn as hidden lines if they have been asked for in the question X X 6 /12 9 8/10 A X’ Because the drawing is beginning to look a bit complicated with so many lines it is a good time to darken in the information that we already have. X’ 5/1 B A 4/2 5/1 BA 4/2 3 1 /11 B A 2 /10 12 3 /9 4 /8 5 /7 6

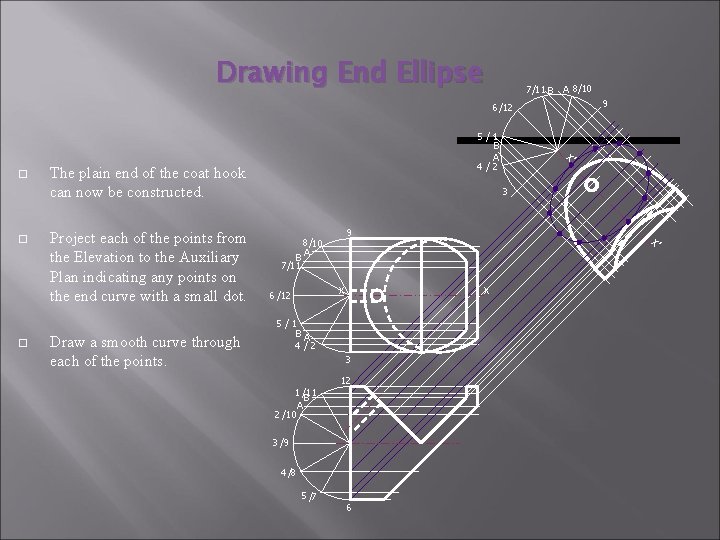
Drawing End Ellipse 7/11 B A 8/10 9 6 /12 Project each of the points from the Elevation to the Auxiliary Plan indicating any points on the end curve with a small dot. Draw a smooth curve through each of the points. 3 B 7/11 9 8/10 A X’ The plain end of the coat hook can now be constructed. X’ 5/1 B A 4/2 X X 6 /12 5/1 BA 4/2 3 1 /11 B A 2 /10 12 3 /9 4 /8 5 /7 6

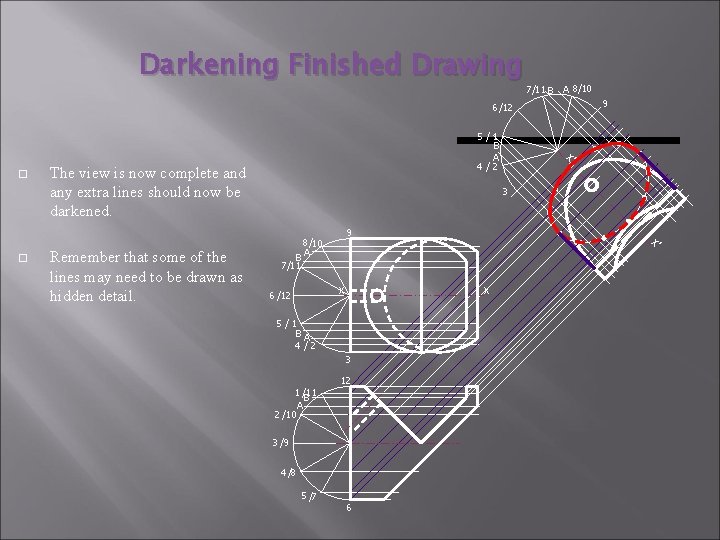
Darkening Finished Drawing 7/11 B A 8/10 9 6 /12 Remember that some of the lines may need to be drawn as hidden detail. 3 B 7/11 9 8/10 A X’ The view is now complete and any extra lines should now be darkened. X’ 5/1 B A 4/2 X X 6 /12 5/1 BA 4/2 3 1 /11 B A 2 /10 12 3 /9 4 /8 5 /7 6

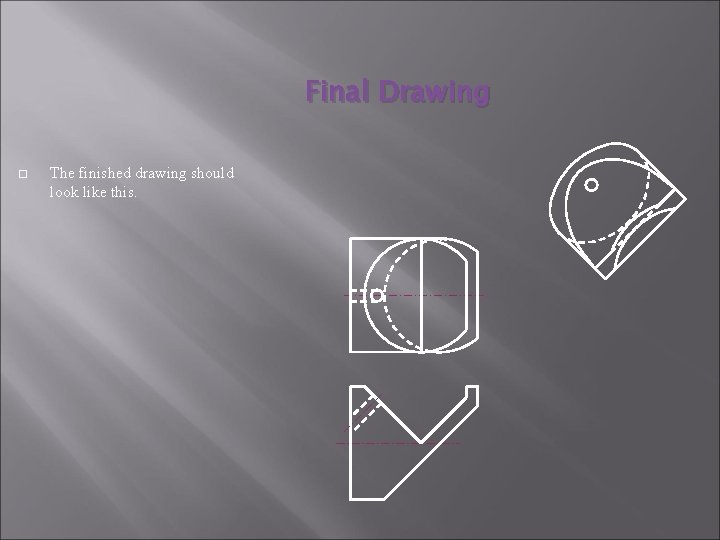
Final Drawing The finished drawing should look like this.

Department Of Technical Education Power. Point Presentation produced by John Mc. Rae, Nairn Academy 2003