Shallow Internal Corrosion Sensor Technology for Heavy Pipe
![Combining SIC with MFL SIC feature sizing customizes MFL sizing model Defect Depth [mm] Combining SIC with MFL SIC feature sizing customizes MFL sizing model Defect Depth [mm]](https://slidetodoc.com/presentation_image_h/eb3be3ef8d6b4be9d087ac42bb0be2a8/image-15.jpg)
![Test Results SIC Scan of Steel Plate with Spherical Pits Depth [mm] y-direction [mm] Test Results SIC Scan of Steel Plate with Spherical Pits Depth [mm] y-direction [mm]](https://slidetodoc.com/presentation_image_h/eb3be3ef8d6b4be9d087ac42bb0be2a8/image-16.jpg)
![Test Results Depth [mm] y-direction [mm] SIC Scan of Steel Plate with TLC x-direction Test Results Depth [mm] y-direction [mm] SIC Scan of Steel Plate with TLC x-direction](https://slidetodoc.com/presentation_image_h/eb3be3ef8d6b4be9d087ac42bb0be2a8/image-18.jpg)
![Test Results SIC Depth [mm] SIC Scan of Steel Plate with TLC Real Depth Test Results SIC Depth [mm] SIC Scan of Steel Plate with TLC Real Depth](https://slidetodoc.com/presentation_image_h/eb3be3ef8d6b4be9d087ac42bb0be2a8/image-19.jpg)

- Slides: 27

Shallow Internal Corrosion Sensor Technology for Heavy Pipe Wall Inspection ROSEN Technology & Research Center Germany Dr. Olaf Stawicki 18 -Nov-2009

Contents • • Motivation Measurement Principle Mechatronic Principle Inspection Tool Design Combining SIC with MFL Test Results On-Site Example Summary Copyright © ROSEN Group 2009 - Copy prepared for PPSA SIC Sensor Technology | O. Stawicki | 18 -Nov-2009

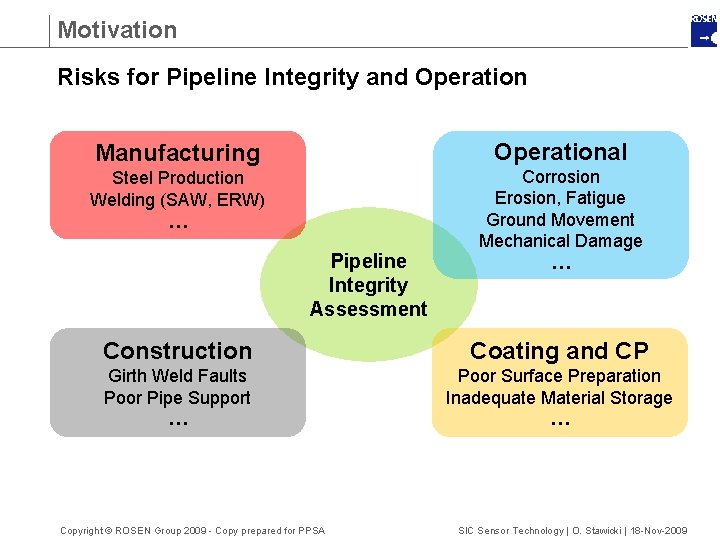
Motivation Risks for Pipeline Integrity and Operational Manufacturing Steel Production Welding (SAW, ERW) … Pipeline Integrity Assessment Corrosion Erosion, Fatigue Ground Movement Mechanical Damage … Construction Coating and CP Girth Weld Faults Poor Pipe Support … Poor Surface Preparation Inadequate Material Storage … Copyright © ROSEN Group 2009 - Copy prepared for PPSA SIC Sensor Technology | O. Stawicki | 18 -Nov-2009

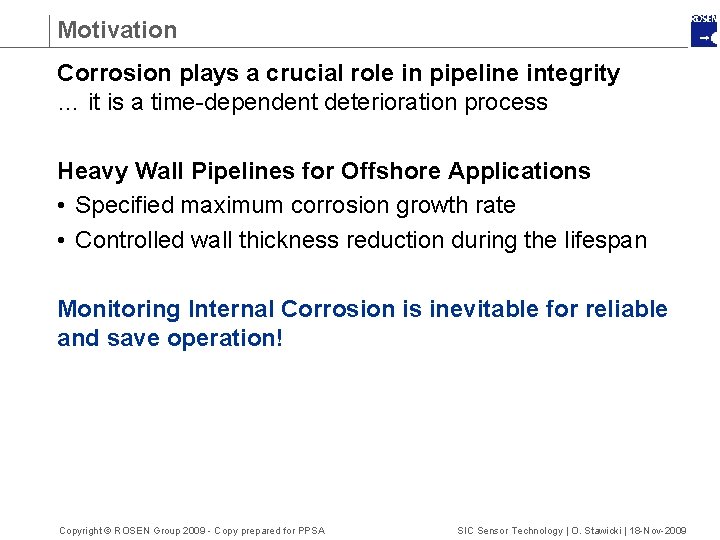
Motivation Corrosion plays a crucial role in pipeline integrity … it is a time-dependent deterioration process Heavy Wall Pipelines for Offshore Applications • Specified maximum corrosion growth rate • Controlled wall thickness reduction during the lifespan Monitoring Internal Corrosion is inevitable for reliable and save operation! Copyright © ROSEN Group 2009 - Copy prepared for PPSA SIC Sensor Technology | O. Stawicki | 18 -Nov-2009

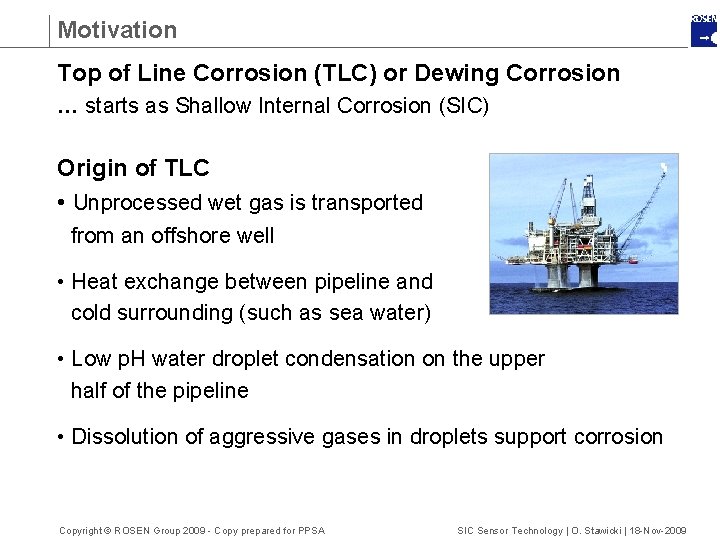
Motivation Top of Line Corrosion (TLC) or Dewing Corrosion … starts as Shallow Internal Corrosion (SIC) Origin of TLC • Unprocessed wet gas is transported from an offshore well • Heat exchange between pipeline and cold surrounding (such as sea water) • Low p. H water droplet condensation on the upper half of the pipeline • Dissolution of aggressive gases in droplets support corrosion Copyright © ROSEN Group 2009 - Copy prepared for PPSA SIC Sensor Technology | O. Stawicki | 18 -Nov-2009

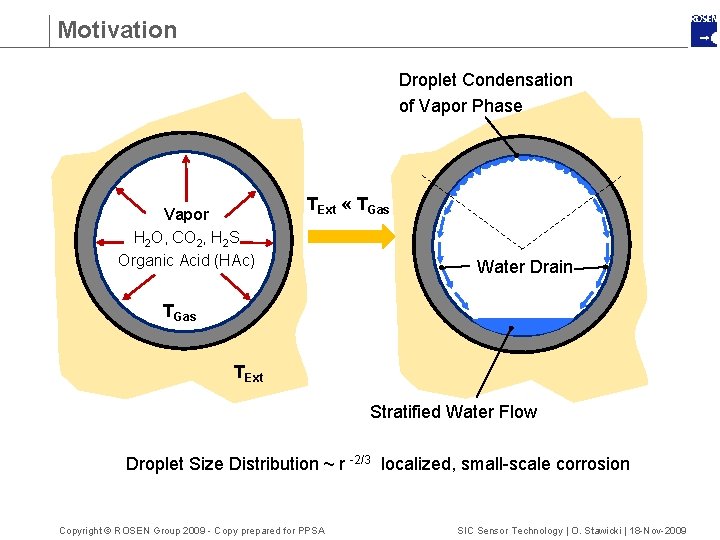
Motivation Droplet Condensation of Vapor Phase Vapor H 2 O, CO 2, H 2 S Organic Acid (HAc) TExt « TGas Water Drain TGas TExt Stratified Water Flow Droplet Size Distribution ~ r -2/3 localized, small-scale corrosion Copyright © ROSEN Group 2009 - Copy prepared for PPSA SIC Sensor Technology | O. Stawicki | 18 -Nov-2009

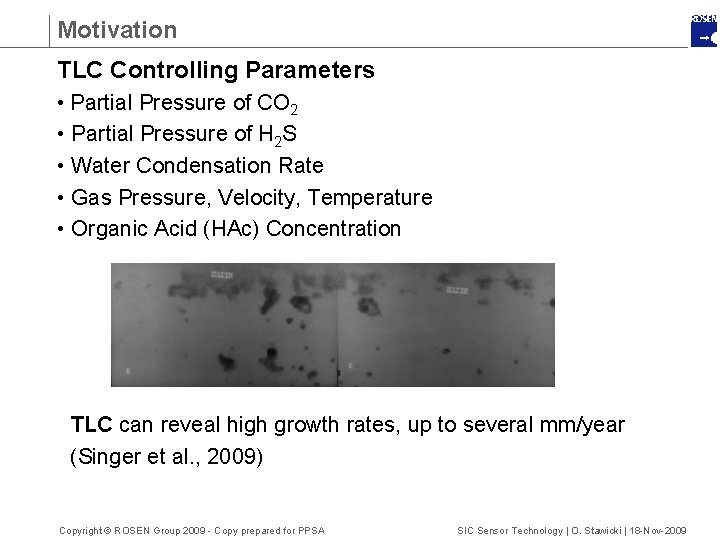
Motivation TLC Controlling Parameters • Partial Pressure of CO 2 • Partial Pressure of H 2 S • Water Condensation Rate • Gas Pressure, Velocity, Temperature • Organic Acid (HAc) Concentration TLC can reveal high growth rates, up to several mm/year (Singer et al. , 2009) Copyright © ROSEN Group 2009 - Copy prepared for PPSA SIC Sensor Technology | O. Stawicki | 18 -Nov-2009

Motivation What kind of inspection technology is required? Due to feature sizes and high Corrosion Growth Rates (CGRs), an approach is required with … … High Sensitivity for early detection and excellent feature discrimination … Accurate Sizing Properties for determining CGRs effectively Both primarily for Heavy Wall Gas Pipelines Copyright © ROSEN Group 2009 - Copy prepared for PPSA SIC Sensor Technology | O. Stawicki | 18 -Nov-2009

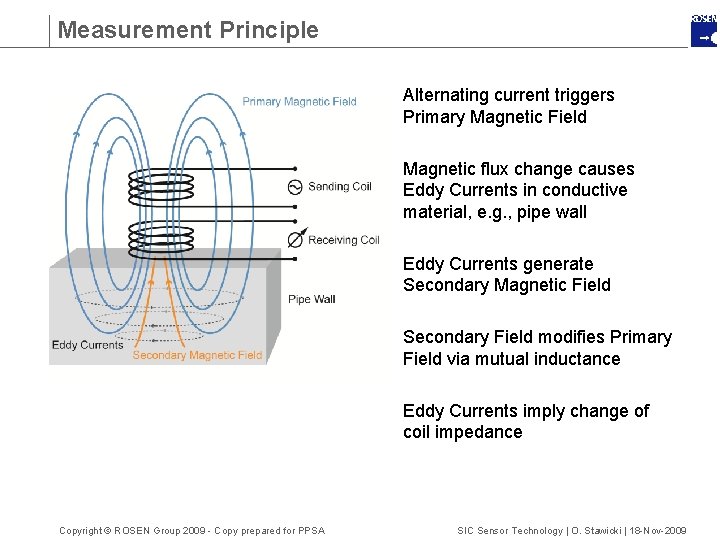
Measurement Principle Alternating current triggers Primary Magnetic Field Magnetic flux change causes Eddy Currents in conductive material, e. g. , pipe wall Eddy Currents generate Secondary Magnetic Field Secondary Field modifies Primary Field via mutual inductance Eddy Currents imply change of coil impedance Copyright © ROSEN Group 2009 - Copy prepared for PPSA SIC Sensor Technology | O. Stawicki | 18 -Nov-2009

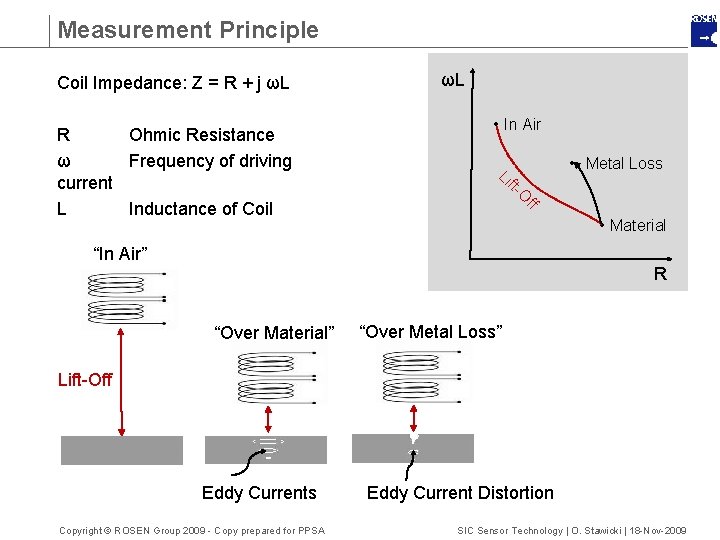
Measurement Principle Coil Impedance: Z = R + j ωL R Ohmic Resistance ω Frequency of driving current L Inductance of Coil ωL • In Air Li ft- • Metal Loss O ff • Material “In Air” R “Over Material” “Over Metal Loss” Lift-Off Eddy Currents Copyright © ROSEN Group 2009 - Copy prepared for PPSA Eddy Current Distortion SIC Sensor Technology | O. Stawicki | 18 -Nov-2009

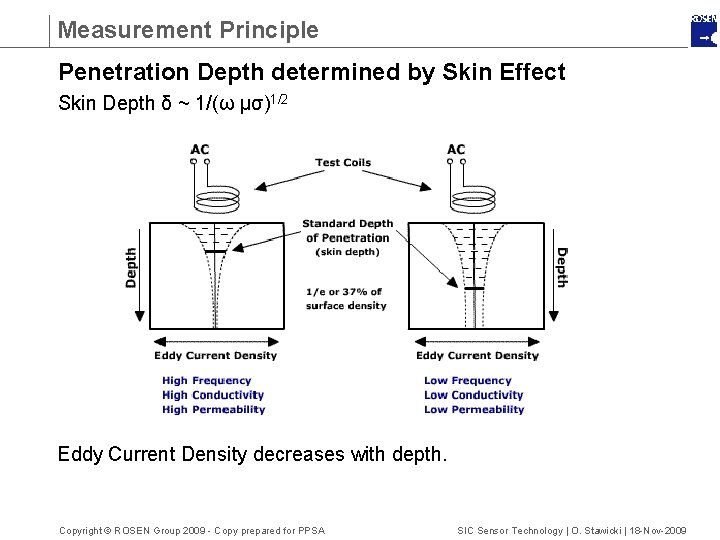
Measurement Principle Penetration Depth determined by Skin Effect Skin Depth δ ~ 1/(ω μσ)1/2 Eddy Current Density decreases with depth. Copyright © ROSEN Group 2009 - Copy prepared for PPSA SIC Sensor Technology | O. Stawicki | 18 -Nov-2009

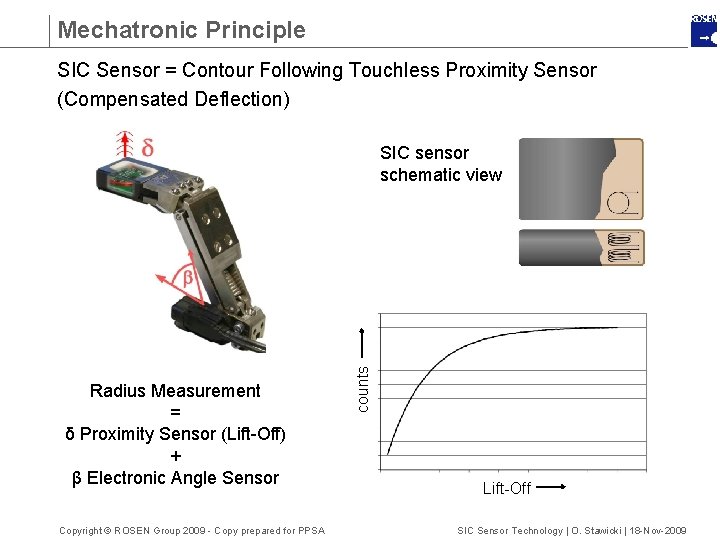
Mechatronic Principle SIC Sensor = Contour Following Touchless Proximity Sensor (Compensated Deflection) Radius Measurement = δ Proximity Sensor (Lift-Off) + β Electronic Angle Sensor Copyright © ROSEN Group 2009 - Copy prepared for PPSA counts SIC sensor schematic view Lift-Off SIC Sensor Technology | O. Stawicki | 18 -Nov-2009

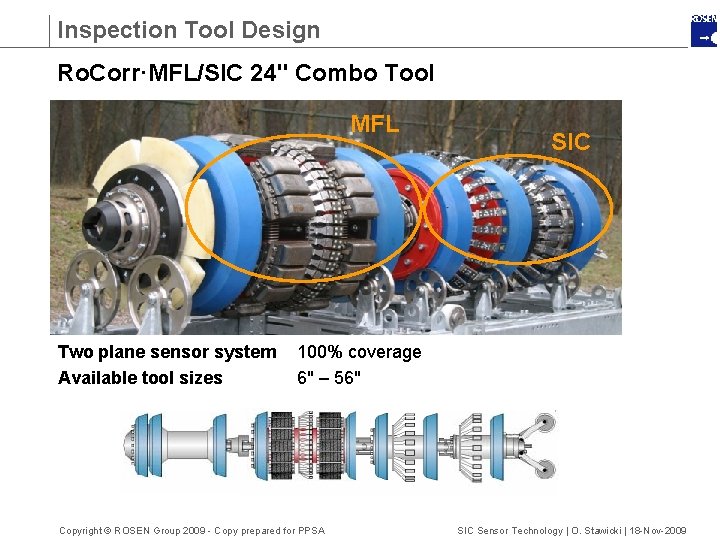
Inspection Tool Design Ro. Corr·MFL/SIC 24" Combo Tool MFL Two plane sensor system Available tool sizes SIC 100% coverage 6" – 56" Copyright © ROSEN Group 2009 - Copy prepared for PPSA SIC Sensor Technology | O. Stawicki | 18 -Nov-2009

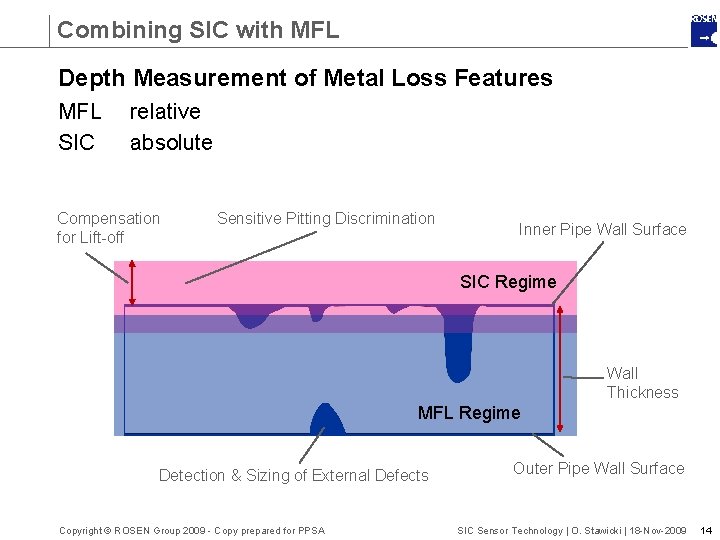
Combining SIC with MFL Depth Measurement of Metal Loss Features MFL SIC relative absolute Compensation for Lift-off Sensitive Pitting Discrimination Inner Pipe Wall Surface SIC Regime Wall Thickness MFL Regime Detection & Sizing of External Defects Copyright © ROSEN Group 2009 - Copy prepared for PPSA Outer Pipe Wall Surface SIC Sensor Technology | O. Stawicki | 18 -Nov-2009 14
![Combining SIC with MFL SIC feature sizing customizes MFL sizing model Defect Depth mm Combining SIC with MFL SIC feature sizing customizes MFL sizing model Defect Depth [mm]](https://slidetodoc.com/presentation_image_h/eb3be3ef8d6b4be9d087ac42bb0be2a8/image-15.jpg)
Combining SIC with MFL SIC feature sizing customizes MFL sizing model Defect Depth [mm] Sample pipe with WT = 20 mm Detection Regime MFL SIC Probe Depth Sizing Accuracies MFL ± 2 mm SIC ± 0. 5 mm Defect Diameter [mm] Copyright © ROSEN Group 2009 - Copy prepared for PPSA SIC Sensor Technology | O. Stawicki | 18 -Nov-2009
![Test Results SIC Scan of Steel Plate with Spherical Pits Depth mm ydirection mm Test Results SIC Scan of Steel Plate with Spherical Pits Depth [mm] y-direction [mm]](https://slidetodoc.com/presentation_image_h/eb3be3ef8d6b4be9d087ac42bb0be2a8/image-16.jpg)
Test Results SIC Scan of Steel Plate with Spherical Pits Depth [mm] y-direction [mm] Lift-Off 3 mm Resolution 2 x 2 mm EDM-made pits x-direction [mm] Copyright © ROSEN Group 2009 - Copy prepared for PPSA SIC Sensor Technology | O. Stawicki | 18 -Nov-2009

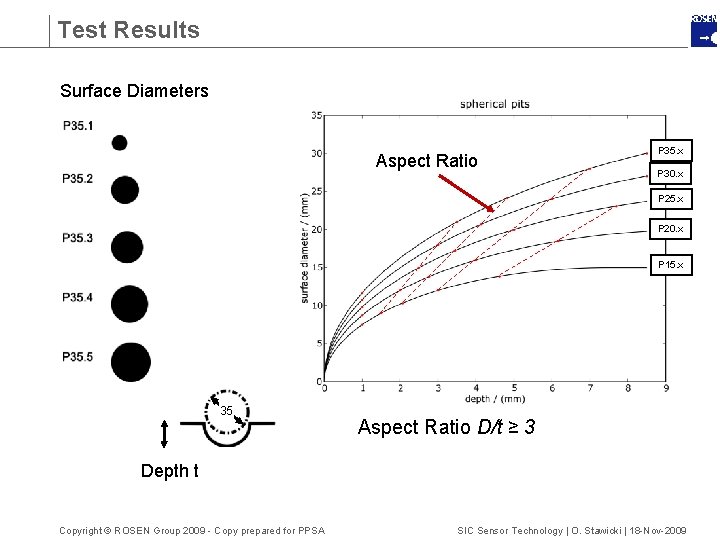
Test Results Surface Diameters Aspect Ratio P 35. x P 30. x P 25. x P 20. x P 15. x 35 Aspect Ratio D/t ≥ 3 Depth t Copyright © ROSEN Group 2009 - Copy prepared for PPSA SIC Sensor Technology | O. Stawicki | 18 -Nov-2009
![Test Results Depth mm ydirection mm SIC Scan of Steel Plate with TLC xdirection Test Results Depth [mm] y-direction [mm] SIC Scan of Steel Plate with TLC x-direction](https://slidetodoc.com/presentation_image_h/eb3be3ef8d6b4be9d087ac42bb0be2a8/image-18.jpg)
Test Results Depth [mm] y-direction [mm] SIC Scan of Steel Plate with TLC x-direction [mm] Copyright © ROSEN Group 2009 - Copy prepared for PPSA SIC Sensor Technology | O. Stawicki | 18 -Nov-2009
![Test Results SIC Depth mm SIC Scan of Steel Plate with TLC Real Depth Test Results SIC Depth [mm] SIC Scan of Steel Plate with TLC Real Depth](https://slidetodoc.com/presentation_image_h/eb3be3ef8d6b4be9d087ac42bb0be2a8/image-19.jpg)
Test Results SIC Depth [mm] SIC Scan of Steel Plate with TLC Real Depth [mm] Copyright © ROSEN Group 2009 - Copy prepared for PPSA SIC Sensor Technology | O. Stawicki | 18 -Nov-2009

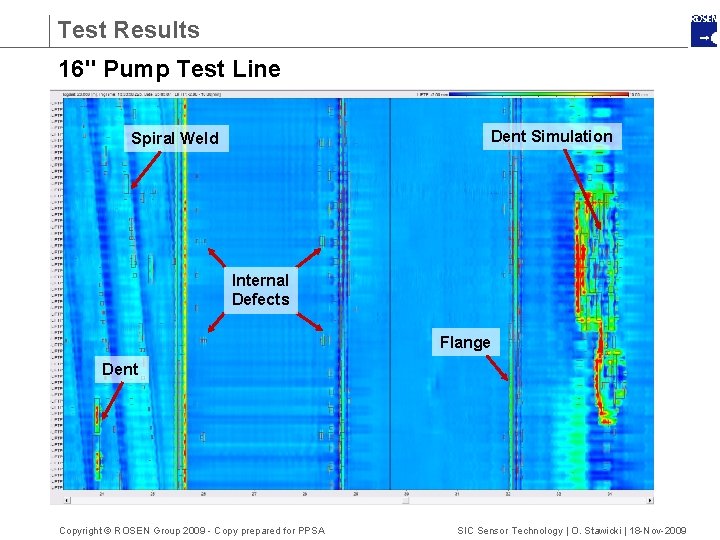
Test Results 16" Pump Test Line Dent Simulation Spiral Weld Internal Defects Flange Dent Copyright © ROSEN Group 2009 - Copy prepared for PPSA SIC Sensor Technology | O. Stawicki | 18 -Nov-2009

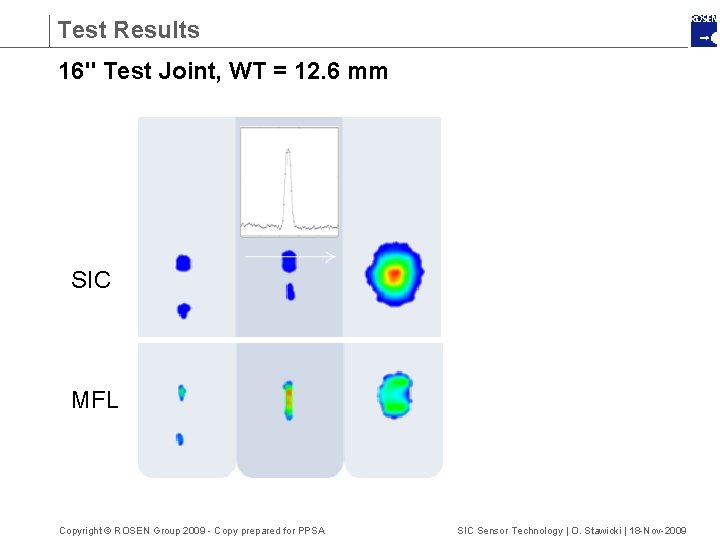
Test Results 16" Test Joint, WT = 12. 6 mm SIC MFL Copyright © ROSEN Group 2009 - Copy prepared for PPSA SIC Sensor Technology | O. Stawicki | 18 -Nov-2009

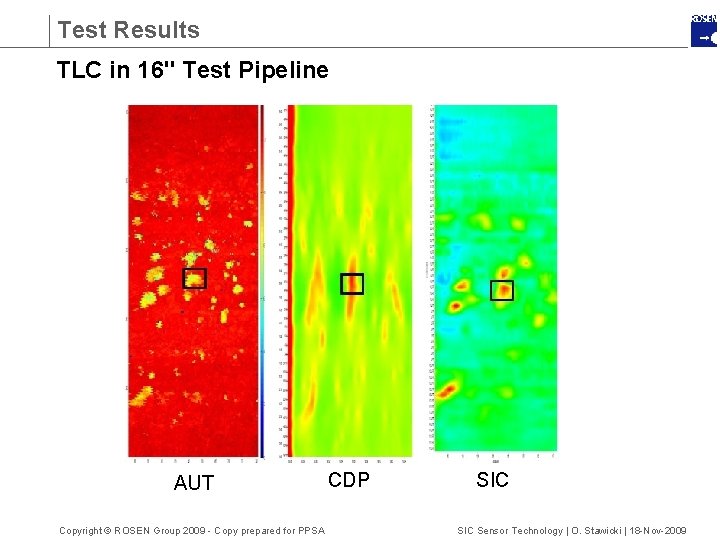
Test Results TLC in 16" Test Pipeline AUT Copyright © ROSEN Group 2009 - Copy prepared for PPSA CDP SIC Sensor Technology | O. Stawicki | 18 -Nov-2009

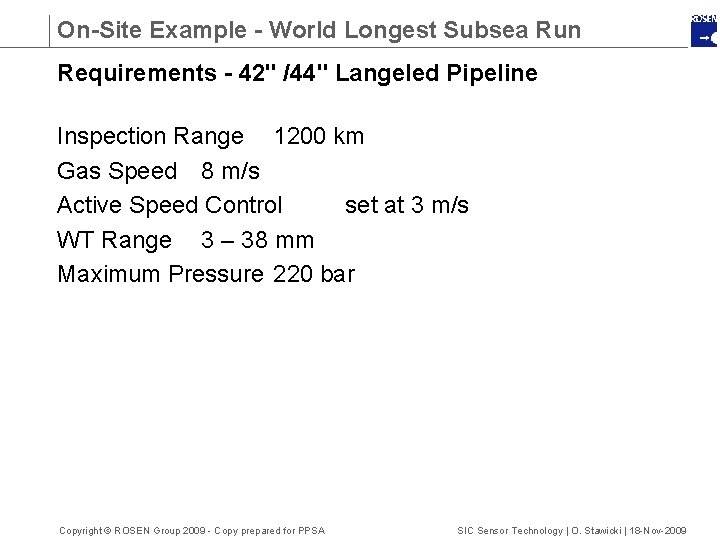
On-Site Example - World Longest Subsea Run Requirements - 42" /44" Langeled Pipeline Inspection Range 1200 km Gas Speed 8 m/s Active Speed Control set at 3 m/s WT Range 3 – 38 mm Maximum Pressure 220 bar Copyright © ROSEN Group 2009 - Copy prepared for PPSA SIC Sensor Technology | O. Stawicki | 18 -Nov-2009

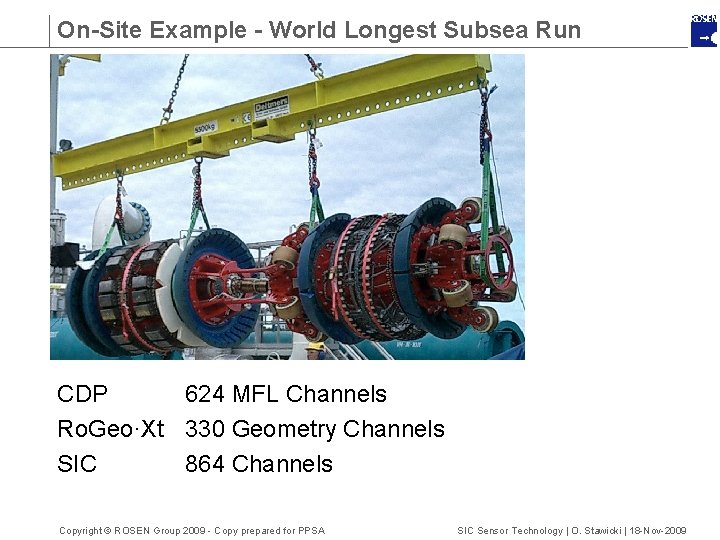
On-Site Example - World Longest Subsea Run CDP 624 MFL Channels Ro. Geo·Xt 330 Geometry Channels SIC 864 Channels Copyright © ROSEN Group 2009 - Copy prepared for PPSA SIC Sensor Technology | O. Stawicki | 18 -Nov-2009

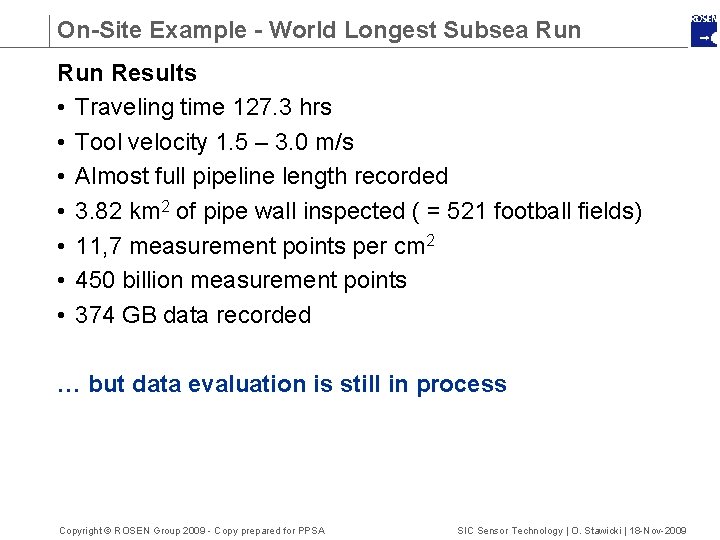
On-Site Example - World Longest Subsea Run Results • Traveling time 127. 3 hrs • Tool velocity 1. 5 – 3. 0 m/s • Almost full pipeline length recorded • 3. 82 km 2 of pipe wall inspected ( = 521 football fields) • 11, 7 measurement points per cm 2 • 450 billion measurement points • 374 GB data recorded … but data evaluation is still in process Copyright © ROSEN Group 2009 - Copy prepared for PPSA SIC Sensor Technology | O. Stawicki | 18 -Nov-2009

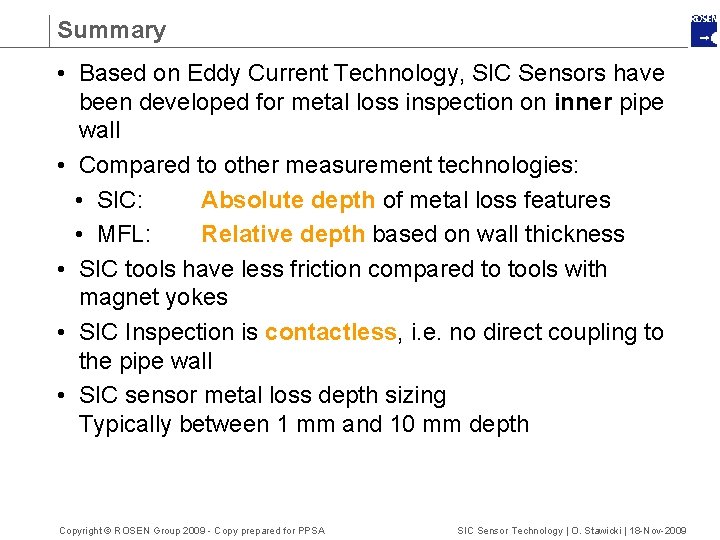
Summary • Based on Eddy Current Technology, SIC Sensors have been developed for metal loss inspection on inner pipe wall • Compared to other measurement technologies: • SIC: Absolute depth of metal loss features • MFL: Relative depth based on wall thickness • SIC tools have less friction compared to tools with magnet yokes • SIC Inspection is contactless, i. e. no direct coupling to the pipe wall • SIC sensor metal loss depth sizing Typically between 1 mm and 10 mm depth Copyright © ROSEN Group 2009 - Copy prepared for PPSA SIC Sensor Technology | O. Stawicki | 18 -Nov-2009

Thank you for joining this presentation.