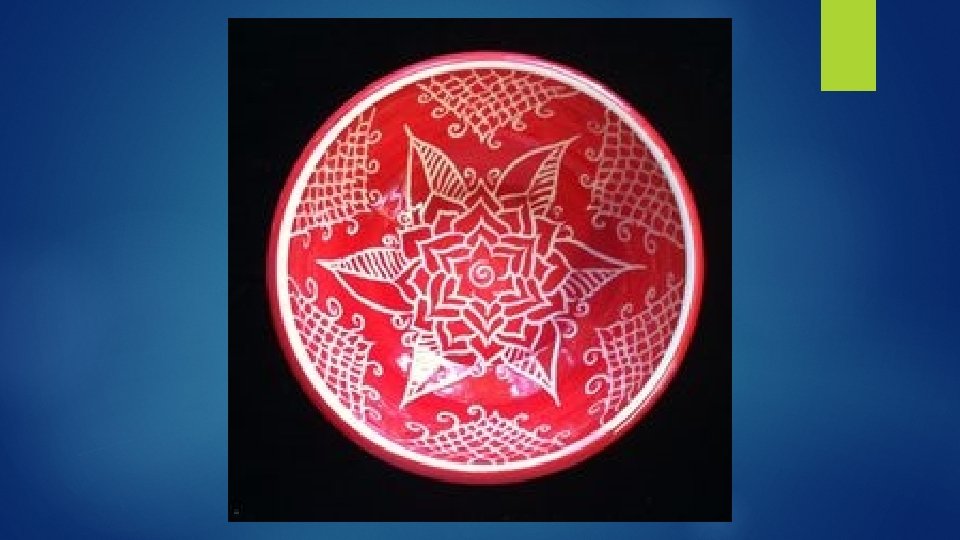
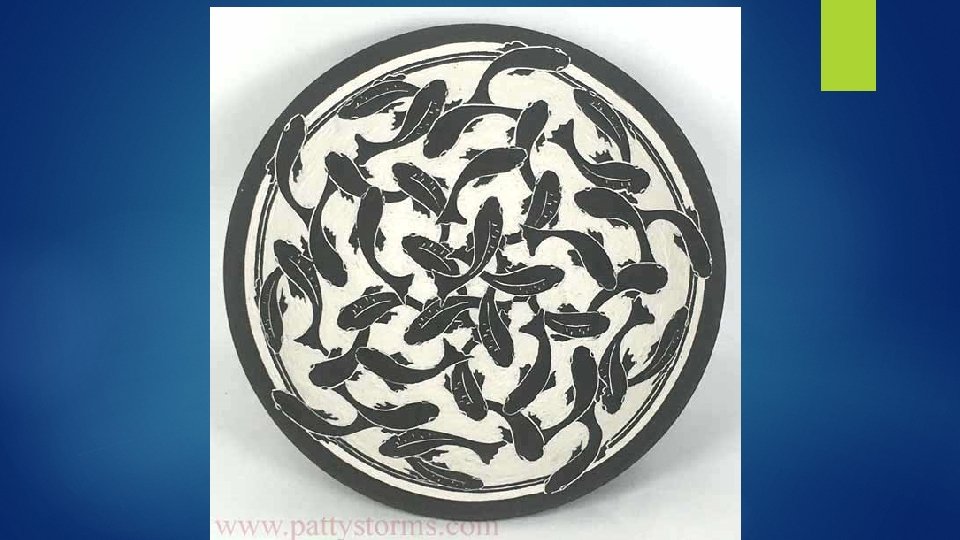
Sgraffito Plate SLAB BUILD SLUMP MOLD AND SGRAFFITO

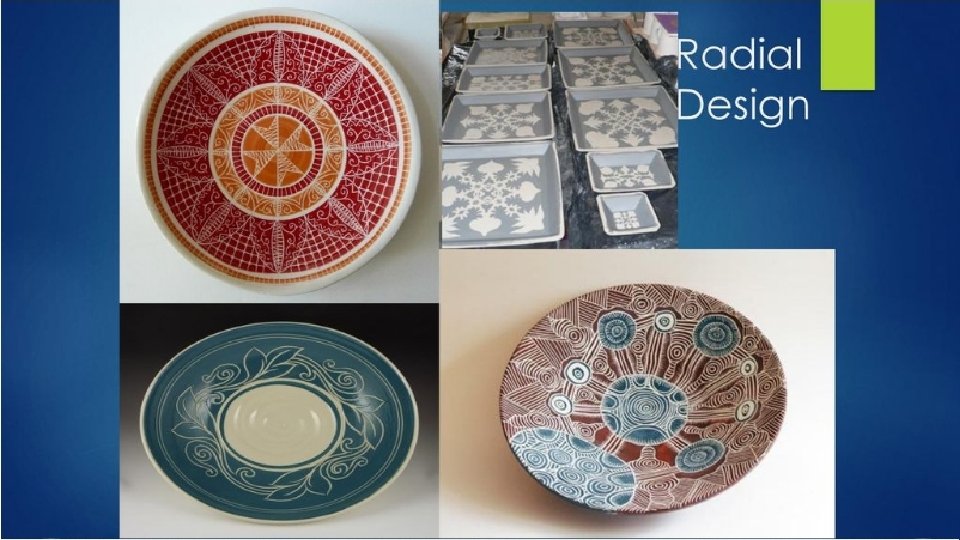
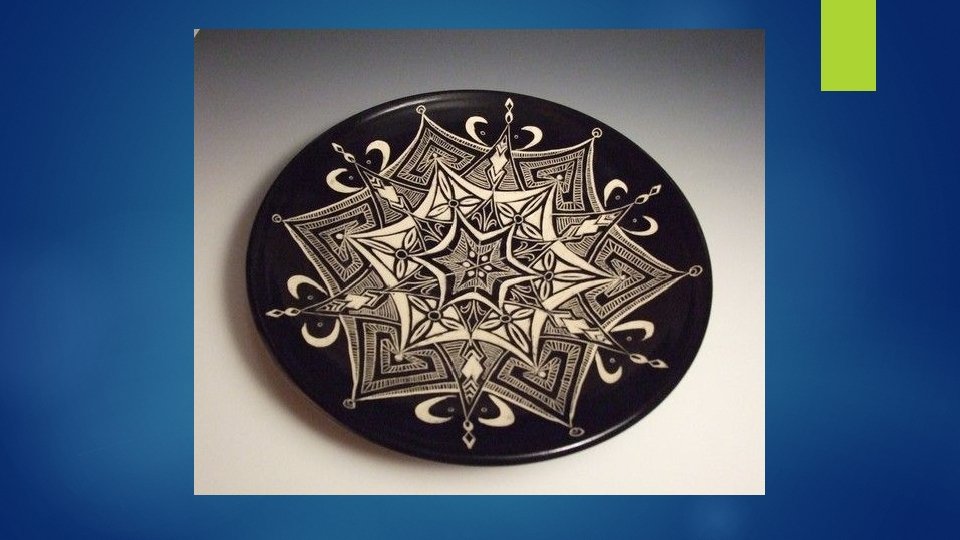
Sgraffito Plate SLAB BUILD SLUMP MOLD AND SGRAFFITO TECHNIQUE USING A RADIAL DESIGN PLATE

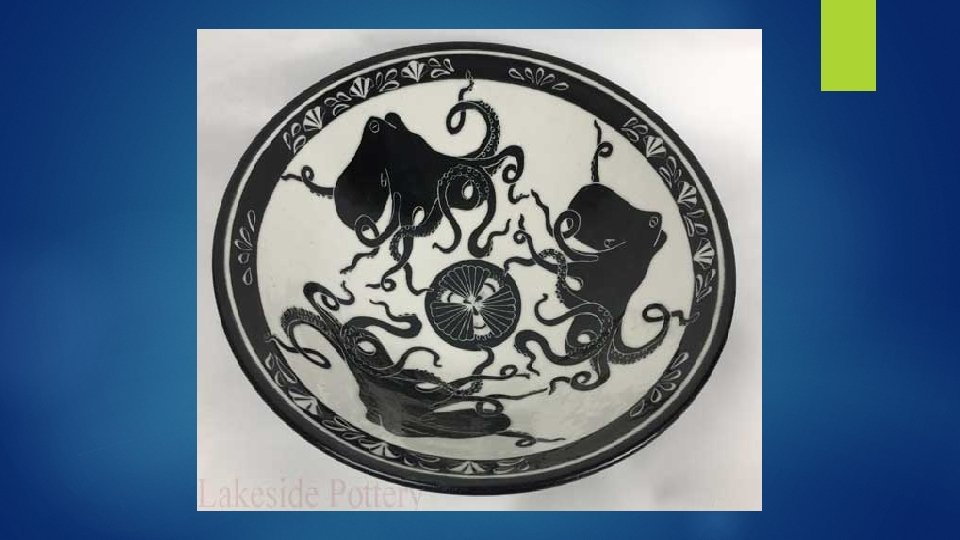
1. 2. 3. 4. Create Radial Design on paper. Make Clay Piece. Dry to Leather Hard. Brush on CONTRASTING underglaze, engobe, or slip. 5. Transfer design onto clay piece. 6. Sgraffito 7. Add a Foot Ring 8. SLOWLY DRY 9. Bisque fire 10. Paint with clear gloss glaze (cone 05) 11. Glaze Fire

Large rolling pin or slab roller Canvas or fabric to keep slab from sticking to table while rolling it out Equipment and Tools for Making Plate Cut off wire (if you are cutting your clay off of a prepared brick of clay) Sponge Clay (choose a clay body that will contrast with the underglaze, slip, or engobe you are using) Fettling knife or needle tool (to cut out slab) Paper plate that DOES NOT have a plastic coating so that the plate can absorb moisture from your clay.

1. Create Radial Design Create a radial design by using the template provided OR create your own HOW TO CREATE YOUR OWN TEMPLATE: Circle diameter between 7 to 8 inches Determine the number of sections you want (need at least 3) Divide number of sections by 360* to determine angle of each section. The template above has 12 equal sections. Determined by the equation 360/x=y X= total number of desired sections Y= degree of angle for each section.

2. Make the Clay Piece. Getting Started ALL STUDENTS WILL BE MAKING A PLATE for this project Roll out a slab to desired thickness LESS THAN ½ inch! Slab must be big enough to cut 1 plate sized circle that will be 9 inches When rolling out a slab, start by throwing it down and across the table in different directions until it is somewhere close to 3 (or less) inches thick. Use slab roller or rolling pin and slab thickness strips to roll slab to the desired thickness. Roll 2 -3 times on one side, stop, flip AND turn quarter of a rotation and repeat until slab reaches desired thickness. When you lift the slab do it carefully creating as much surface area with your hand as possible. Use a rib tool to smooth and compress the slab BEFORE you cut out your shape.

How to Roll Out a Slab https: //www. youtube. com/watch? v=2 osz. ILuetb. Q

2. Make the Clay Piece. Cutting the Shape Place the paper plate upside down to use as a template for cutting the slab (fig. 1) As you cut keep the cutting tool perpendicular to your work surface to create a square rim. Remove excess clay FIRST before trying to pick up/move the circle. Fig. 1 Using a paper plate as a template, cut a circle in the slab
 Slide your finger across")
2. Make the Clay Piece – Smooth the Lip (Edge) Slide your finger across the lip (edge of the rim) with firm consistent pressure. (fig. 2) The sharp corner of the rim softens without flattening the edge. A damp sponge will also work instead of your finger. Put your initials and class period on the underside. Flip the clay slab, smooth the top edge Fig. 2 Remove excess clay from the rim

2. Making the Clay Piece- Forming Plates Place circle slab into the paper plate, lining up the edges so it is centered (fig. 3) Fig. 3 Flip the slab over and place it in the plate Experiment with pressing the clay into the paper plate with your hands or sandwiching your clay between two plates (fig. 4) The clay will have a different character depending on your chosen method Fig. 4 Press the clay with your hands or press with another plate.

3. Let Dry to Leather-Hard Allow plate to dry to leather-hard stage in the bottom paper plate. When your clay is leather hard: Remove the clay from the mold to check to see if it will sit on a flat surface without rocking Take a moment to look closely at the lip of the plate to make sure it is smooth and rounded. If it is not then fix it with your finger or a damp sponge.
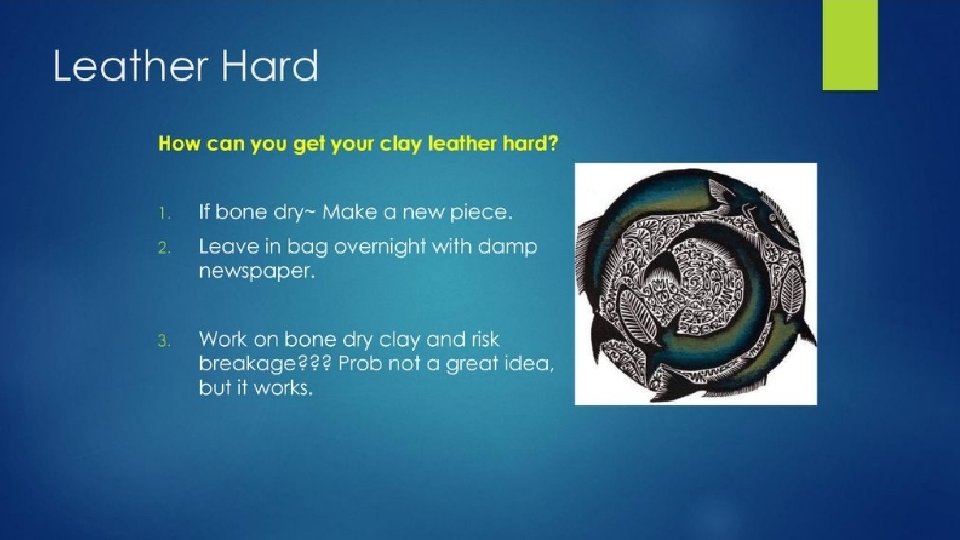

4. Brush on Underglaze, Engobe, or Slip Choose a CONTRASTING color. If you chose a light clay, pick a dark or bright color. If you chose the red clay chose a light color. Brush on the first coat over the entire top side of your plate. Wait for the first layer to dry to leather hard Brush on the second coat KEEP YOUR PLATE IN THE LEATHER-HARD STAGE THE ENTIRE TIME YOU ARE WORKING ON YOUR SGRAFFITO DESIGN You can switch steps 4 and 5 (i. e. do step 5 first then step 4) if you want.

5. Transfer Design to Clay Piece Place your design drawing on top of the plate. Use a blunt pointed tool (such as a pen, pencil, modeling tool, etc) that will not cut through the paper. You are simply pressing the outlines into your plate.

6. Sgraffito Use sgraffito tools to remove color where desired


7. Add a Foot Ring After you have finished your sgraffito design. While clay is still leather hard Get a banding wheel (make sure it is clean) or place a piece of paper towel between plate and turn table top Flip it upside down on the banding wheel Roll a coil Score, slip, smooth coil onto bottom. When smoothing BE GENTLE so you don’t collapse your plate If you covered your initials and class period with the foot ring then re-carve them in.

https: //www. youtube. com/watch? v=YPs. Mxlc 4 vfw

8. SLOWLY DRY After you have attached your foot ring allow your plate to dry slowly so the attachment can homogenize to (even out in moisture content) the plate. This ensures a secure attachment/ Slow dry by placing in a oversized bag and “poofing” it out so that there can be a lot of air in the bag. Close the bag LOOSLY leaving a small opening OR find a bag that has small holes in it already Allow to homogenize for AT LEAST over night. You should be able to take your piece out of bag the next class period AS LONG AS THE PLATE AND THE FOOT RING FEEL TO BE THE SAME STAGE OF CLAY.

9. Bisque Fire Place plate on center table in the kiln room after the foot ring has homogenized to finish drying Once it is completely dry it will be bisque fired.

10. Clear Glaze & 11. Glaze Fire Brush on 3 Coats of Clear Cone 05 glaze. DRY foot!!! Place on correct side of counter for cone 05 glaze fire. It will be fired as soon as there is a full Kiln Load Worth of projects ∆05 ∆5

Sgraffito Project Criteria – WRITE IT DOWN!!! q q q q q Followed ALL step by step instructions (from previous slides) Sgraffito technique Contrasting Underglaze, Engobe, or Slip applied correctly. Can do layered sgraffito just make sure you do it correctly too! Detailed radial design using a variety of line types, widths, repetitions etc. Slab slump molded plate Good craftsmanship Creative original idea Foot ring on bottom (coil or slap strip attached after you have finished the sgraffito design) Full coverage of clear gloss glaze with dry foot.
- Slides: 26