Section Views Introduction Section views are used to

- Slides: 11

Section Views

Introduction • Section views are used to show internal features of parts that can’t easily be seen on multiview drawings. • Section views reveal internal details by displaying the part as if cut by an imaginary cutting plane. • It helps the drawing be more understandable, especially when showing internal features or in assembly drawings.

Section Drawing Types • • • Full section view Half section view Offset section view Broken-out section Revolved section view

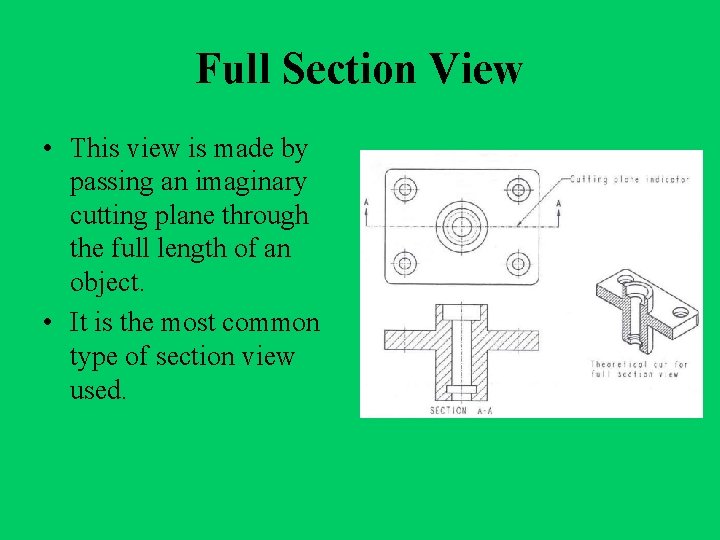
Full Section View • This view is made by passing an imaginary cutting plane through the full length of an object. • It is the most common type of section view used.

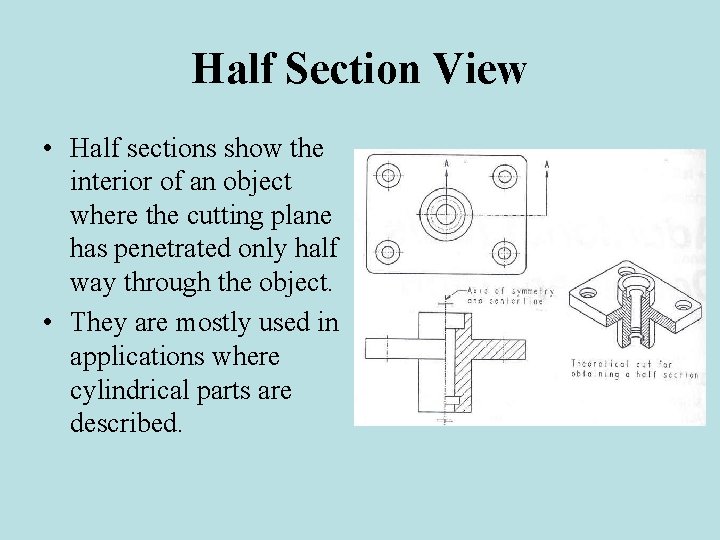
Half Section View • Half sections show the interior of an object where the cutting plane has penetrated only half way through the object. • They are mostly used in applications where cylindrical parts are described.

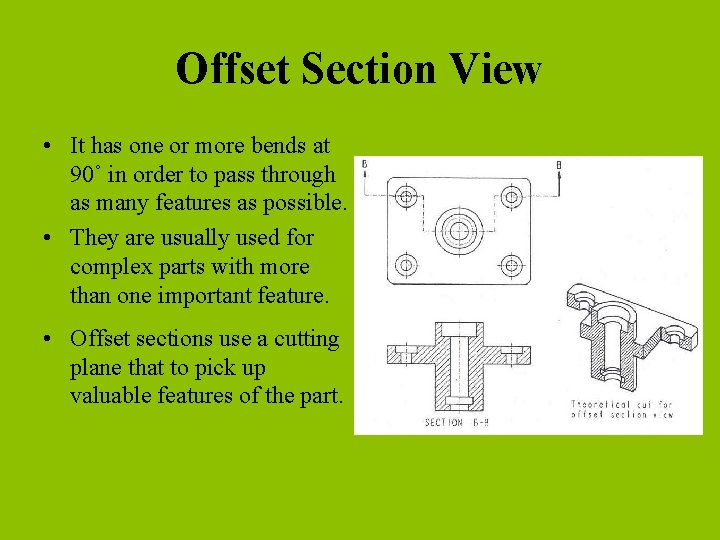
Offset Section View • It has one or more bends at 90˚ in order to pass through as many features as possible. • They are usually used for complex parts with more than one important feature. • Offset sections use a cutting plane that to pick up valuable features of the part.

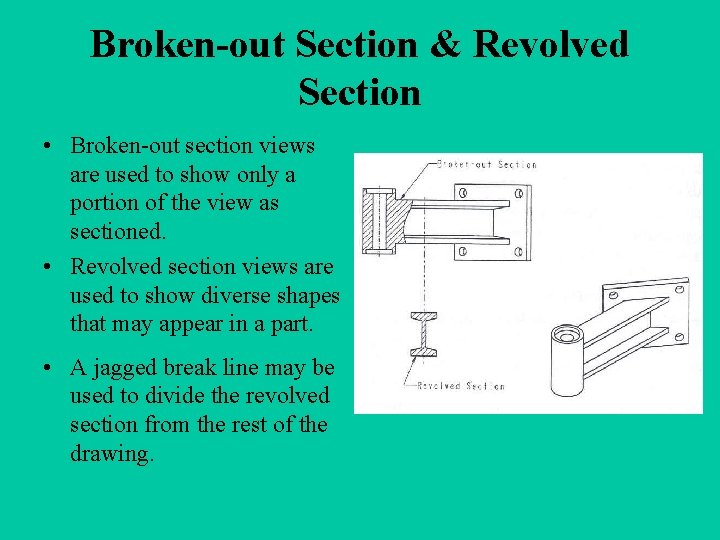
Broken-out Section & Revolved Section • Broken-out section views are used to show only a portion of the view as sectioned. • Revolved section views are used to show diverse shapes that may appear in a part. • A jagged break line may be used to divide the revolved section from the rest of the drawing.

The Cutting Plane • • • It’s an imaginary plane that shows where an object was cut to obtain a section view. Shows the line of sight so a proper section view can be drawn. Drawn with the

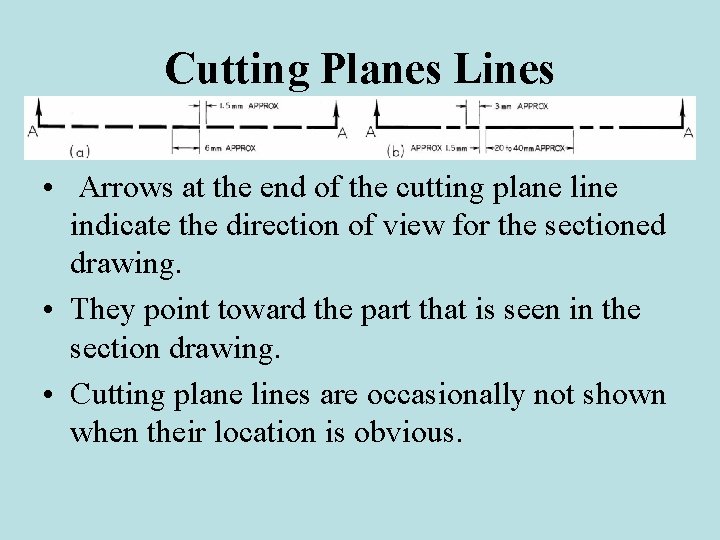
Cutting Planes Lines • Arrows at the end of the cutting plane line indicate the direction of view for the sectioned drawing. • They point toward the part that is seen in the section drawing. • Cutting plane lines are occasionally not shown when their location is obvious.

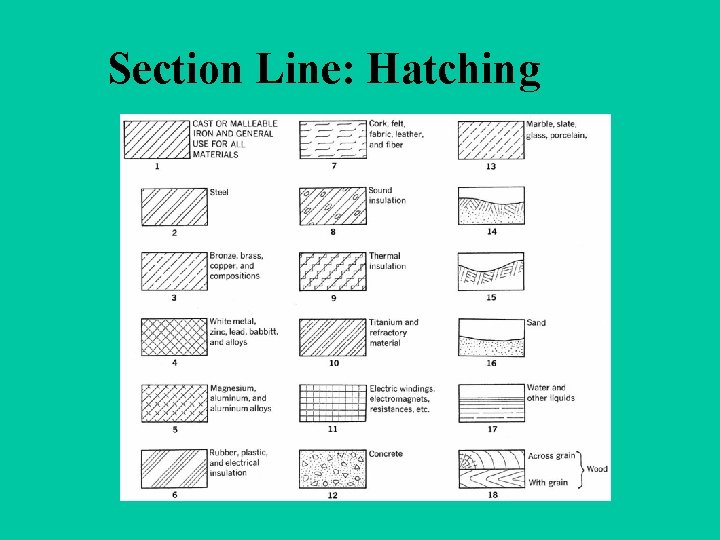
Section Lines/Hatching • These are hatching patterns that are used to represent different types of materials. • Hatching should not run parallel or perpendicular to a major feature. • If there is a need to show dimensions or add a note within the hatched area, do so by leaving “white space” in the center of the hatch area.

Section Line: Hatching