Section 8 Working Drawings q Mechanical working drawings
- Slides: 20

Section 8 Working Drawings q Mechanical working drawings q General sheet layout q Assembly drawings q Architectural drawings Working Drawings

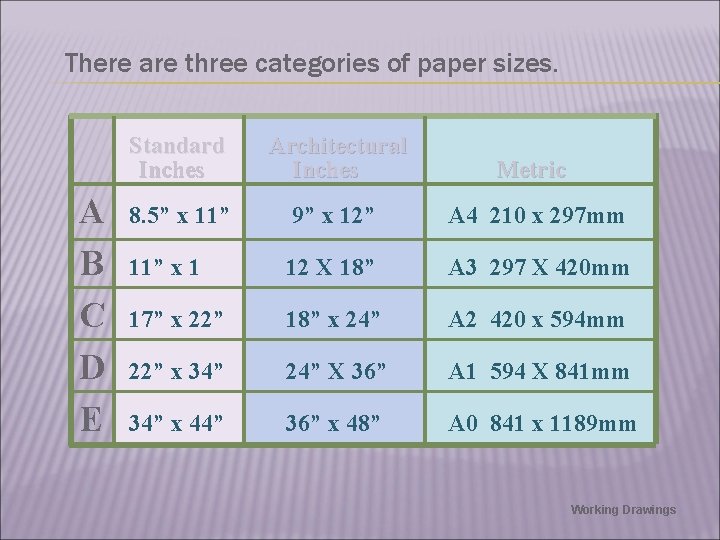
There are three categories of paper sizes. A B C D E Standard Inches Architectural Inches Metric 8. 5” x 11” 9” x 12” A 4 210 x 297 mm 11” x 1 12 X 18” A 3 297 X 420 mm 17” x 22” 18” x 24” A 2 420 x 594 mm 22” x 34” 24” X 36” A 1 594 X 841 mm 34” x 44” 36” x 48” A 0 841 x 1189 mm Working Drawings

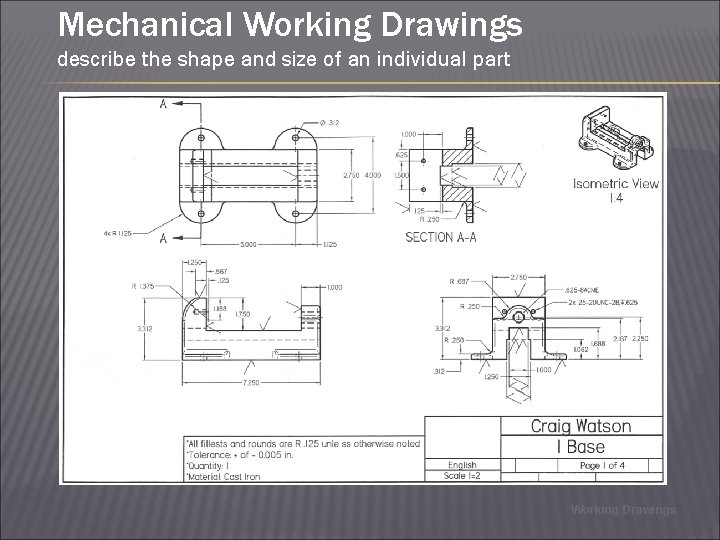
Mechanical Working Drawings describe the shape and size of an individual part Working Drawings

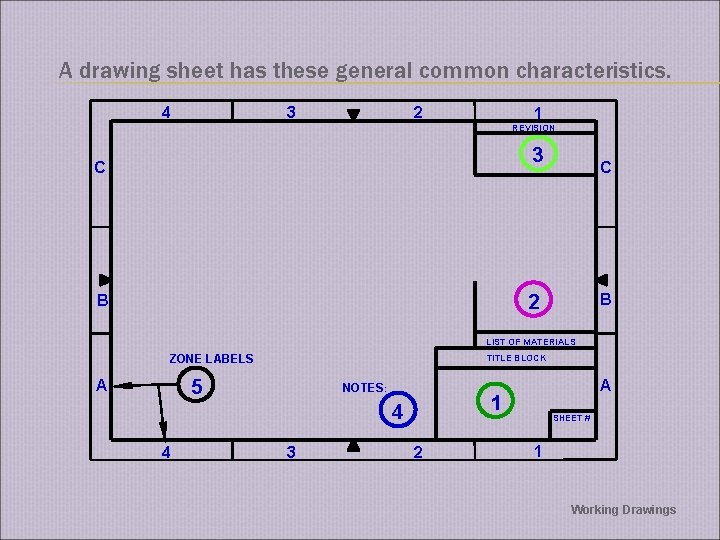
A drawing sheet has these general common characteristics. 3 4 2 1 REVISION 3 C C B 2 B LIST OF MATERIALS ZONE LABELS TITLE BLOCK 5 A NOTES: 1 4 4 3 A 2 SHEET # 1 Working Drawings

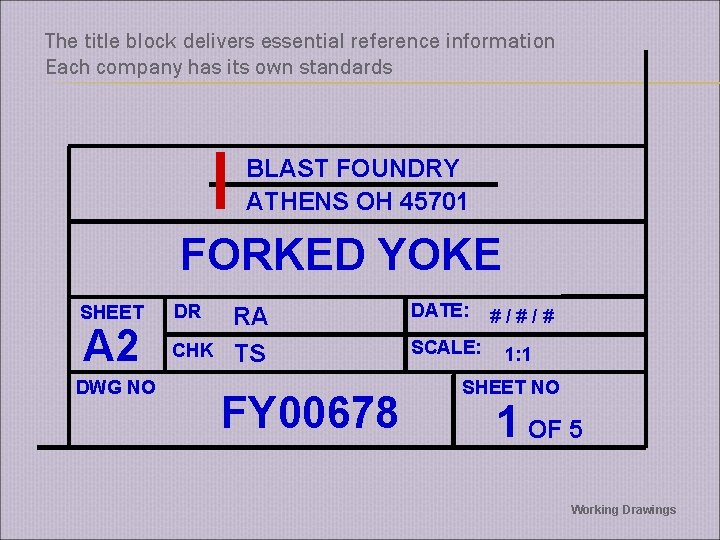
The title block delivers essential reference information Each company has its own standards BLAST FOUNDRY ATHENS OH 45701 FORKED YOKE SHEET A 2 DWG NO DR CHK RA TS FY 00678 DATE: SCALE: #/#/# 1: 1 SHEET NO 1 OF 5 Working Drawings

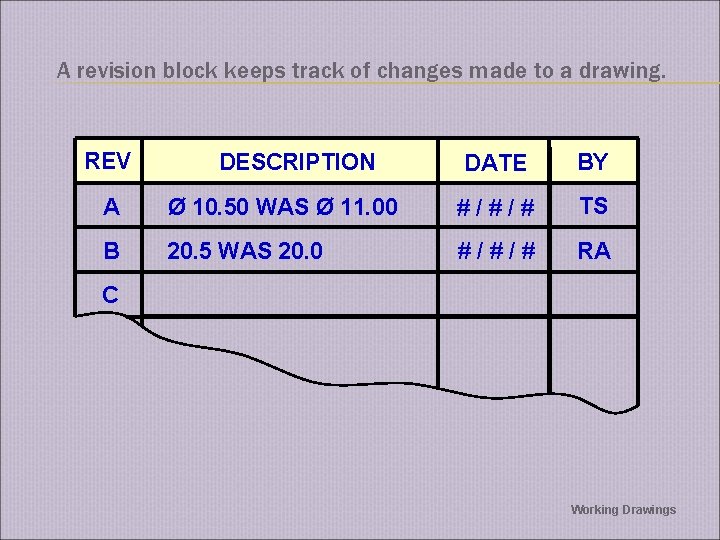
A revision block keeps track of changes made to a drawing. REV DESCRIPTION DATE BY A Ø 10. 50 WAS Ø 11. 00 #/#/# TS B 20. 5 WAS 20. 0 #/#/# RA C Working Drawings

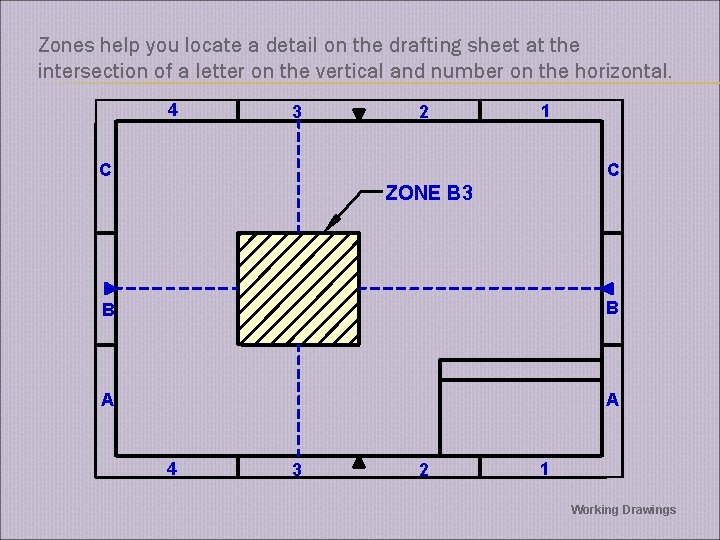
Zones help you locate a detail on the drafting sheet at the intersection of a letter on the vertical and number on the horizontal. 4 3 2 1 C C ZONE B 3 B B A A 4 3 2 1 Working Drawings

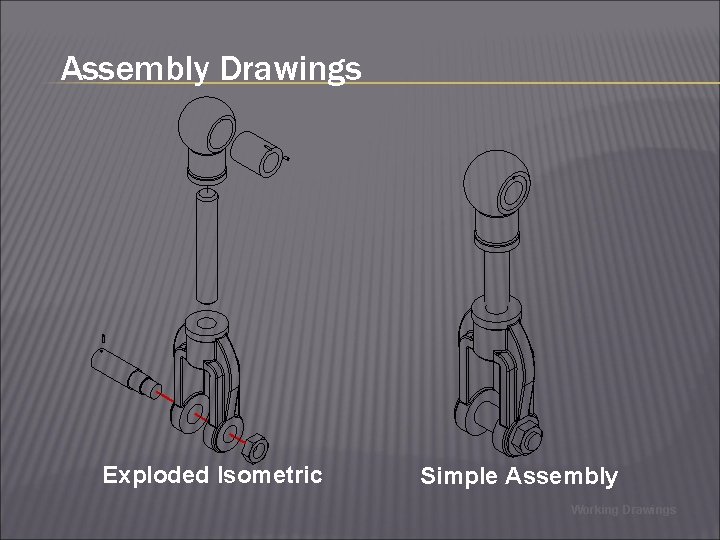
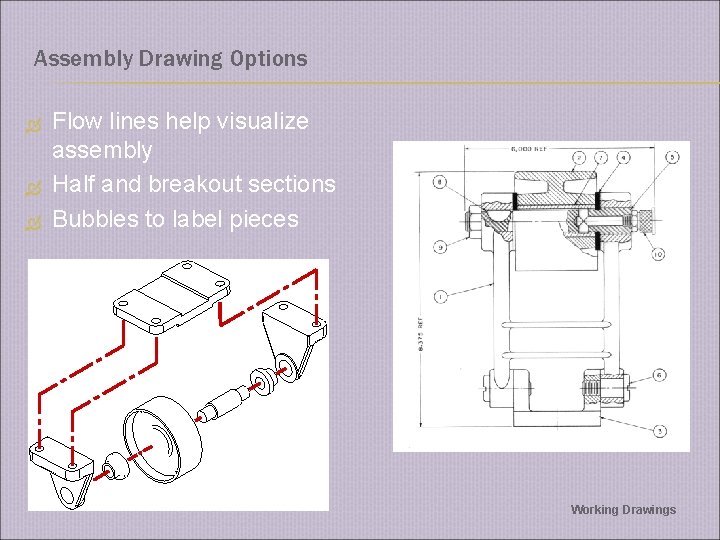
Assembly Drawings Exploded Isometric Simple Assembly Working Drawings

Assembly Drawing Options Flow lines help visualize assembly Half and breakout sections Bubbles to label pieces Working Drawings

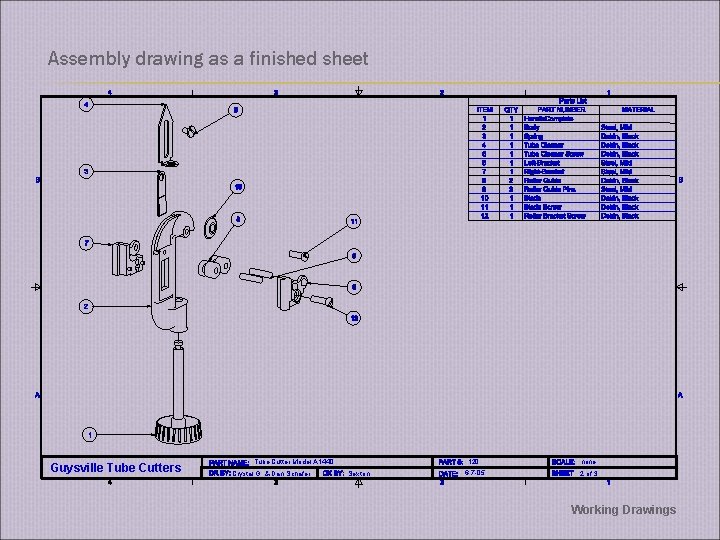
Assembly drawing as a finished sheet Guysville Tube Cutters Tube Cutter Model A 1440 Crystal G. & Dan Schafer Sexton 120 none 6 -7 -05 2 of 3 Working Drawings

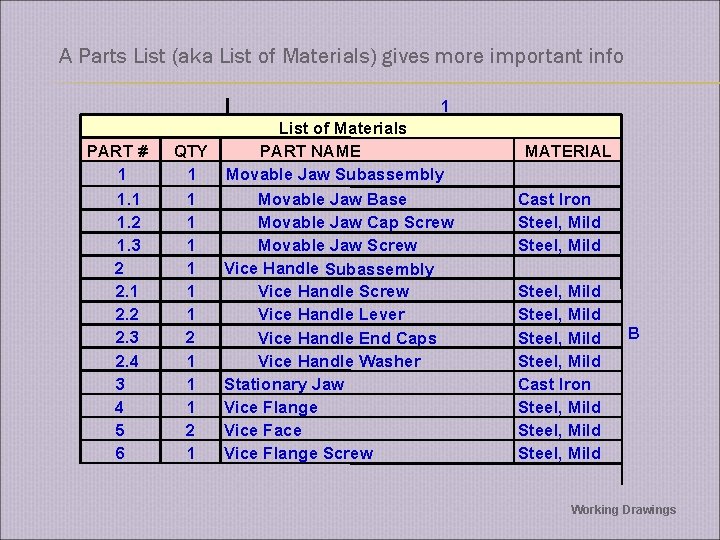
A Parts List (aka List of Materials) gives more important info 1 PART # 1 1. 2 1. 3 2 2. 1 2. 2 2. 3 2. 4 3 4 5 6 List of Materials PART NAME QTY Movable Jaw Subassembly 1 1 Movable Jaw Base 1 Movable Jaw Cap Screw 1 Movable Jaw Screw 1 Vice Handle Subassembly 1 Vice Handle Screw Vice Handle Lever 1 2 Vice Handle End Caps 1 Vice Handle Washer 1 Stationary Jaw 1 Vice Flange 2 Vice Face 1 Vice Flange Screw MATERIAL Cast Iron Steel, Mild Steel, Mild Cast Iron Steel, Mild B Working Drawings

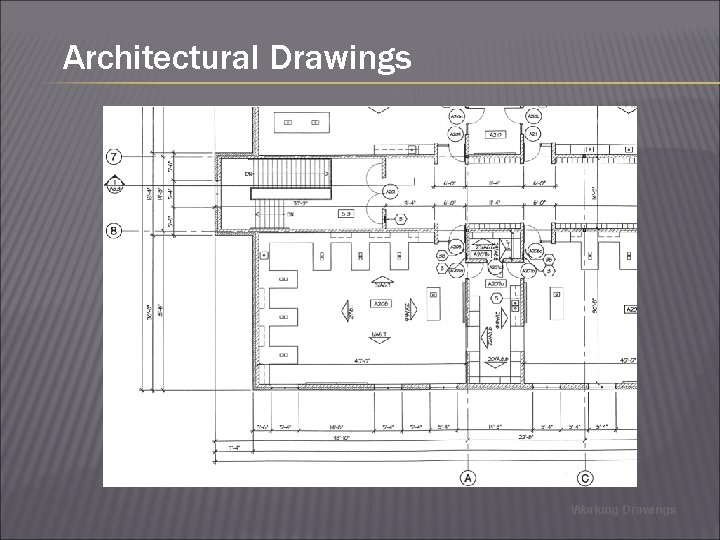
Architectural Drawings Working Drawings

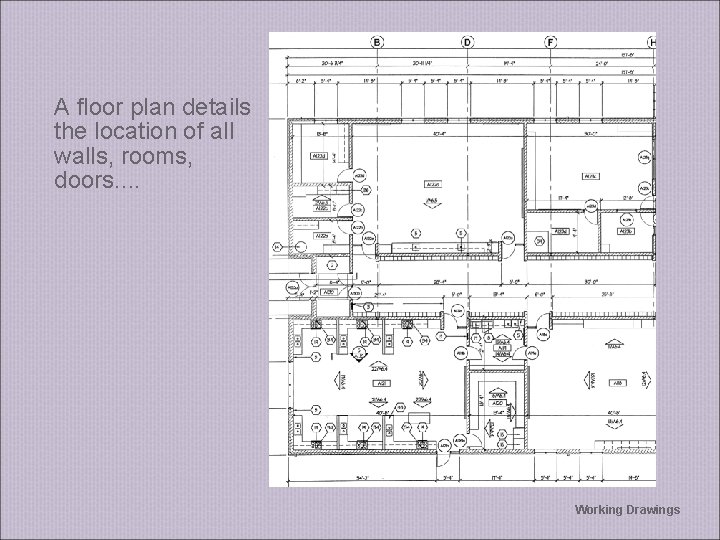
A floor plan details the location of all walls, rooms, doors. . Working Drawings

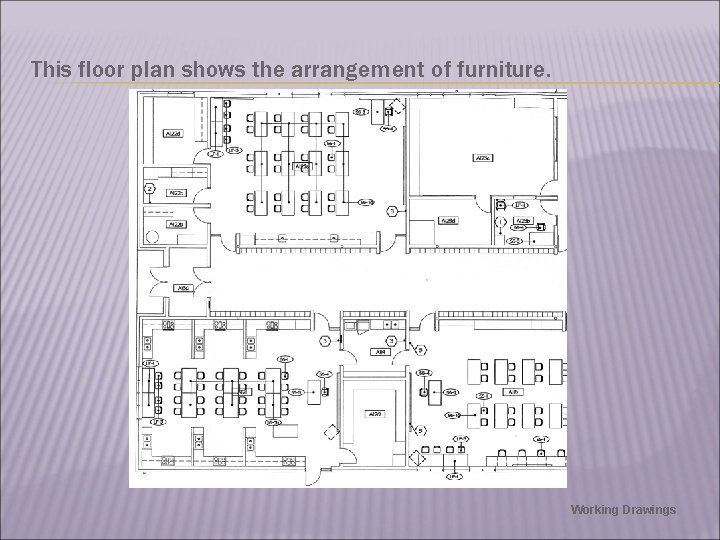
This floor plan shows the arrangement of furniture. Working Drawings

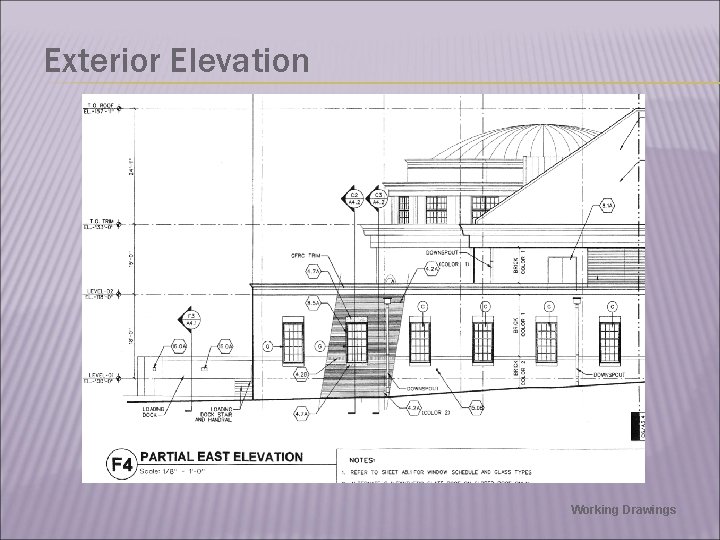
Exterior Elevation Working Drawings

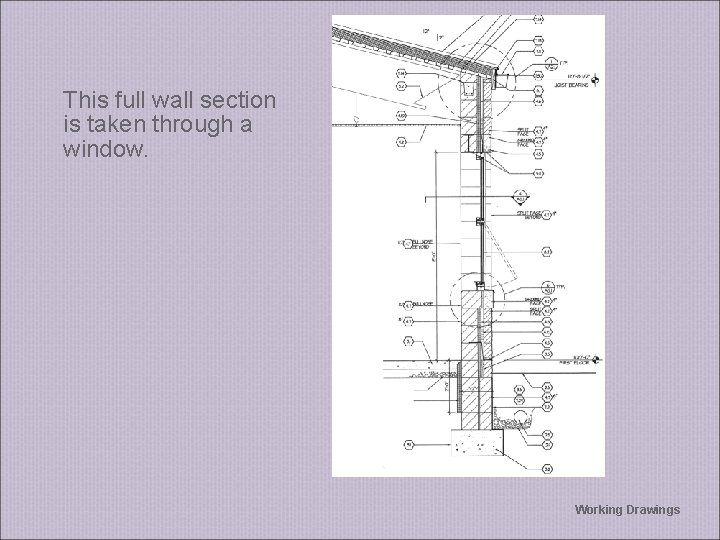
This full wall section is taken through a window. Working Drawings

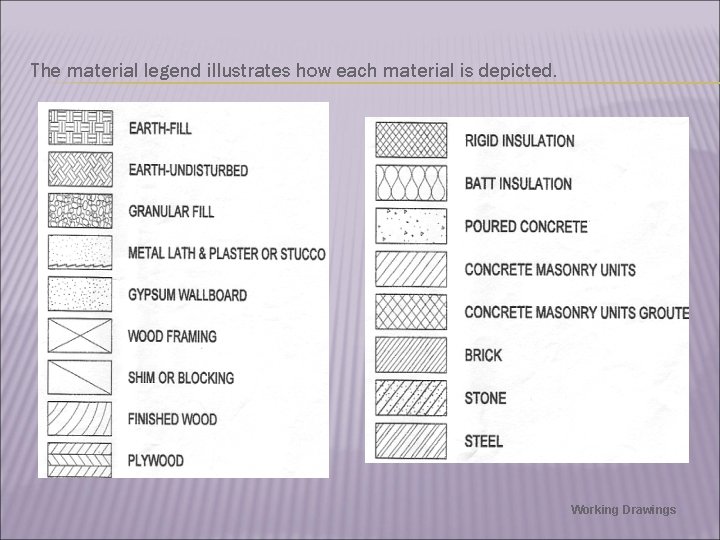
The material legend illustrates how each material is depicted. Working Drawings

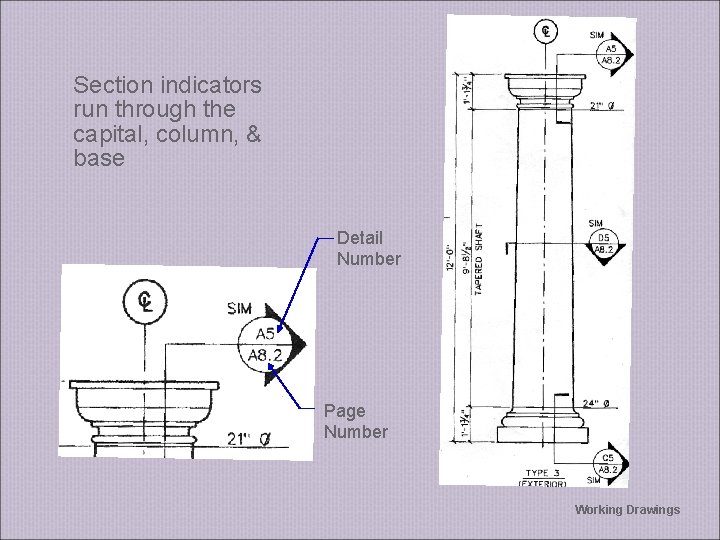
Section indicators run through the capital, column, & base Detail Number Page Number Working Drawings

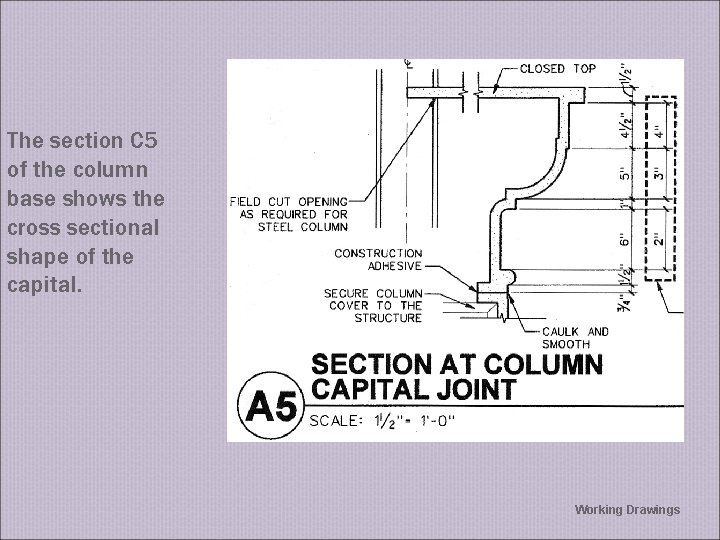
The section C 5 of the column base shows the cross sectional shape of the capital. Working Drawings

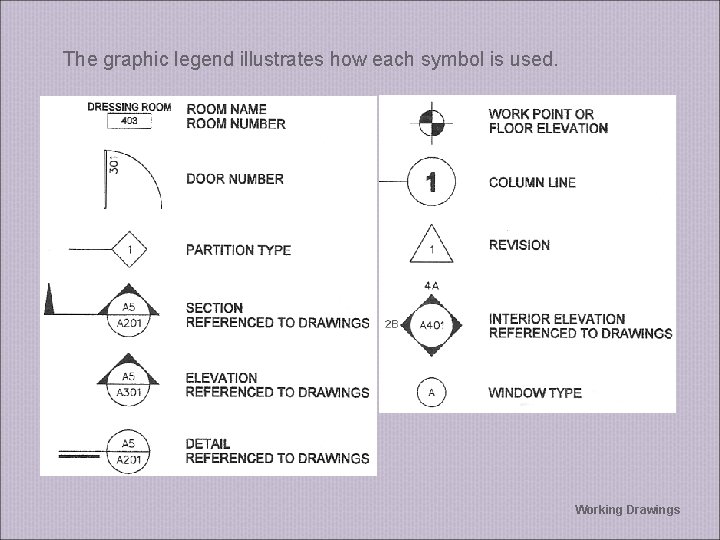
The graphic legend illustrates how each symbol is used. Working Drawings