SECTION 4 2 STRAIGHTNESS MEASUREMENT Straightness Measurement is
- Slides: 11

SECTION 4. 2 STRAIGHTNESS MEASUREMENT

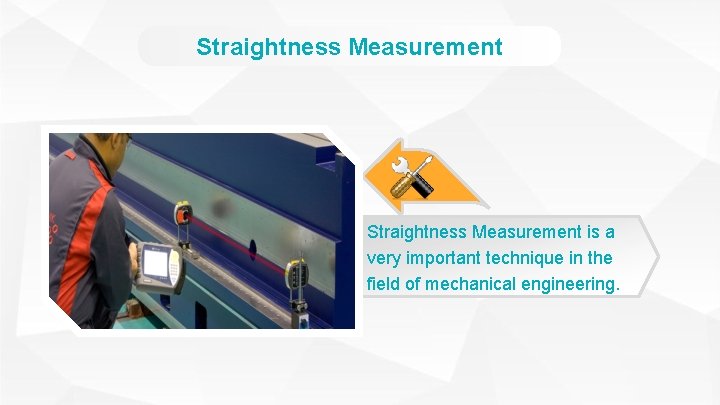
Straightness Measurement is a very important technique in the field of mechanical engineering.

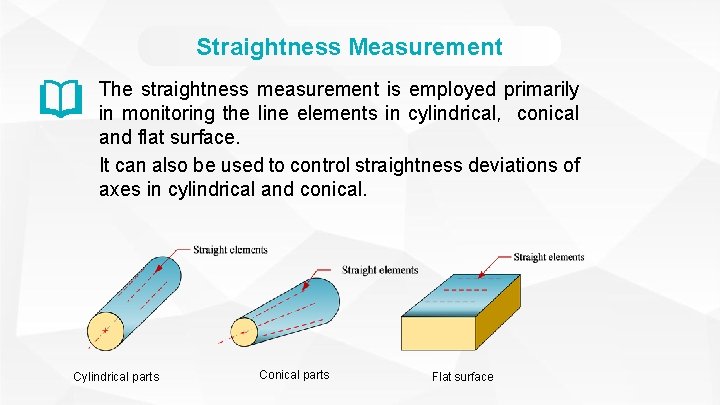
Straightness Measurement The straightness measurement is employed primarily in monitoring the line elements in cylindrical,conical and flat surface. It can also be used to control straightness deviations of axes in cylindrical and conical. Cylindrical parts Conical parts Flat surface

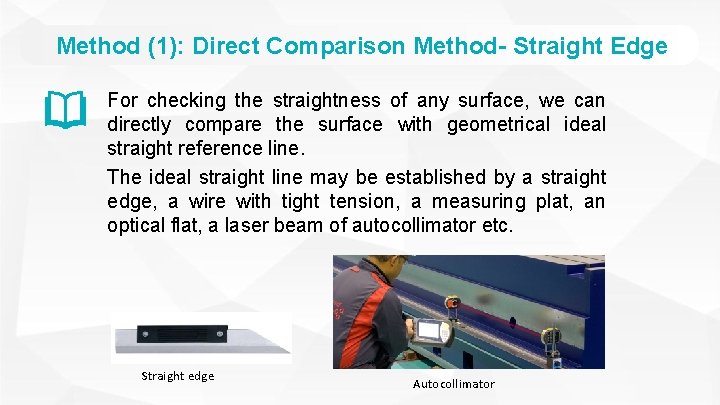
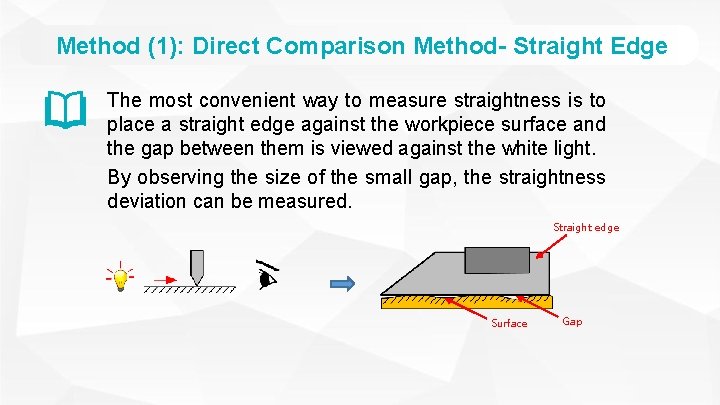
Method (1): Direct Comparison Method- Straight Edge For checking the straightness of any surface, we can directly compare the surface with geometrical ideal straight reference line. The ideal straight line may be established by a straight edge, a wire with tight tension, a measuring plat, an optical flat, a laser beam of autocollimator etc. Straight edge Autocollimator

Method (1): Direct Comparison Method- Straight Edge The most convenient way to measure straightness is to place a straight edge against the workpiece surface and the gap between them is viewed against the white light. By observing the size of the small gap, the straightness deviation can be measured. Straight edge Surface Gap

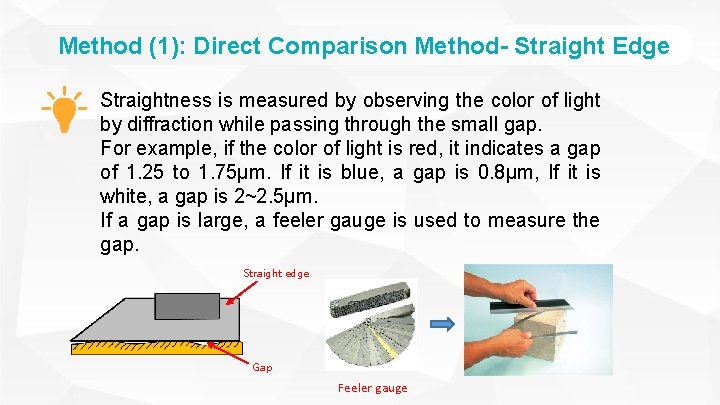
Method (1): Direct Comparison Method- Straight Edge Straightness is measured by observing the color of light by diffraction while passing through the small gap. For example, if the color of light is red, it indicates a gap of 1. 25 to 1. 75μm. If it is blue, a gap is 0. 8μm, If it is white, a gap is 2~2. 5μm. If a gap is large, a feeler gauge is used to measure the gap. Straight edge Gap Feeler gauge

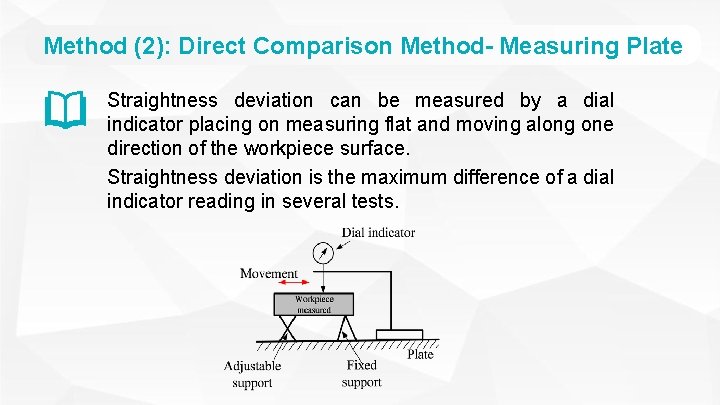
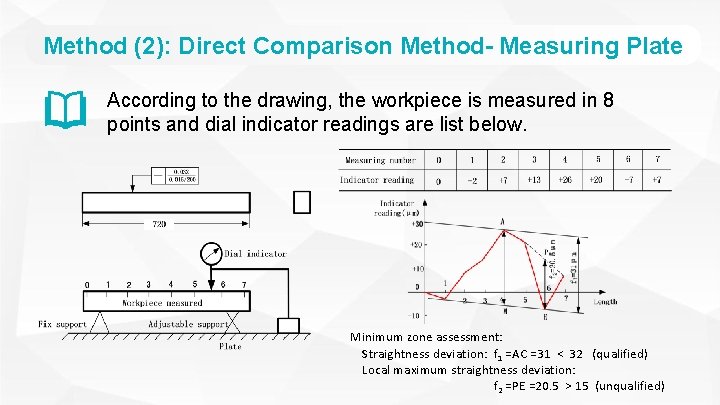
Method (2): Direct Comparison Method- Measuring Plate Straightness deviation can be measured by a dial indicator placing on measuring flat and moving along one direction of the workpiece surface. Straightness deviation is the maximum difference of a dial indicator reading in several tests.

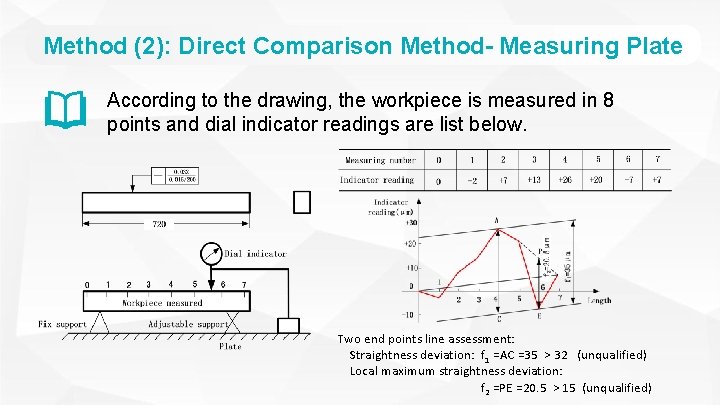
Method (2): Direct Comparison Method- Measuring Plate According to the drawing, the workpiece is measured in 8 points and dial indicator readings are list below. Two end points line assessment: Straightness deviation: f 1 =AC =35 > 32 (unqualified) Local maximum straightness deviation: f 2 =PE =20. 5 > 15 (unqualified)

Method (2): Direct Comparison Method- Measuring Plate According to the drawing, the workpiece is measured in 8 points and dial indicator readings are list below. Minimum zone assessment: Straightness deviation: f 1 =AC =31 < 32 (qualified) Local maximum straightness deviation: f 2 =PE =20. 5 > 15 (unqualified)

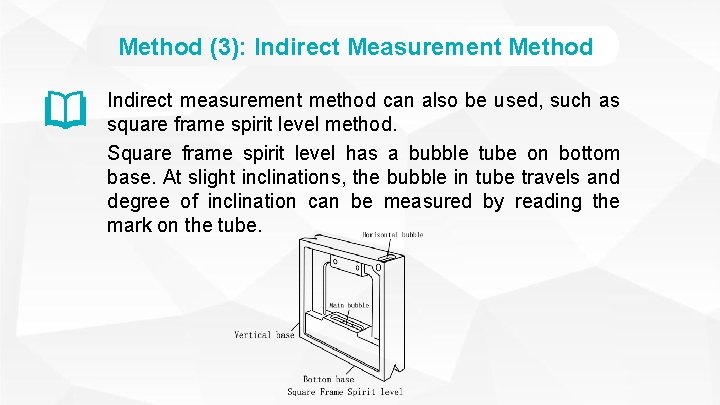
Method (3): Indirect Measurement Method Indirect measurement method can also be used, such as square frame spirit level method. Square frame spirit level has a bubble tube on bottom base. At slight inclinations, the bubble in tube travels and degree of inclination can be measured by reading the mark on the tube.

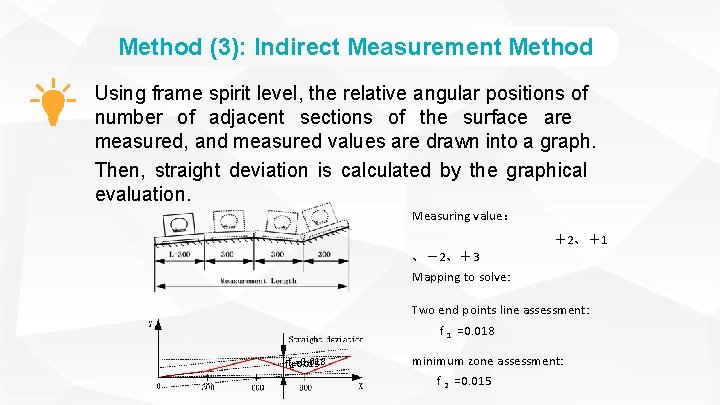
Method (3): Indirect Measurement Method Using frame spirit level, the relative angular positions of number of adjacent sections of the surface are measured, and measured values are drawn into a graph. Then, straight deviation is calculated by the graphical evaluation. Measuring value: +2、+1 、-2、+3 Mapping to solve: Two end points line assessment: f 1 =0. 018 ff 21=0. 015 minimum zone assessment: f 2 =0. 015