Section 1 Multiview Drawings q q q q
- Slides: 28

Section 1 Multiview Drawings q q q q Orthographic projection Six principle projection planes 3 rd angle vs. 1 st angle projection Curved Surfaces Linetypes: Hidden and Center Inclined and oblique planes Circle vs. ellipses Multiview Drawings

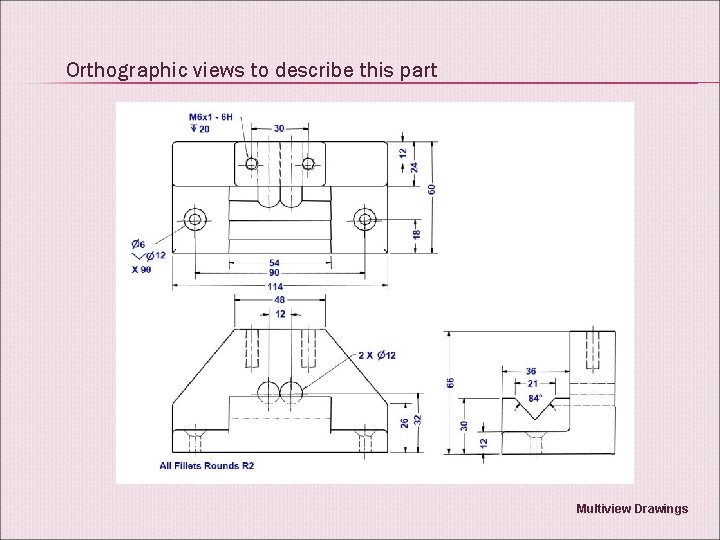
Orthographic views to describe this part Multiview Drawings

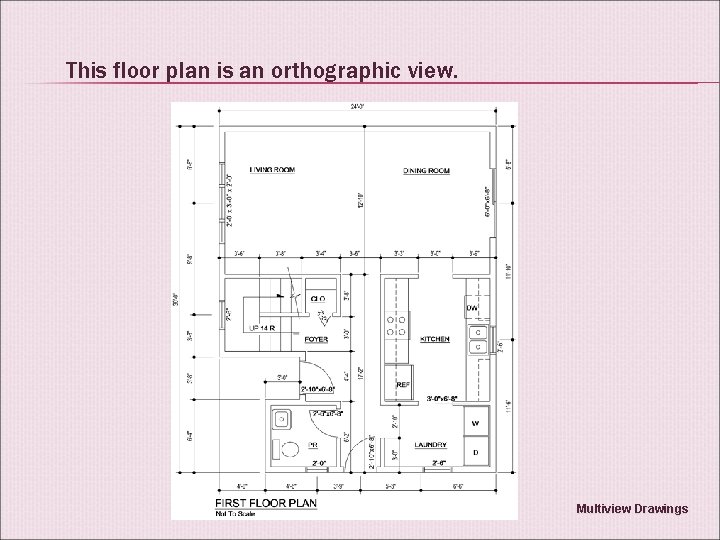
This floor plan is an orthographic view. Multiview Drawings

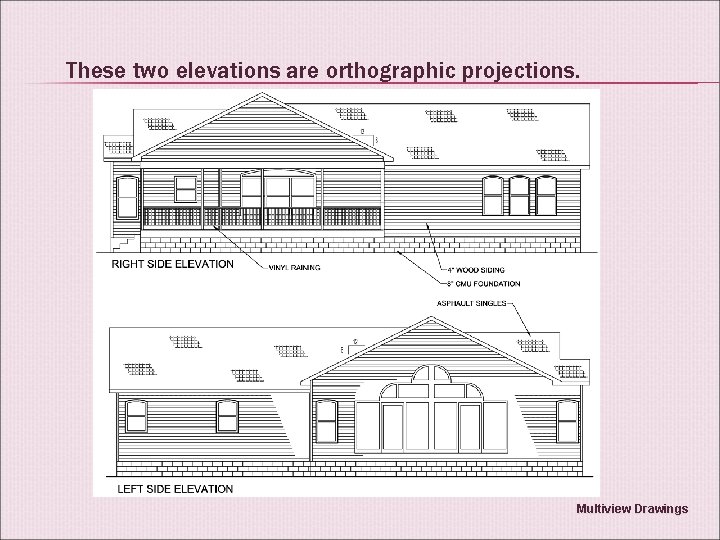
These two elevations are orthographic projections. Multiview Drawings

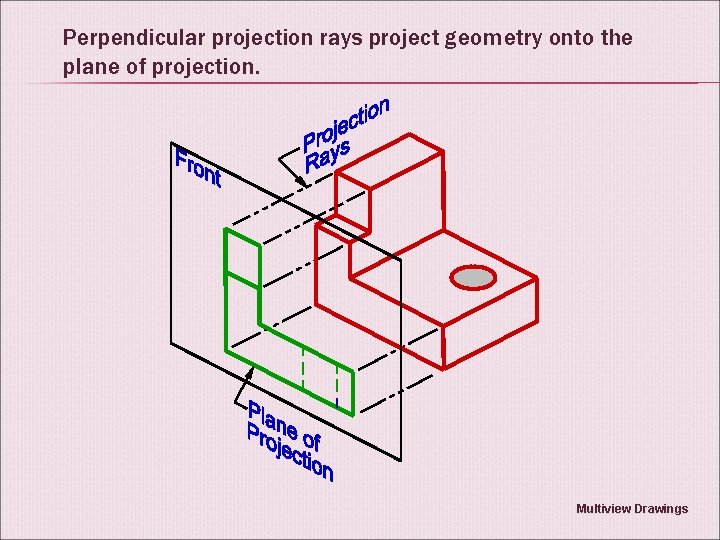
Perpendicular projection rays project geometry onto the plane of projection. Multiview Drawings

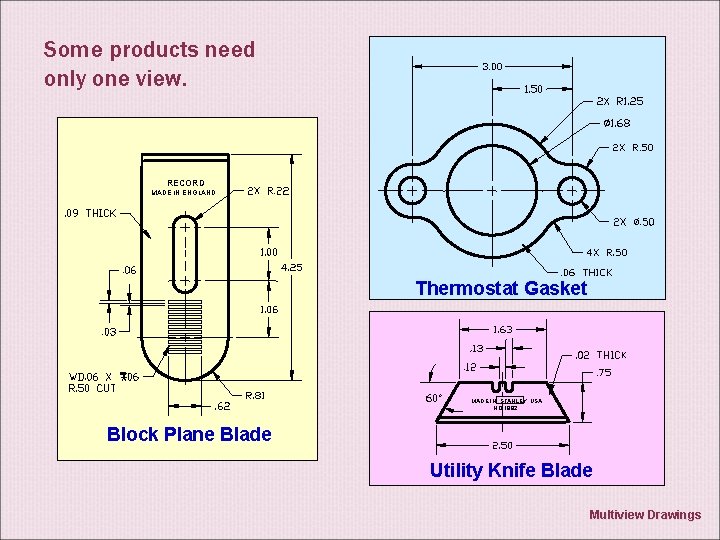
Some products need only one view. RECORD MADE IN ENGLAND Thermostat Gasket i MADE IN STANLEY USA NO 1992 Block Plane Blade Utility Knife Blade Multiview Drawings

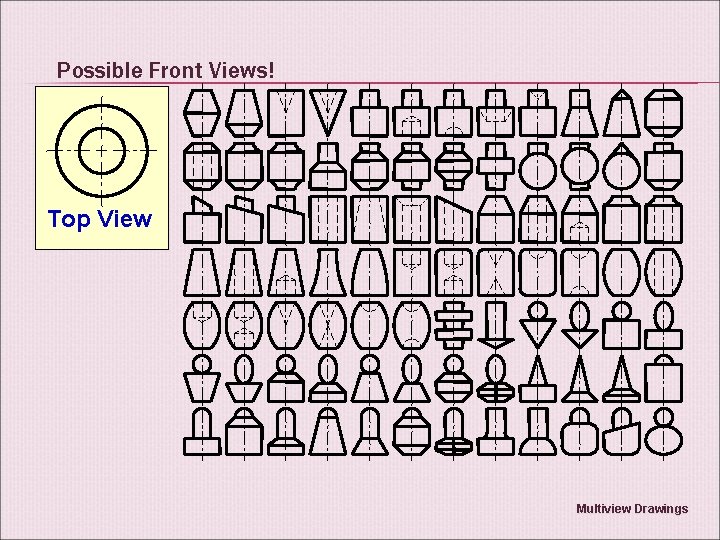
Possible Front Views! Top View Multiview Drawings

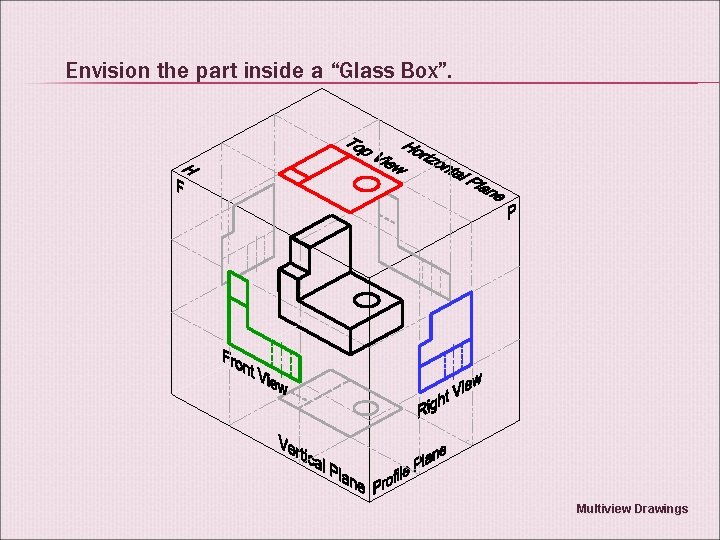
Envision the part inside a “Glass Box”. Multiview Drawings

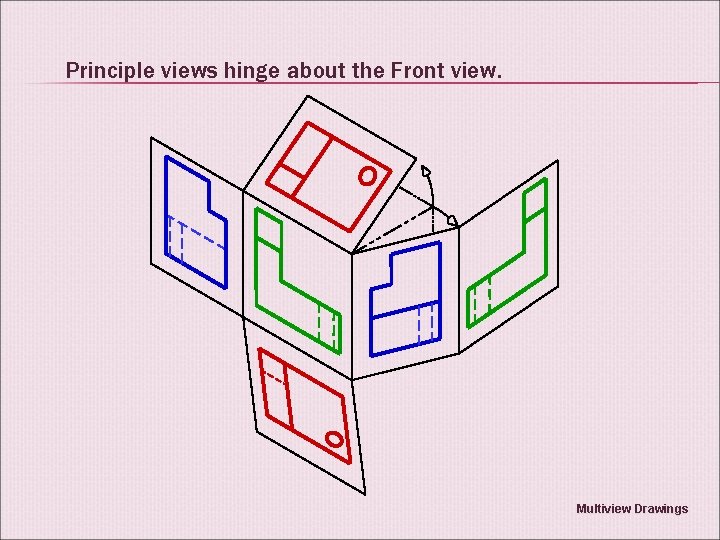
Principle views hinge about the Front view. Multiview Drawings

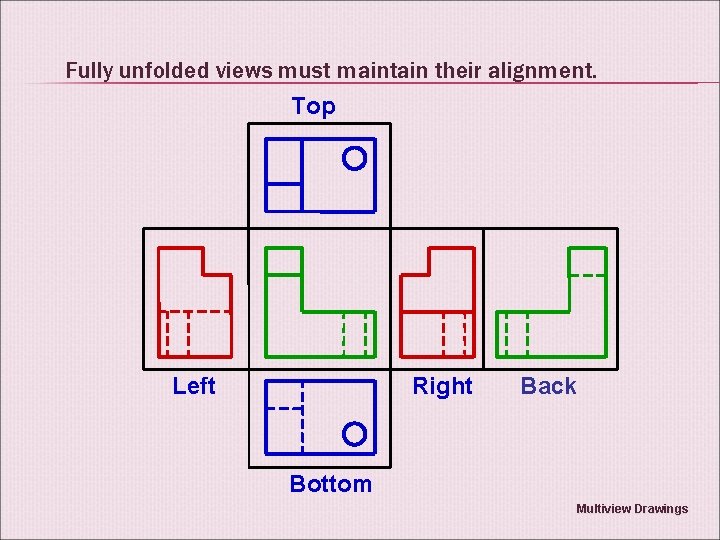
Fully unfolded views must maintain their alignment. Top Right Left Back Bottom Multiview Drawings

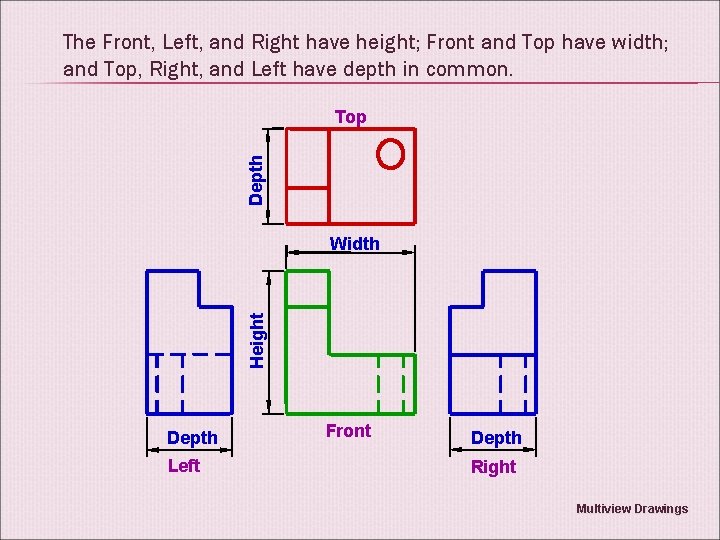
The Front, Left, and Right have height; Front and Top have width; and Top, Right, and Left have depth in common. Depth Top Height Width Depth Left Front Depth Right Multiview Drawings

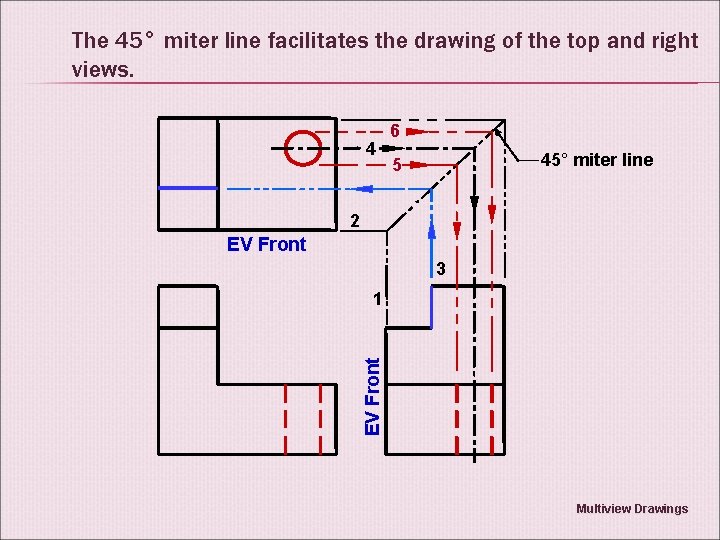
The 45° miter line facilitates the drawing of the top and right views. 4 6 45° miter line 5 2 EV Front 3 EV Front 1 Multiview Drawings

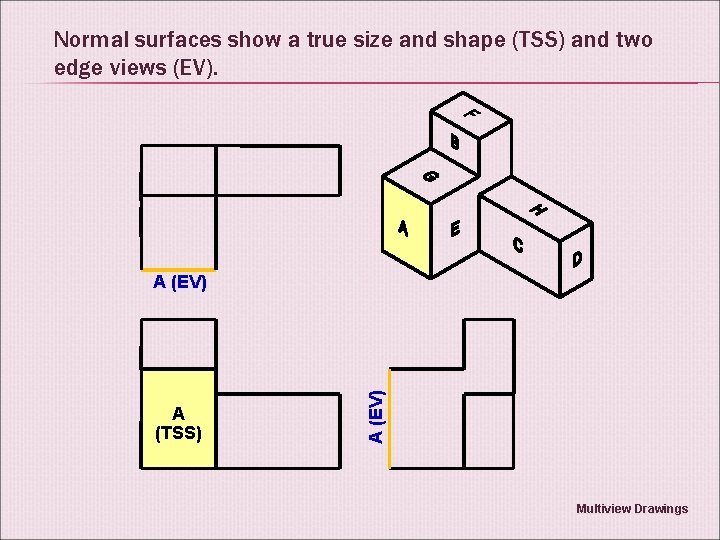
Normal surfaces show a true size and shape (TSS) and two edge views (EV). A (TSS) A (EV) Multiview Drawings

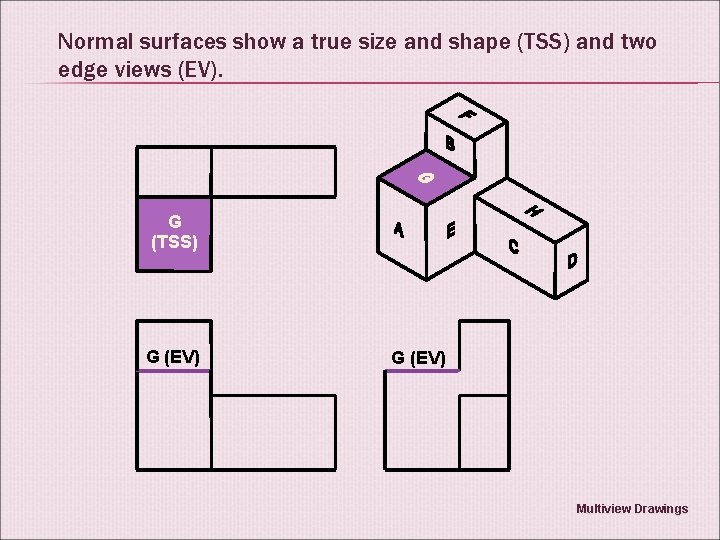
Normal surfaces show a true size and shape (TSS) and two edge views (EV). G (TSS) G (EV) Multiview Drawings

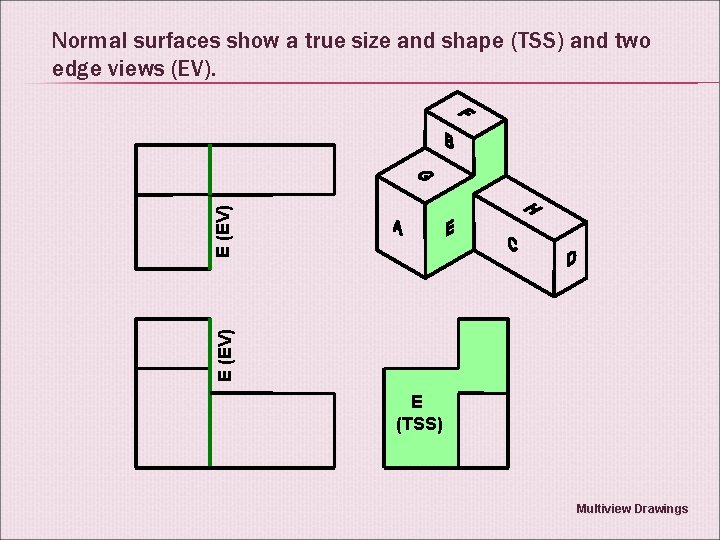
E (EV) Normal surfaces show a true size and shape (TSS) and two edge views (EV). E (TSS) Multiview Drawings

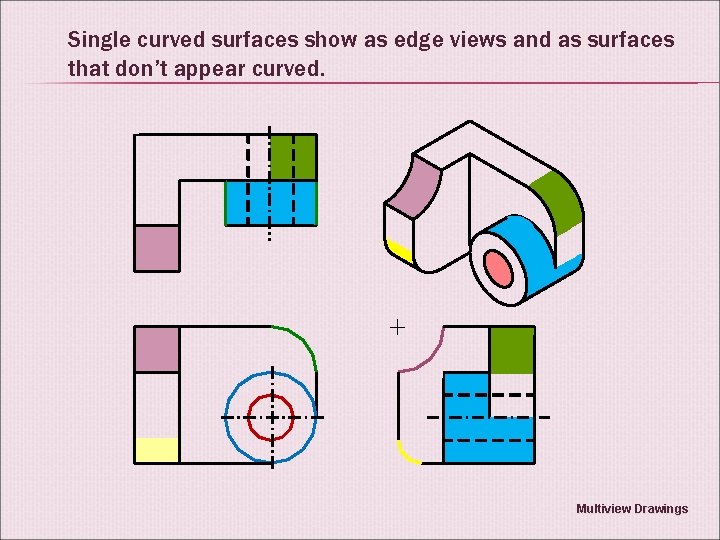
Single curved surfaces show as edge views and as surfaces that don’t appear curved. Multiview Drawings

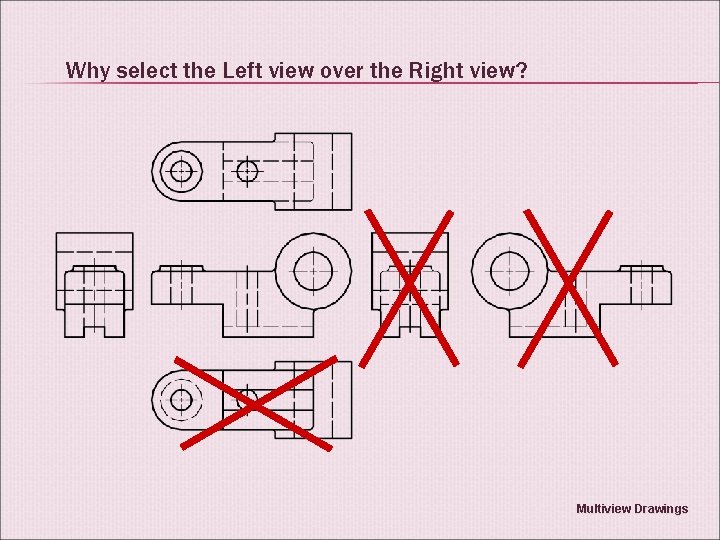
Why select the Left view over the Right view? Multiview Drawings

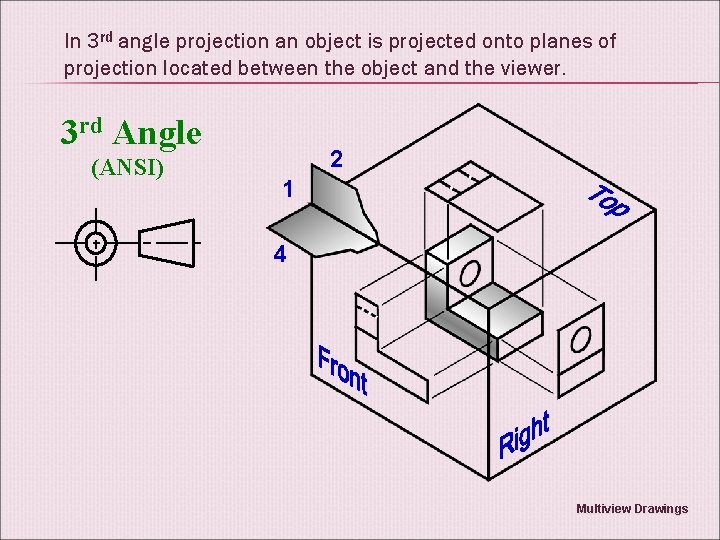
In 3 rd angle projection an object is projected onto planes of projection located between the object and the viewer. 3 rd Angle (ANSI) 2 1 4 Multiview Drawings

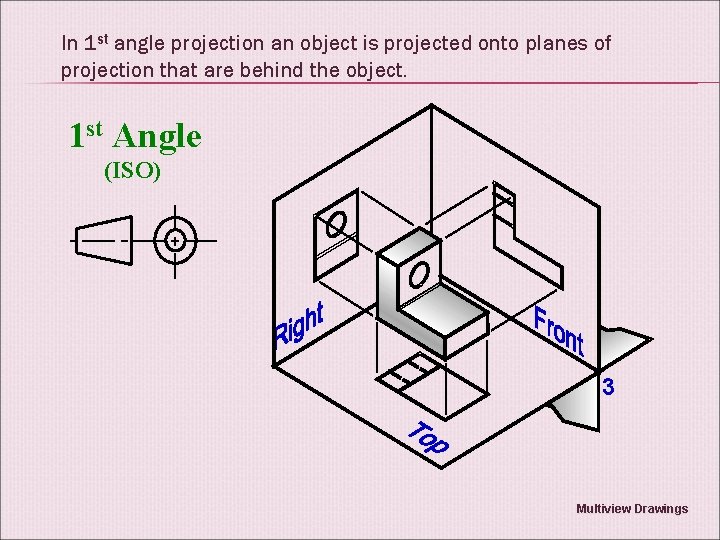
In 1 st angle projection an object is projected onto planes of projection that are behind the object. 1 st Angle (ISO) 2 4 3 Multiview Drawings

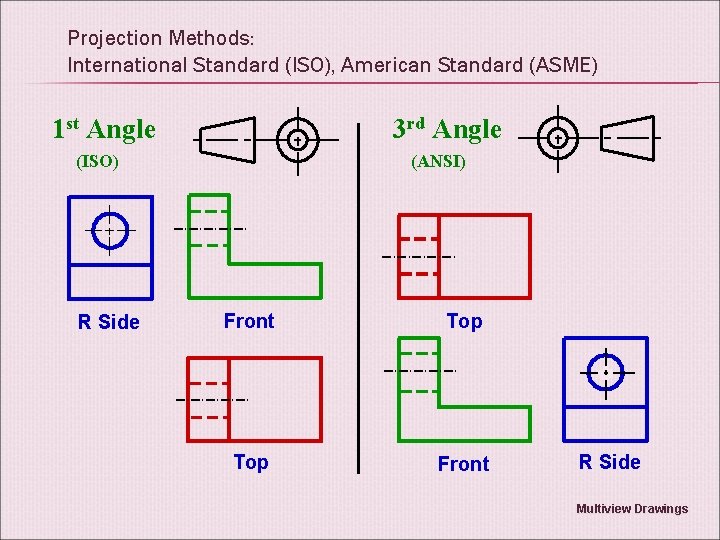
Projection Methods: International Standard (ISO), American Standard (ASME) 1 st Angle 3 rd Angle (ISO) R Side (ANSI) Front Top Front R Side Multiview Drawings

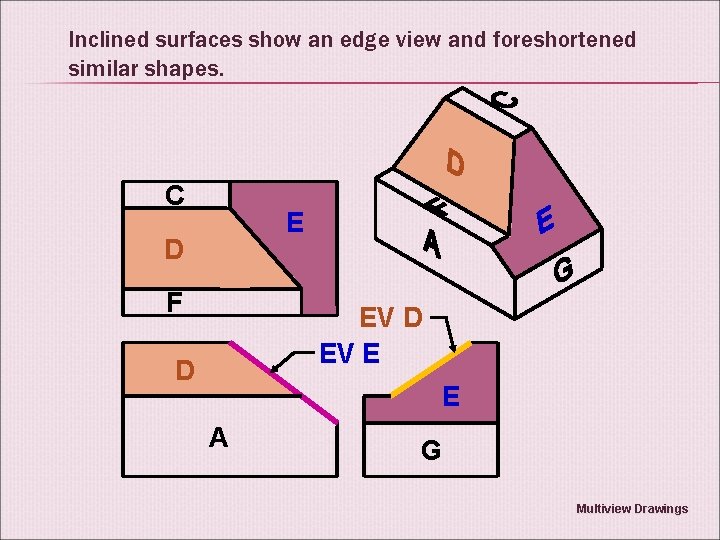
Inclined surfaces show an edge view and foreshortened similar shapes. C E D F EV D EV E D E A G Multiview Drawings

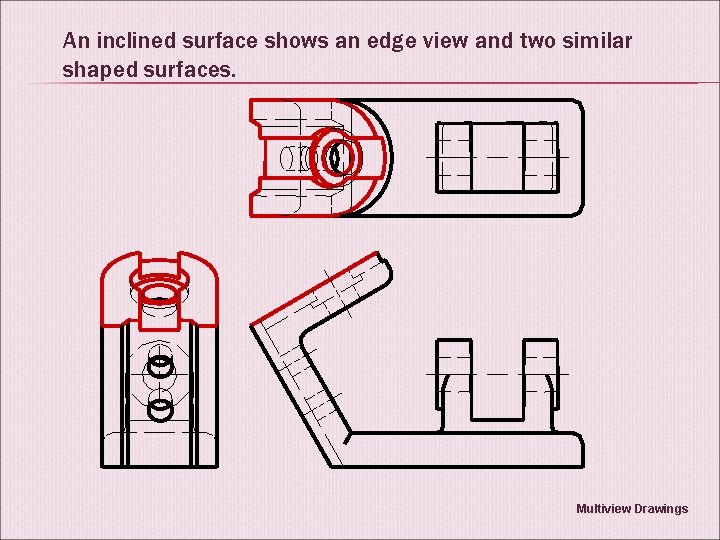
An inclined surface shows an edge view and two similar shaped surfaces. Multiview Drawings

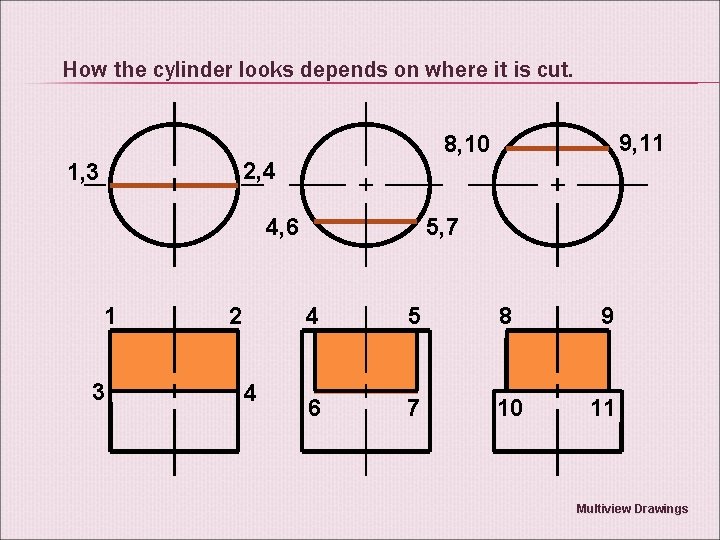
How the cylinder looks depends on where it is cut. 9, 11 8, 10 2, 4 1, 3 4, 6 1 3 2 4 5, 7 4 5 8 9 6 7 10 11 Multiview Drawings

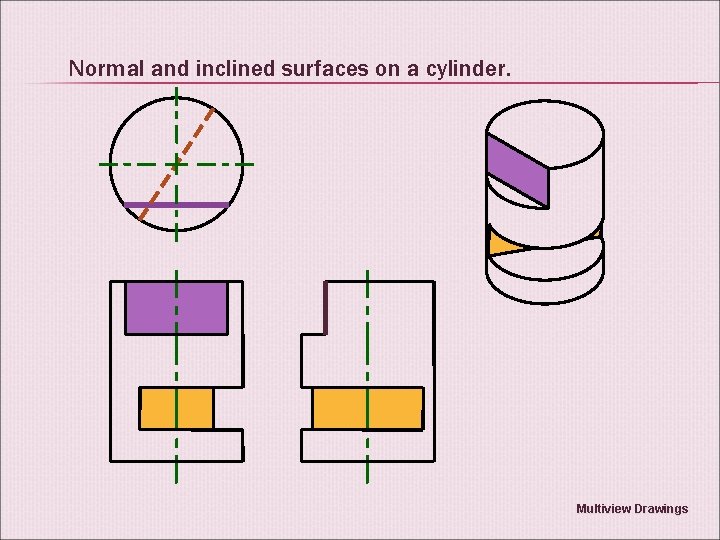
Normal and inclined surfaces on a cylinder. Multiview Drawings

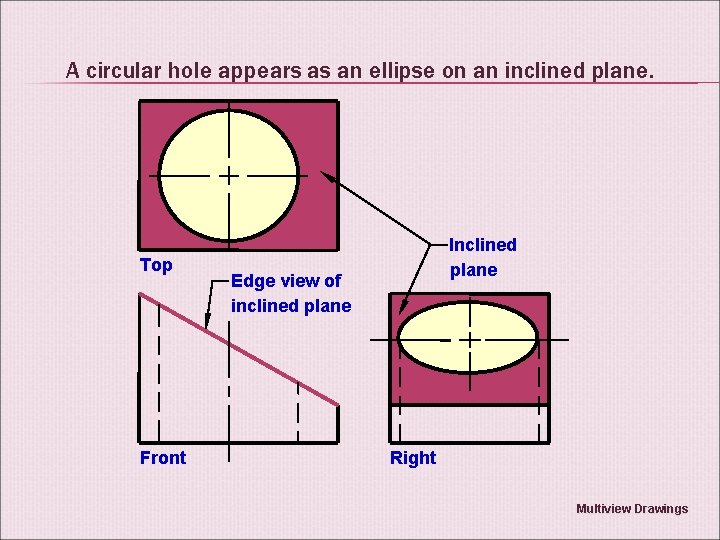
A circular hole appears as an ellipse on an inclined plane. Top Front Inclined plane Edge view of inclined plane Right Multiview Drawings

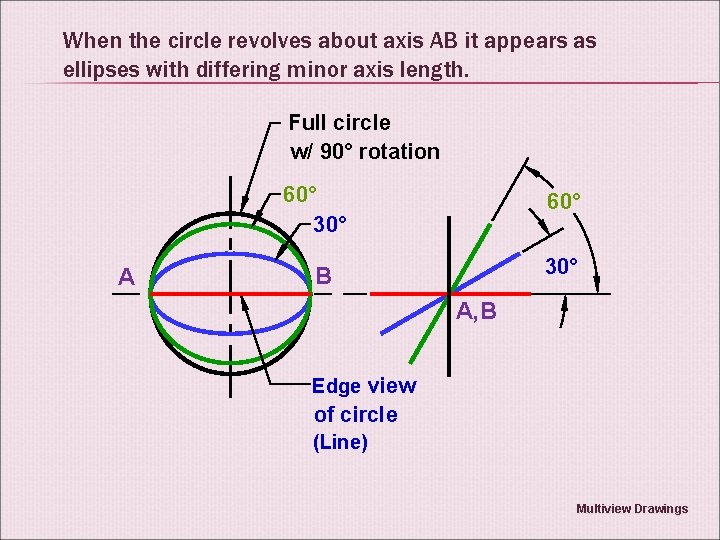
When the circle revolves about axis AB it appears as ellipses with differing minor axis length. Full circle w/ 90° rotation 60° 30° A 60° 30° B A, B Edge view of circle (Line) Multiview Drawings

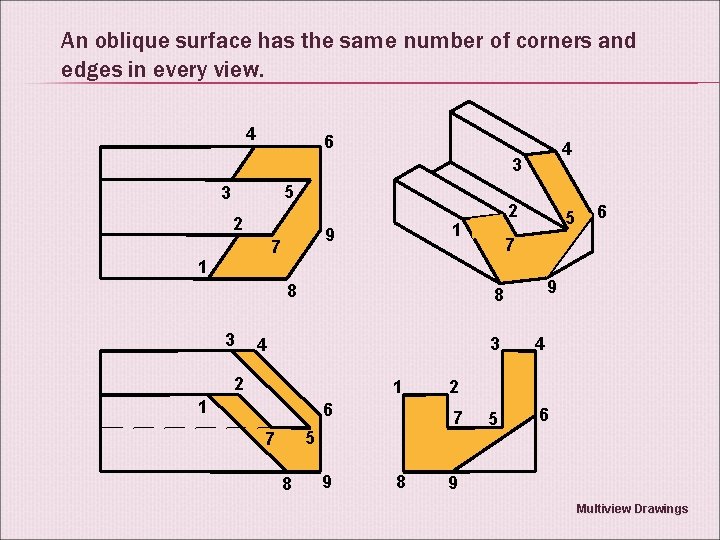
An oblique surface has the same number of corners and edges in every view. 4 6 4 3 5 3 2 1 1 9 7 8 3 2 1 1 6 9 7 8 6 7 9 3 4 5 6 2 5 8 4 7 2 9 Multiview Drawings

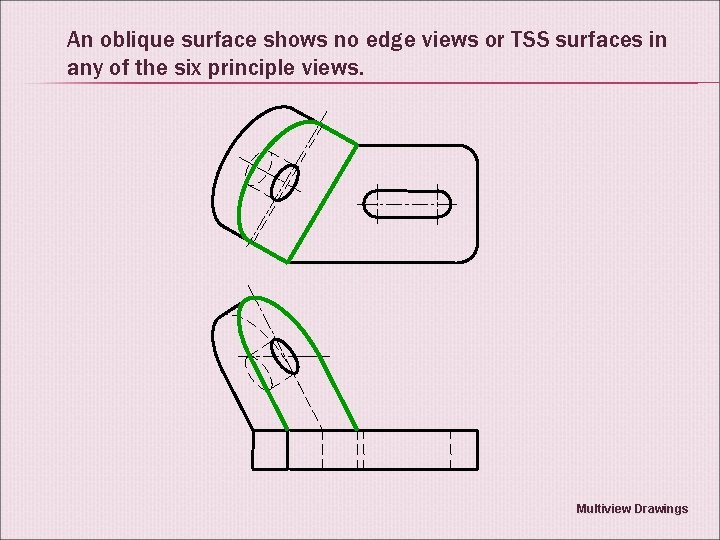
An oblique surface shows no edge views or TSS surfaces in any of the six principle views. Multiview Drawings