SAP Module Pool Program Part Contents Part Include


![Part Ⅲ. Screen 생성-PBO (2/46) 1. 화면번호 [0100]](https://slidetodoc.com/presentation_image/1c601879eebeca62f7a93c79af899159/image-4.jpg "Part Ⅲ. Screen 생성-PBO (2/46) 1. 화면번호 [0100]")
![Part Ⅲ. Screen 생성-PBO (5/46) 1. [흐름로직]의 구성 - PBO (Process Before Output) -](https://slidetodoc.com/presentation_image/1c601879eebeca62f7a93c79af899159/image-7.jpg "Part Ⅲ. Screen 생성-PBO (5/46) 1. [흐름로직]의 구성 - PBO (Process Before Output) -")
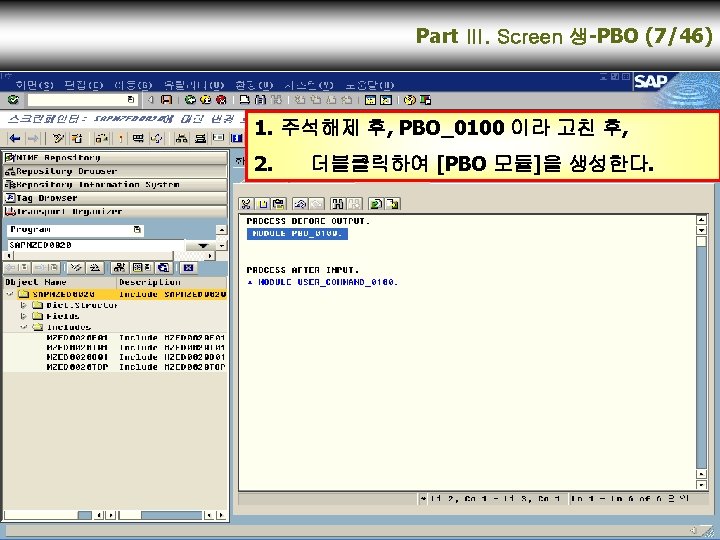
 1. PBO module PBO_0100 생성을 위해 ‘예’ 버튼 2.")
 1. PBO module 이므로 include MZED 0020 O 01")
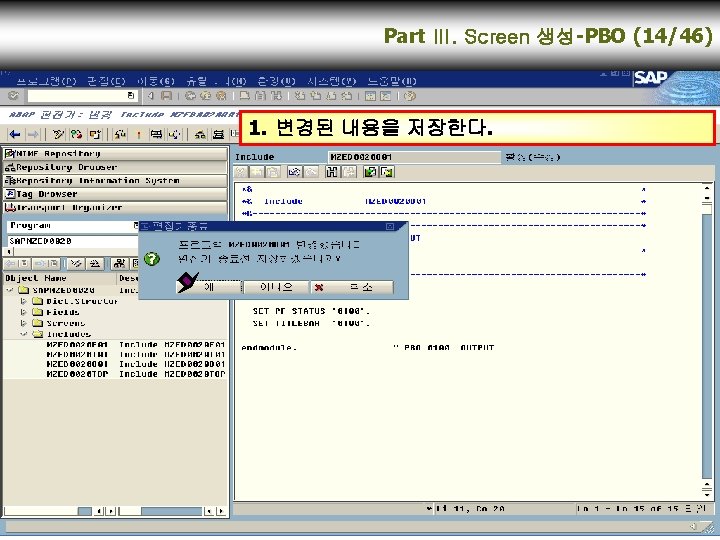
 1. Include MZED 0020 O 01 에 2. PBO")
 1. 화면 toolbar와 title을 위해 다음과 같이 정의한 다.")
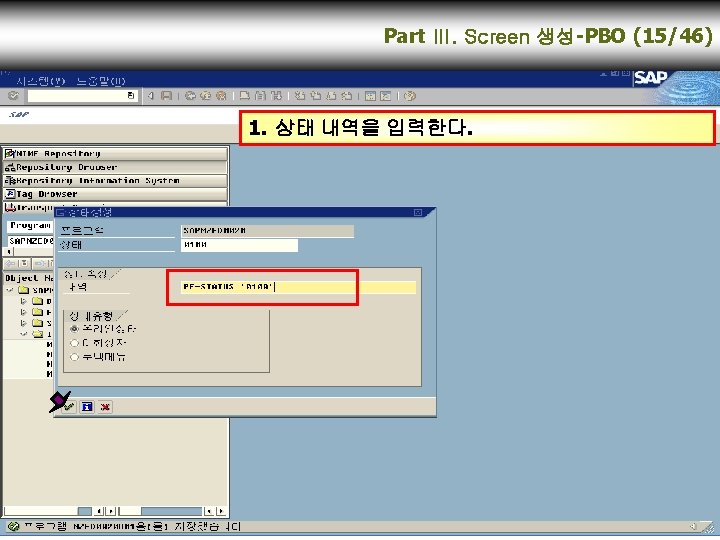
 1. SET PF-STATUS ‘ 0100’. 0100 2. ‘ 0100’을")
 1. Menu Bar – 화면 맨 위에 있는 메뉴")
")
")
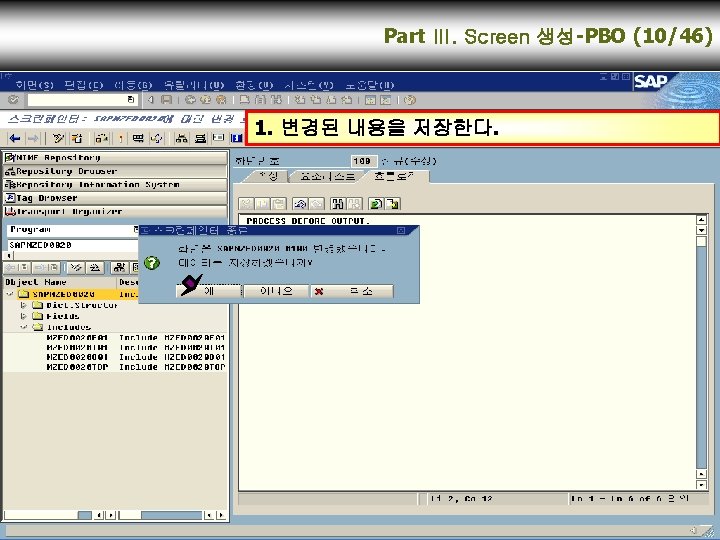
 1. SAVE 입력 후, click the ENTER button")
")
 1. 입력 후, Enter")
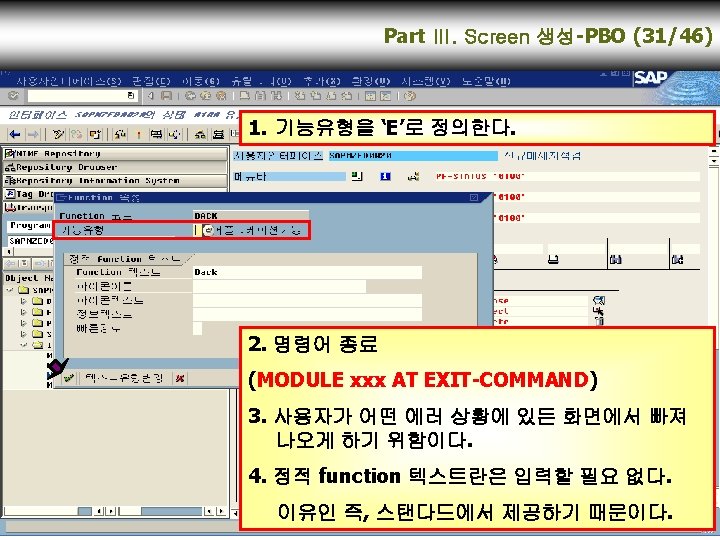
![Part Ⅲ. Screen 생성-PBO (32/46) 1. [BACK] key 생성방법과 동일](https://slidetodoc.com/presentation_image/1c601879eebeca62f7a93c79af899159/image-34.jpg "Part Ⅲ. Screen 생성-PBO (32/46) 1. [BACK] key 생성방법과 동일")
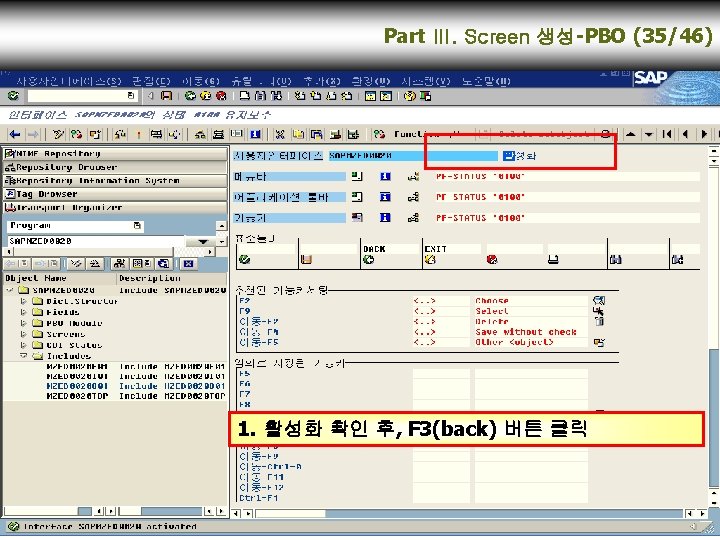
![Part Ⅲ. Screen 생성-PBO (33/46) 1. [BACK] & [EXIT] 정의 후, Activate !!!](https://slidetodoc.com/presentation_image/1c601879eebeca62f7a93c79af899159/image-35.jpg "Part Ⅲ. Screen 생성-PBO (33/46) 1. [BACK] & [EXIT] 정의 후, Activate !!!")
![Part Ⅲ. Screen 생성-PBO (34/46) 1. Object [CUAD]만 Activate 한다. 2. 동시에 하면 컴파일](https://slidetodoc.com/presentation_image/1c601879eebeca62f7a93c79af899159/image-36.jpg "Part Ⅲ. Screen 생성-PBO (34/46) 1. Object [CUAD]만 Activate 한다. 2. 동시에 하면 컴파일")
")
![Part Ⅲ. Screen 생성-PBO (39/46) 1. Press Activate button or [control + F 3]](https://slidetodoc.com/presentation_image/1c601879eebeca62f7a93c79af899159/image-41.jpg "Part Ⅲ. Screen 생성-PBO (39/46) 1. Press Activate button or [control + F 3]")
![Part Ⅲ. Screen 생성-PBO (40/46) 1. Object [CUAD]만 Activate!!!](https://slidetodoc.com/presentation_image/1c601879eebeca62f7a93c79af899159/image-42.jpg "Part Ⅲ. Screen 생성-PBO (40/46) 1. Object [CUAD]만 Activate!!!")
 1. 활성화 확인 후, Back(F 3)")
 1. SET PF-STATUS ‘ 0100’ 2. SET TITLEBAR ‘")
 1. PBO 처음 실행시에만 수행하기 위한 처리 2. IF")
 1. 활성화 확인 후, Back(F 3)")
 1. 활성화 확인 후, Back(F 3)")
- Slides: 48
SAP Module Pool Program Part Ⅲ
Contents PartⅠ. 프로그램 및 Include 생성 PartⅡ. Data declaration PartⅢ. Screen 생성 - PBO PartⅣ. Screen 생성 - PAI PartⅤ. Screen 생성 - Layout PartⅥ. Transaction code 생성 PartⅥ. 입력 데이터 체크 및 저장
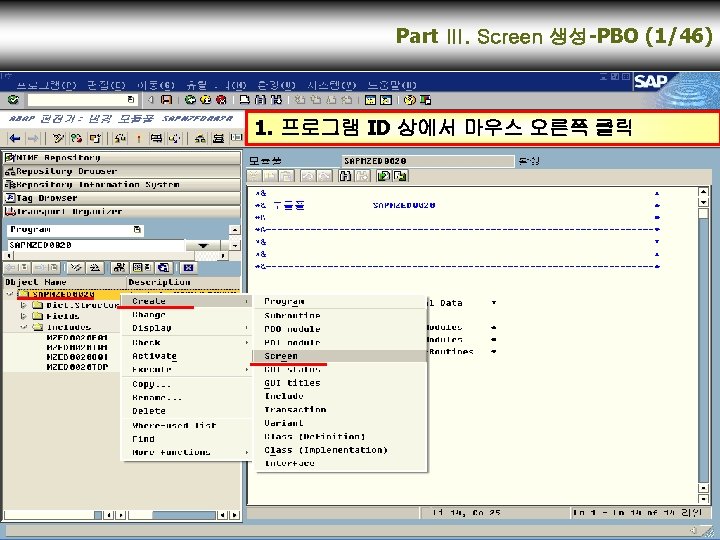
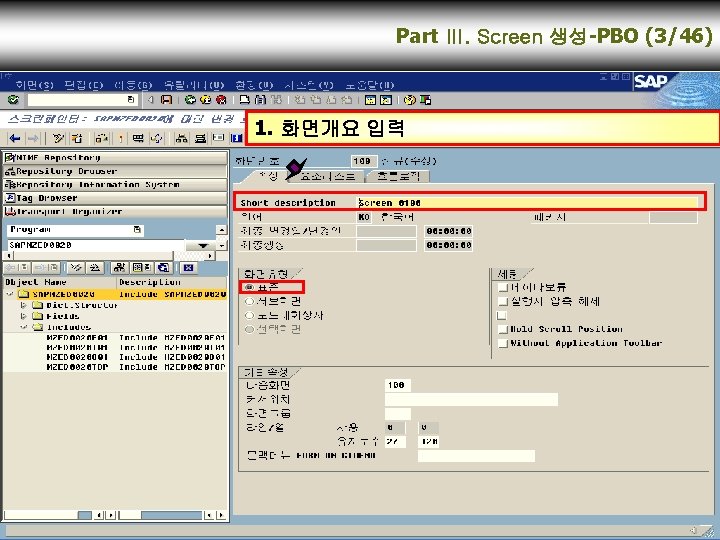
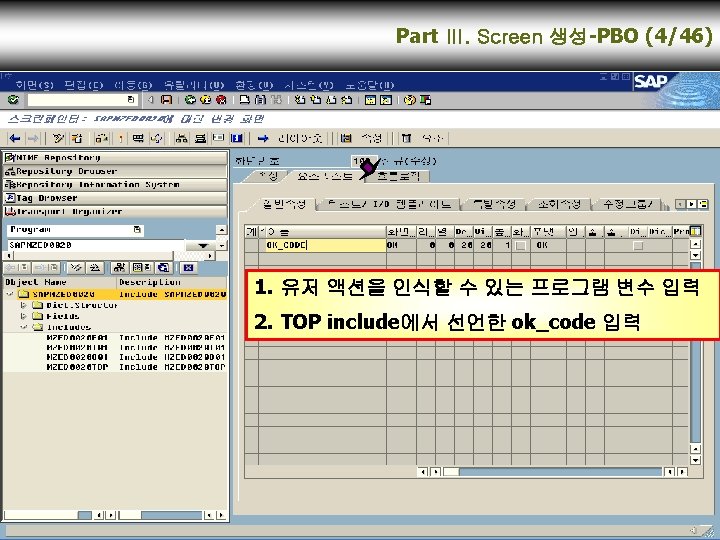
Part Ⅲ. Screen 생성-PBO (2/46) 1. 화면번호 [0100]
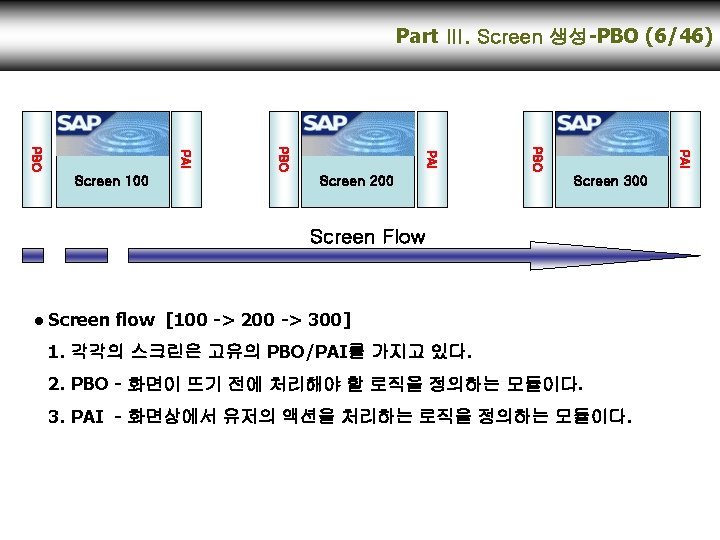
Part Ⅲ. Screen 생성-PBO (5/46) 1. [흐름로직]의 구성 - PBO (Process Before Output) - PAI (Process After Input)
Part Ⅲ. Screen 생성-PBO (8/46) 1. PBO module PBO_0100 생성을 위해 ‘예’ 버튼 2. 클릭
Part Ⅲ. Screen 생성-PBO (9/46) 1. PBO module 이므로 include MZED 0020 O 01 2. 에 생성한다.
Part Ⅲ. Screen 생성-PBO (11/46) 1. Include MZED 0020 O 01 에 2. PBO module PBO_0100을 생성했음!
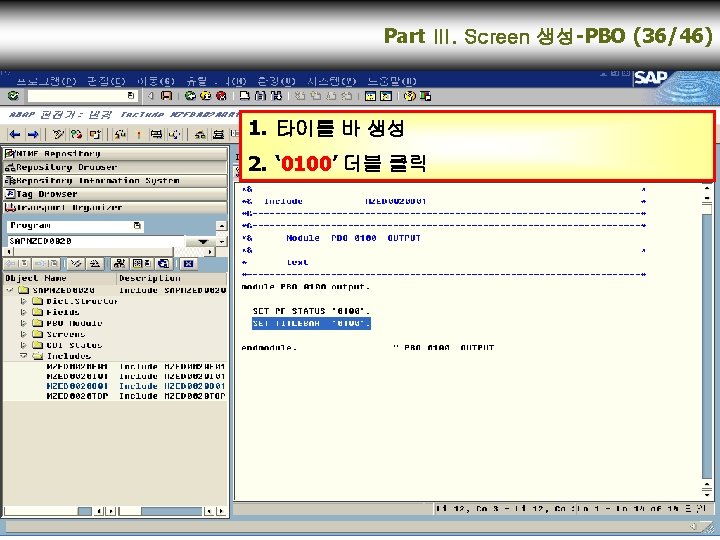
Part Ⅲ. Screen 생성-PBO (12/46) 1. 화면 toolbar와 title을 위해 다음과 같이 정의한 다. 2. SET PF-STATUS ‘ 0100’. 3. SET TITLEBAR ‘ 0100’.
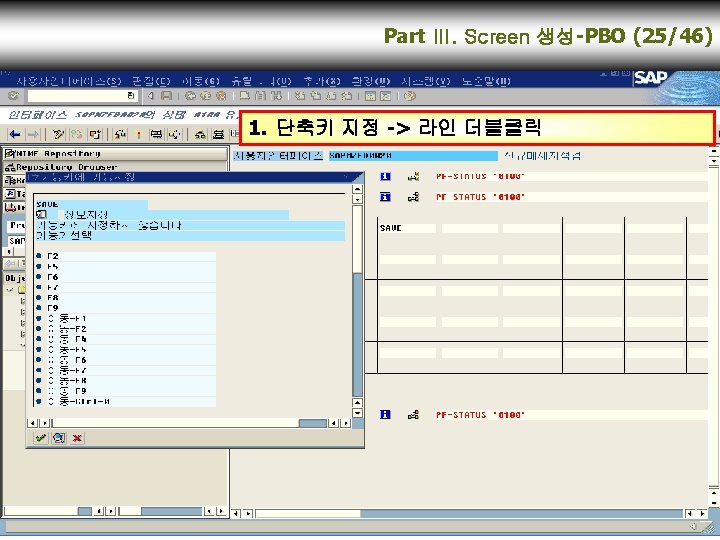
Part Ⅲ. Screen 생성-PBO (13/46) 1. SET PF-STATUS ‘ 0100’. 0100 2. ‘ 0100’을 더블 클릭하여 Toolbar를 생성한다. 0100
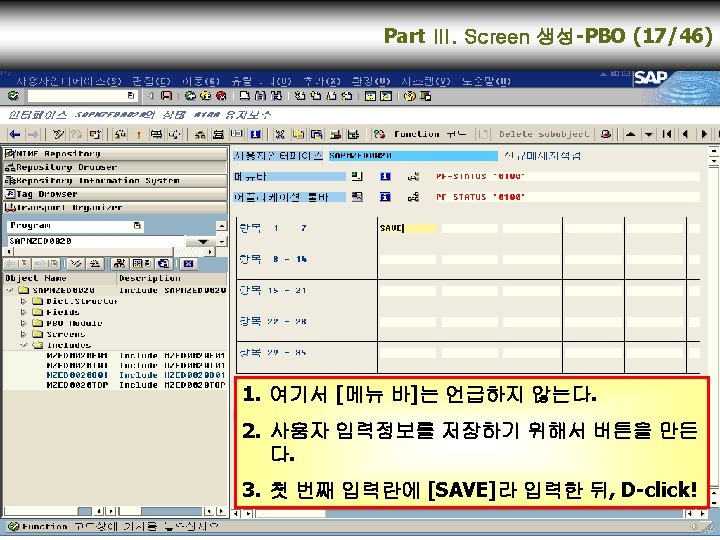
Part Ⅲ. Screen 생성-PBO (16/46) 1. Menu Bar – 화면 맨 위에 있는 메뉴 2. App. Toolbar – title 아래 툴바 3. Function Key – command 입력란 옆의 기능키
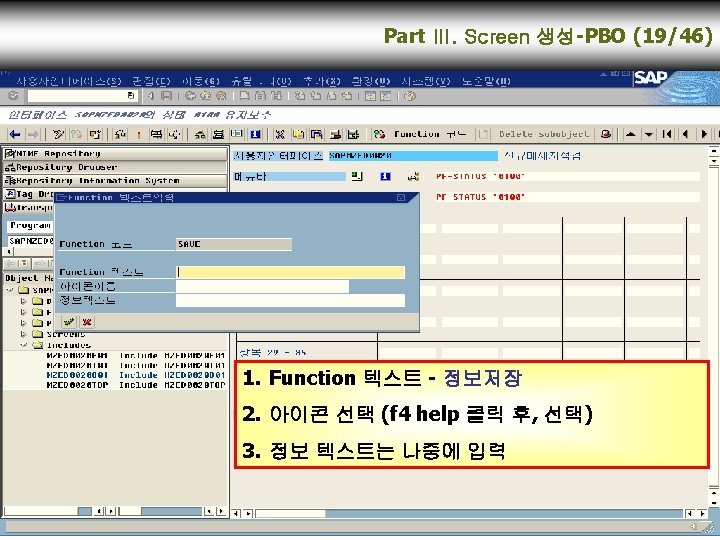
Part Ⅲ. Screen 생성-PBO (18/46)
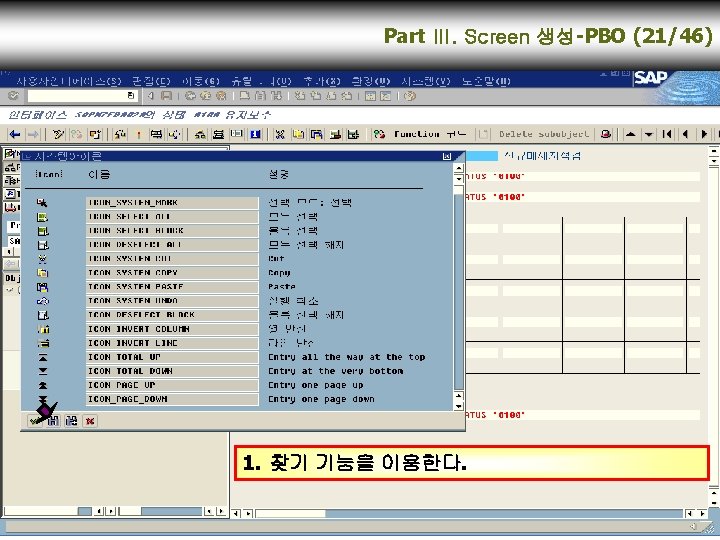
Part Ⅲ. Screen 생성-PBO (20/46)
Part Ⅲ. Screen 생성-PBO (22/46) 1. SAVE 입력 후, click the ENTER button
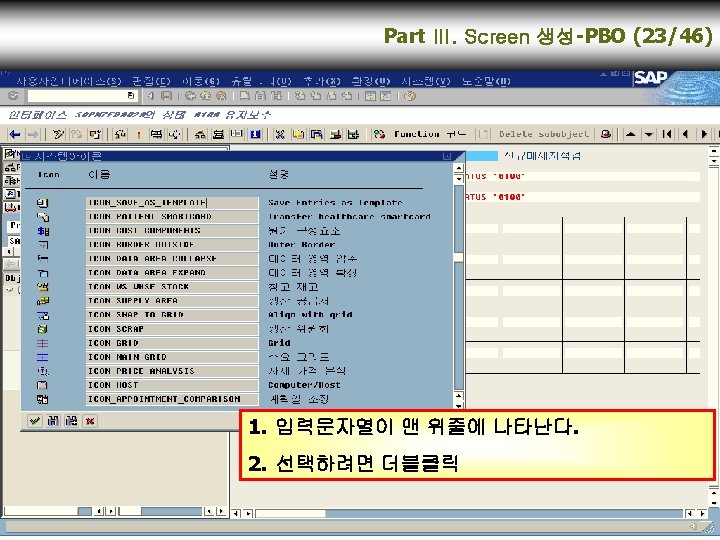
Part Ⅲ. Screen 생성-PBO (24/46)
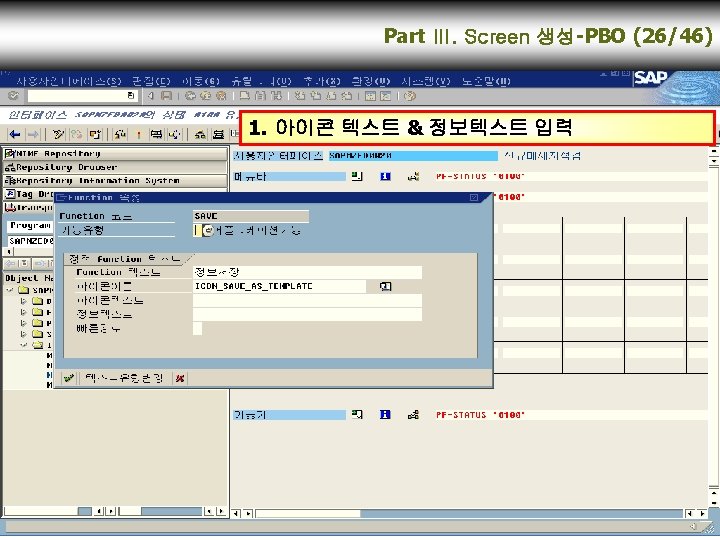
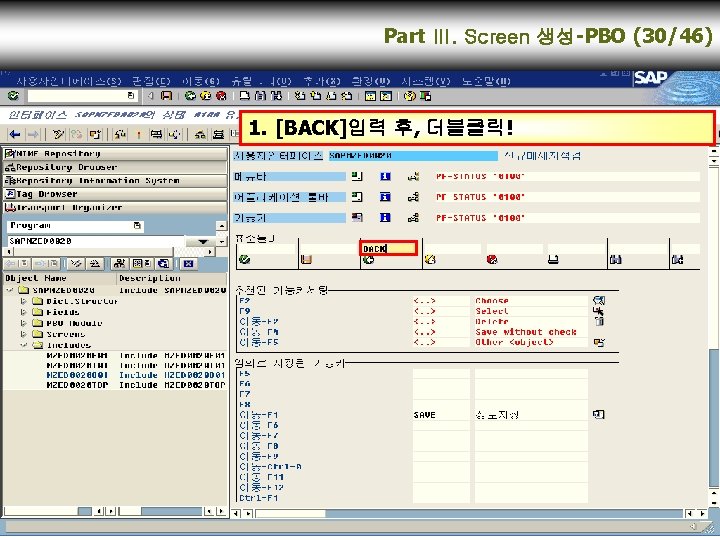
Part Ⅲ. Screen 생성-PBO (27/46) 1. 입력 후, Enter
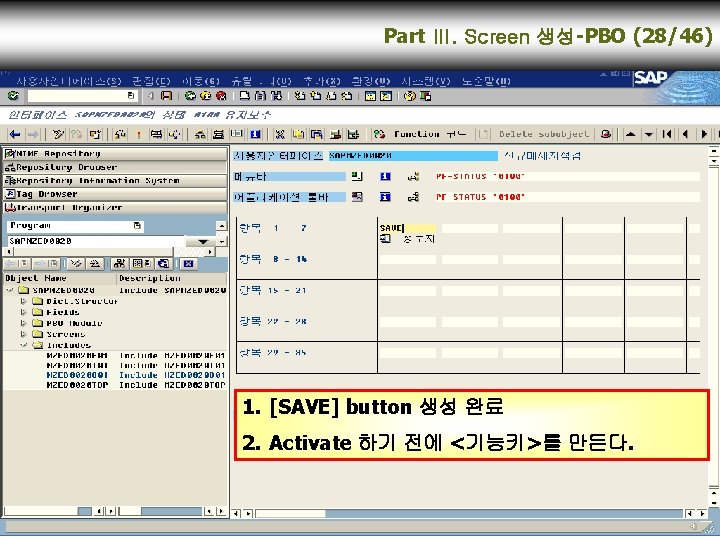
Part Ⅲ. Screen 생성-PBO (32/46) 1. [BACK] key 생성방법과 동일
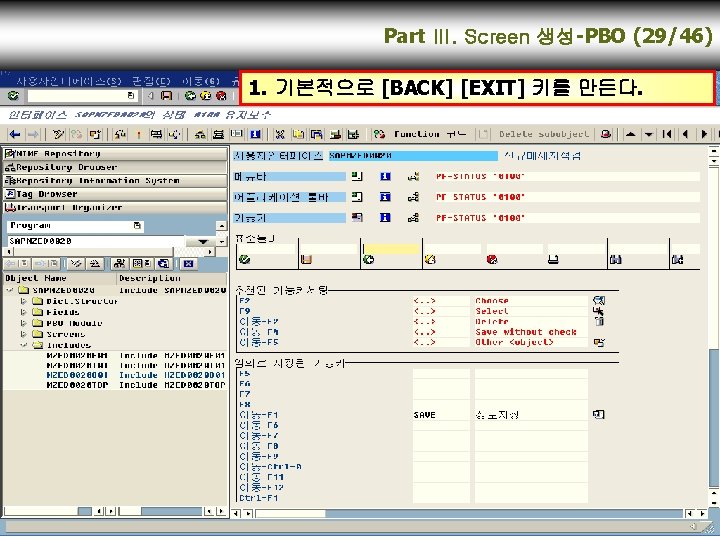
Part Ⅲ. Screen 생성-PBO (33/46) 1. [BACK] & [EXIT] 정의 후, Activate !!!
Part Ⅲ. Screen 생성-PBO (34/46) 1. Object [CUAD]만 Activate 한다. 2. 동시에 하면 컴파일 에러 발생
Part Ⅲ. Screen 생성-PBO (37/46)
Part Ⅲ. Screen 생성-PBO (39/46) 1. Press Activate button or [control + F 3]
Part Ⅲ. Screen 생성-PBO (40/46) 1. Object [CUAD]만 Activate!!!
Part Ⅲ. Screen 생성-PBO (41/46) 1. 활성화 확인 후, Back(F 3)
Part Ⅲ. Screen 생성-PBO (42/46) 1. SET PF-STATUS ‘ 0100’ 2. SET TITLEBAR ‘ 0100’ 생성 완료
Part Ⅲ. Screen 생성-PBO (43/46) 1. PBO 처음 실행시에만 수행하기 위한 처리 2. IF just_one_time IS INITIAL. 3. 4. (프로그램 로직) ENDIF.
Part Ⅲ. Screen 생성-PBO (44/46) 1. 활성화 확인 후, Back(F 3)
Part Ⅲ. Screen 생성-PBO (45/46) 1. 활성화 확인 후, Back(F 3)