Roy Lichtenstein Pop Artist Roy Lichtenstein to paint


- Slides: 17
Roy Lichtenstein Pop Artist Roy Lichtenstein ……. . to paint all mass-produced, everyday objects in the world. Before you start the project, use these video links to research POP ART and the artist and look at his work. https: //www. youtube. com/watch? v=Ls. Y 4 ih. ZCJL 8 https: //www. youtube. com/watch? v=AG 6 M 1 uo 2 PVY https: //www. youtube. com/watch? v=q. QIe. Ir. Gr 5 x 8
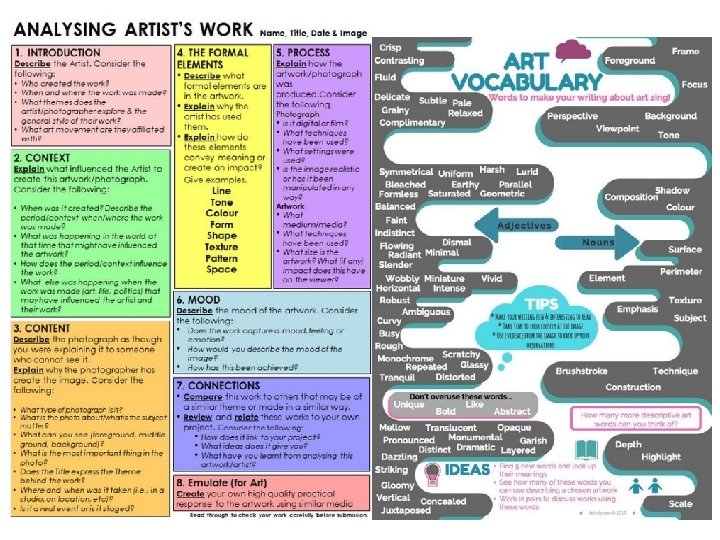
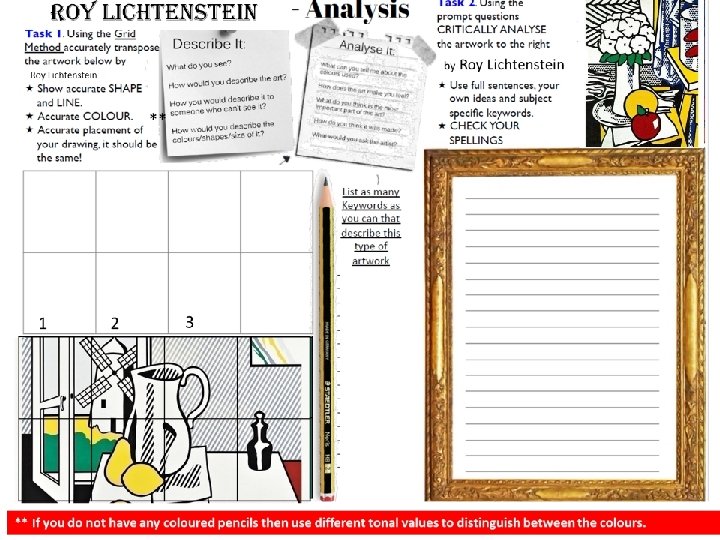
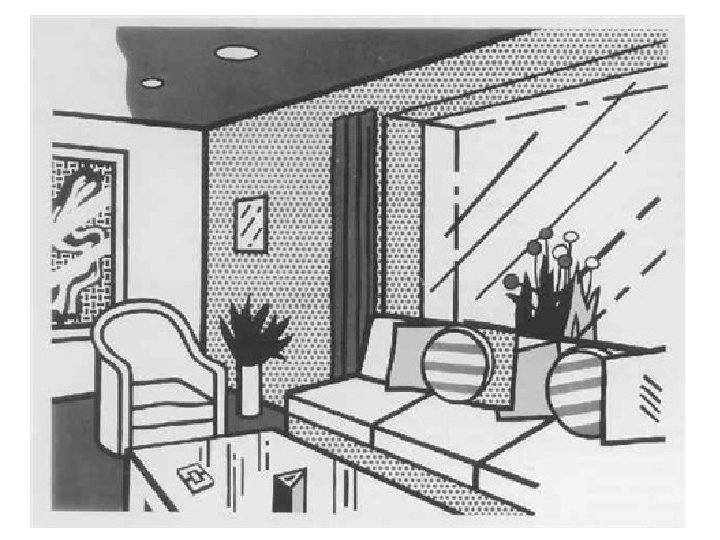
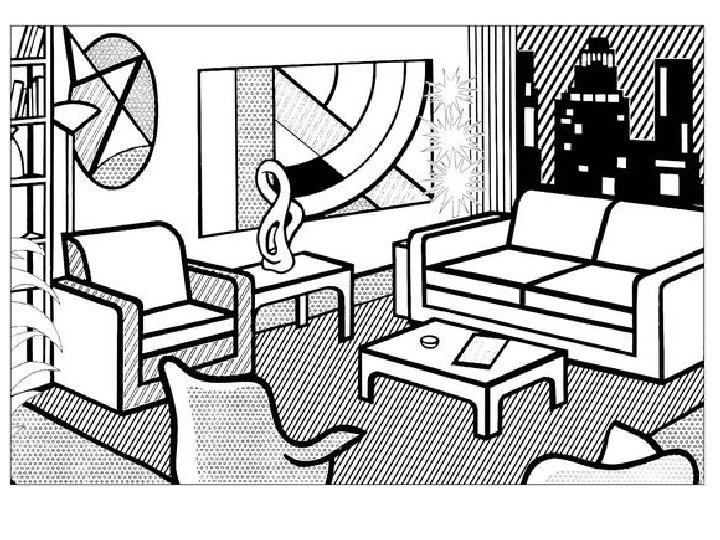
Week 1 – Analysing the Artists work What can you see? • Pick the image shown apart and use Artistic elements to help you describe the work of Roy Lichtenstein. • Record your analysis on paper or on the computer. Artistic Elements LINE SHAPE & FORM COLOUR TEXTURE SPACE VALUE/TONE For example: • Are the lines thin, thick, bold, curved, straight, wavy, overlapped or coloured? • Are the shapes simple, detailed, recognisable, organic, geometric, 2 D or 3 D? • Are the colours bold, bright, primary, secondary, complimentary, contrasting? • Is there texture shown? Is it flat, fluffy, rough, hard, soft? • How has the artist used the space? Is it full, empty, busy, simple, overlapped, interesting or boring? • Does the image show value? Is there tone? Can you see a light source, light and dark, Tints or shades? This link will also help you https: //www. bbc. co. uk/bitesize/guides/zgtngdm/video
Week 2 – Creating a copy of the Artists work Carry out some research into the artists work. Save some images that you particularly like and create at least one copy. You could: • Draw the image as you see it • Trace the image, using your i. Pad as a light box • Print the grid method images on the next page and copy the images square by square • Print and complete the colouring page
B Drawing grid resources B use the grids to help you copy the images – simply copy the image section by section and they will come together to piece the image together A A 1 1 3 2 2 C 3 C B B A A 1 2 3 4 B A 1 2 3 4
C C B B A A 2 1 2 3 B A 3 1 2 3 B 1 1 2 A 2 1 2
Colouring in page Resources
Week 3 – Making your own still life and drawing from it. • Remember that Roy Lichtenstein has an interest in mass produced every day objects. • Collect at least 10 different objects. Looking for a variety of shapes within your objects. • Take in to consideration the arrangements of your objects. You could copy the layout of one of Roy Lichtenstein's painting. • Make sure your objects are the main focus of the image (not the table!) and if you are taking a photograph to draw from then make sure they are in focus. Try using a plain background like this example. • Place larger objects in the background with smaller objects in front. • Make sure the objects overlap and do not stand in isolation.
Drawing from your still life – measuring your proportions – part 1 If you have access to the internet then watch this clip before you begin the work. https: //www. youtube. com/watch? v=HQgj. Zb. GK 8 Yc Option 1 – if you can print your photograph of you still life then you could try working from the photograph like so. Option 2 – challenge yourself, try to draw at arms length with the real still life in front of you How to draw from your still life 1. Set up your still life of objects 2. Stand at least an arms length away 3. Use your finger and your pencil to measure your proportions and sizes of objects in front of you (as shown in the video) 4. Begin to mark out where objects will go on your page. Remember to check the sizes and proportions of the negative space (this is the area around the objects) 5. PTO
This is the negative space – it is the area that exists around the objects. It is equally important in drawing your still life as it makes proportions correct and accurate. Once you have measured everything out you can begin drawing in the shapes of the objects, Remember – ALWAYS draw lightly with a sharp pencil & keep a rubber handy Add shading if you would like to or move onto the next slides and find out how to turn your work into a Lichtenstein masterpiece Follow this link to find out more about how to draw from a still life and begin to https: //www. youtube. com/watch? v=Zqi 7 S 74 ouqw add shade to it
If you have access to a printer you could print your own photo (or this one) and grid it up using 4 cm squares.
Week 4 & 5 - Develop your drawing using the style of Roy Lichtenstein. Follow the steps on the next slide to find out how… Using your drawing of your still life from the previous challenge you are now going to create your own art work inspired by Roy Lichtenstein. You will need- your drawing, felt tips pens are ideal (alternatively pencil crayons pressed hard or paint), a ruler.
1. Block fill using the bold colours that Roy Lichtenstein did. Red, Yellow, Blue (sometimes orange and green). 3. Look for cast shadows, block fill them with solid black. 2. Use a black felt tip pen to create bold outlines. 4. Although the outlines are bold and simple, Lichtenstein still took time to create form (3 D effect) with his use of shadows (black) and highlights (white) on the surface. Highlight Shadow 5. Add details to the background such as hatched lines (use a ruler) and other ‘blocks’ of colour. ‘Ben day dots’ If you have spare bubble wrap (often found at the bottom of fruit packaging), a sponge and some paint - why not print some ‘ben day’ dots? Wait for it to dry before cutting to shape and gluing onto a section of the background.