Ricoh Paper Cut Device Training Ricoh Canada Inc


- Slides: 70

Ricoh Paper. Cut & Device Training Ricoh Canada Inc. 2020 -10 -07

Welcome to Paper. Cut . . . your new eco-friendly print software 2

Agenda Activating Your Card Print to Me Scan to Me Ricoh Scan Copy Global Scan Right Fax Status / Misfeeds / Maintenance 3

Activating Your Card 02292011229787 -1

Activating your card Step 1 Tap your Access Card over the card reader on your Ricoh device. The screen will read, Associate your card with a user account by entering in your login details. Press Username to associate your card with an account This is a one time process. 5

Activating your card Step 2 Enter your Network Username and Press Next Enter you Network Password Step 3 Press Associate on the touch screen. . 6

Activating your card Step 4 If Network information is entered correctly it will say that your “Card is successfully associated with account”. Press OK on the touch screen to proceed. Tap card again to access Print Release, Device Functions and Scan If your card doesn’t associate, re-tap your card and enter network username and password again. 7

Login and Logout Once your card is activated, you can go to any Ricoh device in your office to Log In and release your Print jobs, use Device Functions and Scan. Don’t Forget To Log out by pressing the Logout button at the top right of the screen or swipe your card on the reader or it will log you out automatically after 60 seconds. 8

Forgot Your Card? If you forget or lose your card, you can manually login with your network authentication. Enter your username in the Username field, then in the Password field and press Log in. 9

Using Print To Me

Print to Me Printing Select your ‘Print To Me’ print queue. Print To Me Queue 11

Print Driver Open your document, click on File and Print. Select the Print to Me printer, if it is not your default, and click on Properties or Preferences depending on the application to get into the Ricoh driver. 12

Frequent Settings Frequently Used settings Document Size Portrait or Landscape Paper Type Input Tray Layout 2 -Sided Booklet - Magazine Staple Punch Color/Black and White You can make One Click Presets by picking the features and then click Register Current Settings. 13

Print To Me Printing Step 1 Tap your card on the reader at the Ricoh device. OR If you forgot your card you will need to authenticate manually, enter your Username and Password and press Log in. 14

Print To Me Printing – Print Release Step 2 You can press Print All to release all jobs or press Print release - you will notice your print jobs queued up ready for release. Select your print jobs and press Print. To delete a print job select the print jobs then press the garbage can icon. 15

Print To Me Printing – Logging Out Step 3 Press the Log out button at the top of the screen, or tap your card on reader to log out. If you forget to logout Paper. Cut will log out after 60 seconds or if another person taps their card they will log you out. 16

Check Status - Correcting a Print Job Error When the red light under Check Status is highlighted, touch the icon to resolve the problem. Opposite the function, the unit indicates the reason for the error. 17

Check Status - Correcting a Print Job Error When you are in the Check Status menu, click on the Check icon and that will bring you to the page below and allow you to resolve the issue. If you want to stop a job press the Stop button to stop and cancel the job. 18

Usin g Scan to Me

Scan to Me Tap your card on the card reader at the Ricoh device OR Log in manually with your username and password. Step 1 Press the Scan button in the Paper. Cut screen. 20

Scan to Me Step 2 Customize Your Info Subject – select box and enter a personal subject line or leave the default. Filename – select box and enter a new name for your file or keep the default. Press Scan setting to change the default settings OR Press Start Scanning 21

Scan to Me Step 3 Scan Settings Select Settings to Change for your scan Duplex Mode (Single or 2 -Sided) Orientation – Portrait or Landscape Paper Size – Letter, Legal Ledger File Type – PDF, JPEG, TIFF DPI – 100 to 600 DPI (dots per Inch) Colour Mode – Colour, Grayscale or BW PRESS SCAN to SEND Your Document 22

Ricoh Scanning

Ricoh Scan Tap your card on the card reader at the Ricoh device OR Login manually with your username and password. Press the Device Functions button in the Paper. Cut screen. 24

Scan to Email Choose Scanner Select Your Name. Press Start. 25

Specify Destination Select from a preprogrammed destination or Press “+” for drop down menu. And press Enter Using Keyboard Press Done after entering an email address. 26

Program New Destination • Select Program New Destination to add a quick key contact • Enter an Email address in the Email Address field • Press the Name tab and enter a name. • Press OK to save. 27

Edit/Delete Contact If you need to Edit/Delete someone from the address book, go to Home Page and Select Address Book (you may need to flip to the second page of screen). 28

Preview will show a fullpage image of your scanned document. 29

Scan Defaults for scanning will appear here. Press Send Settings to adjust. 30

Colour & File Type Options Choose from color options. File Type Options: Multi Page- sends documents as a single attachment. Single Page: sends documents as multiple attachments. 31

Original Settings & Size Choose from 1 sided, 2 sided open RT/ Lft, or 2 sided Top to Top. Choose from Auto Detect : Same Size, Auto Detect : Mixed Sizes, Regular Size, Custom Size, and Programmed Size. 32

Divide To split up multiple pages into smaller PDF’s, press Divide. Press the Divided box. Enter the number of pages for division and press Done. Press OK. 33

Changing the File Name your file by selecting File Name. Touch the File Name field Type in the name you want to call your file and press Done. Press OK. 34

One Touch Job Settings History will show the last 10 uses of the device and what settings were chosen. Recommended Setting will show some optimal settings for special scan projects. 35

Scan File Status: View status of a job or cancel a scan if status is pending. 36

Copy

Copy No need to tap card or login Press Copy Button On Home Screen You can use Copy or Copy Classic Button 38

Colour or B&W To choose Color Copying Press Black & White, With the drop down screen you can choose Full Color, Auto Color Select when copying mixed colour and b&w documents. 39

Reduce/Enlarge This option allows you to choose presets from 25 to 400%, Zoom in 1% increments with + or -, or enter your percentage directly with Number Keys. You can also choose Scale to Paper Size to allow the device to decide how to reduce or enlarge to a particular size that you choose. 40

Quantity & Sort/Stack Quantity: Select how many copies you would like to make. Sort/Stack: You can turn on SORT to collate documents. Density: Lighter or Darker Select Tray: choose a paper tray or bypass 41

2 sided Press 2 Sided/Combine Or Scroll Down for the Quick Buttons 42

Staple – Hole Punch Press Staple or Hole Punch Or Scroll Down for the Quick Buttons Or Finishing for more options 43

Original Size & Original Type Original Size: allows you to select Mixed Sizes when your document has various page sizes in it. Original Type: allows you to set the type of document to be copied, or choose Text, Text photo. Generation Copy, Light or Map for image repair. Generation Copy – For originals that have been copied repeatedly. Will lighten the text and straighten out lettering. Light – For originals containing light text. Will darken lighter text on a page only. Map – For originals containing maps. Will darken faint lines on maps or drawings. 44

Create Margin Create margin: allows you to shift wide image on document to allow for hole punching without losing important information of the document 45

Quick Buttons: 2 sided - Staples - Hole Punch options Scroll down 2 Sided quick buttons Stapling - 4 quick buttons Hole Punch - 2 quick buttons 46

Status. Misfeeds. Maintenanc e-Supplies -

Check Status The Check Status light will come on in red if there is a paper misfeed or if there is something else going on with the device. 48

Check Status When the light under Check Status is lit, press the icon to resolve the problem. Next to the function, the device indicates the reason for the error. 49

Clearing a Misfeed Follow the indications on the screen that show you step-by-step how to remove the misfed paper. 50

Clearing a Misfeed Section Y Sections B and C Always remove the misfed paper in the same direction as the feed rollers. Do not pull sideways as the paper will tear and the rollers will wear. 51

Finisher Misfeeds Section R (1000 -sheet finisher) 52

Feeder Misfeed To lift top of the document feeder, pull up on the handle. Push the grey latch to access the paper from the inside. 53

Document Feeder The three sensors on the feed table should not be blocked by paper, etc. It will result in undesired paper size output, or the unit will beep indicating to load special paper size in the tray. 54

Cleaning the Glass A- Series Docume nt Feeder Cleaning the glass: a cloth is supplied with your unit. Please clean the scan glass and exposure glass frequently (about once every 2 weeks), or when you notice lines or spots on your copies. 55

Cleaning the Slit Glass Remove the blue cleaning wand from its slot in the front panel. At an angle, slide it in and out, a few times, in each of the 4 color slots as indicated by the brush sticker. This should be done every 2 months, to prevent dust build-up on the slit glass, which causes the laser to malfunction, and white streaks as a result 56

Changing Toner, Waste Toner Cartridge and Staple Cartridges 57

Replacing the Toner Open the front panel and remove the used cartridge. Shake the new cartridge LIGHTLY vertically (see inside panel), unscrew the cap, and insert it into the toner unit with the arrow on top. NEVER REMOVE, SHAKE AND RE-INSERT THE USED CARTRIDGE. When the System Message box shows toner bottle empty, it is time to change the toner cartridge. You can still print up to 300 pages in this state. 58

Changing the Toner - BW Open the front panel and remove the used cartridge. Shake the new cartridge LIGHTLY vertically (see inside panel), unscrew the cap, and insert it into the toner unit with the arrow on top. NEVER REMOVE, SHAKE AND RE-INSERT THE USED CARTRIDGE When the Add Toner message appears under Check Status, it is time to change the toner cartridge. 59

Replacing Staples Following the instructions on the display or box of staples, push the stapling unit to the left, pull out the casing, remove the empty cartridge, and insert a new one. 500 -sheet Finisher (SR 3130): when the Staple icon (bottom left of screen) flashes, it is time to change the staple cartridge. 60

Replacing Staples Following the instructio ns on the display or the box of staples, remove the cartridge from the casing and insert a new one 2000 -sheet Booklet Finisher (SR 3160 -70): when the Staple icon (bottom left of the screen) flashes, it is time to change the staple cartridge with a refill. 61

Replacing Staples Pull out the stapling unit by its handle. The staple cartridge is located on the left side, 2000 -sheet Booklet Finisher (SR 3160 on the 70): when the Staple icon (bottom of left of the screen) flashes, it is time the unit to change the staple cartridge 62

Replacing Staples 1000 -sheet Booklet Finisher (SR 3150) 63

Waste Toner Cartridge (colour copiers only) A message will appear in the System Message box that will let you know when the waste toner cartridge is getting full. To change cartridge, open the door next to Tray 1, remove full container and replace with an empty one. Please order an extra cartridge with supplies (free with contract). If using @remote the waste toner cartridge will be automatically sent out. Please recycle through our toner recycling program. 64

Returning Cartridges To return your empty toner cartridges and full toner waste cartridges to Ricoh, simply go to the Ricoh website and move the mouse over the Products title. Then select Toner Bottle and Cartridge Return Program. Follow the instructions to print off a mailing or courier label. https: //www. ricoh. ca/en/about-us/corporate-responsibility-and-environmentalsustainability/product-stewardship-and-recycling 65

@Remote You are registered with @Remote Your first set of toner and waste toner bottle has been ordered. After changing the toner cartridge once, @Remote will send a signal to Ricoh, and a new cartridge will be shipped to you, and thus, for the duration of the contract. For other consumables such as staples please use the same process as before. 66

Placing a Service Call To place a service call, please call the phone number that is on the Ricoh sticker on the front of your device Please have your serial number handy when calling. If you are registered with My. Ricoh. ca you can submit a service call on the web site

Rebooting Machine To reboot: Press the main power button, Machine will do a shut down. When shut down count to 10 and press the main power button to start up machine. 68

Thank You

 Ricoh cartridge return canada
 Input output storage devices
 Match cut
 Red and green cut in prolog
 Rip cut vs crosscut
 Consistent cut and inconsistent cut
 Techno canada inc
 Mvl iron works productions canada, inc
 Pine environmental locations
 Nylene canada inc
 2016 pearson education inc
 Pearson canada inc.
 University of kentucky disability resource center
 Ricoh copiers broussard
 Ricoh resource center
 Ricoh aficio mp 2352
 Ricoh rdc-1
 My print um
 Papercut scan to cloud storage
 Papercut uga
 Paper cut mf
 Aice english paper 2
 Aice general paper topics
 Input devices
 A tagout device is preferable to using a lockout device.
 Input device dan output device
 Training is expensive without training it is more expensive
 Metode of the job training
 Aggression replacement training facilitator training
 Lamb cut sheet
 Curb cut effect
 Biological weathering
 Upper tier of uterus
 Mulit hairstyle
 Contoh graf sederhana 5 simpul
 Rough cut capacity planning
 Framing terms and definitions
 How to cut steel rods
 Infiltration definition geography
 Ventilation terminology
 What does fat do in quick breads
 Kb.promob
 Is aluminum foil cut in half a physical or chemical change
 Bacak venleri
 Perbezaan copy and paste dan cut and paste
 60 entre 3
 Alternate exterior
 What is the tone of othello's herald's proclamation?
 Episiotomy types
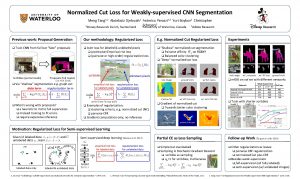
 Normalized cut loss for weakly-supervised cnn segmentation
 What are the objectives of sequence diagram?
 Normalized cut loss for weakly-supervised cnn segmentation
 What is rough cut capacity planning
 Cut and cover method
 Identify the market forms of meat
 Knickpoint definition geography
 Lathe cut amalgam
 Tax cut bill of 1964 objectives or results
 Non-parallel lines cut by a transversal
 Wave cut platform diagram
 Saturation condition for bjt
 Terminologi graf
 Heavy rectangular knives used by butchers
 Trueing knife
 Medium dice cut size
 A hand surface on which you place foods to be cut
 For ad
 Jack the
 X-cut astm d6677
 What is a cheat cut?
 A cheat cut involves


