Retrieval of Separated Endodontic Files and Other Intracanal


- Slides: 17

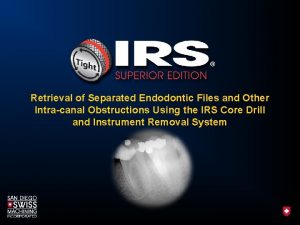
Retrieval of Separated Endodontic Files and Other Intra-canal Obstructions Using the IRS Core Drill and Instrument Removal System

IRS Core Drills IRS Instrument Removal System

IRS® Core Drill vs. Ultrasonics Minimal Dentin Removal Unnecessary Dentin Removal

1. Create straight line access.

2. Choose the IRS Core Drill which most closely relates in size to the coronal portion of the file. Separated Endodontic File

3. Place the IRS Core Drill over the head of the separated file. 4. Using a watch-wind motion, (cutting in a clockwise rotation) begin trephining around the file until there is 1 mm to 1. 5 mm of exposed instrument.

5. Remove the core drill.

6. Choose the color coded IRS instrument that corresponds to the core drill that was just used. (IRS assembly needs to be “unthreaded” when placing over obstruction. ) IRS Assembly (unthreaded) Core Drill

7. Drop the IRS assembly over the head of the exposed broken instrument.

8. Slowly engage the IRS screw wedge by threading in a counterclockwise rotation. (It is important to allow the lumen to “move” to its desired position to allow the broken instrument to “kick out” of the window).

9. Continue to thread the screw wedge until it is completely engaged with the obstruction (Tight).

10. Gently rotate entire assembly using a watchwind motion to loosen the obstruction. Continue to unwind and lift assembly until obstruction is removed.

Example of Silverpoint Removal 1. Radiograph of silverpoint. Photo’s courtesy of: Dr. Charles Agriesti, DDS Memphis, TN USA

Example of Silverpoint Removal Continued 2. Partial silverpoint removal. Photo’s courtesy of: Dr. Charles Agriesti, DDS Memphis, TN USA

Example of Silverpoint Removal Continued 3. Continued removal of silverpoint using Red IRS. Photo’s courtesy of: Dr. Charles Agriesti, DDS Memphis, TN USA

Example of Silverpoint Removal Continued 4. Radiograph of completed silverpoint removal and endodontic treatment. Photo’s courtesy of: Dr. Charles Agriesti, DDS Memphis, TN USA

. 4 mm (I. D. ) . 6 mm (I. D. ) . 8 mm (I. D. ) 1. 3 mm (I. D. ) Core Drills Sold Separately. Y See Instructions for Use. Phone: (855) 737 -9477 Outside USA: +1 -619 -470 -2375 www. sdswiss. com © 2007. No unauthorized reproductions without prior consent of San Diego Swiss Machining, Inc. IRS® is a registered trademark of San Diego Swiss Machining, Inc. Patent number 6, 227, 855 and other patents pending.
 Cmcp intracanal medicament
 Classification of root canal irrigants
 Ncic restricted files list
 Cjis meaning
 Dot powai files are binary files
 Endodontic diagnosis and treatment planning
 Endodontic instruments classification
 Irs endodontic system
 Obturating material
 Root canal obturation materials
 A simple pendulum of length 40 cm subtends 60
 Pictures of mixtures
 Trishna and krishna
 When did singapore merge with malaysia
 Spicules in sponges
 Self initiated other repair examples
 Allows the replication of only immutable files
 Advantage of serial file organization
