Respiratory System Structures Pair of Lungs Series of


- Slides: 13
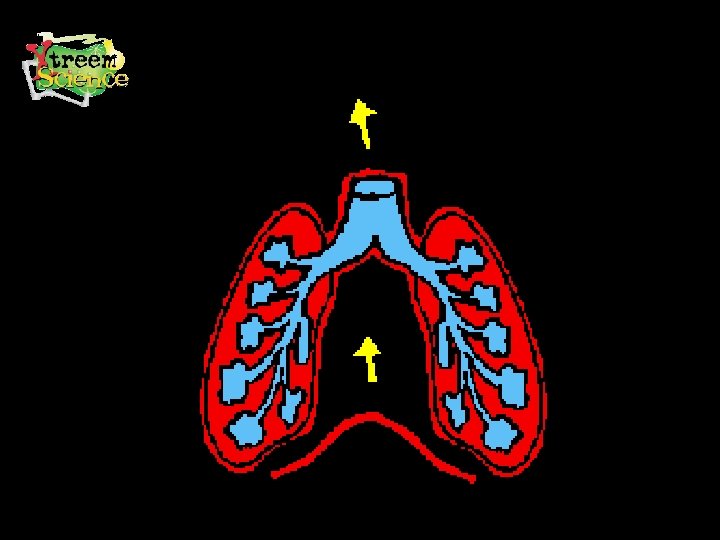
Respiratory System Structures • Pair of Lungs • Series of passageways – Trachea – Bronchioles – Alveoli • Diaphragm (thin sheet of smooth muscle)
Respiratory System Function • Involves all mechanisms that get O 2 to the cells • Gets rid of CO 2 • Formation of ATP for energy
Path Air Takes 1. 2. 3. 4. 5. 6. Air enters nose or mouth Passes Pharynx Moves past epiglottis Passes through larynx Trachea Lungs and their passageways
Respiratory System • I bring in the oxygen that is carried on the red blood cells…without me you’d have no oxygen to carry! • I carry the CO 2 (waste gas) out of the body. • The circulatory system needs me for gas exchange. • The muscles need oxygen to move. • The brain needs my oxygen to think.
Breathe Easy
ENGAGE Engage 1: • Obtain a pluck from Owen’s Sausage. Demonstrate how air goes in and out of their lungs. The lungs are very elastic and will expand greatly. Allow the students to look at the heart, lungs and trachea. Engage 2 1. Use the paper towel to clean and dry the mirror. 2. Hold the mirror near, but not touching, your mouth. 3. Exhale onto the mirror two or three times. 4. Examine the surface of the mirror. • What happens to the mirror? • Why does the mirror become fogged?
MODEL EXPLORE Explore 1 Construct a Lung Model • Have students work together in groups to construct a lung model Do-It-Yourself Lung Model http: //student. biology. arizona. edu/sciconn/respiratory/step 4. html
Assemble the “Lungs” • Step 1 • Step 2
Construct the “Chest Cavity” • Step 3 • Step 4
Prepare the “Diaphragm” • Step 5 • Step 6
Start “Breathing”
Breaths per Minute Explore 2 • BREATHER: All students sit quietly (lie down if possible) with hands placed over their stomachs or chests. • WATCHERS: The watchers must watch their partners and count the breaths taken in one minute (count ONE breathe for every time the stomach or chest rises). Teacher cues the watcher when to begin and when to stop after 60 seconds. After the 60 seconds, watchers tell the breathers how many breaths were counted. Then all breathers record their at rest information on the index card or sticky notepaper. Students trade places and repeat the activity. Next, students do jumping jacks or run in place for 60 seconds before recording breathing rates as described above.