REMOUNT procedure INTRODUCTION Defn Any method used to


. �Not to")

 Various movements")
 The sequence of steps should be as follows: 1. Restore")


 are recorded. �Before proceeding CR is")

- Slides: 45
REMOUNT procedure
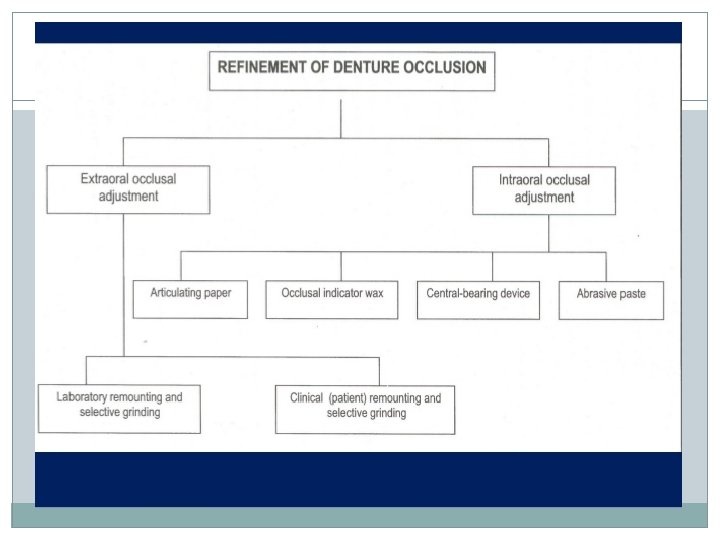
INTRODUCTION �Defn. - “Any method used to relate restorations to an articulator for the analysis and/or to assist in the development of a plan for occlusal equilibration or reshaping” – GPT 8 �Accurate location and correction of the occlusal errors can be done. �Two types- Laboratory remounting Clinical remounting.
What is the ideal occlusal contact? At first contact, even maximum intercuspation at CR without denture shifting or instability & without pain *
Causes of Occlusal Errors �Errors in impressions �Ill-fitting trial denture bases �Inaccurate jaw relation records �Errors during transfer of the records to articulator �Incorrect arrangement of posterior teeth �Dimensional changes during curing �Processing faults……. . *
processing errors: 1. Dimensional changes in the wax after setting up of the teeth. This should be very slight if the occlusion of the wax-up was carefully examined before flasking. 2. The heat cured acrylic resin expands and contracts during the curing procedure. It expands as the polymerizing temperature is reached then starts to contract (polymerization shrinkage). Then as it cools to room temperature it contracts again. The total effect of this dimensional change is a slight shrinkage which may change the position of the teeth. 3. The expansion of the investing material during the processing. 4. The pressure of the flask press.
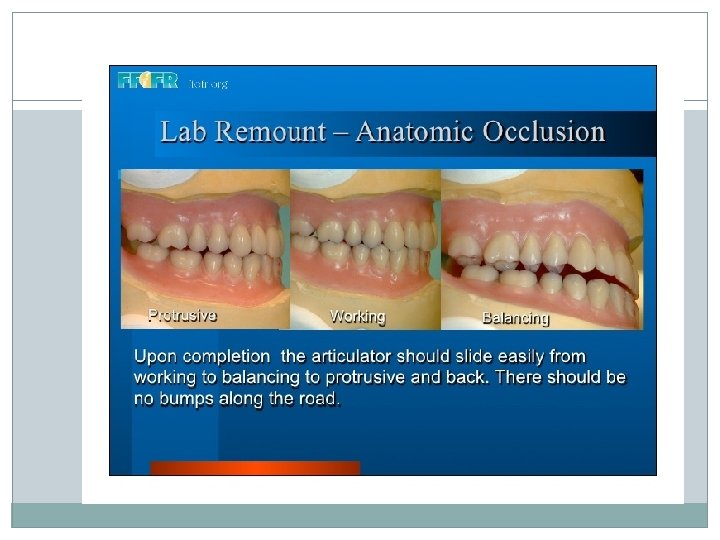
Laboratory remount procedure and selective grinding: Objective: to correct errors in the occlusion due to slight changes in the position of the teeth that may have occurred during waxing, packing and processing. To obtain a smooth even contact of the teeth in centric and eccentric positions.
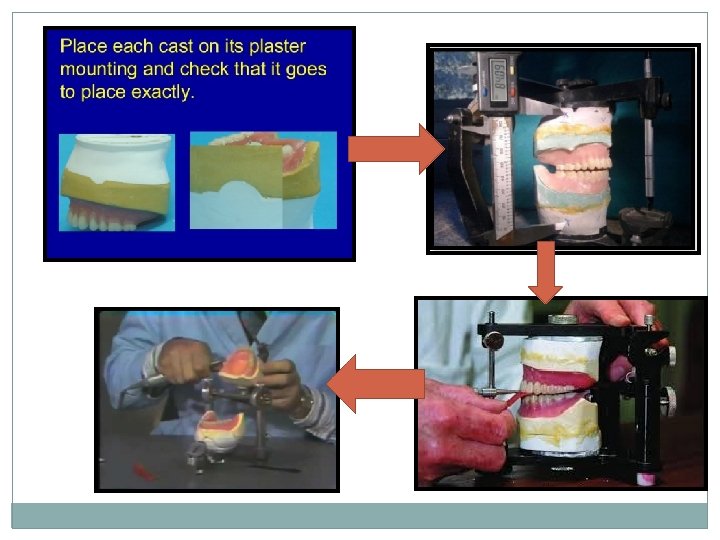
*In order to correct these errors, the dentures are returned to the articulator after deflasking. The casts are repositioned on the original plaster mountings using the key (index) in the base of the cast. The casts are attached to the plaster mountings by sticky wax. *The condylar elements of the articulator are locked in the centric relation and the articulator is closed. If the incisal pin does not touch the incisal guide table the occlusal vertical dimension has been changed and must be re-established.
LABORATORY REMOUNT �Used to correct processing errors only (ex. Mild tooth displacement). �Not to correct the errors made during impression making, jaw relation etc. �The denture should not be separated from the cast after processing.
Upper and lower casts reattached to the articulator (used for teeth arrangement) Various movements are carried out in the articulator Occlusal interferences are identified using articulating paper Identified contacts are ground Denture is separated from its cast and polished
Occlusal adjustment: (Selective grinding) The sequence of steps should be as follows: 1. Restore the vertical dimension. 2. Refine centric occlusion. 3. Perfect working and balancing occlusion. 4. Correct protrusive occlusion.
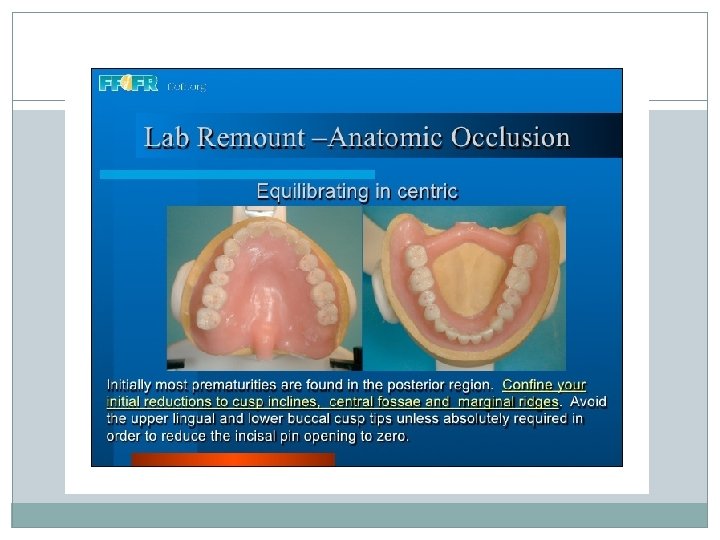
*Selective grinding is carried out using articulating paper to mark the area of premature contacts. Procedure: 1. Adjust the articulator to the proper setting. Use red articulating paper for making centric occlusion and blue articulating paper for the eccentric movements. 2. Grind the teeth with small green or diamond stones.
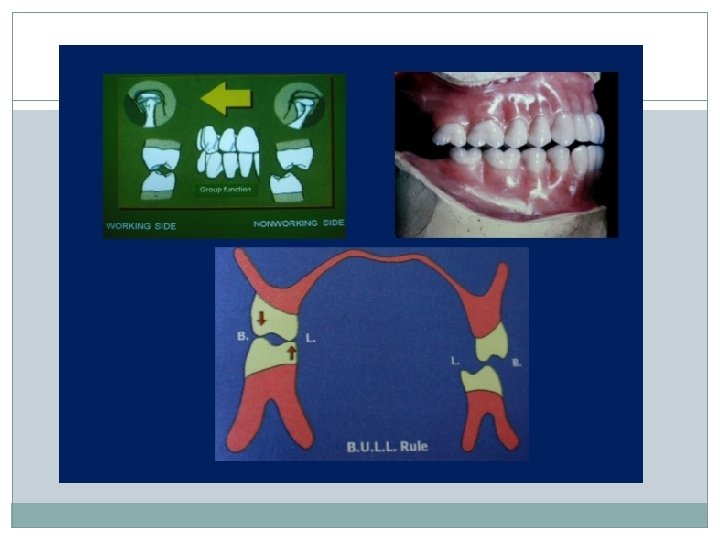
Basic Tooth Positions Balancing Contacts Centric Occlusion Working Contacts
How to Recognize Premature Contacts? � A dark ring with a light center usually denotes a premature contact � You should distinguish betw. marks made by normal occlusal contacts and those of premature contacts � Articulating paper should not be reused many times and should be changed often.
3. Restore the vertical dimension: A lateral shift of a tooth or a tooth shifted to produce a high cusp can increase the vertical dimension. Do not grind the cusp tips unless it is high in every excursion, but rather reduce the fossa or inclined plane of the cusp. Error: high cusp grind the fossa. Error: Lateral shift, buccal shift or lingual shift grind the cusp inclines
4. Obtain even contact in centric occlusion: a. Lock the upper arm of the articulator in centric relation. Check the occlusion by opening and closing the articulator, and lightly tapping the teeth together on red articulating paper. b. Loosen the locks on the condylar elements and move the denture in eccentric movements. Using blue articulating paper between the teeth. - If the cusp is high in centric occlusion only deepen the fossa. - If the cusp is high in both centric and eccentric position reduce the cusp.
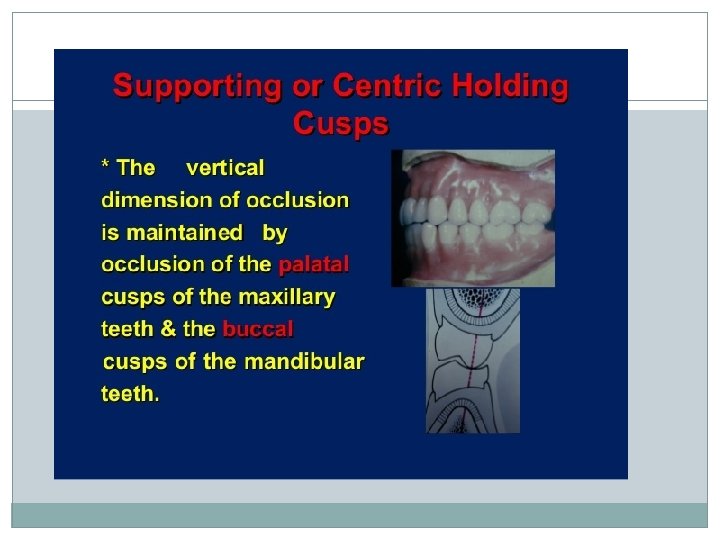
Reduce the teeth until the incisal pin touches the incisal guide table and uniform contact exists on all posterior teeth. Anterior teeth should not touch in centric occlusion. 5. Adjust the working relation: Loosen the centric locks and use blue articulating paper. As a rule in selective grinding the centric holding cusps are not ground. These are : the maxillary lingual cusps and the mandibular buccal cusps. These cusps are essential to maintain the recorded vertical dimension. If interferences exists in the working side reduce either the upper buccal cusps or the lower lingual cusps. This is called B. U. L. L. Rule
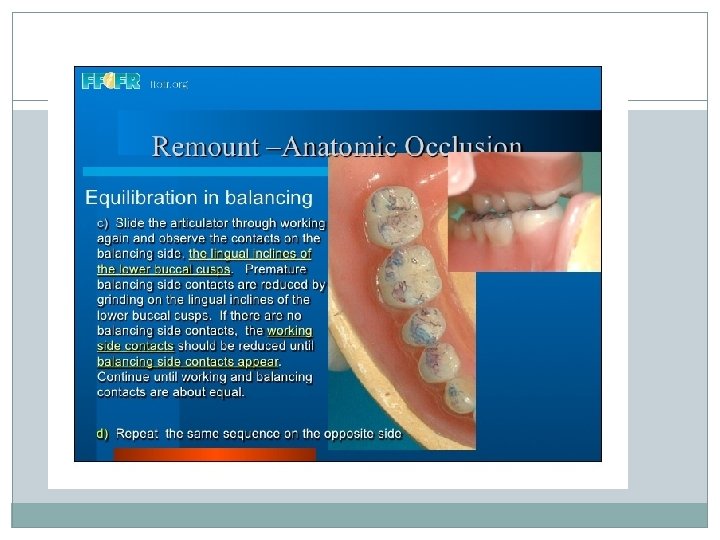
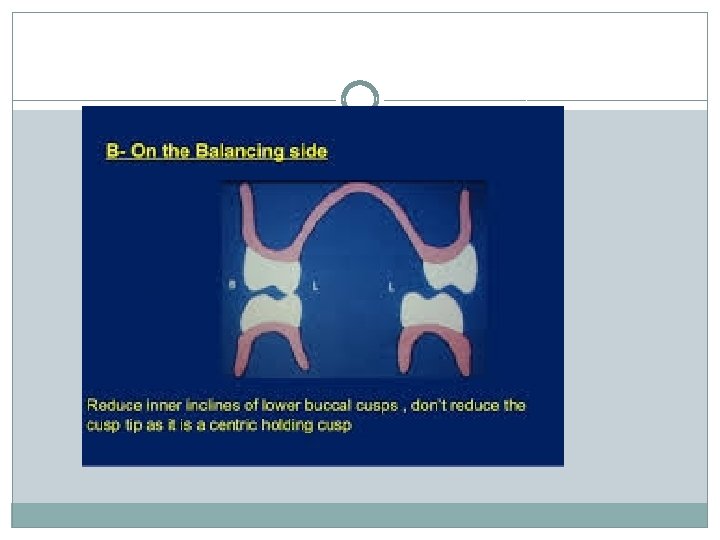
In the bull rule reduce the lingual inclines of the upper buccal cusp and the buccal inclines of the lower lingual cusps. 6. Adjust the balancing relation: Rule : If interference exists on the balancing side reduce the lingual slope of the lower buccal cusp. The lingual buccal cusp is a centric holding cusp so grind carefully and do not reduce the cusp tip.
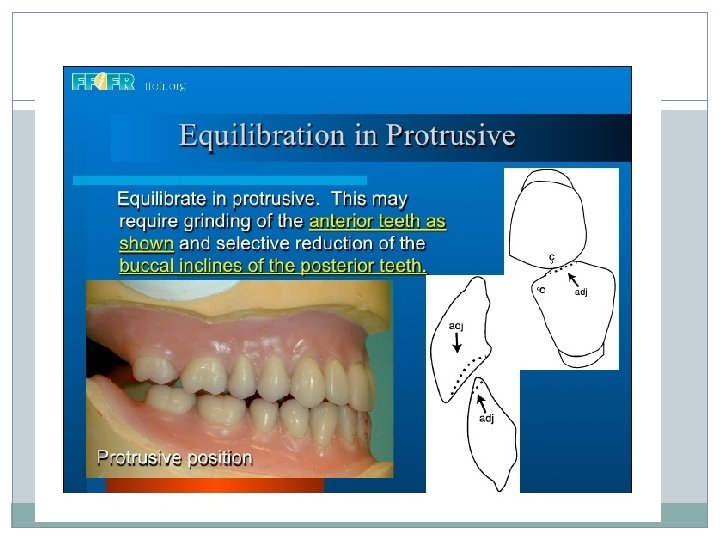
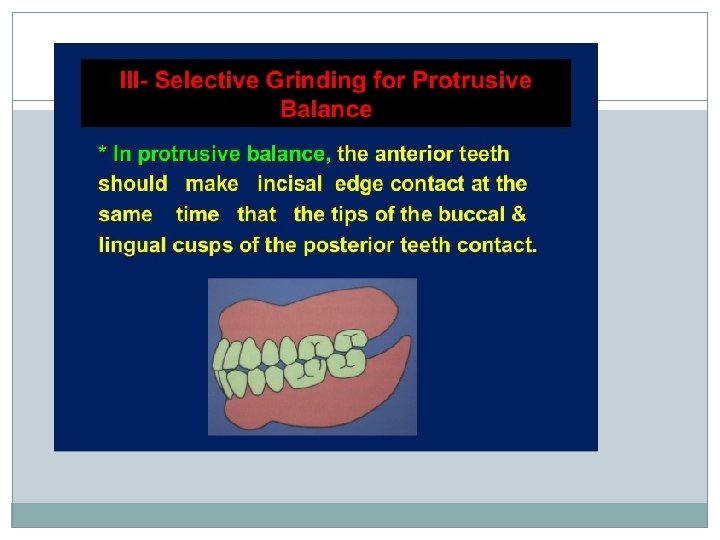
7. Adjust protrusive relation: a. If the anterior teeth have heavy contact with no contact on the posterior teeth grind the labial surface of the lower anterior and the palatal surface of the upper anteriors. b. If heavy posterior contact exists with no anterior contact reduce the distal inclines of the maxillary cusps and the mesial inclines of the mandibular cusps.
8. Carborundum paste milling: The articulator is moved through all the excursive movements using carborundum paste to smooth the various gliding surface of the teeth. Milling must be done lightly to prevent losing balancing contacts which might decrease the vertical dimension. a. Move the articulator into right lateral, left lateral and protrusive movements. b. Move the articulator in a circular movement. Use light strokes do not force or press.
9. When milling is completed remove all traces of carborundum. 10. The ground surfaces of the teeth must be polished when grinding has been completed.
Laboratory Remounting * Disadvantages Cannot correct errors made while recording jaw relations Cannot correct errors made while mounting the casts on the articulator Does not compensate changes caused by settling of the denture bases
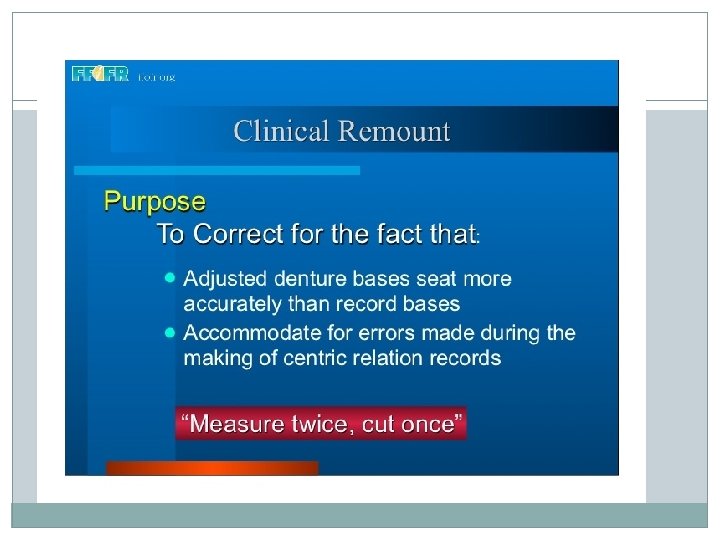
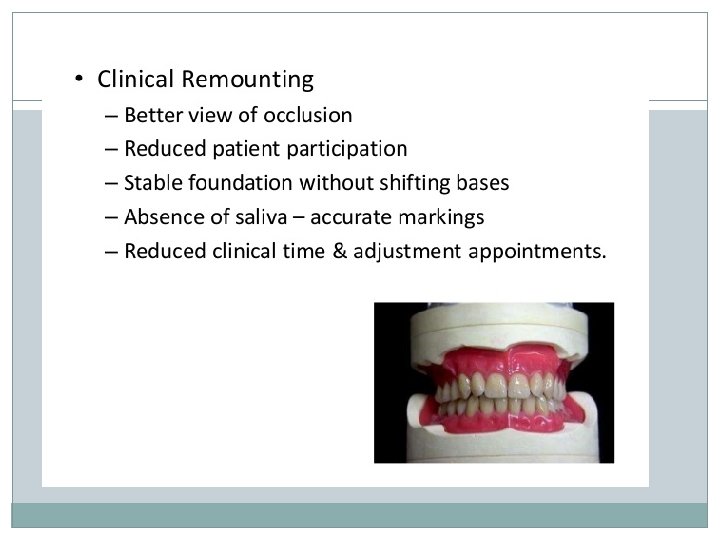
CLINICAL REMOUNT �Done using inter-occlusal check records. �These records are made in centric and eccentric positions
Clinical Remounting Procedure �Guide mandible into CR �Obtain interocclusal record of CR.
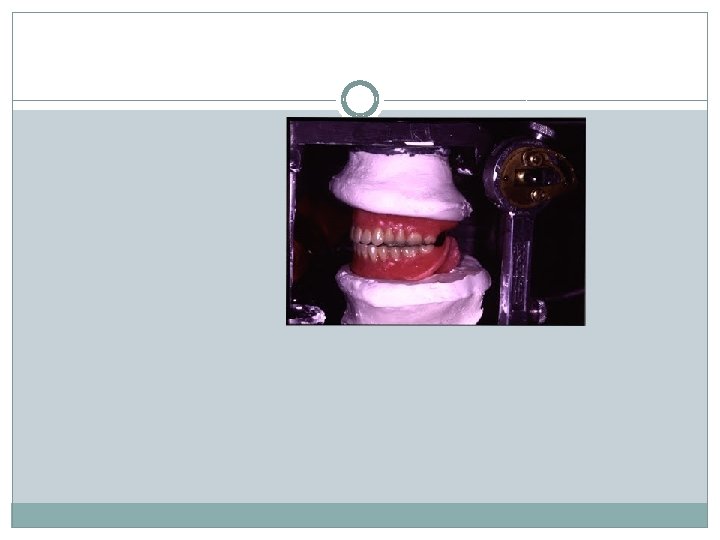
Remounting using CR record. Articulator is programmedcondylar elements in centric position Maxillary denture mounted onto the articulator Using remount cast or remount jig (occlusal index) Mandibular denture is positioned using centric record and articulated
Clinical Remounting Procedure �Mount upper denture using remounting jig �Mount lower denture
Remounting using eccentric relation record�Eccentric records (usually protrusive) are recorded. �Before proceeding CR is verified. �Articulator is programmed according to these records. �L=(H/8)+12 L= lateral condylar guidance H= horizontal condylar guidance value
Direct Intraoral Correction Disadvantages § Requires a lot of pt cooperation § Pt should have good neuromuscular control § Saliva § Inaccurate closure by pt § Misleading due to resiliency of tissues and shifting of denture bases