Register Login Populate data manually OR Import Nat


- Slides: 23
Register Login Populate data manually OR Import Nat files Export NAT files Submit Validate NAT files
Registration Additional text or comments here
Login Provide your registered username Provide your password Click Log In button Click this link if you New user ? Register after punching in yourhave forgotten either before you can login username and your username or password your password
Home Screen : Shows the global navigation menu
Back button. Takes you to the previous screen Global Navigation : available in all the screens. Helps quickly navigate to any screen from any screen.
Bottom Action button bar when no record is selected Filter the records : click Filter button > punch in search term and hit enter Bottom Action button bar with Edit/Delete/View buttons when a record is selected Delete a record
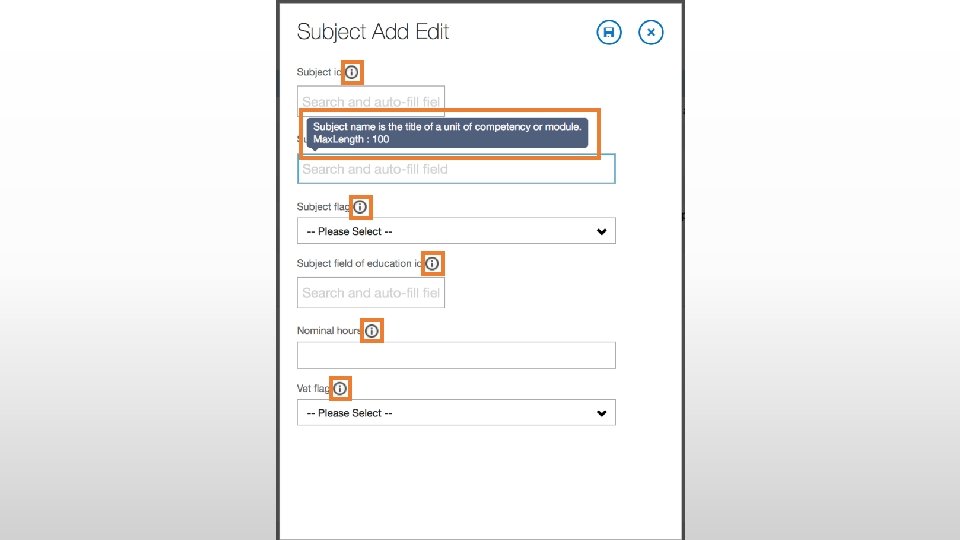
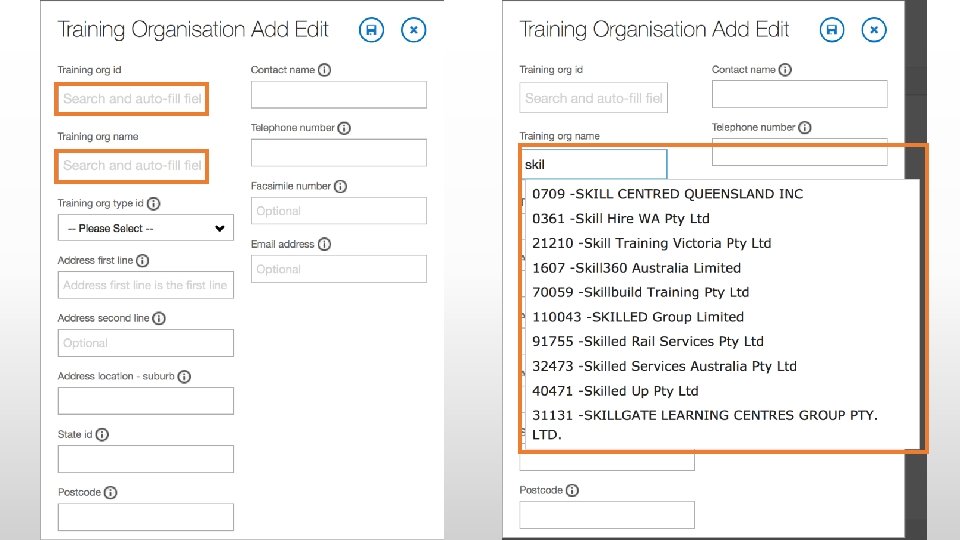
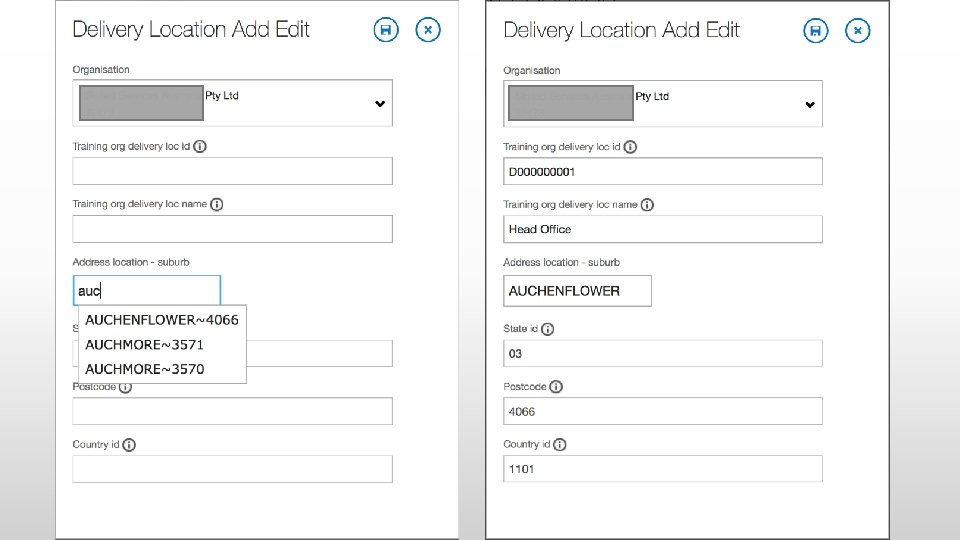
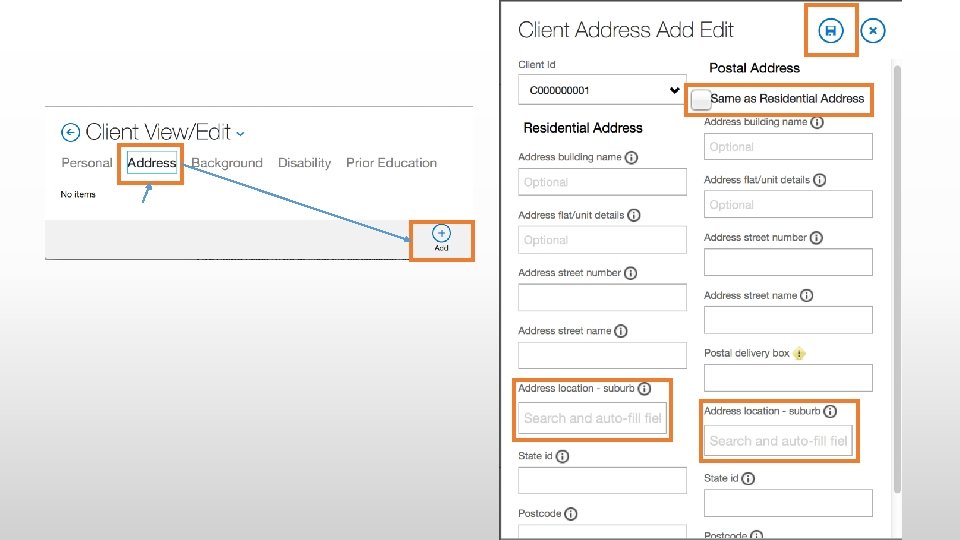
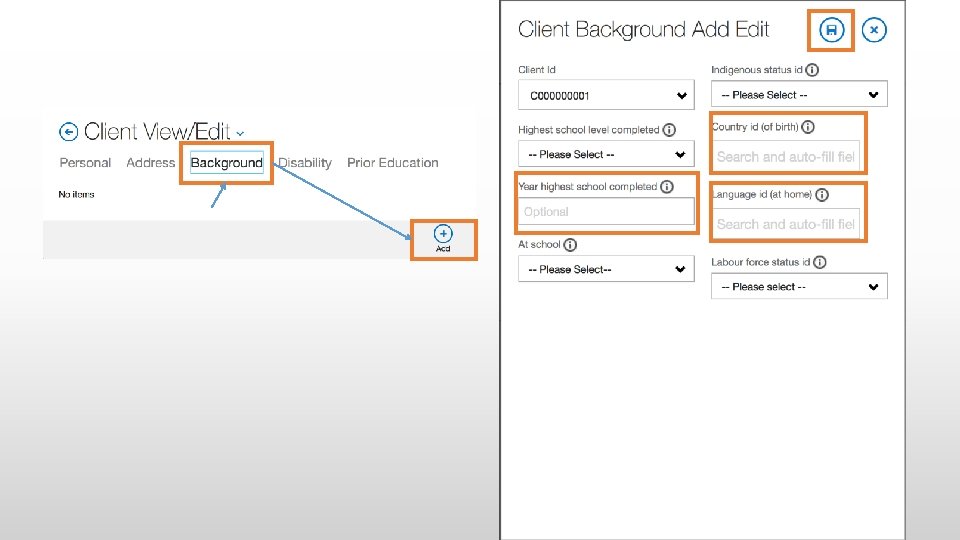
‘Search and auto-fill field’ help fill the form FASTER. Click Add Button to create a new record
Start typing and suggestions will show up matching your search term. Select 1 from the suggestions list. Confirmation on selecting 1 from suggestions list.
Hit Save Button Ta Da !! The form is auto-completed for you based on the choice you selected in suggestions list
Fill the form and hit save Only 1 telephone number is required out of the 3 numbers. ‘@@’ for DD and MM ‘@@@@’ for YYYY when not specified. Client ID is unique On Save, this screen shows up. Click on the tabs to enter Address, Background, Disability and Prior Education data about the client.
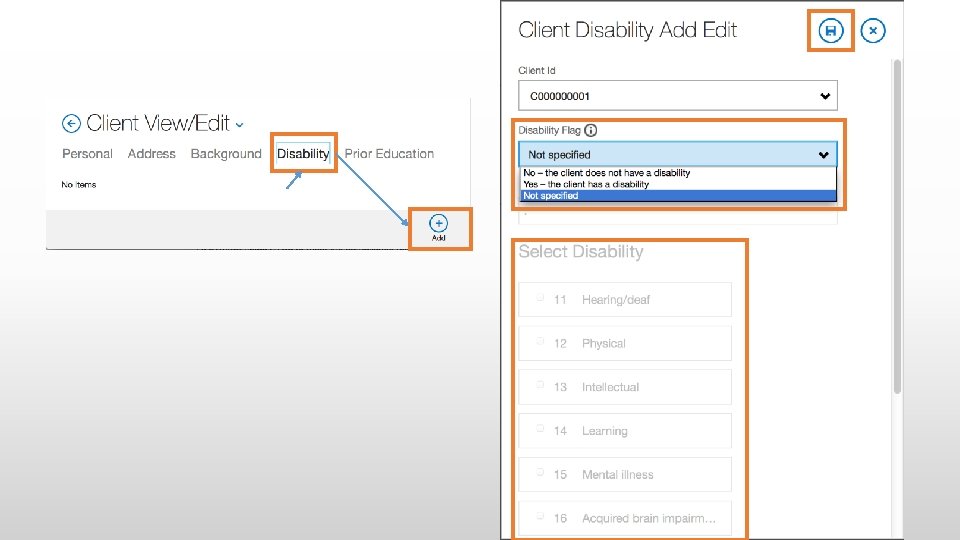
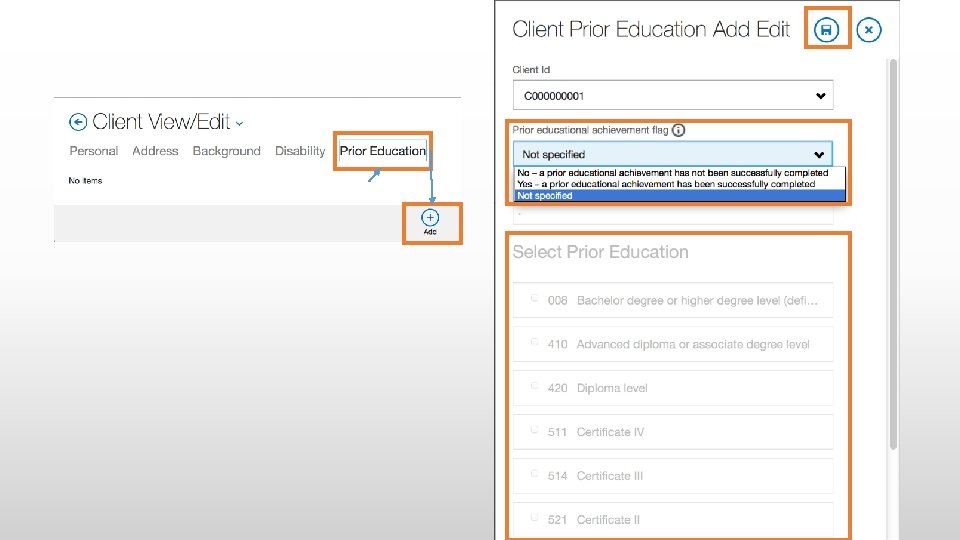
Tabs Note : Subject tab is Read. Only here. Check the image below to see how subjects are created On save, this screen shows up Now click ‘Subject tab’ Fill ‘Client tab’ fields and click Program tab Fill ‘Program tab’ fields and hit save
This screen shows up on saving subject. Add more subject records if needed Fill ‘Details tab’ fields and click ‘State Data tab’ Fill ‘Subject tab’ fields and click ‘Details tab’ Fill ‘State Data tab’ fields and click Save
Search existing client by code or name Search existing program by code or name
Hit Save to start Export process Sets start and end date. You can manually change the start & end date
Create a Zip folder with AVS verified NAT files. Please verify the filenames should match exactly as shown in the image. Upload the folder, check the checkbox and hit ‘Import Files’ button to start import process. If your Ace Avetmiss account has data, then you will not be able to Import. You can delete all you data using the ‘Delete All Data’ button. Once your data is deleted, you will be able to import.