
Reduction Lino Process Plan your design Consider how
- Slides: 2
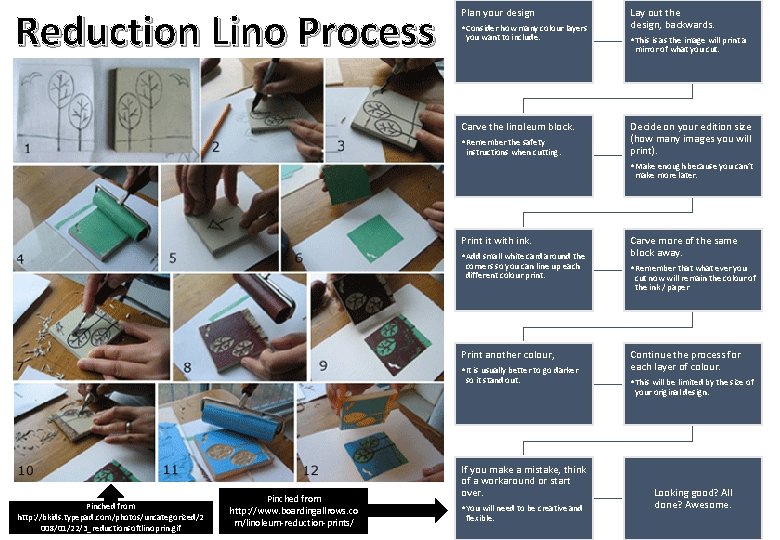
Reduction Lino Process Plan your design • Consider how many colour layers you want to include. Lay out the design, backwards. • This is as the image will print a mirror of what you cut. Carve the linoleum block. • Remember the safety instructions when cutting. Decide on your edition size (how many images you will print). • Make enough because you can’t make more later. Print it with ink. • Add small white card around the corners so you can line up each different colour print. Print another colour, • It is usually better to go darker so it stand out. Carve more of the same block away. • Remember that what ever you cut now will remain the colour of the ink / paper Continue the process for each layer of colour. • This will be limited by the size of your original design. Pinched from http: //bkids. typepad. com/photos/uncategorized/2 008/01/22/3_reductionsoftlinoprin. gif Pinched from http: //www. boardingallrows. co m/linoleum-reduction-prints/ If you make a mistake, think of a workaround or start over. • You will need to be creative and flexible. Looking good? All done? Awesome.