Quadrant Fabrication Study KEK Toshikazu TAKATOMI Yuichi WATANABE

Quadrant Fabrication Study KEK Toshikazu TAKATOMI Yuichi WATANABE 2 nd Collaboration Meeting on X-band Accelerator Structure Design and Test-Program 13 -15 May 2008
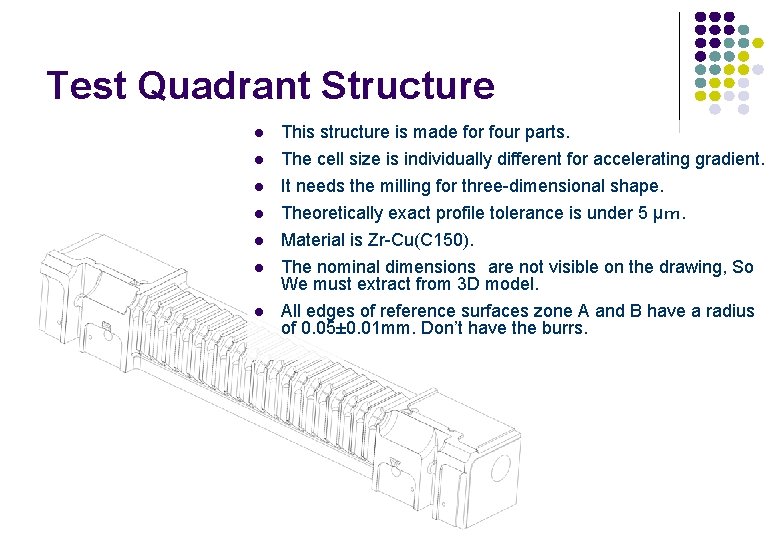
Test Quadrant Structure l This structure is made for four parts. l The cell size is individually different for accelerating gradient. It needs the milling for three-dimensional shape. Theoretically exact profile tolerance is under 5 μm. Material is Zr-Cu(C 150). The nominal dimensions are not visible on the drawing, So We must extract from 3 D model. All edges of reference surfaces zone A and B have a radius of 0. 05± 0. 01 mm. Don’t have the burrs. l l l

The drawing of test Quadrant Structure Beam Coupler Cavity l Reference surface l l l Coupler Flatness :under 5μm Square ness : under 5μm Cavity (Zone A) l l Theoretically exact profile tolerance : 5 μm Surface roughness :Ra 0. 1
Issues in processing l To keep in straight l l l The bending must be under 5μm for needs straight of beam line. Material is Zr-Cu(C 150: φ65× 300). It can't have heat anneal. We have to get the processing which doesn't bend. l Dimension and theoretically exact profile need high precision l Error factor is variations in temperature and in machine motion. We have to study for error factor. l Quality of Surface roughness l We have to get under Ra 0. 1 in surface roughness. but, it gets difficult at ball-nosed end mills. We have to study for the processing.
Points of Fabrication l Fabrication was the 5 -axis precision machine that is controlled with constant temperature at 23± 0. 5 ℃ degrees. l CAM data was made to change in 23 ℃ degrees temperature. l We studied to find the best processing. l Alignment of the machine and shape of the tools was measured to keep high precision. l It is processed four times to repair bend.
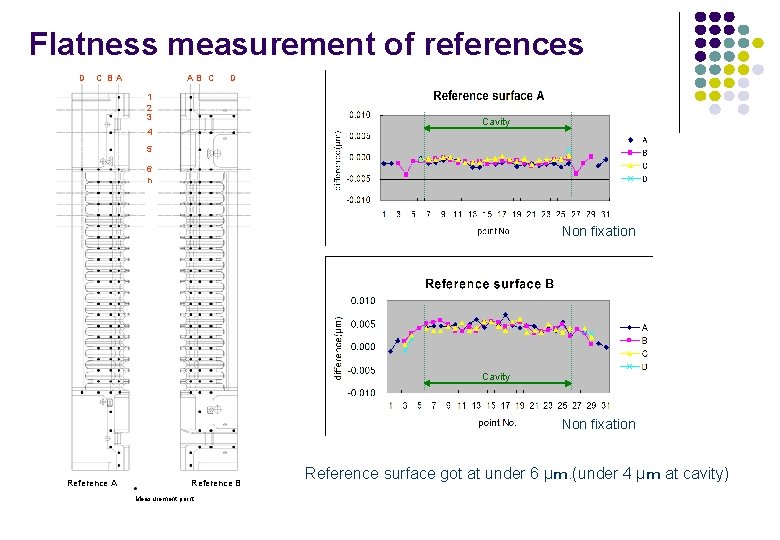
Flatness measurement of references D C BA AB C D 1 2 3 Cavity 4 5 6 n Non fixation Cavity Non fixation Reference A Reference B Measurement point Reference surface got at under 6 μm. (under 4 μm at cavity)
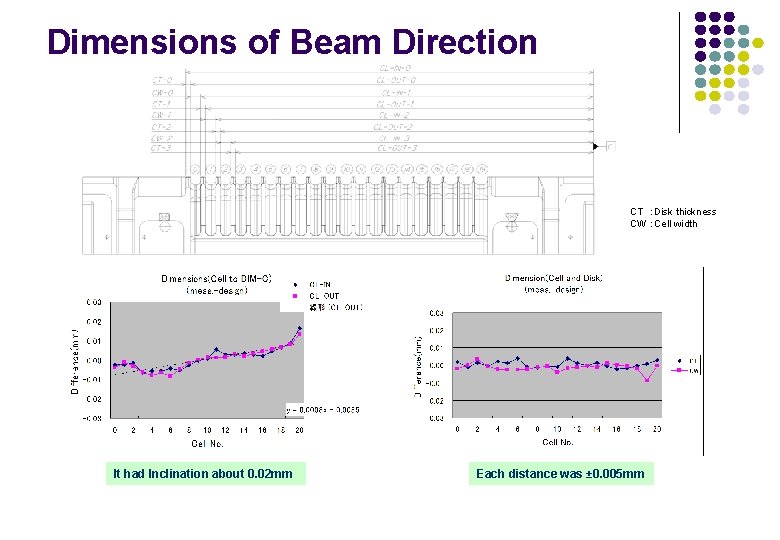
Dimensions of Beam Direction CT :Disk thickness CW :Cell width It had Inclination about 0. 02 mm Each distance was ± 0. 005 mm
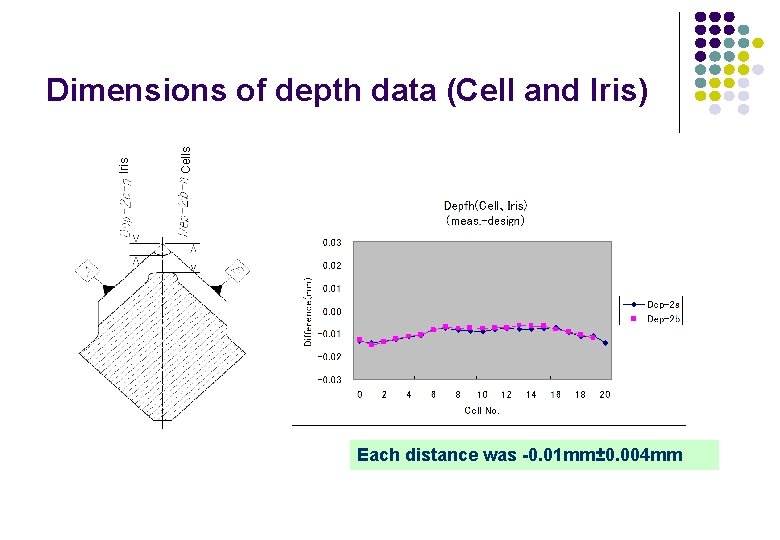
Cells Iris Dimensions of depth data (Cell and Iris) Each distance was -0. 01 mm± 0. 004 mm
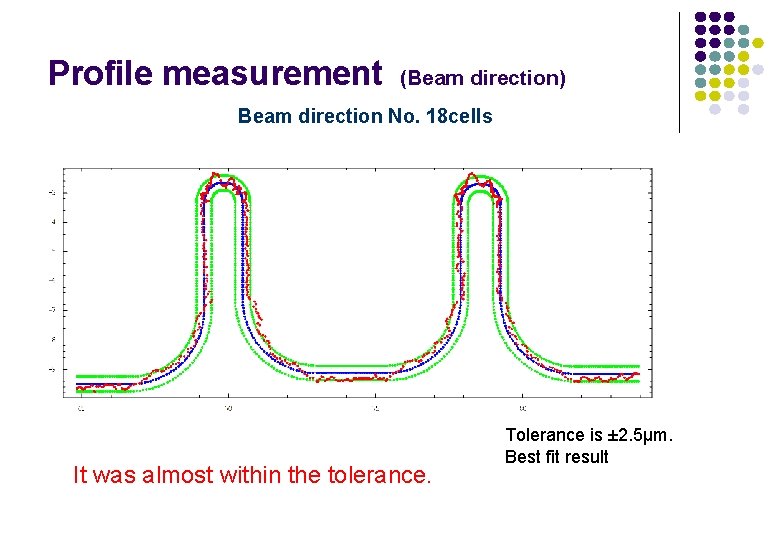
Profile measurement (Beam direction) Beam direction No. 18 cells It was almost within the tolerance. Tolerance is ± 2. 5μm. Best fit result
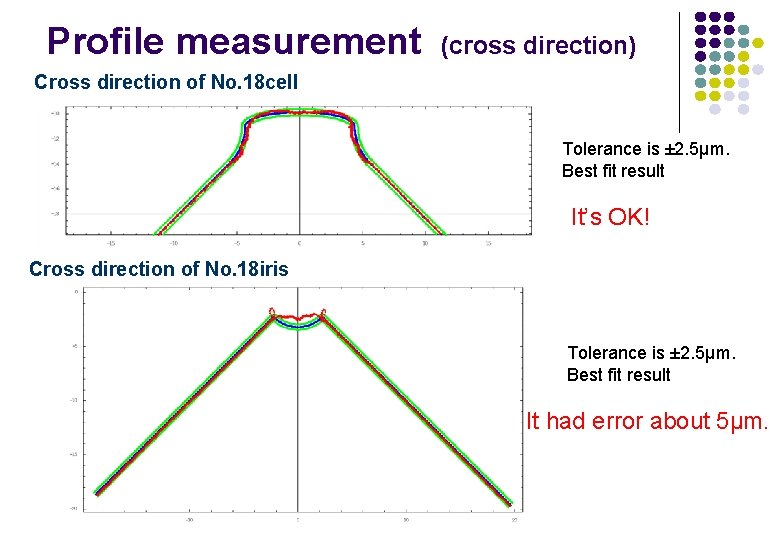
Profile measurement (cross direction) Cross direction of No. 18 cell Tolerance is ± 2. 5μm. Best fit result It’s OK! Cross direction of No. 18 iris Tolerance is ± 2. 5μm. Best fit result It had error about 5μm.
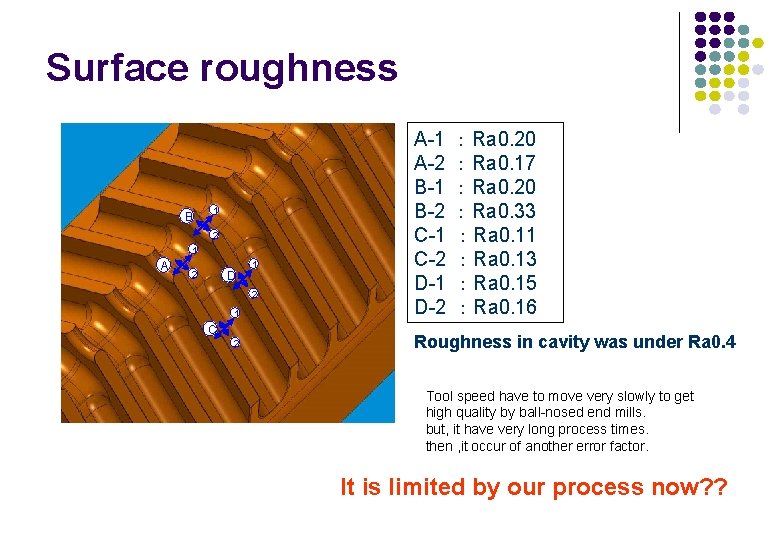
Surface roughness B 1 A-2 B-1 B-2 C-1 C-2 D-1 D-2 2 Roughness in cavity was under Ra 0. 4 1 2 1 A 2 D 1 2 C : Ra 0. 20 : Ra 0. 17 : Ra 0. 20 : Ra 0. 33 : Ra 0. 11 : Ra 0. 13 : Ra 0. 15 : Ra 0. 16 Tool speed have to move very slowly to get high quality by ball-nosed end mills. but, it have very long process times. then , it occur of another error factor. It is limited by our process now? ?
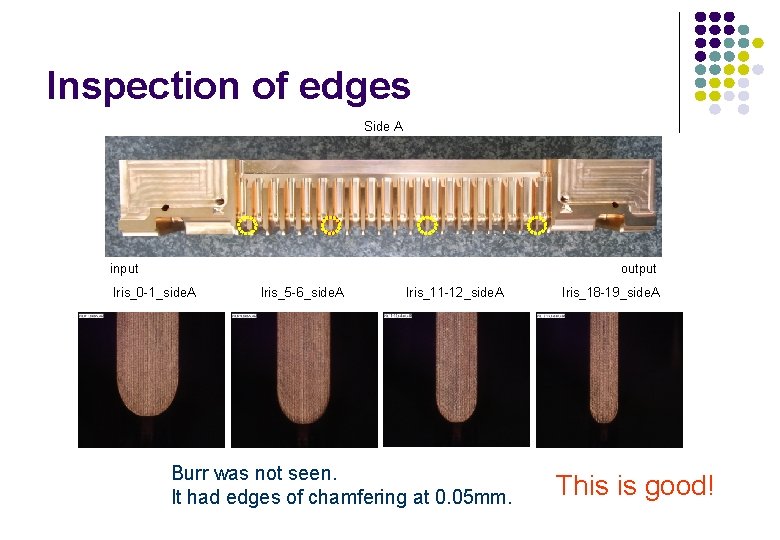
Inspection of edges Side A input output Iris_0 -1_side. A Iris_5 -6_side. A Iris_11 -12_side. A Burr was not seen. It had edges of chamfering at 0. 05 mm. Iris_18 -19_side. A This is good!
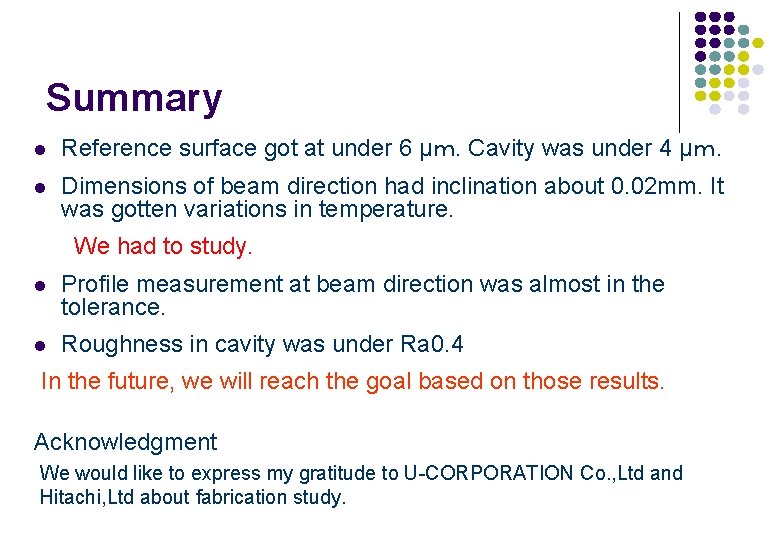
Summary l Reference surface got at under 6 μm. Cavity was under 4 μm. l Dimensions of beam direction had inclination about 0. 02 mm. It was gotten variations in temperature. We had to study. l Profile measurement at beam direction was almost in the tolerance. l Roughness in cavity was under Ra 0. 4 In the future, we will reach the goal based on those results. Acknowledgment We would like to express my gratitude to U-CORPORATION Co. , Ltd and Hitachi, Ltd about fabrication study.
- Slides: 13