PUSAT PENGAJIAN DIPLOMA UNIVERSITI MALAYSIA PERLIS Uni MAP
![40 Units Conversions for Temperature From Celsius To Celsius Fahrenheit [°F] = ( [°C] 40 Units Conversions for Temperature From Celsius To Celsius Fahrenheit [°F] = ( [°C]](https://slidetodoc.com/presentation_image_h/2683d20be7c5ebb92acbe625b3fa9d8b/image-40.jpg)
- Slides: 40

PUSAT PENGAJIAN DIPLOMA UNIVERSITI MALAYSIA PERLIS (Uni. MAP) DNT 245 SENSORS & MEASUREMENTS Chapter 1 General Characteristics Of Measurement System Lecturer : Nor Shaifudin Bin Abdul Hamid

Overview 2 OVERVIEW DEFINITION OF SENSOR & MEASUREMENT GENERALIZED MEASUREMENT SYSTEM VALIDITY OF MEASUREMENTS – TYPES OF ERROR QUALITY PARAMETERS OF MEASUREMENT UNITS & STANDARD MEASUREMENT

3 What are Sensors and Transducers? SENSOR is a device that has a characteristic that changes in a predictable way when exposed to the stimulus it was designed to detect. Example: When measuring temperature, are not directly measuring the temperature of an object, but measuring a sensors change in resistance or the amount of voltage it produces from being exposed to a temperature.

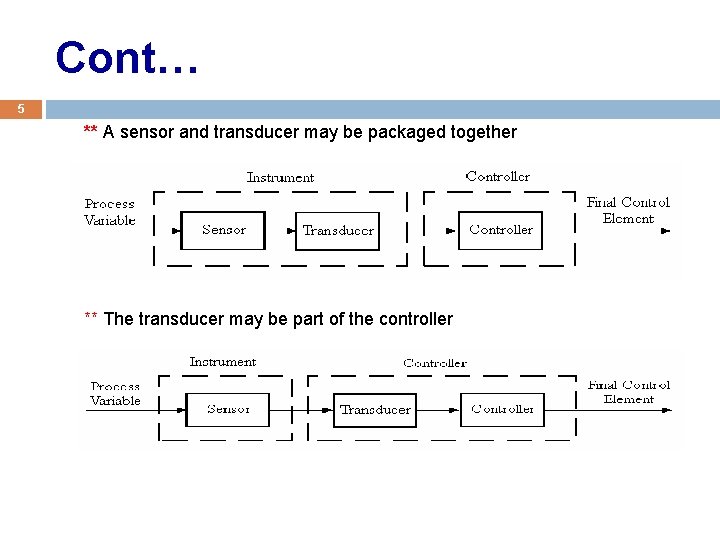
Cont… 4 TRANSDUCER is a device that converts one form of energy into another. ** A transducer will convert the output of the sensor into a standard signal that a controller can use. ** The output of a sensor may be a mechanical movement, or a change in size or position, or a nonstandard electrical signal. **The output of a sensor may even be

Cont… 5 ** A sensor and transducer may be packaged together ** The transducer may be part of the controller

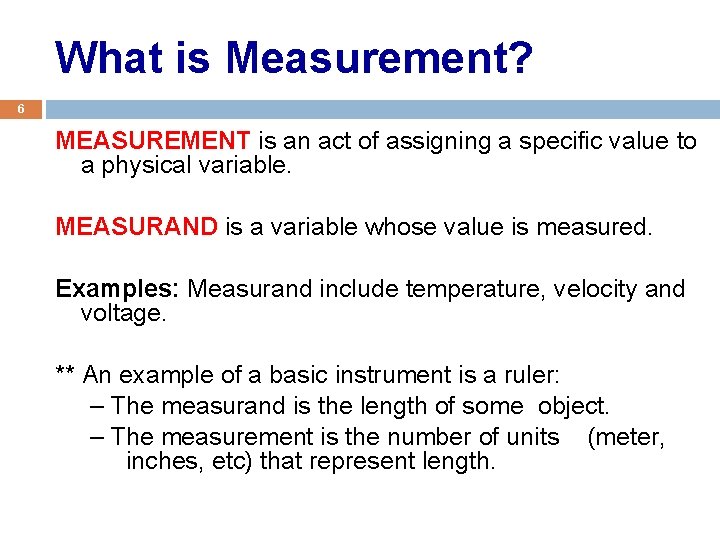
What is Measurement? 6 MEASUREMENT is an act of assigning a specific value to a physical variable. MEASURAND is a variable whose value is measured. Examples: Measurand include temperature, velocity and voltage. ** An example of a basic instrument is a ruler: – The measurand is the length of some object. – The measurement is the number of units (meter, inches, etc) that represent length.

Why do we need Sensors & Measurements? 7 q q To determine various parameters/ information of the system or a process. To control the system variables (temperature, pressure, flow rate. . ) based on the collected measurement data. ** Currently, automatic control systems are widely used in process industries (oil refineries, chemical plants. . ) and modern sophisticated systems (missile guidance, radar tracking system. . )

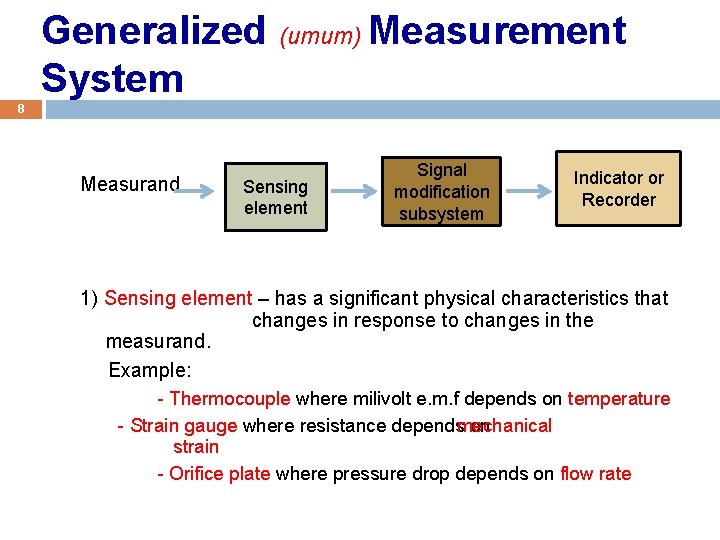
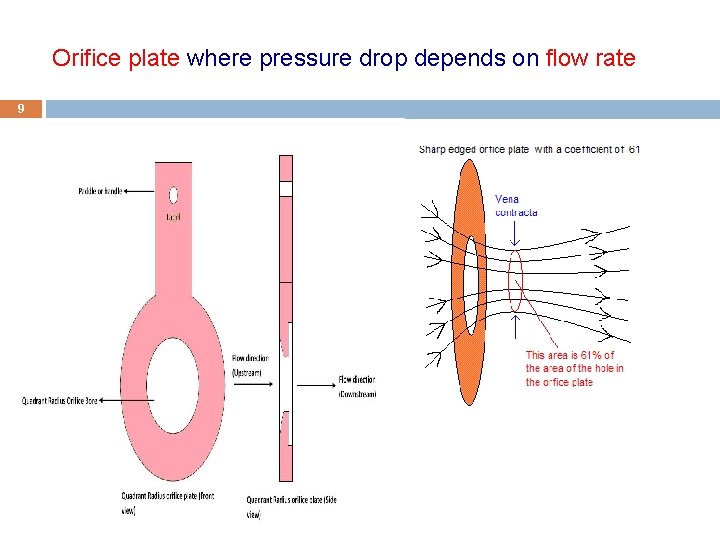
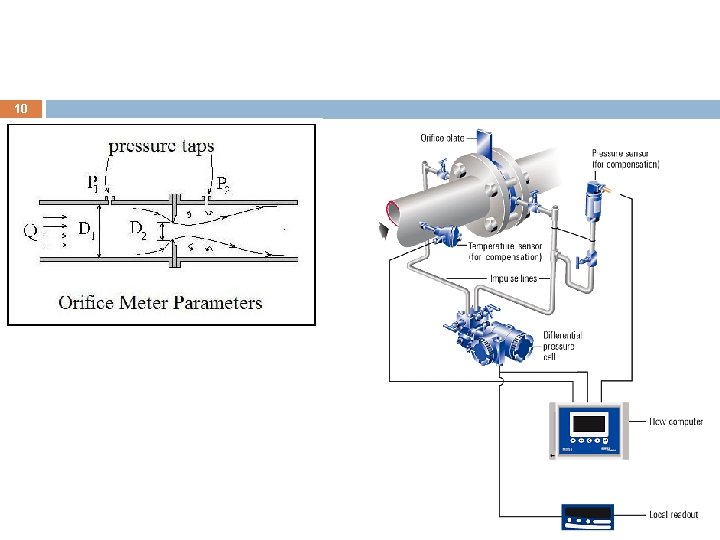
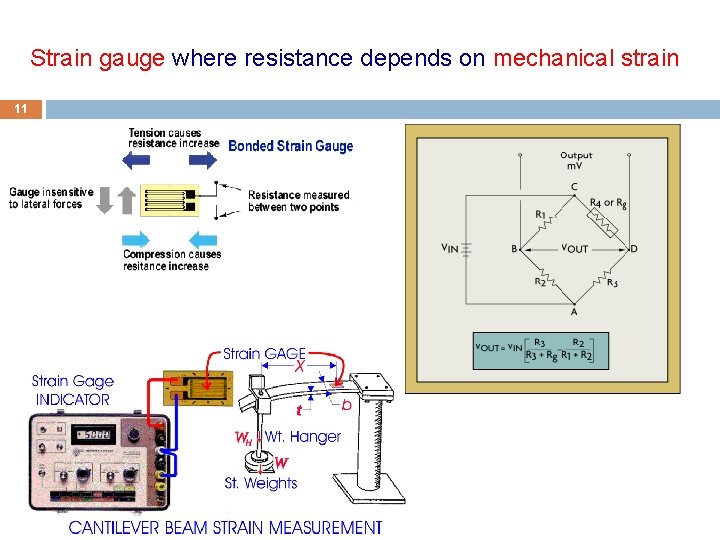
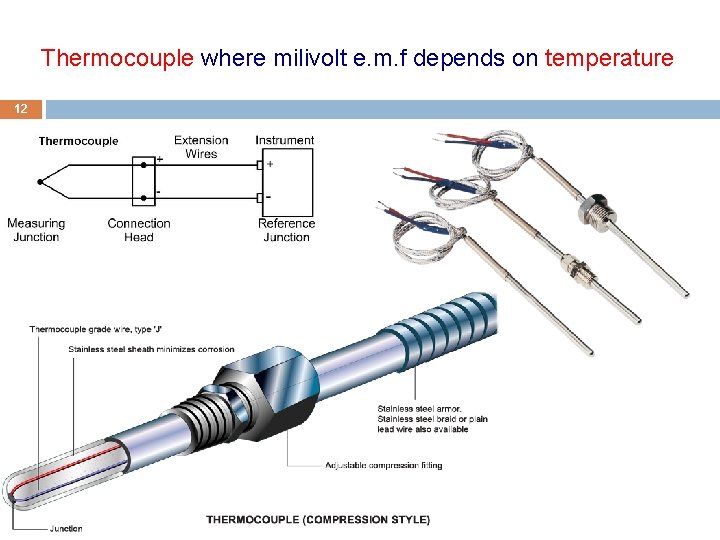
Generalized (umum) Measurement System 8 Measurand Sensing element Signal modification subsystem Indicator or Recorder 1) Sensing element – has a significant physical characteristics that changes in response to changes in the measurand. Example: - Thermocouple where milivolt e. m. f depends on temperature - Strain gauge where resistance depends on mechanical strain - Orifice plate where pressure drop depends on flow rate

Orifice plate where pressure drop depends on flow rate 9

10

Strain gauge where resistance depends on mechanical strain 11

Thermocouple where milivolt e. m. f depends on temperature 12

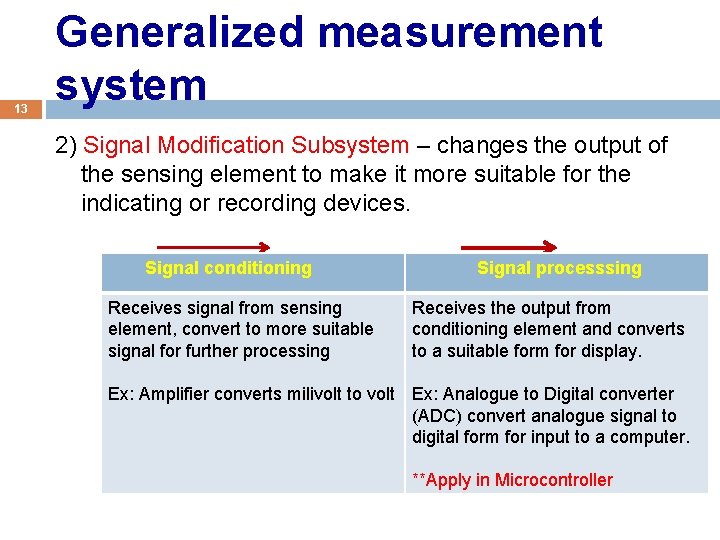
13 Generalized measurement system 2) Signal Modification Subsystem – changes the output of the sensing element to make it more suitable for the indicating or recording devices. Signal conditioning Signal processsing Receives signal from sensing element, convert to more suitable signal for further processing Receives the output from conditioning element and converts to a suitable form for display. Ex: Amplifier converts milivolt to volt Ex: Analogue to Digital converter (ADC) convert analogue signal to digital form for input to a computer. **Apply in Microcontroller

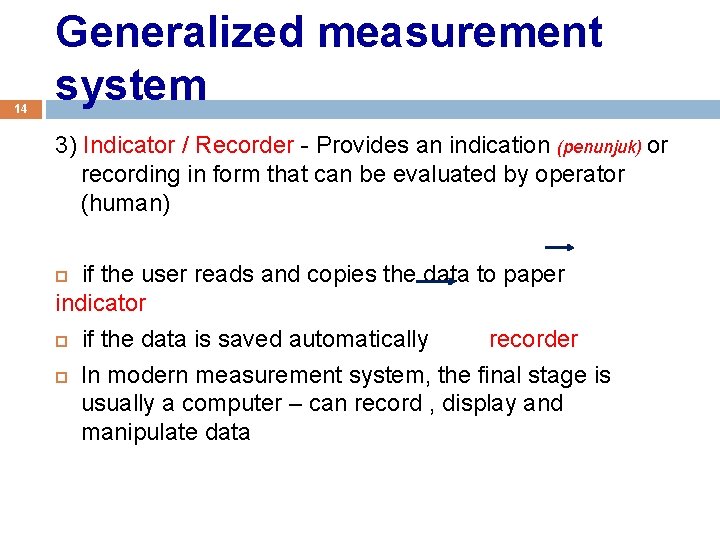
14 Generalized measurement system 3) Indicator / Recorder - Provides an indication (penunjuk) or recording in form that can be evaluated by operator (human) if the user reads and copies the data to paper indicator if the data is saved automatically recorder In modern measurement system, the final stage is usually a computer – can record , display and manipulate data

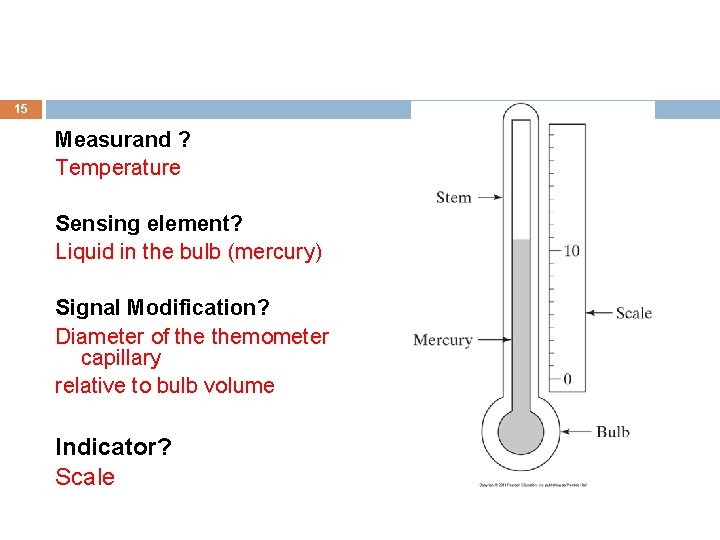
15 Measurand ? Temperature Sensing element? Liquid in the bulb (mercury) Signal Modification? Diameter of themometer capillary relative to bulb volume Indicator? Scale

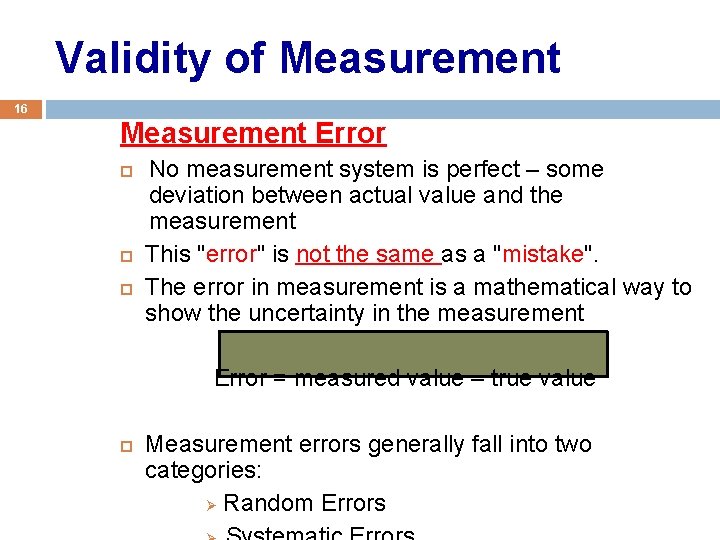
Validity of Measurement 16 Measurement Error No measurement system is perfect – some deviation between actual value and the measurement This "error" is not the same as a "mistake". The error in measurement is a mathematical way to show the uncertainty in the measurement Error = measured value – true value Measurement errors generally fall into two categories: Ø Random Errors

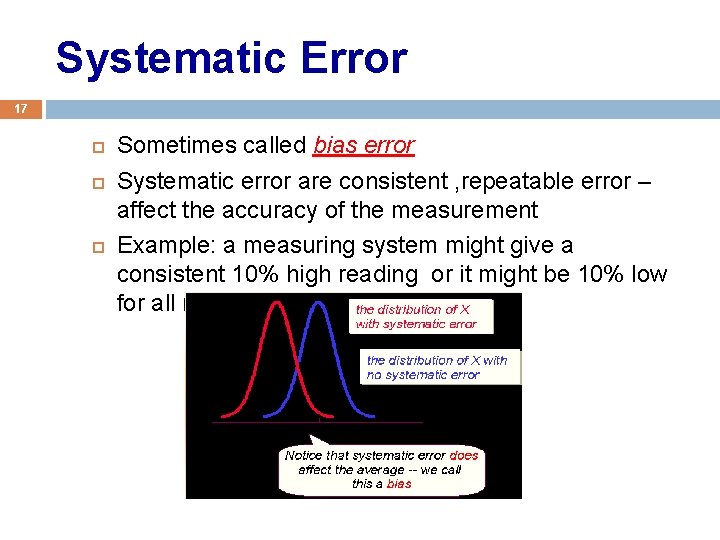
Systematic Error 17 Sometimes called bias error Systematic error are consistent , repeatable error – affect the accuracy of the measurement Example: a measuring system might give a consistent 10% high reading or it might be 10% low for all reading.

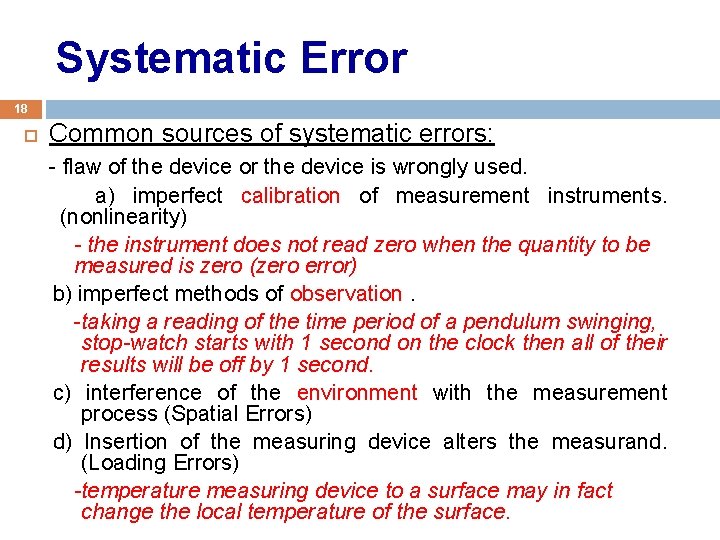
Systematic Error 18 Common sources of systematic errors: - flaw of the device or the device is wrongly used. a) imperfect calibration of measurement instruments. (nonlinearity) - the instrument does not read zero when the quantity to be measured is zero (zero error) b) imperfect methods of observation. -taking a reading of the time period of a pendulum swinging, stop-watch starts with 1 second on the clock then all of their results will be off by 1 second. c) interference of the environment with the measurement process (Spatial Errors) d) Insertion of the measuring device alters the measurand. (Loading Errors) -temperature measuring device to a surface may in fact change the local temperature of the surface.

19 Intrusive & non. Instrusive measurement Devices INTRUSIVE – produces a significant loading error. - Example: Thermometer NON-INTRUSIVE – negligible loading errors - Example: measuring temperature by sensing the infrared radiation emitted.

Systematic Error 20 How to Minimize Systematic Error ? Calibration - where the measurement instrument is used to record values from standard input and is adjusted for any discrepancy (perbezaan). Systematic errors caused by using measuring system may be reduced by analytical correction for unwanted effect. **Systematic error cannot be removed by repeating measurements or averaging large numbers of results using the same device.

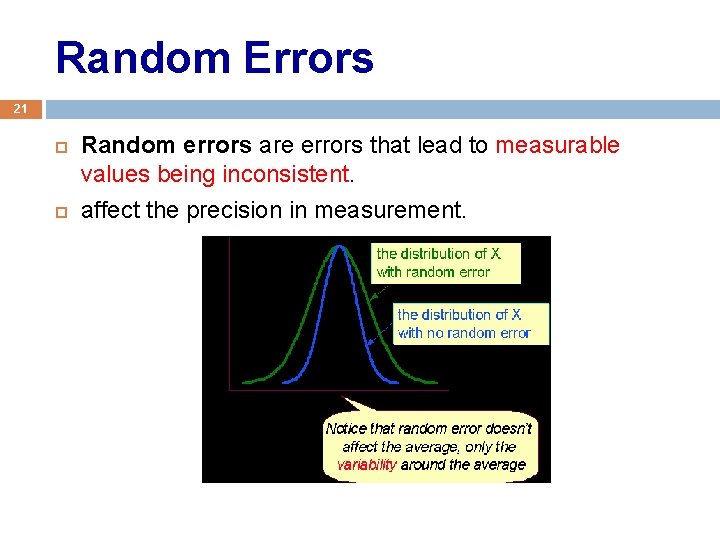
Random Errors 21 Random errors are errors that lead to measurable values being inconsistent. affect the precision in measurement.

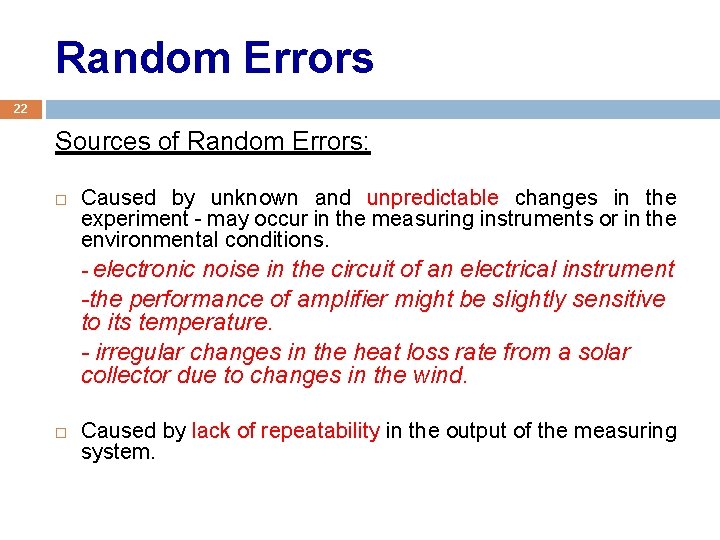
Random Errors 22 Sources of Random Errors: Caused by unknown and unpredictable changes in the experiment - may occur in the measuring instruments or in the environmental conditions. - electronic noise in the circuit of an electrical instrument -the performance of amplifier might be slightly sensitive to its temperature. - irregular changes in the heat loss rate from a solar collector due to changes in the wind. Caused by lack of repeatability in the output of the measuring system.

Random Errors 23 How to Minimize Random Error ? Random errors can be evaluated through statistical analysis. Take more data – error can be reduced by averaging over a large number of observations. Can often be minimized by eliminating uncontrolled variables or properly shielding or grounding the measuring system.

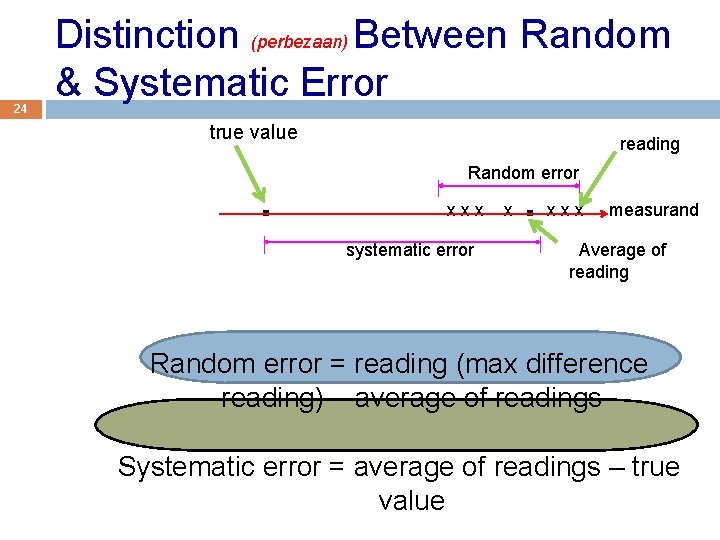
24 Distinction (perbezaan) Between Random & Systematic Error true value . reading . Random error x x x x x x x measurand systematic error Average of reading Random error = reading (max difference reading) – average of readings Systematic error = average of readings – true value

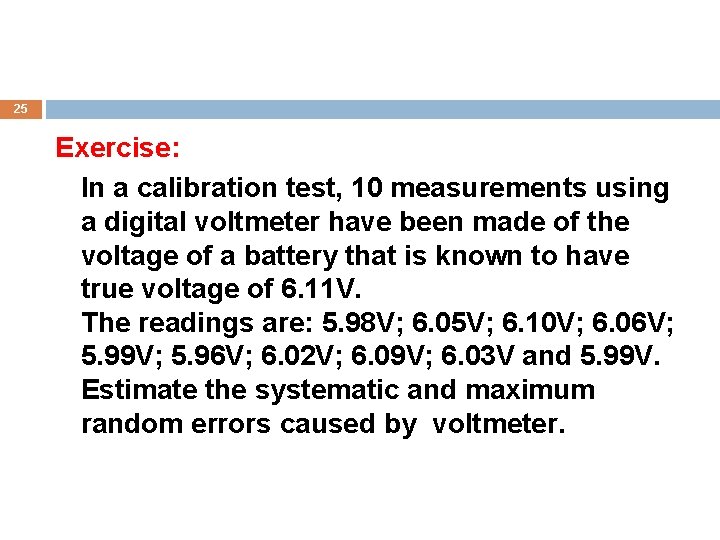
25 Exercise: In a calibration test, 10 measurements using a digital voltmeter have been made of the voltage of a battery that is known to have true voltage of 6. 11 V. The readings are: 5. 98 V; 6. 05 V; 6. 10 V; 6. 06 V; 5. 99 V; 5. 96 V; 6. 02 V; 6. 09 V; 6. 03 V and 5. 99 V. Estimate the systematic and maximum random errors caused by voltmeter.

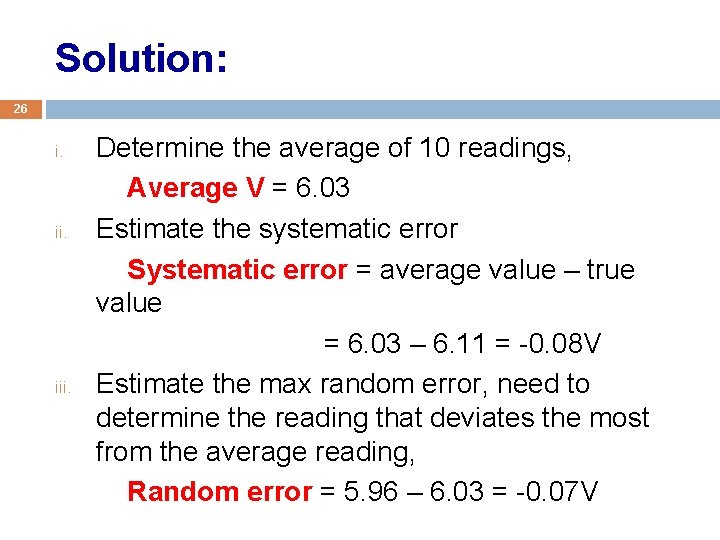
Solution: 26 i. iii. Determine the average of 10 readings, Average V = 6. 03 Estimate the systematic error Systematic error = average value – true value = 6. 03 – 6. 11 = -0. 08 V Estimate the max random error, need to determine the reading that deviates the most from the average reading, Random error = 5. 96 – 6. 03 = -0. 07 V

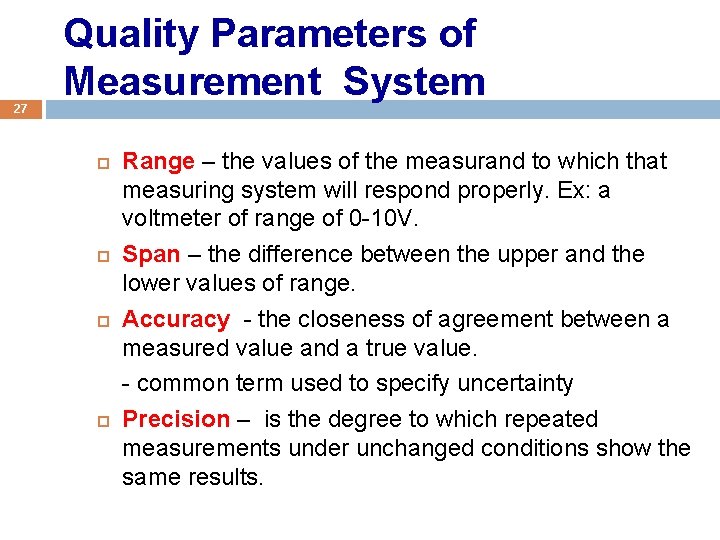
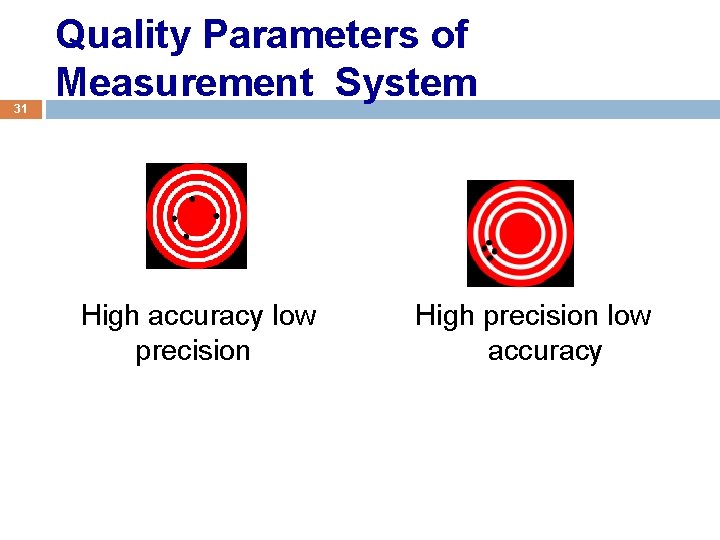
27 Quality Parameters of Measurement System Range – the values of the measurand to which that measuring system will respond properly. Ex: a voltmeter of range of 0 -10 V. Span – the difference between the upper and the lower values of range. Accuracy - the closeness of agreement between a measured value and a true value. - common term used to specify uncertainty Precision – is the degree to which repeated measurements under unchanged conditions show the same results.

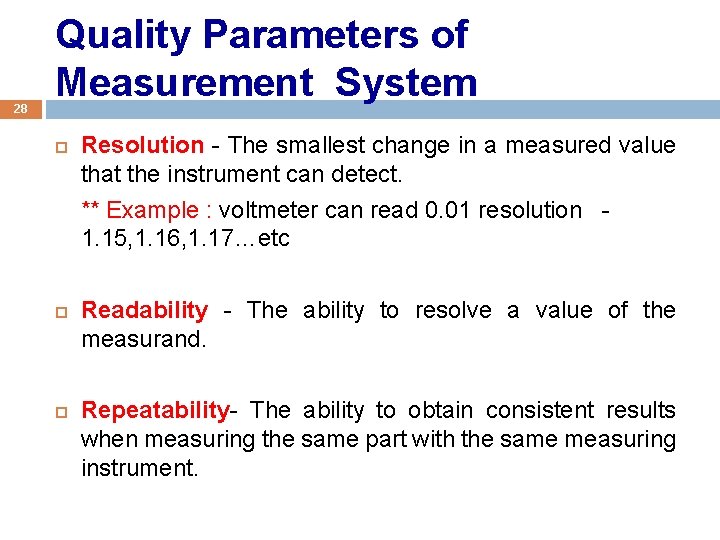
28 Quality Parameters of Measurement System Resolution - The smallest change in a measured value that the instrument can detect. ** Example : voltmeter can read 0. 01 resolution - 1. 15, 1. 16, 1. 17…etc Readability - The ability to resolve a value of the measurand. Repeatability- The ability to obtain consistent results when measuring the same part with the same measuring instrument.

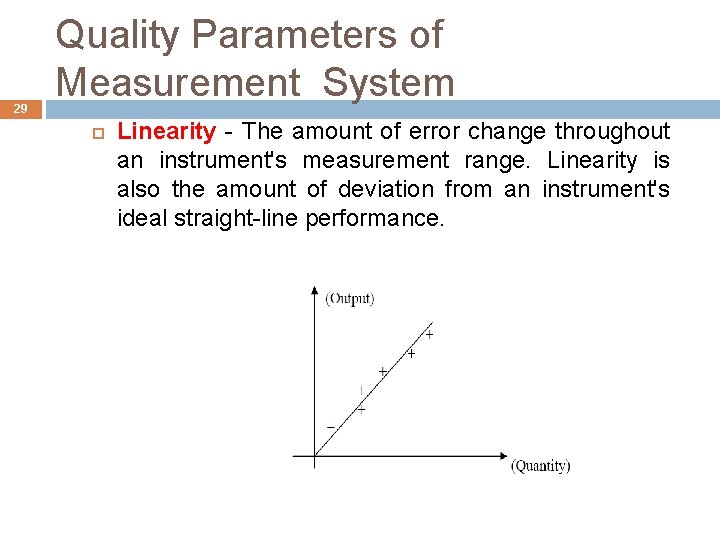
29 Quality Parameters of Measurement System Linearity - The amount of error change throughout an instrument's measurement range. Linearity is also the amount of deviation from an instrument's ideal straight-line performance.

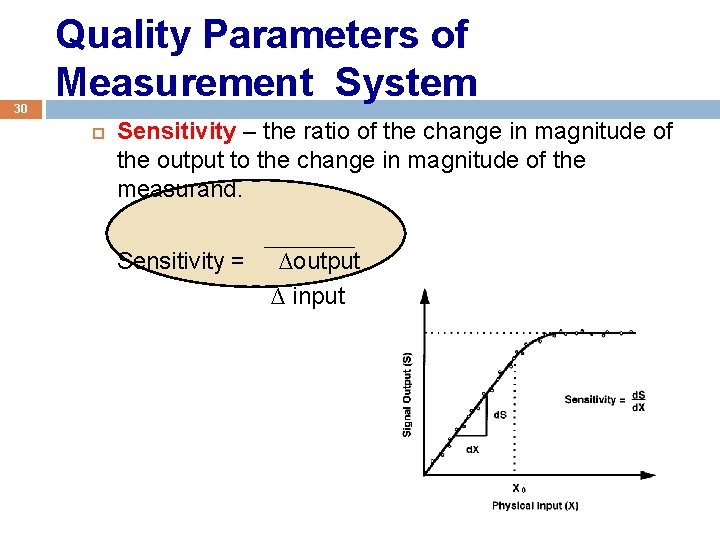
30 Quality Parameters of Measurement System Sensitivity – the ratio of the change in magnitude of the output to the change in magnitude of the measurand. Sensitivity = ∆output ∆ input

31 Quality Parameters of Measurement System High accuracy low precision High precision low accuracy

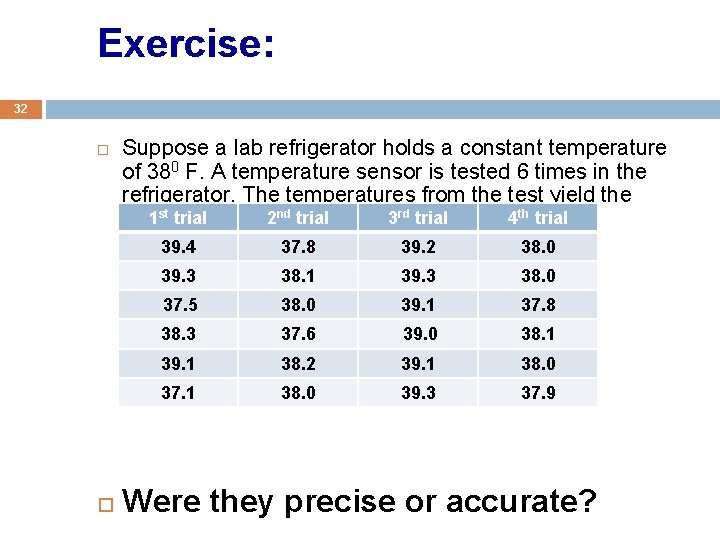
Exercise: 32 Suppose a lab refrigerator holds a constant temperature of 380 F. A temperature sensor is tested 6 times in the refrigerator. The temperatures from the test yield the 1 st trial 2 nd trial 3 rd trial 4 th trial temperatures of: 39. 4 37. 8 39. 2 38. 0 39. 3 38. 1 39. 3 38. 0 37. 5 38. 0 39. 1 37. 8 38. 3 37. 6 39. 0 38. 1 39. 1 38. 2 39. 1 38. 0 37. 1 38. 0 39. 3 37. 9 Were they precise or accurate?

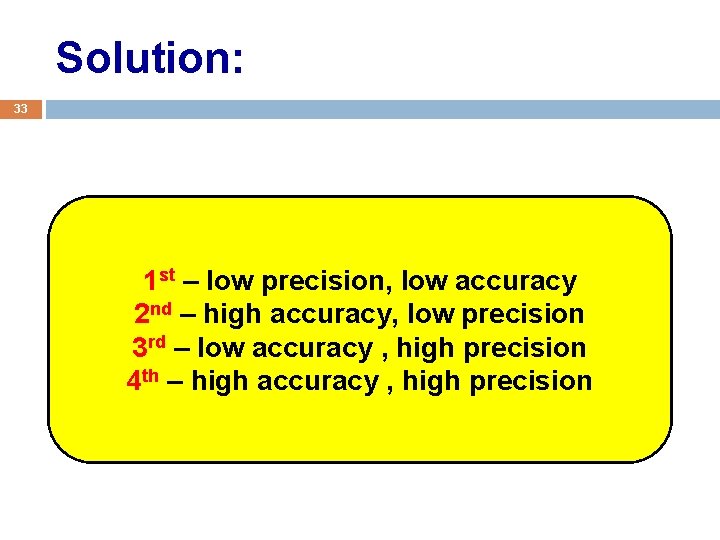
Solution: 33 1 st – low precision, low accuracy 2 nd – high accuracy, low precision 3 rd – low accuracy , high precision 4 th – high accuracy , high precision

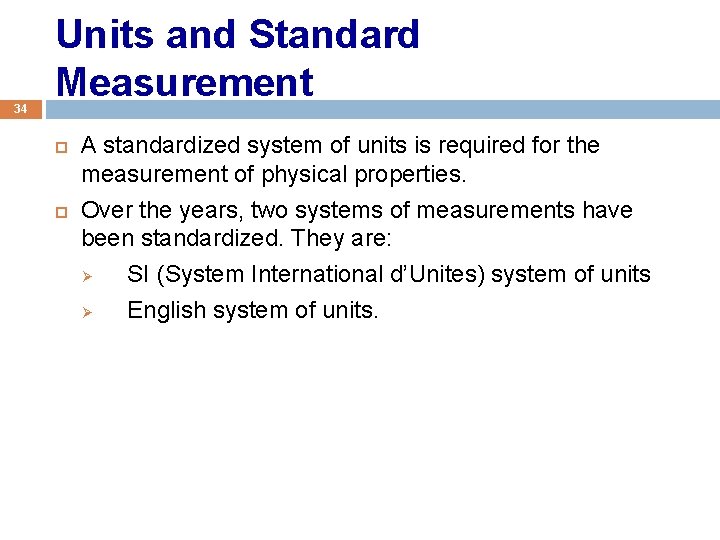
34 Units and Standard Measurement A standardized system of units is required for the measurement of physical properties. Over the years, two systems of measurements have been standardized. They are: Ø SI (System International d’Unites) system of units Ø English system of units.

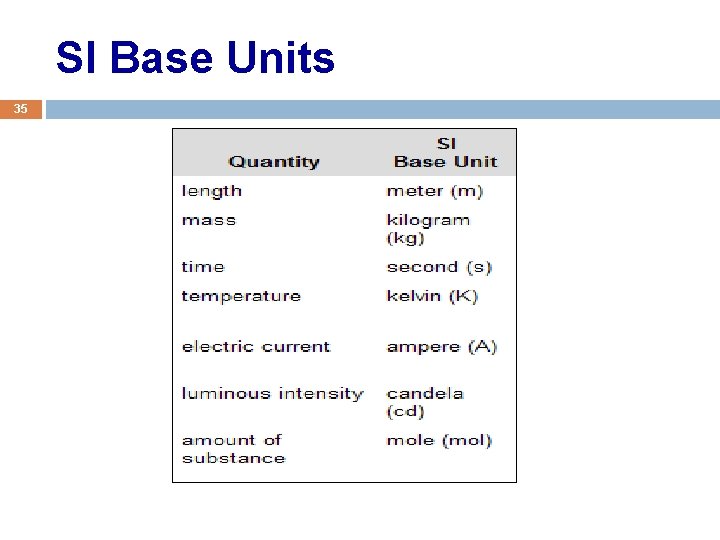
SI Base Units 35

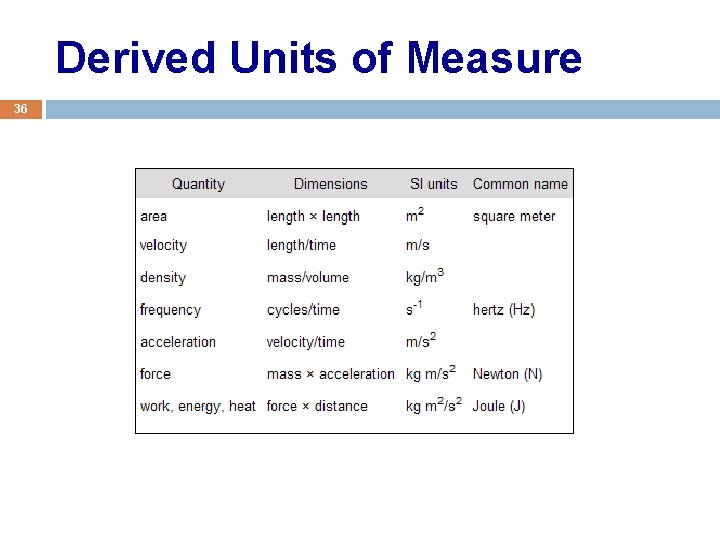
Derived Units of Measure 36

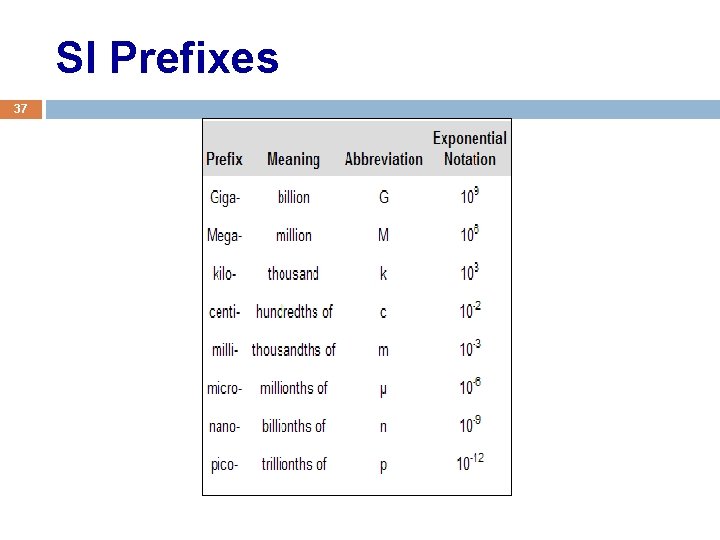
SI Prefixes 37

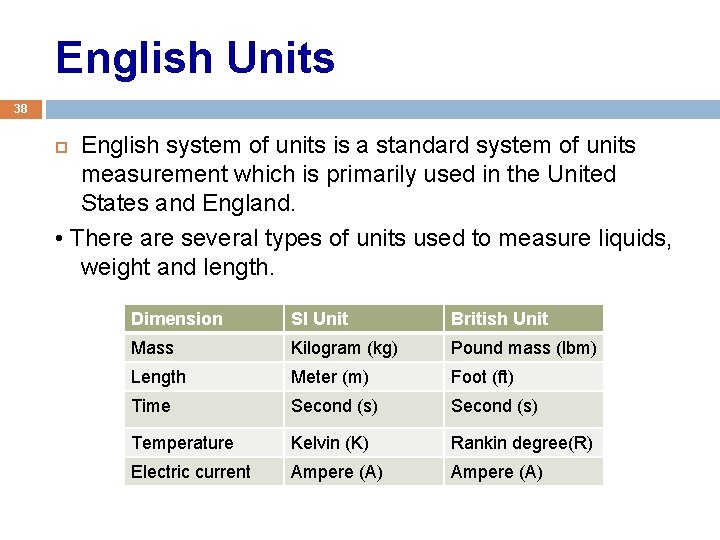
English Units 38 English system of units is a standard system of units measurement which is primarily used in the United States and England. • There are several types of units used to measure liquids, weight and length. Dimension SI Unit British Unit Mass Kilogram (kg) Pound mass (lbm) Length Meter (m) Foot (ft) Time Second (s) Temperature Kelvin (K) Rankin degree(R) Electric current Ampere (A)

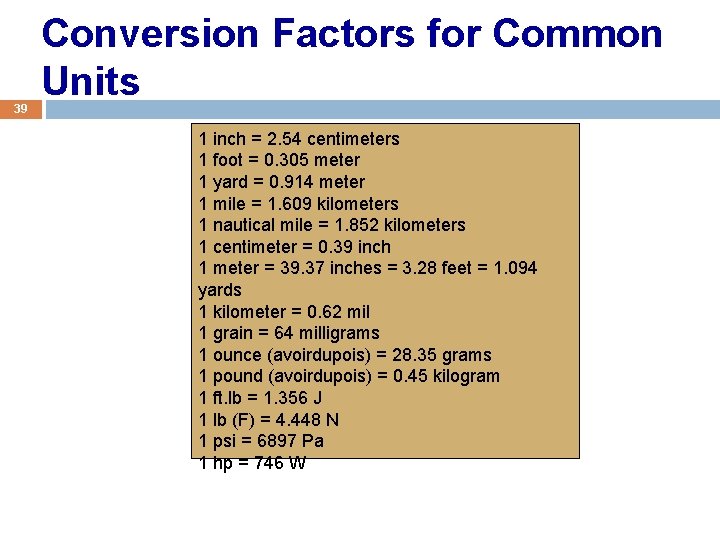
39 Conversion Factors for Common Units 1 inch = 2. 54 centimeters 1 foot = 0. 305 meter 1 yard = 0. 914 meter 1 mile = 1. 609 kilometers 1 nautical mile = 1. 852 kilometers 1 centimeter = 0. 39 inch 1 meter = 39. 37 inches = 3. 28 feet = 1. 094 yards 1 kilometer = 0. 62 mil 1 grain = 64 milligrams 1 ounce (avoirdupois) = 28. 35 grams 1 pound (avoirdupois) = 0. 45 kilogram 1 ft. lb = 1. 356 J 1 lb (F) = 4. 448 N 1 psi = 6897 Pa 1 hp = 746 W
![40 Units Conversions for Temperature From Celsius To Celsius Fahrenheit F C 40 Units Conversions for Temperature From Celsius To Celsius Fahrenheit [°F] = ( [°C]](https://slidetodoc.com/presentation_image_h/2683d20be7c5ebb92acbe625b3fa9d8b/image-40.jpg)
40 Units Conversions for Temperature From Celsius To Celsius Fahrenheit [°F] = ( [°C] × 9⁄5 )+ 32 [°C] = ([°F] − 32) × 5⁄9 Kelvin [K] = [°C] + 273. 15 [°C] = [K] − 273. 15 Rankine [°R] = ([°C] + 273. 15) × 9⁄5 [°C] = ([°R] − 491. 67) × 5⁄9