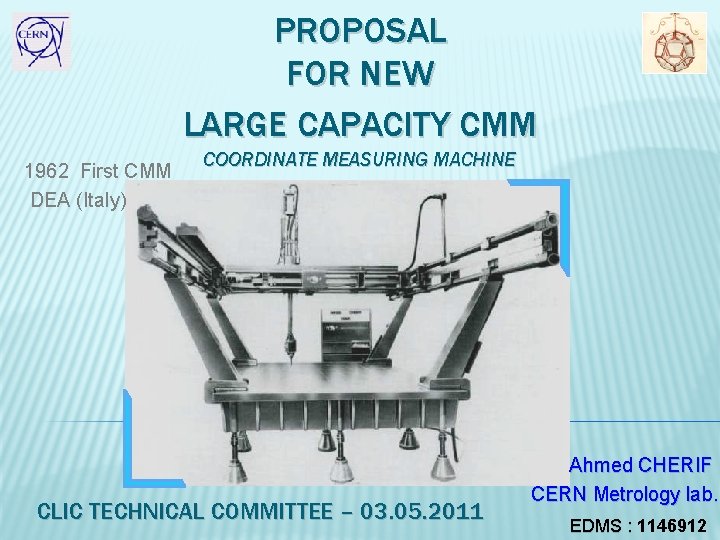
PROPOSAL FOR NEW LARGE CAPACITY CMM 1962 First
![Measuring range : From 2 m up to 10 m Accuracy: From MPEE [um]= Measuring range : From 2 m up to 10 m Accuracy: From MPEE [um]=](https://slidetodoc.com/presentation_image_h/7d8a7f2f47e7668363fecf08b4f8f92e/image-12.jpg)
- Slides: 24

PROPOSAL FOR NEW LARGE CAPACITY CMM 1962 First CMM DEA (Italy) COORDINATE MEASURING MACHINE CLIC TECHNICAL COMMITTEE – 03. 05. 2011 Ahmed CHERIF CERN Metrology lab. EDMS : 1146912

OUTLINE � Overview of CMMs of the CERN Metrology lab. � Today and future needs � How to deal with a large capacity measurement � Example of DB girders � Metrology of CLIC Modules: open questions � Available long stroke machine on the market � Adapted environment to be set up for large CMM � Proposed solutions � Figures (budget and schedule) � Open discussion Ahmed CHERIF EN/MME-MM 03. 05. 2011 2

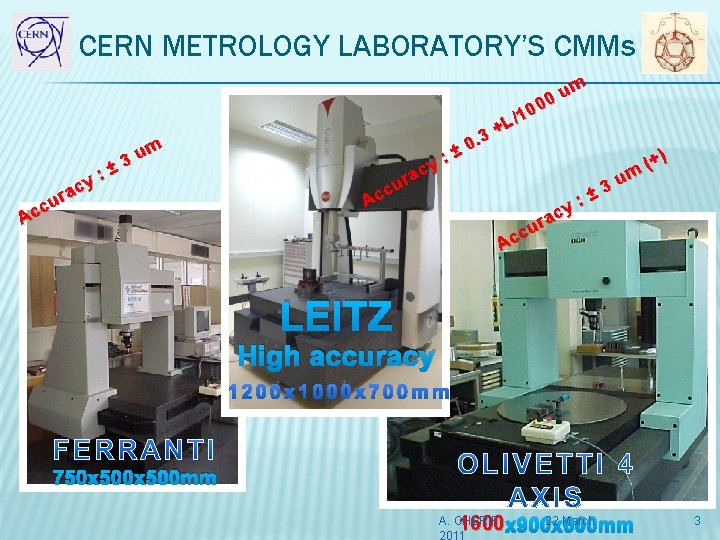
CERN METROLOGY LABORATORY’S CMMs y ac r cu c A : um 3 ± ± : y ac r cu c A um 0 0 0 1 L/ + 0. 3 : y rac u c Ac um 3 ± (+) LEITZ High accuracy 750 x 500 mm 22 March 1600 x 900 x 600 mm A. CHERIF 2011 3

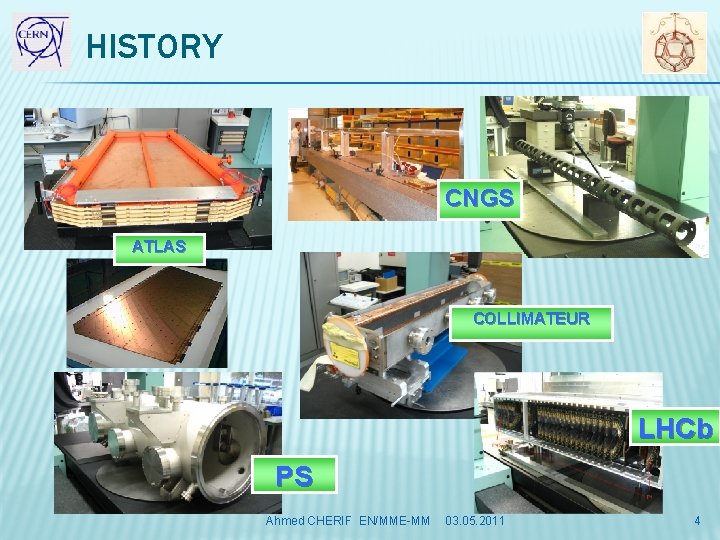
HISTORY CNGS ATLAS COLLIMATEUR LHCb PS Ahmed CHERIF EN/MME-MM 03. 05. 2011 4

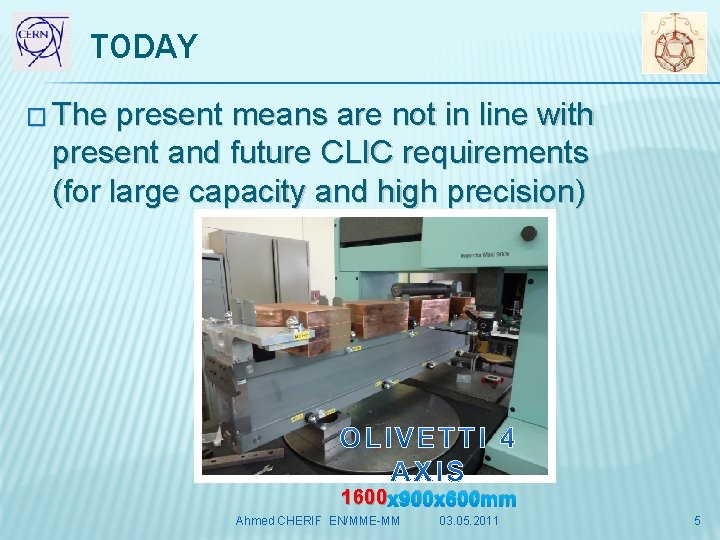
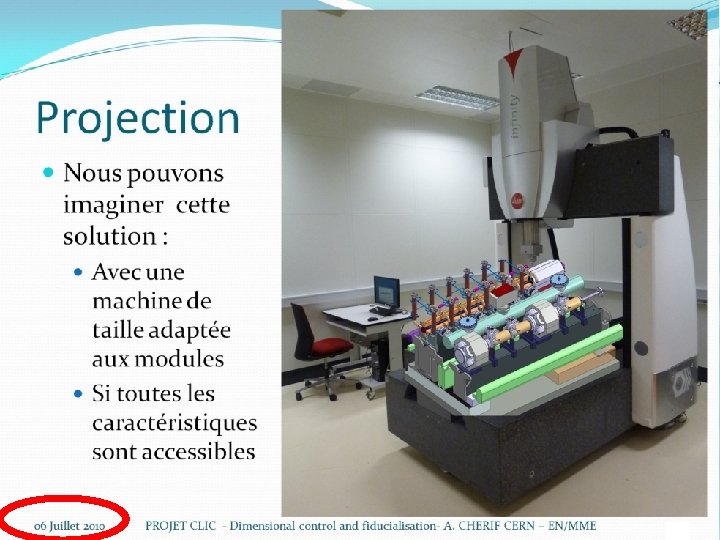
TODAY � The present means are not in line with present and future CLIC requirements (for large capacity and high precision) 1600 x 900 x 600 mm Ahmed CHERIF EN/MME-MM 03. 05. 2011 5

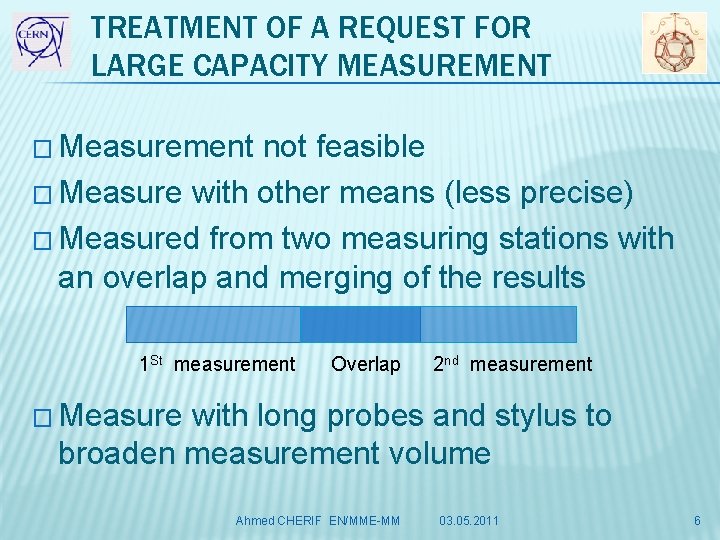
TREATMENT OF A REQUEST FOR LARGE CAPACITY MEASUREMENT � Measurement not feasible � Measure with other means (less precise) � Measured from two measuring stations with an overlap and merging of the results 1 St measurement Overlap 2 nd measurement � Measure with long probes and stylus to broaden measurement volume Ahmed CHERIF EN/MME-MM 03. 05. 2011 6

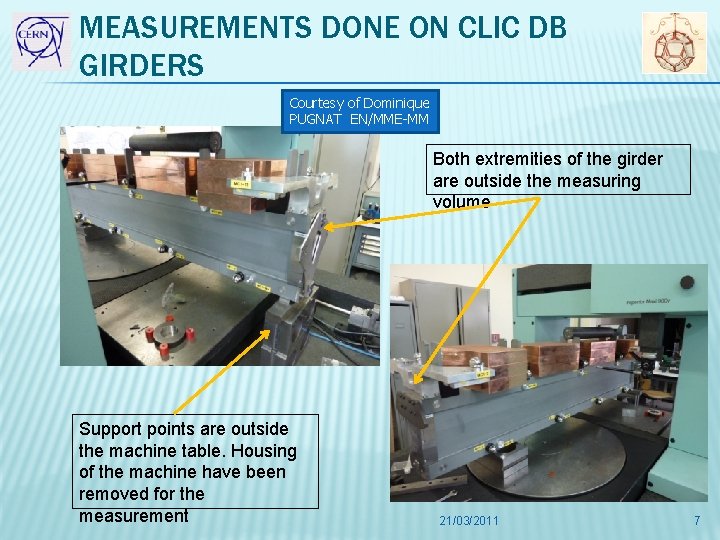
MEASUREMENTS DONE ON CLIC DB GIRDERS Courtesy of Dominique PUGNAT EN/MME-MM Both extremities of the girder are outside the measuring volume Support points are outside the machine table. Housing of the machine have been removed for the measurement 21/03/2011 7

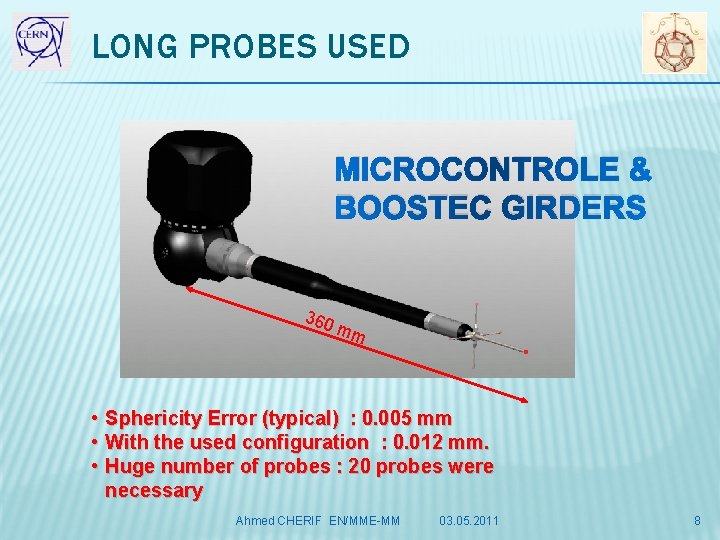
LONG PROBES USED MICROCONTROLE & BOOSTEC GIRDERS 360 mm • Sphericity Error (typical) : 0. 005 mm • With the used configuration : 0. 012 mm. • Huge number of probes : 20 probes were necessary Ahmed CHERIF EN/MME-MM 03. 05. 2011 8

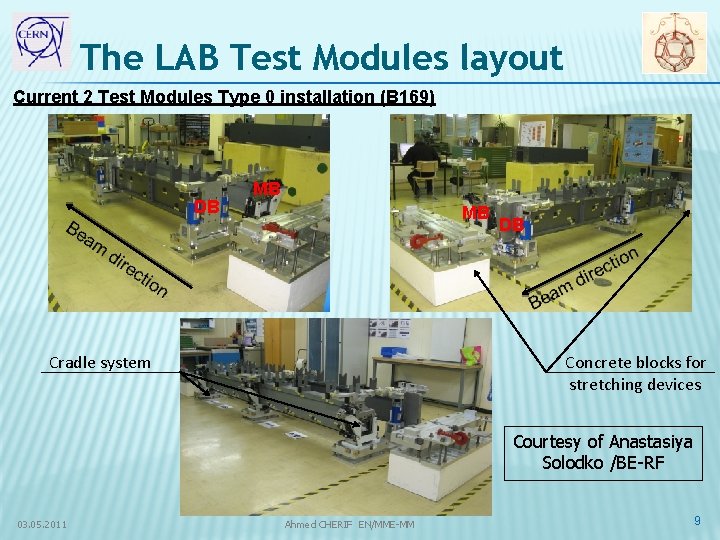
The LAB Test Modules layout Current 2 Test Modules Type 0 installation (B 169) DB MB MB Cradle system DB Concrete blocks for stretching devices Courtesy of Anastasiya Solodko /BE-RF 03. 05. 2011 Ahmed CHERIF EN/MME-MM 9

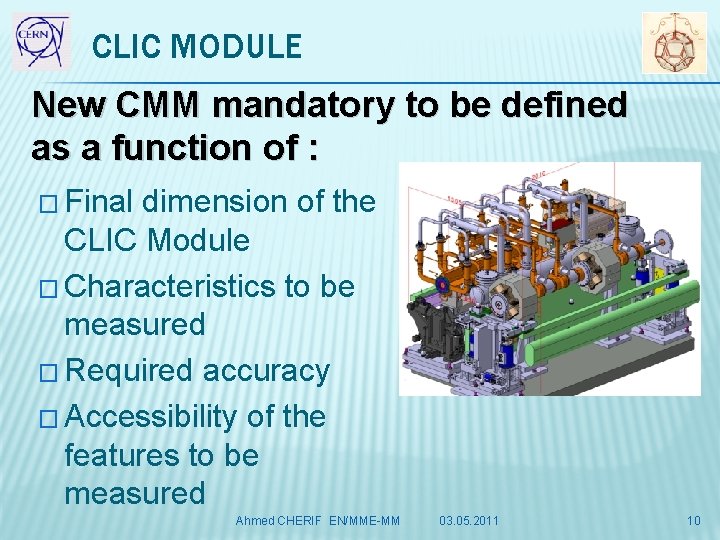
CLIC MODULE New CMM mandatory to be defined as a function of : � Final dimension of the CLIC Module � Characteristics to be measured � Required accuracy � Accessibility of the features to be measured Ahmed CHERIF EN/MME-MM 03. 05. 2011 10

11
![Measuring range From 2 m up to 10 m Accuracy From MPEE um Measuring range : From 2 m up to 10 m Accuracy: From MPEE [um]=](https://slidetodoc.com/presentation_image_h/7d8a7f2f47e7668363fecf08b4f8f92e/image-12.jpg)
Measuring range : From 2 m up to 10 m Accuracy: From MPEE [um]= ± 2. 3 + L/400 to MPEE = ± 7 + 7 L/1000 For 2 m : ± 7. 3 [um] For 4 m : ± 17. 5 [um] For 6 m : ± 49 [um] For 10 m : ± 77 [um] Different types of machines available depending on required measuring range and accuracy Ahmed CHERIF EN/MME-MM 03. 05. 2011 12

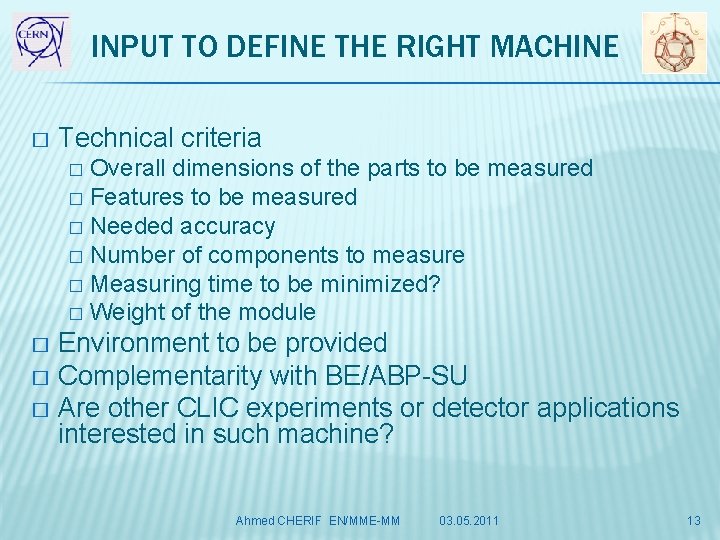
INPUT TO DEFINE THE RIGHT MACHINE � Technical criteria Overall dimensions of the parts to be measured � Features to be measured � Needed accuracy � Number of components to measure � Measuring time to be minimized? � Weight of the module � Environment to be provided � Complementarity with BE/ABP-SU � Are other CLIC experiments or detector applications interested in such machine? � Ahmed CHERIF EN/MME-MM 03. 05. 2011 13

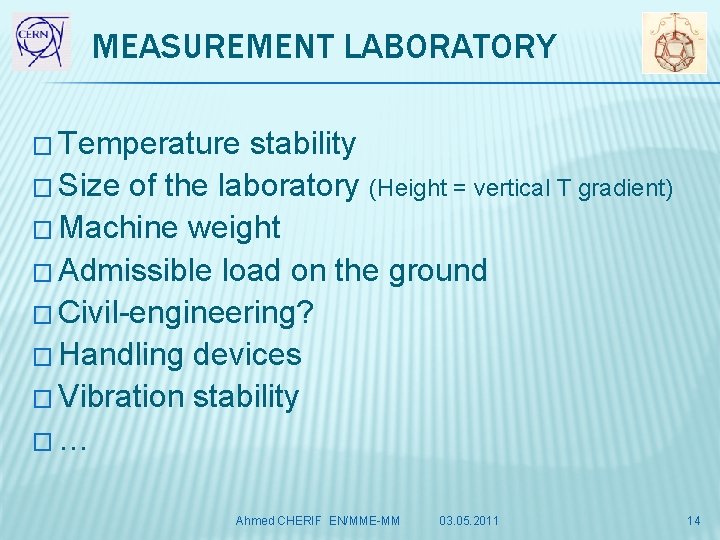
MEASUREMENT LABORATORY � Temperature stability � Size of the laboratory (Height = vertical T gradient) � Machine weight � Admissible load on the ground � Civil-engineering? � Handling devices � Vibration stability �… Ahmed CHERIF EN/MME-MM 03. 05. 2011 14

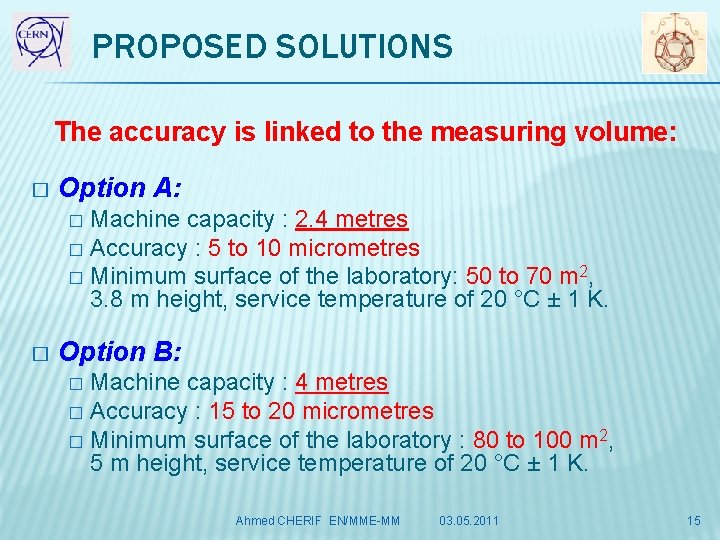
PROPOSED SOLUTIONS The accuracy is linked to the measuring volume: � Option A: Machine capacity : 2. 4 metres � Accuracy : 5 to 10 micrometres � Minimum surface of the laboratory: 50 to 70 m 2, 3. 8 m height, service temperature of 20 °C ± 1 K. � � Option B: Machine capacity : 4 metres � Accuracy : 15 to 20 micrometres � Minimum surface of the laboratory : 80 to 100 m 2, 5 m height, service temperature of 20 °C ± 1 K. � Ahmed CHERIF EN/MME-MM 03. 05. 2011 15

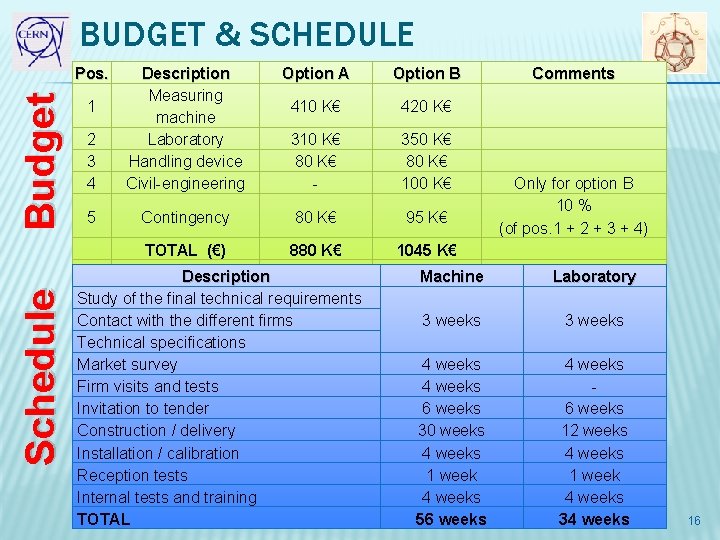
BUDGET & SCHEDULE Budget Pos. Option A Option B 410 K€ 420 K€ 2 3 4 Description Measuring machine Laboratory Handling device Civil-engineering 310 K€ 80 K€ - 350 K€ 80 K€ 100 K€ 5 Contingency 80 K€ 95 K€ 1 Schedule TOTAL (€) 880 K€ 1045 K€ TOTALDescription (CHF) ~1 144 KCHF ~1 360 Machine KCHF Comments Only for option B 10 % (of pos. 1 + 2 + 3 + 4) (rate: 1. 30 CHF=1€) Laboratory Study of the final technical requirements Contact with the different firms 3 weeks Technical specifications Market survey 4 weeks Firm visits and tests 4 weeks Invitation to tender 6 weeks Construction / delivery 30 weeks Installation / calibration 4 weeks Reception tests 1 week Internal tests and training 4 weeks TOTAL 56 weeks Ahmed CHERIF EN/MME-MM 03. 05. 2011 3 weeks 4 weeks 6 weeks 12 weeks 4 weeks 1 week 4 weeks 34 weeks 16

THANK YOU FOR YOUR ATTENTION �Questions and/or Comments are welcome �Decision ? Ahmed CHERIF EN/MME-MM 03. 05. 2011 17

ANNEX Ahmed CHERIF EN/MME-MM 03. 05. 2011 18

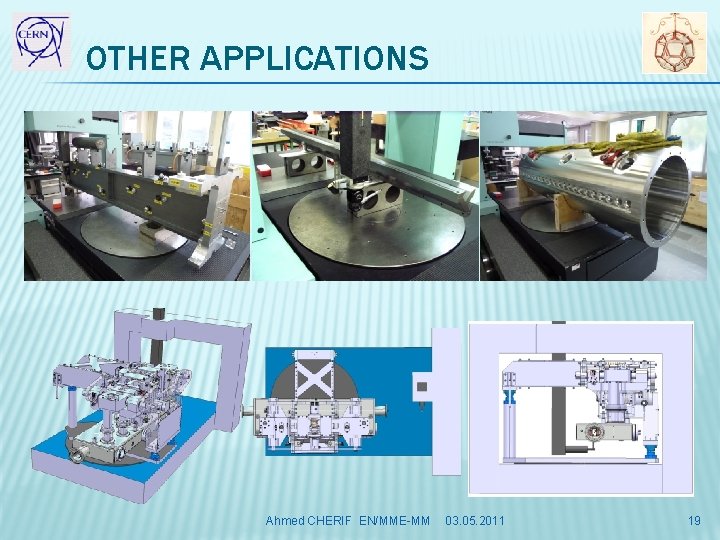
OTHER APPLICATIONS Ahmed CHERIF EN/MME-MM 03. 05. 2011 19

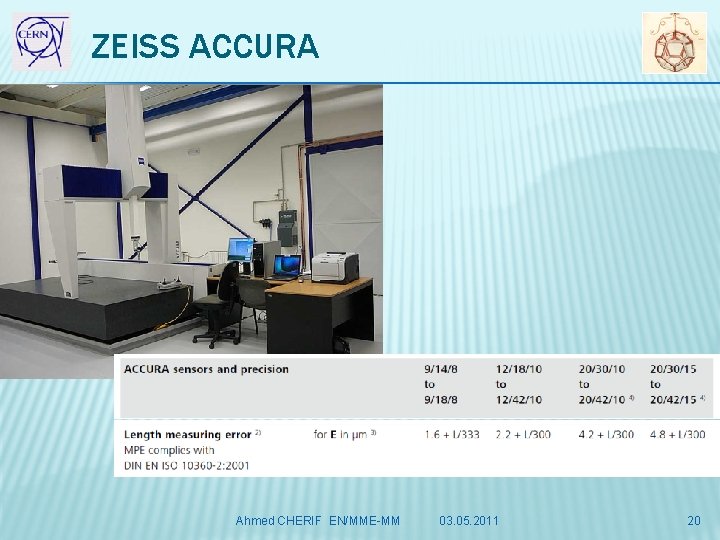
ZEISS ACCURA Ahmed CHERIF EN/MME-MM 03. 05. 2011 20

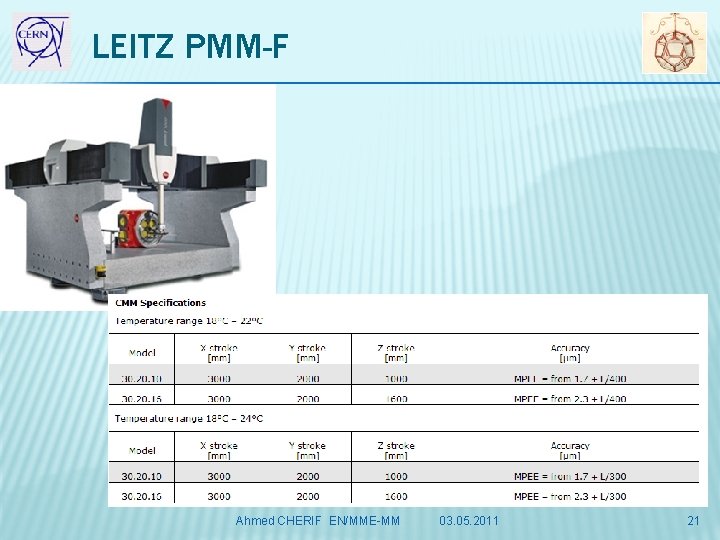
LEITZ PMM-F Ahmed CHERIF EN/MME-MM 03. 05. 2011 21

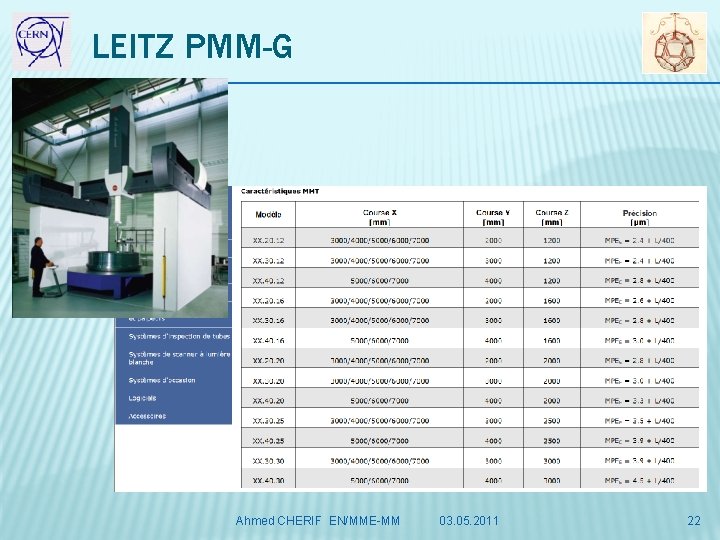
LEITZ PMM-G Ahmed CHERIF EN/MME-MM 03. 05. 2011 22

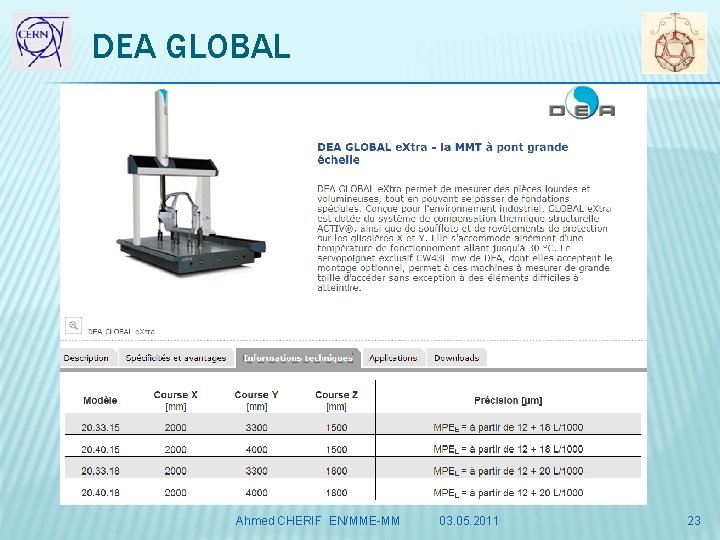
DEA GLOBAL Ahmed CHERIF EN/MME-MM 03. 05. 2011 23

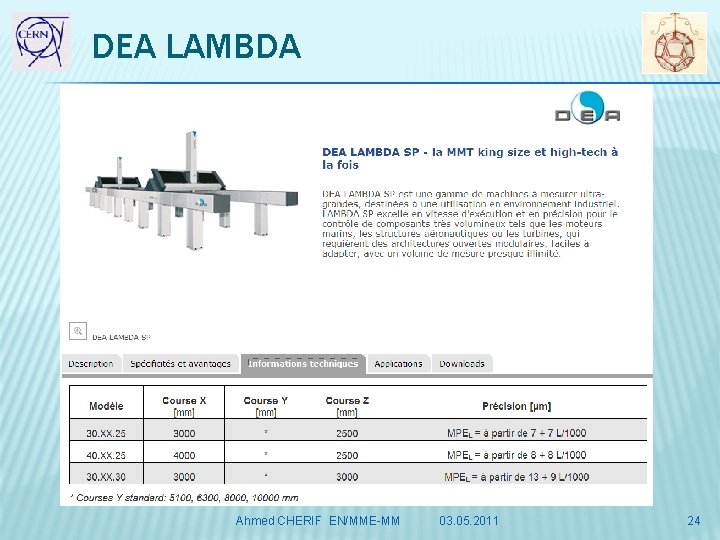
DEA LAMBDA Ahmed CHERIF EN/MME-MM 03. 05. 2011 24