Project Timeline using Microsoft Project Two things to


- Slides: 14
Project Timeline using Microsoft Project
Two things to start creating your first project using Microsoft Project application: ▪ How to start the Microsoft Project software installed on your computer. ▪ Must have a broad idea of your own project and its activities (also referred to as tasks). ▪ For the Sample Project: – Project Manager with an Event Management firm – organizing a musical concert at one of the local auditoriums
TASK PANE CALENDAR PANE
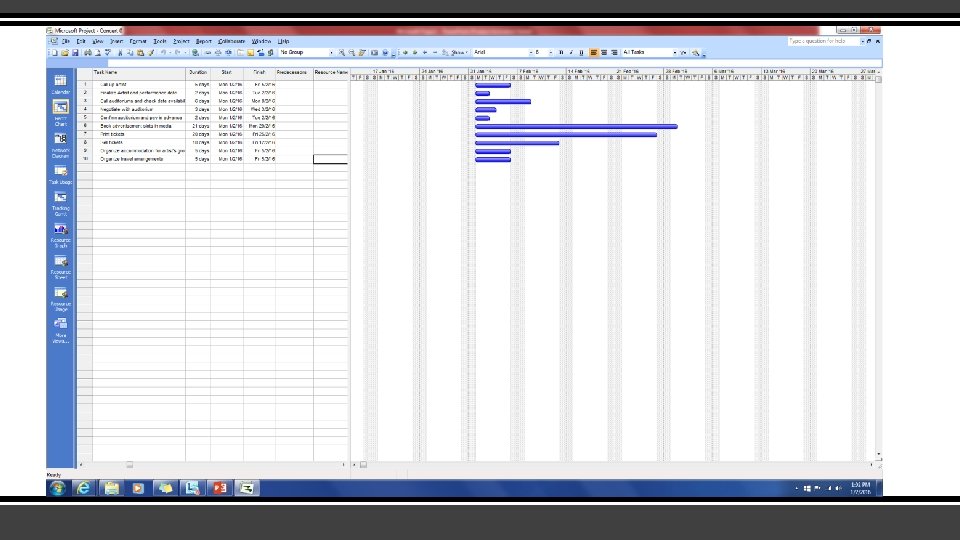
Ready to start. Here we go. . . ▪ Entering Data – Enter Tasks and Duration – For the moment, ignore the first column in the Task pane, and enter the data only under Task Name and Duration columns – The tasks and the durations you need to enter are as follows (the default unit for duration is "days, " and therefore you only need to enter the numeric part) – As you enter the task duration, you can see a Blue bar appearing on the right, graphically indicating the duration. This is the task bar, and the collection of these bars is called the Gantt chart
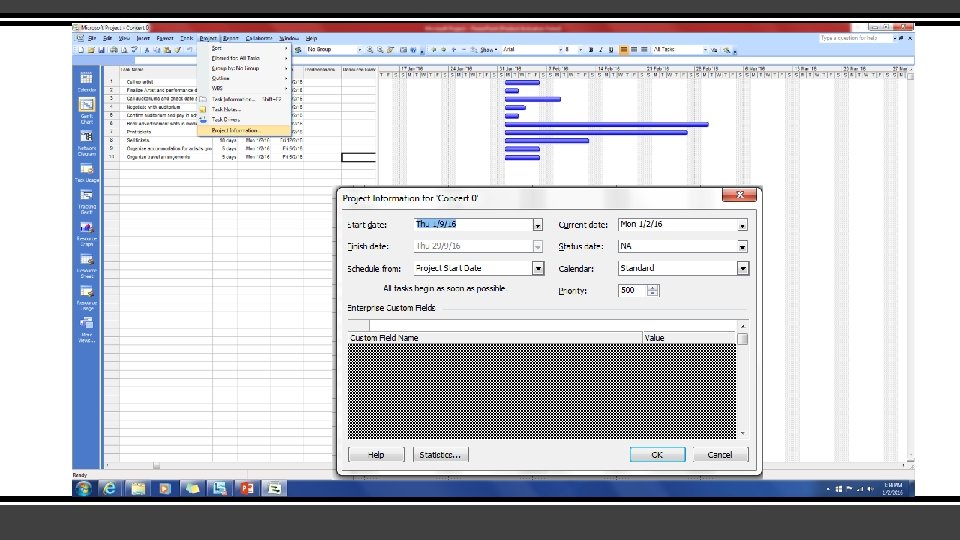
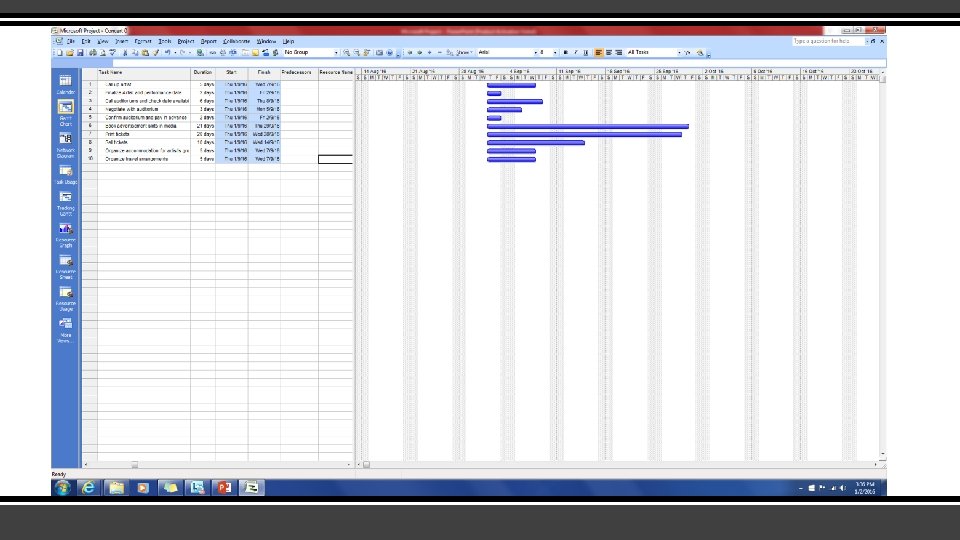
▪ Enter Project Start Date and Task Dependencies – Wondering why all the activities are starting on the same date, right? – By default, Microsoft Project will assume the Project and all activities start on the current date. – How to give instructions to Microsoft Project that our activities need to follow some logical sequence? – Done by using "Task dependencies" or "Precedence relationships ". – For this lesson let us do it by simply "linking" the tasks graphically.
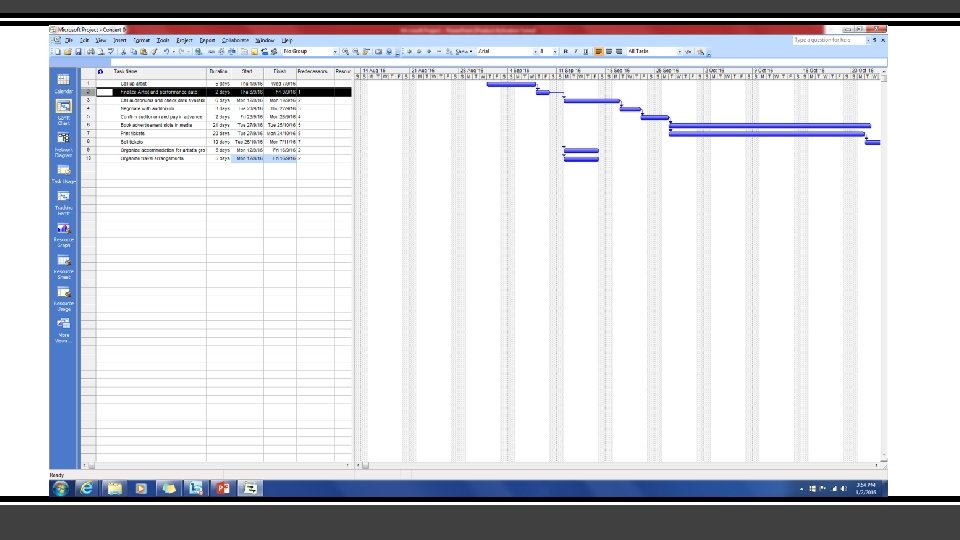
▪ Enter Project Start Date and Task Dependencies – continue – On the Gantt chart, position the mouse on the center of the task bar corresponding to the first task, until the mouse cursor turns into a 4 -way arrow. – Hold down the left mouse button and drag the mouse pointer over the second task (Finalize artist. . ) which is to be linked. and then release the mouse button. You will notice a link line from the finish of the first task to the start of the second task.
Task Insertions, Amendments and Other Features in Microsoft Project ▪ Insert new tasks in an existing project, and assess their impact on overall schedules. ▪ Make changes to tasks. ▪ Understand define milestones in Microsoft Project. ▪ Group tasks in some logical fashion. ▪ Add notes to tasks to provide additional information about specific tasks
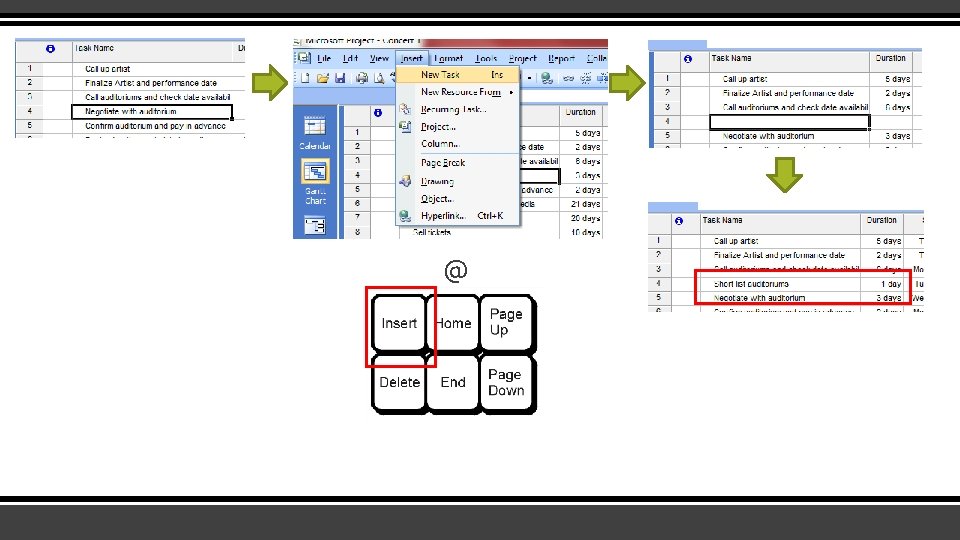
Insert New Tasks ▪ Insert new tasks in an existing project, and assess their impact on overall schedules. ▪ Make changes to tasks. ▪ Understand define milestones in Microsoft Project. ▪ Group tasks in some logical fashion. ▪ Add notes to tasks to provide additional information about specific tasks.
- dependencies automatically - happens by default - insert a task between two tasks that sequentially followed one another prior to the insertion of the new task - has no clear clue on where it should be placed - this task is assumed to start on the Project start date without any predecessor or successor dependencies