Process Control Loop and Calibration Basics Learning objectives
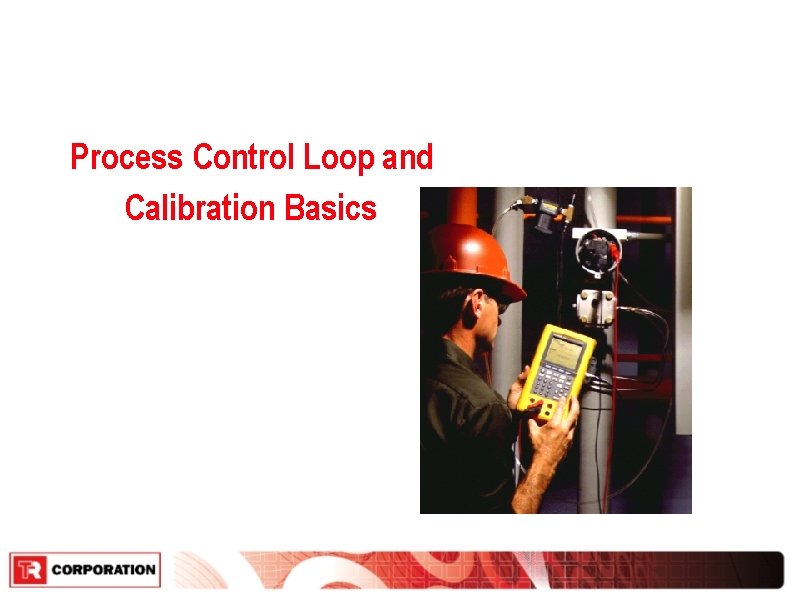
Process Control Loop and Calibration Basics
Learning objectives ● Develop an understanding of calibration and why it’s important ● Review the related quality standards and regulations ● m. A control loop basics ● Understand m. A and voltage input indicators ● Hands on lab: m. A loop calibrators ● Hands on lab: Verifying a m. A input indicator ● Transmitter basics ● Hands on lab: Fluke-744 Calibrator overview
What is calibration? Calibration is: ● Comparison of a measured value to a traceable measurement standard ● Adjust to agree with a standard if necessary Reasons to calibrate: ● Product quality, quality standards ● Regulatory compliance ● Personal safety
Why calibrate: Product quality ●Processes working to same standards ●Processes stay working to same standards ●Product quality stays consistent ●Company saves money, stays competitive
Quality standards ISO-9000, Quality practices ● ANSI-ASQC-9000 ● Ford Q 9000 IS 0 -17025 ● Proficiency/accreditation based regulation ● Fo. Mo. Co is a big advocate/driver in the US Six Sigma corporate initiatives ● Pioneered by Motorola o Adopted as a standard in industry
Compliance and regulatory standards E. P. A. Emission regulations O. S. H. A. 1910 Safety systems F. D. A. c. GMP regulations Consumer protection D. O. T Custody transfer, weight and volume N. R. C Environmental protection, human safety A. P. I Voluntary, American Petroleum Institute
Electrical safety, 4 -20 m. A, 24 V, No harm? ● Normal instrumentation signals are 4 -20 m. A and voltages 24 V and below ● Older instrumentation systems can be 10 -50 m. A o 48 V and 96 V supplies ● Many instruments require line power, 120 Vac ● Many instrumented systems switch 120, 240, even 480 Vac. o Process heating circuits o Pump controls ● Never assume low voltage: always take the same precautions you would take working with high power electrical circuits
Process loop introduction Process loop and control signals take many forms ● Analog: o 4 -20 m. A signal, most common o 3 -15 PSI, old control system technology, still in use o 10 -50 m. A signal, old technology, isolated use ● Digital equivalents o Foundation Fieldbus o Profi. Bus o HART o Control. Net – Device. Net
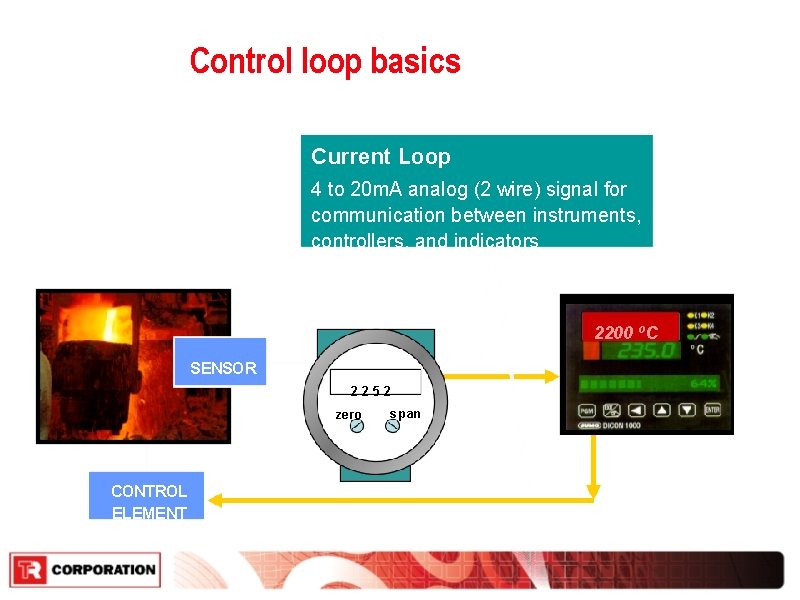
Control loop basics Current Loop 4 to 20 m. A analog (2 wire) signal for communication between instruments, controllers, and indicators Instrumentation Transmitter 2200ºC ºC 2200 SENSOR 2252 zero CONTROL ELEMENT span Controller PLC, DCS Indicator
Current loop devices ● Transmitters o Temperature, pressure, flow, analytical ● I to P, 4 -20 m. A input, 3 -15 PSI output ● Control Valves ● PLC and DCS analog Inputs ● Indicators ● Controllers ● Flow computers ● Chart recorders or Dataloggers ● PLC: Programmable Logic Controller
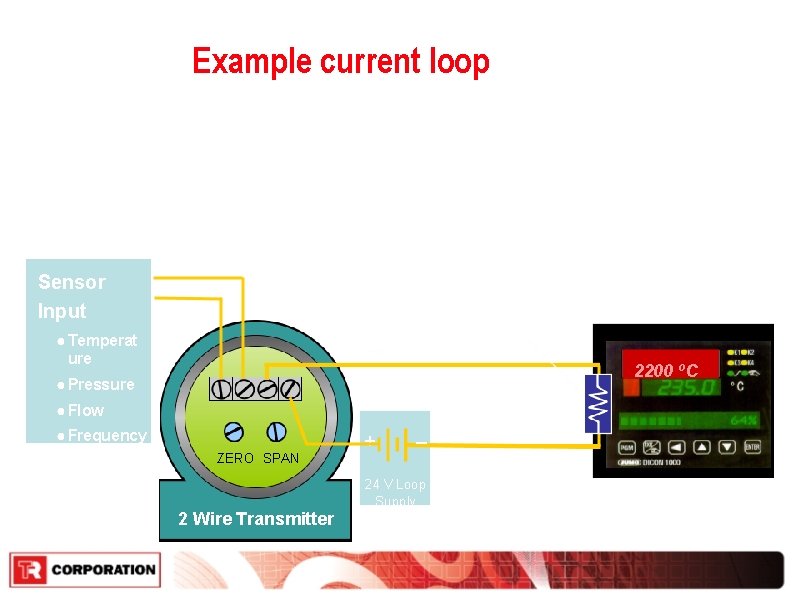
Example current loop ● 4 -20 m. A (DC) signal is proportional to sensor input or PV ● Series circuit dictates the current at one location must be identical to other locations ● Big advantage sending in sending m. A signals over long distances compared to voltage or pressure signals Sensor Input 250 ohm input shunt ● Temperat ure 2200 ºC ● Pressure ● Flow ● Frequency ● PH ZERO SPAN + – 24 V Loop Supply 2 Wire Transmitter 4 to 20 m. A Readout / Controller DCS / PLC / Recorder
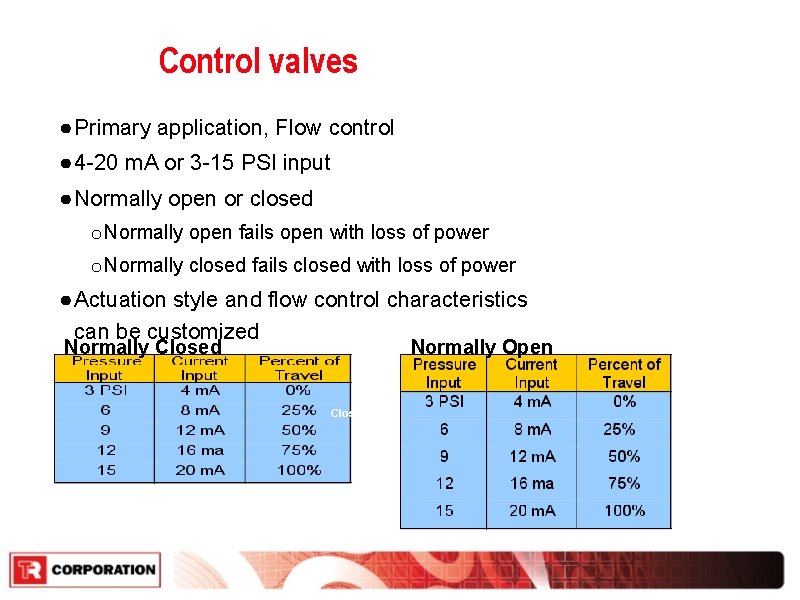
Control valves ● Primary application, Flow control ● 4 -20 m. A or 3 -15 PSI input ● Normally open or closed o Normally open fails open with loss of power o Normally closed fails closed with loss of power ● Actuation style and flow control characteristics can be customized Normally Closed Normally Open Closed
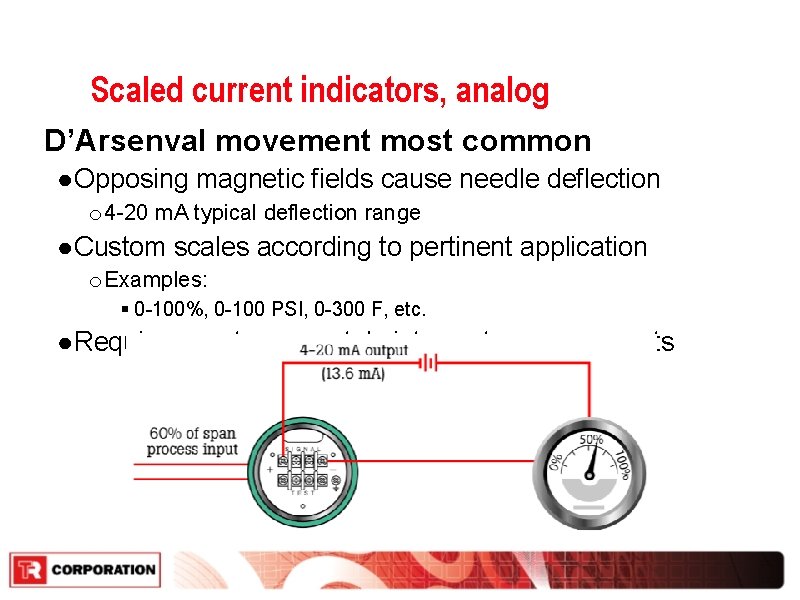
Scaled current indicators, analog D’Arsenval movement most common ● Opposing magnetic fields cause needle deflection o 4 -20 m. A typical deflection range ● Custom scales according to pertinent application o Examples: § 0 -100%, 0 -100 PSI, 0 -300 F, etc. ● Require care to accurately interpret measurements
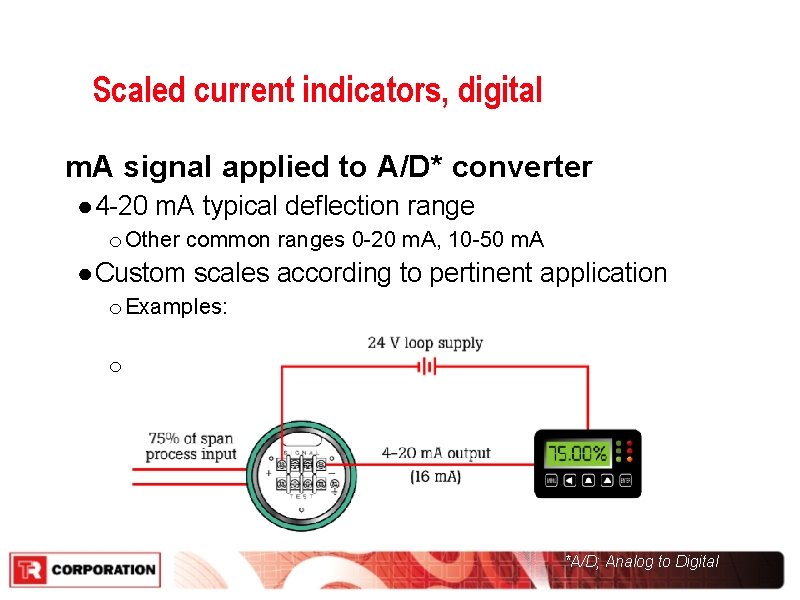
Scaled current indicators, digital m. A signal applied to A/D* converter ● 4 -20 m. A typical deflection range o Other common ranges 0 -20 m. A, 10 -50 m. A ● Custom scales according to pertinent application o Examples: § 0 -100%, 0 -100 PSI, 0 -300 F, etc. o Connected in the output loop of a transmitter *A/D; Analog to Digital
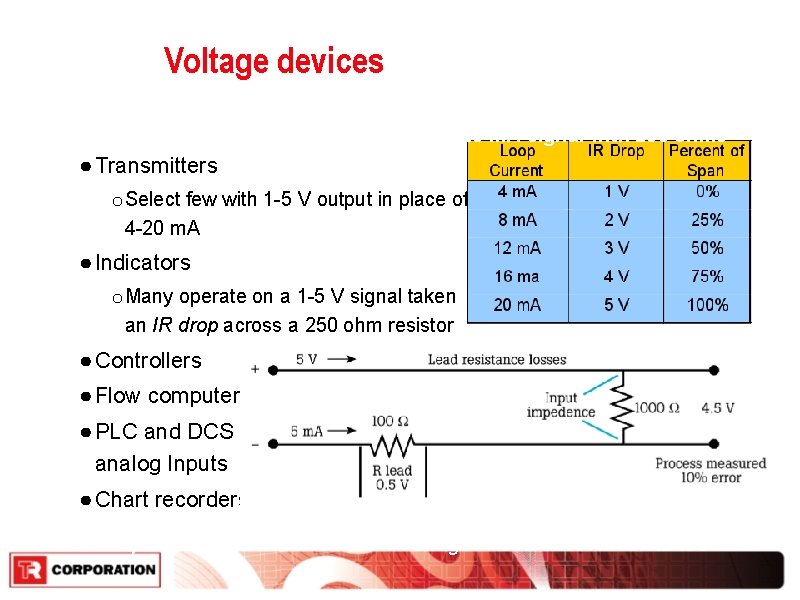
Voltage devices 4 -20 m. A signal with 250 ohms ● Transmitters o Select few with 1 -5 V output in place of 4 -20 m. A ● Indicators o Many operate on a 1 -5 V signal taken an IR drop across a 250 ohm resistor ● Controllers ● Flow computers ● PLC and DCS analog Inputs ● Chart recorders IR drop: Ohms law states: E=I*R Voltage = Current X Resistance
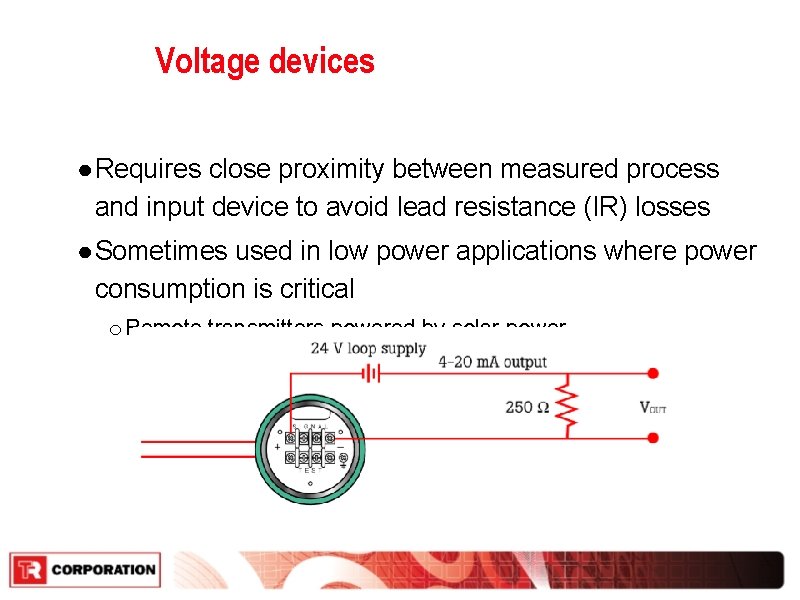
Voltage devices ● Requires close proximity between measured process and input device to avoid lead resistance (IR) losses ● Sometimes used in low power applications where power consumption is critical o Remote transmitters powered by solar power.
Transmitter basics ● Primary function: accurately “transmit” a signal proportionate to the measured PV ● 4 -20 m. A (common), 1 -5 V (rare) analog outputs ● HART, Fieldbus, Profi. Bus digital outputs ● Analog and smart versions o HART smart versions can be m. A, digital output or both ● Analog versions are fixed range o Basic signal conditioner technology ● Smart versions can be digitally re-ranged PV: Primary variable, e. g. : temperature, pressure, flow … o Microprocessor controlled HART : Highway Addressable Remote Transducer
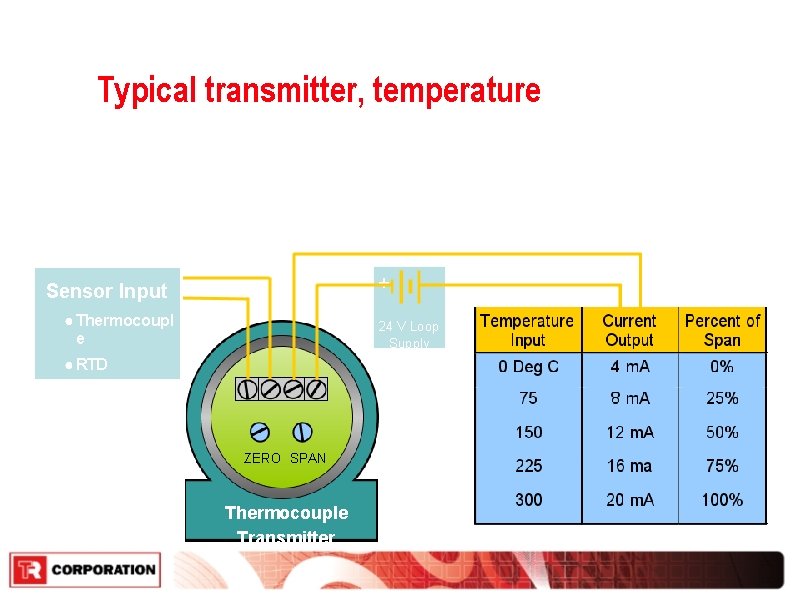
Typical transmitter, temperature ● Converts low level, non-linear thermocouples, RTD signals to linear 4 - 20 m. A or DC voltage ● Millions in service, require service and calibration ● “A temperature controlled current regulator” + Sensor Input ● Thermocoupl e 24 V Loop Supply ● RTD ● Thermistor ZERO SPAN 0 to 300 Deg C – Thermocouple Transmitter
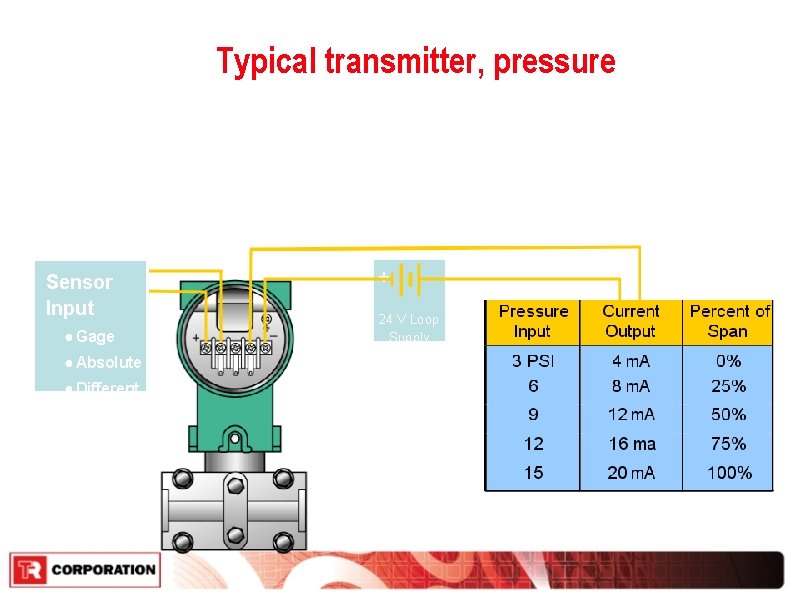
Typical transmitter, pressure ● Converts pressure to linear or square root responding 4 - 20 m. A or DC voltage ● Millions in service, require service and calibration ● “Pressure controlled current regulator” Sensor Input ● Gage + 24 V Loop Supply ● Absolute ● Different ial – Pressure Transmitter 3 to 15 PSI
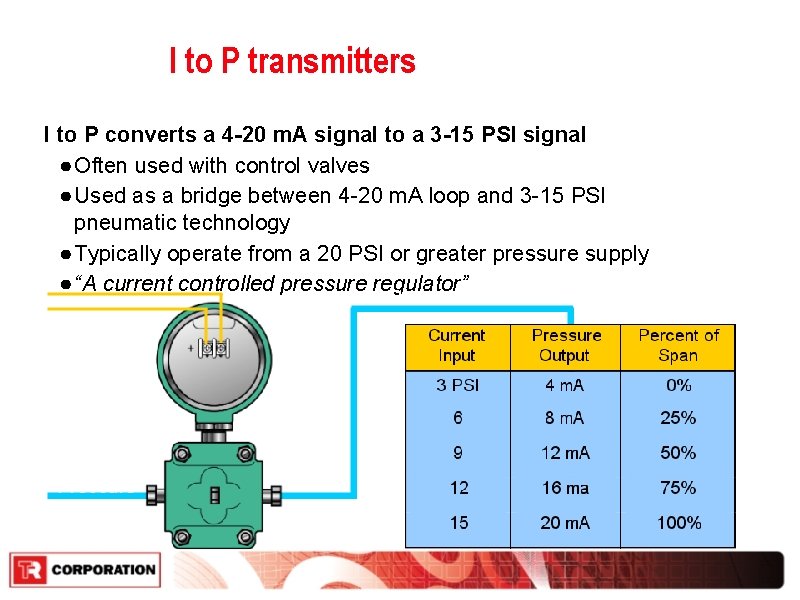
I to P transmitters I to P converts a 4 -20 m. A signal to a 3 -15 PSI signal ● Often used with control valves ● Used as a bridge between 4 -20 m. A loop and 3 -15 PSI pneumatic technology ● Typically operate from a 20 PSI or greater pressure supply ● “A current controlled pressure regulator” Pressure Output 4 -20 m. A Current input Supply Pressure ~20 PSI
Transmitter terms Input span ● The values that correlate to 0% and 100% of measured process ● The values when applied to the input correlate to an output of 4 -20 m. A if there are no errors Output span ● For a 4 -20 m. A device: 20 m. A – 4 m. A = 16 m. A span Re-span ● Change the setpoints of a transmitter for 0% and 100% Dampening ● A setting that causes a delay in the output m. A signal for a change in the applied PV
Transmitter terms Commissioning ● Configuring a transmitter and the installation and verification of its performance o Setting the span, tag number, dampening and transfer function Turn-down ratio ● The ratio between the factory calibrated span and the commissioned span once installed Tag ● An identification number assigned to a location in a loop that is attached to the transmitter installed there Transfer function ● The relationship between applied signal and the output o Linear, square root or other
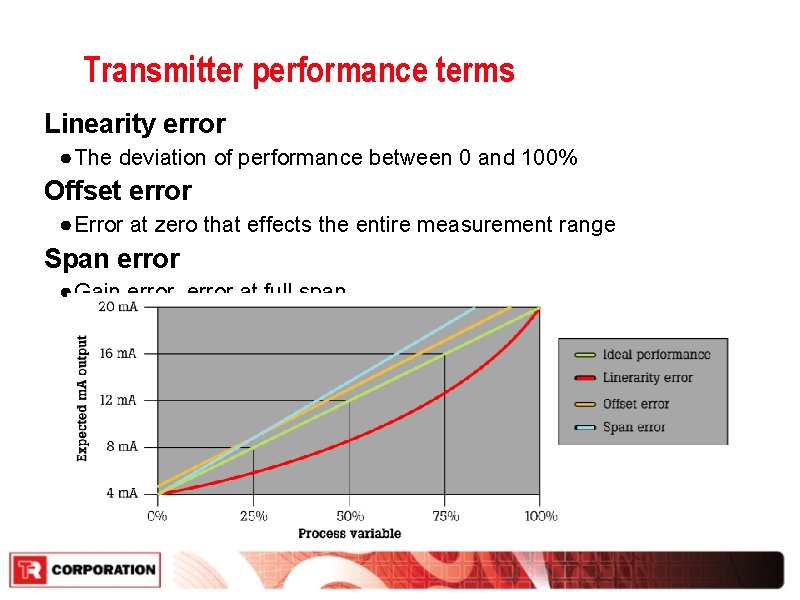
Transmitter performance terms Linearity error ● The deviation of performance between 0 and 100% Offset error ● Error at zero that effects the entire measurement range Span error ● Gain error, error at full span
Specification definitions Reference uncertainty ● Performance immediately after being calibrated Stability ● Error due to the effects of time Temperature coefficient error ● Additive errors when used outside a specified temperature range Total uncertainty ● Performance over a specified period of time with the effects of temperature and other adders included ● Sometimes referred to as total performance Error % of span ● ((Nominal – Actual) / Span) * 100 ● Most common error calculation method for instrumentation Error % of actual ● (Nominal – Actual) * 100
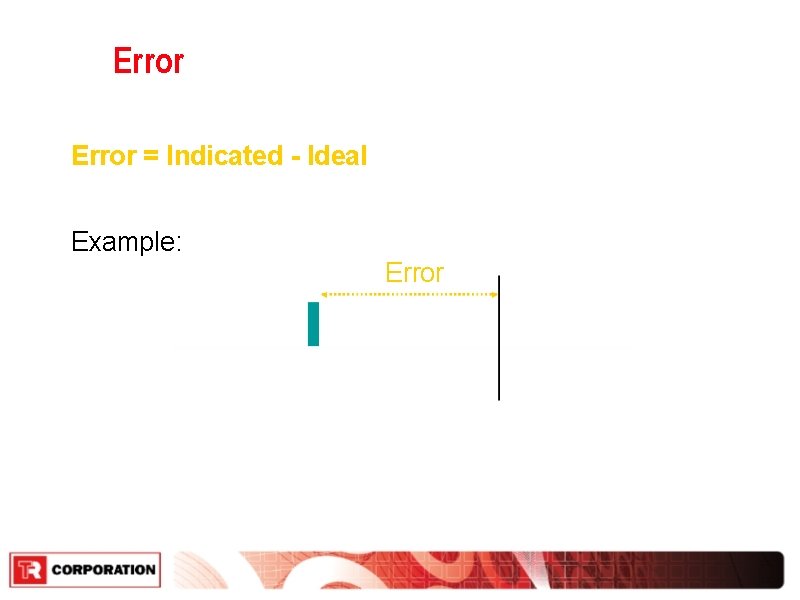
Error = Indicated - Ideal Example: Error Indicated Ideal
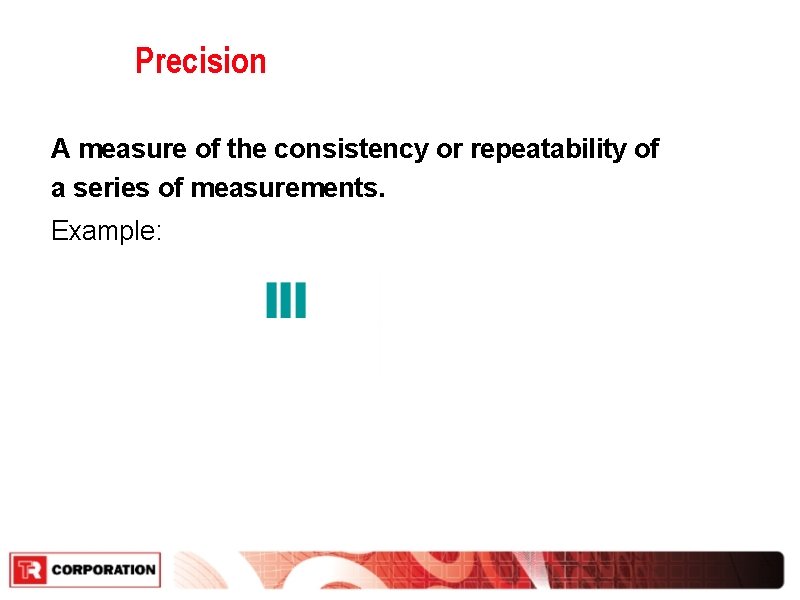
Precision A measure of the consistency or repeatability of a series of measurements. Example: Ideal
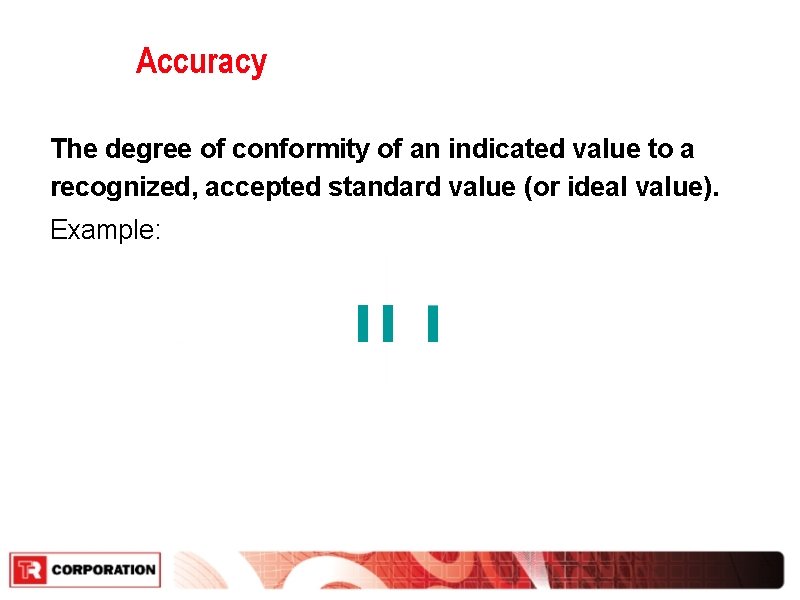
Accuracy The degree of conformity of an indicated value to a recognized, accepted standard value (or ideal value). Example: Ideal
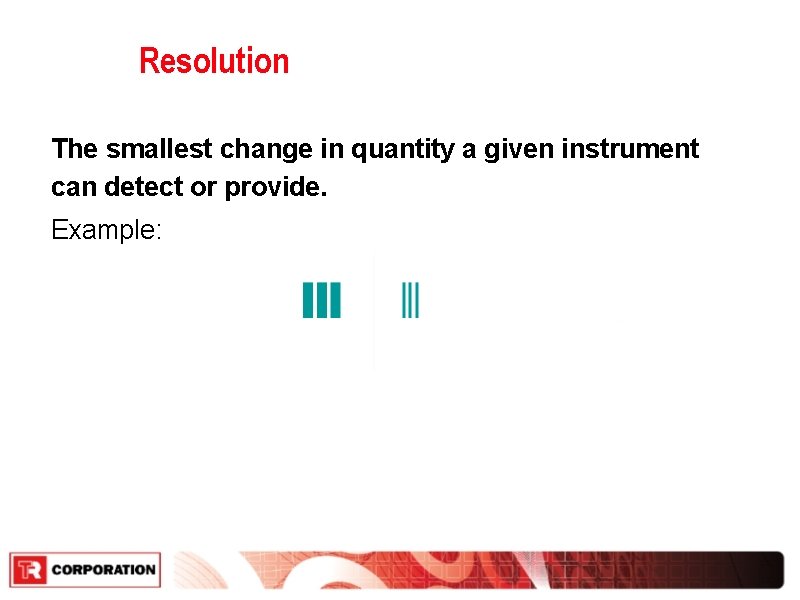
Resolution The smallest change in quantity a given instrument can detect or provide. Example: Ideal Resolution does not equal accuracy!
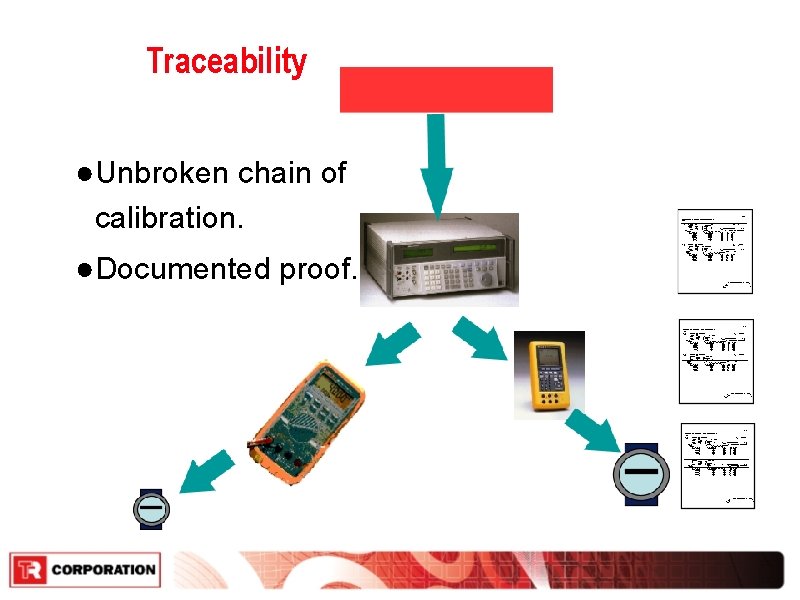
Traceability NATA or NIST ●Unbroken chain of calibration. ●Documented proof.
Test uncertainty ratios ● The Test Uncertainty Ratio (TUR) is the ratio between the accuracy of a calibration device to device under test (DUT). ● Ideal ratio, 10 X or better o 10: 1 ratio is ideal but impractical ● Typical accepted ratio, 4: 1 o Based on outdated MIL-STD-45662 A ● Ratios of as small as 1. 5: 1 with guard banding o Test the DUT to 80% of specification § Provides same confidence level as 4: 1
As Found / As Left Test As found ● The verified condition of a device prior to adjustment o If the test results are within the specified values no adjustment is required Adjustment if necessary As Left ● The verified condition of a device after adjustment o If the test results are within the specified values no further adjustment is required. o If test fails, readjust, re-run As Left until the test passes o If the device fails As Left after several re-tries, it may be defective and need replacement
Calibration Documentation A documented calibration requires: ● Tag, model and serial number of the device ● Person performing the task ● Calibration device and its certification information o When calibrated and when due for re-calibration ● Date and time performed ● Test tolerance ● The As Found data o Applied value, measured value, error calculation ● As Left data if adjustment is performed
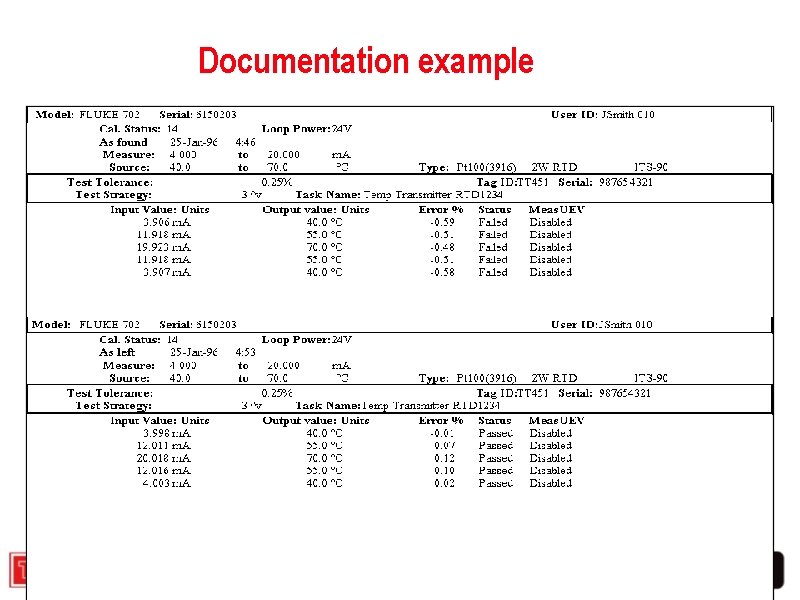
Documentation example
Summary ● Quality and regulatory forces mandate calibration ● Normal electrical precautions are necessary for working on low voltage 4 -20 m. A circuits ● 4 -20 m. A devices are the most common devices to be calibrated ● Indicators with a 4 -20 m. A input can be custom scaled ● The m. A output of a transmitter is proportional to the PV input being measured ● Total uncertainty is the combination of a number of different error types ● Documentation is necessary proof of a successful calibration
- Slides: 34