Principles of Measuring Instruments 5 th Term Batch
Principles of Measuring Instruments 5 th Term, Batch: 20010 10/2/2012 lec no. 8 & 9 1
DEFINATIONS 1. Measure: It is the numerical evaluation of a dimension or a property of comparison with standard of same kind 2. Compare: Compare is to judge of similar components are alike, comparing them together 10/2/2012 lec no. 8 & 9 2
DEFINATIONS (Cont. . ) 3. Test: • Test is to be certain that the exact value of the dimension or property is within the allowable tolerance • Presenting to the nominal dimension by means of measuring standards of the same kind is essential • Testing give the indirect comparison 10/2/2012 lec no. 8 & 9 3
DEFINATIONS (Cont. . ) 4. Count: • Count is to setup a serial number of abstract & concrete things • The last number of the series give the result of the counting process 5. Classify: • Classify is to arrange the component in groups according to a certain order. The specification of each group are to be determined 10/2/2012 lec no. 8 & 9 4
CLASSIFICATION OF MEASURING INSTRUMENTS Classified as follows 1. Measuring Instruments 2. Limit Gauges 3. Measuring Devices 4. Measuring Machines 10/2/2012 lec no. 8 & 9 5
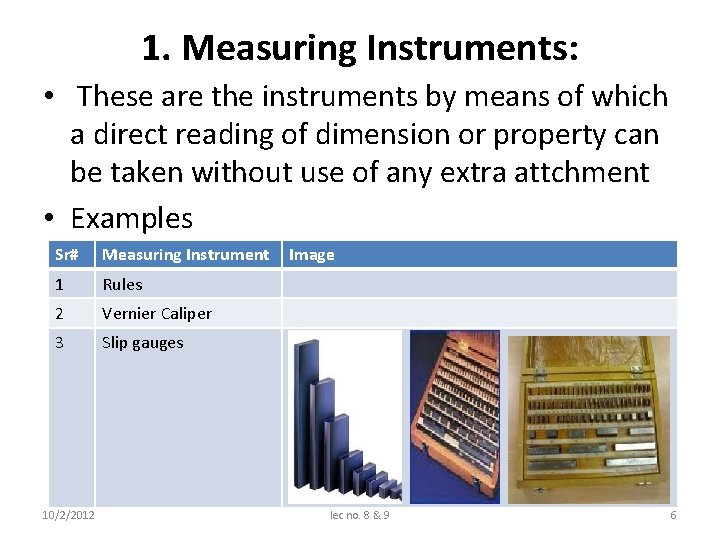
1. Measuring Instruments: • These are the instruments by means of which a direct reading of dimension or property can be taken without use of any extra attchment • Examples Sr# Measuring Instrument 1 Rules 2 Vernier Caliper 3 Slip gauges 10/2/2012 Image lec no. 8 & 9 6
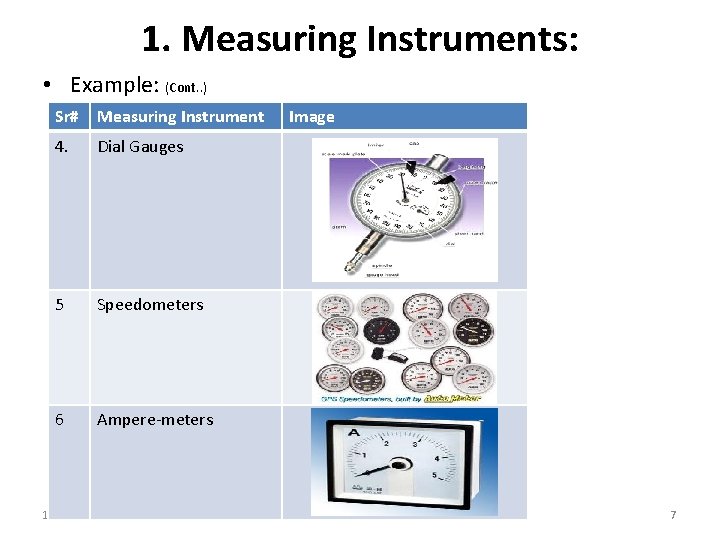
1. Measuring Instruments: • Example: (Cont. . ) Sr# Measuring Instrument 4. Dial Gauges 5 Speedometers 6 Ampere-meters 10/2/2012 Image lec no. 8 & 9 7
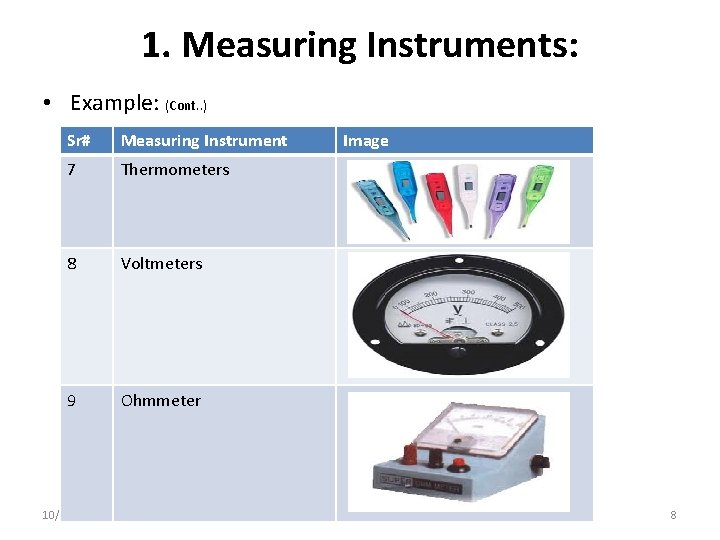
1. Measuring Instruments: • Example: (Cont. . ) Sr# Measuring Instrument 7 Thermometers 8 Voltmeters 9 Ohmmeter 10/2/2012 Image lec no. 8 & 9 8
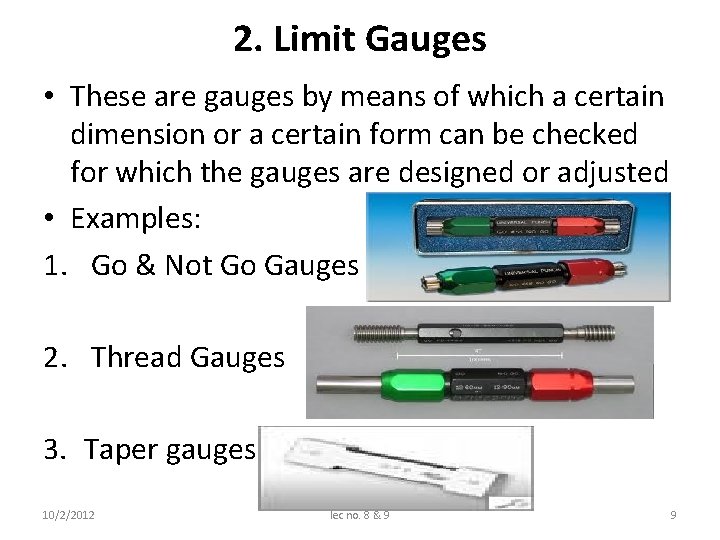
2. Limit Gauges • These are gauges by means of which a certain dimension or a certain form can be checked for which the gauges are designed or adjusted • Examples: 1. Go & Not Go Gauges 2. Thread Gauges 3. Taper gauges 10/2/2012 lec no. 8 & 9 9
3. Measuring Devices • These are the means of measurement by which the measured value is indicated on the measuring head • Some time it is possible to register the reading on a recording device • These are measuring devices with installed standards & others without installed standards. The later type is used for comparison 10/2/2012 lec no. 8 & 9 10
3. Measuring Devices • The measurement devices can be classified according to the type of measured head, eg: i. Mechanical Measuring Devices: In these devices the magnification of the reading is done by pure mechanical means such as levers & gears, Examples: a)Dial Indicator, b) Passimeter: c) Graphotester: 10/2/2012 lec no. 8 & 9 11
3. Measuring Devices (cont. . ) ii. Optical Measuring Devices: In these devices means are used in the measuring process. This can be an optical enlargement just for reading the standards (eg. Loop microscope or Projector), or it can be an optical magnification of the measured value. Usually a combination of these two is used. 10/2/2012 lec no. 8 & 9 12
3. Measuring Devices (cont. . ) iii. Electrical Measuring Instruments: – These are the device in which electrical energy is used in the measuring process. – The measurement is usually done by mechanical means (like: tracer, stylus, or plunger) & the movement is then converted to electric current, voltage or impulse – eg: Electrical Comparator, Perthometer tester 10/2/2012 lec no. 8 & 9 13
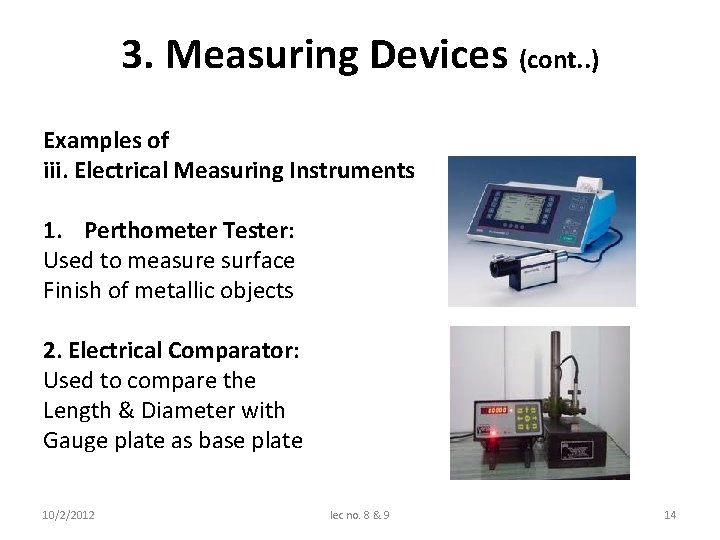
3. Measuring Devices (cont. . ) Examples of iii. Electrical Measuring Instruments 1. Perthometer Tester: Used to measure surface Finish of metallic objects 2. Electrical Comparator: Used to compare the Length & Diameter with Gauge plate as base plate 10/2/2012 lec no. 8 & 9 14
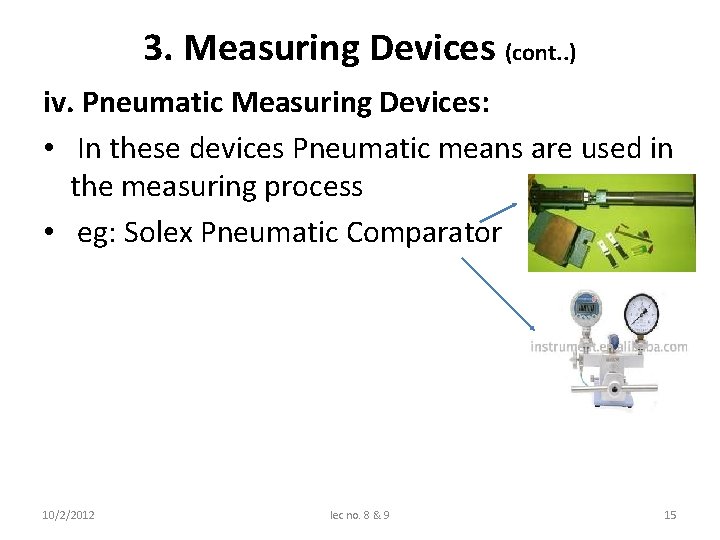
3. Measuring Devices (cont. . ) iv. Pneumatic Measuring Devices: • In these devices Pneumatic means are used in the measuring process • eg: Solex Pneumatic Comparator 10/2/2012 lec no. 8 & 9 15
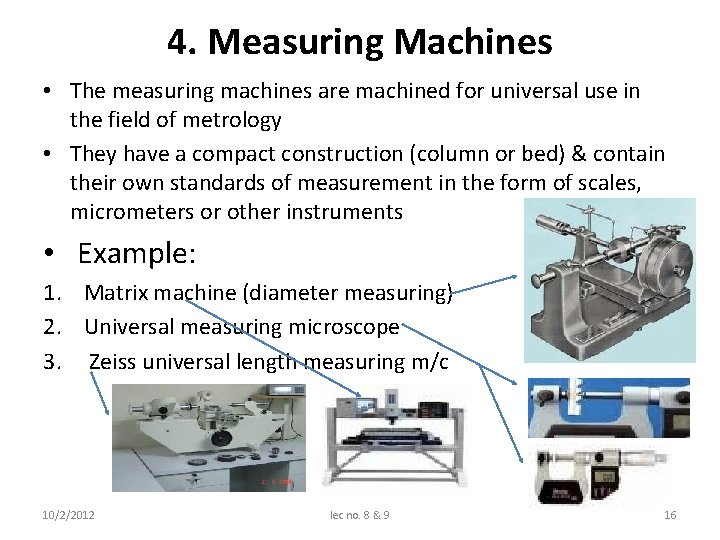
4. Measuring Machines • The measuring machines are machined for universal use in the field of metrology • They have a compact construction (column or bed) & contain their own standards of measurement in the form of scales, micrometers or other instruments • Example: 1. Matrix machine (diameter measuring) 2. Universal measuring microscope 3. Zeiss universal length measuring m/c 10/2/2012 lec no. 8 & 9 16
TECHNICAL SPECIFICATIONS OF MEASURING INSTRUMENTS The choice for selection of measuring instrument mainly depend upon its technical specification which are briefly discussed below: 1. Scale Value: “ It is the smallest possible value that can be read on the scale”. It is important to know whether the required accuracy will be achieved or not – In order to have a higher accuracy it should be small – 10/2/2012 lec no. 8 & 9 17
TECHNICAL SPECIFICATIONS OF MEASURING INSTRUMENTS (cont. . ) 2. Scale Division: “It is the distance in mm b/w two successive graduation on the scale” – In optical measuring equipment it is the apparent distance which is equal to the actual distance b/w any two successive graduations multiplied by the optical magnification use 3. Graduation Range: “ It is the product of the total number of scale divisions & the scale value”. It gives the measuring capacity of the measuring instrument. 10/2/2012 lec no. 8 & 9 18
TECHNICAL SPECIFICATIONS OF MEASURING INSTRUMENTS (cont. . ) 4. Linearity: “ It is ability of an instrument to reproduce the input characteristic symmetrically. It can be expressed by eq: – – – 10/2/2012 Y = m. X + C Where, Y = Output, X = Input, C = Intercept, m = slope The working range of many instruments provide the linear relationship b/w the output & input Within the graduation range, the scale should be linearly divided to allow for uniform accuracy The relation b/w the reading taken & real value of the dimension or property being measured should be a straight line relation. If there is no error, the slope of the line must be at 450 lec no. 8 & 9 19
TECHNICAL SPECIFICATIONS OF MEASURING INSTRUMENTS (cont. . ) 5. Threshold Value: “It is the smallest change in the dimension or property being measured that can just be indicated on the measuring device” If the instrument input is gradually increased from zero, there will be some minimum value below which no output change can be observed. – This minimum value represent the threshold of an Instrument – It can be more than one scale value – Reason of that can be backlash in the gearing or the thread used or the friction b/w the moving parts of the measuring device – 10/2/2012 lec no. 8 & 9 20
TECHNICAL SPECIFICATIONS OF MEASURING INSTRUMENTS (cont. . ) 6. Sensitivity: “ It is the property of measuring instrument to respond to changes in the measured quantity – It is the ratio b/w the displacement of the pointer or mark on scale, measured in scale division or in mm, & the corresponding change in the measured value – It is also known as resolution – Sensitivity depends on the magnification or amplification used – eg: a plain scale has less sensitivity than a vernier scale 10/2/2012 lec no. 8 & 9 21
TECHNICAL SPECIFICATIONS OF MEASURING INSTRUMENTS (cont. . ) 7. Accuracy: “It is the exactness of the indicated readings with the actual values of the measured dimension or property. It usually given as the %age graduation error in the form of a tolerance – It is not possible to achieve 100% accuracy – It is numerically equal to the degree of error in the final result – 10/2/2012 lec no. 8 & 9 22
TECHNICAL SPECIFICATIONS OF MEASURING INSTRUMENTS (cont. . ) 8. Measuring Force: “ It is the force by which the measuring anvil, plunger or stylus presses against the specimen being measured” This force can be responsible for the false measurements due to corresponding deformation of the specimen being measured as well as deformation of the elements of the measured device – Measuring force is not constant all over the graduation due to the variation of length of the spring providing the force – 10/2/2012 lec no. 8 & 9 23
TECHNICAL SPECIFICATIONS OF MEASURING INSTRUMENTS (cont. . ) 9. Working Capacity: “ It is the maximum dimensions & the maximum weight of the workpiece that can be measured by a given device 10. Free Stroke: “ It is the movement of measuring spindle outside the graduation range” 11. Error of Measuring Surface: 1. Flateness 10/2/2012 2. Squareness 3. Parallelism lec no. 8 & 9 24
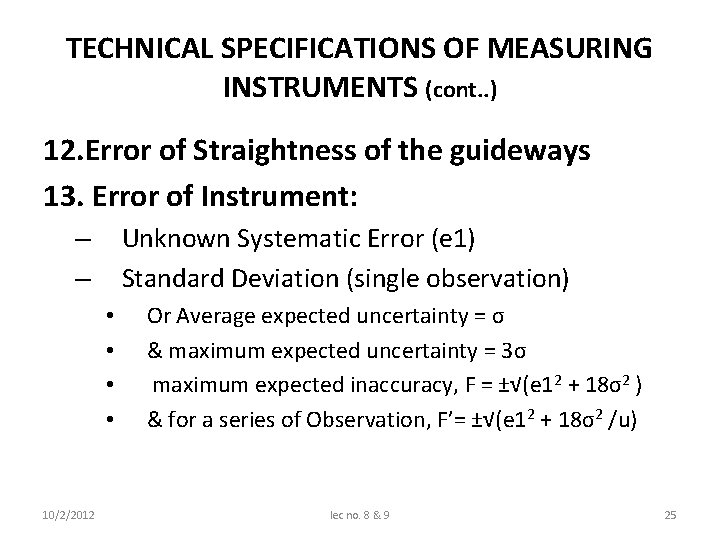
TECHNICAL SPECIFICATIONS OF MEASURING INSTRUMENTS (cont. . ) 12. Error of Straightness of the guideways 13. Error of Instrument: Unknown Systematic Error (e 1) Standard Deviation (single observation) – – • • 10/2/2012 Or Average expected uncertainty = σ & maximum expected uncertainty = 3σ maximum expected inaccuracy, F = ±√(e 12 + 18σ2 ) & for a series of Observation, F’= ±√(e 12 + 18σ2 /u) lec no. 8 & 9 25
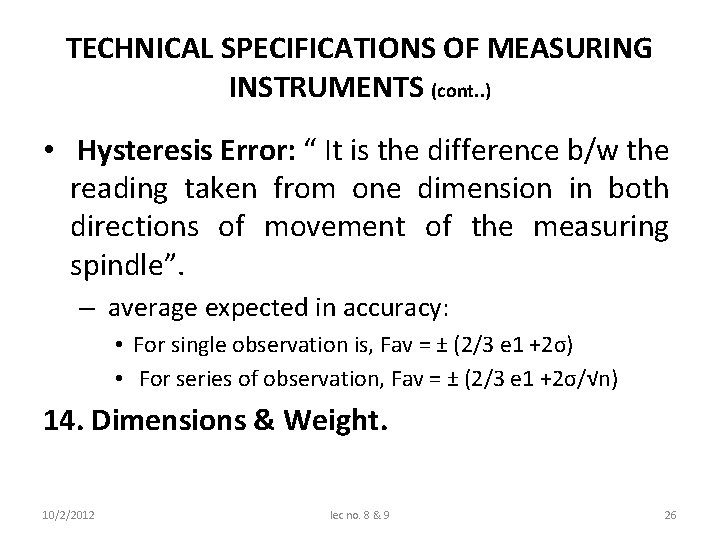
TECHNICAL SPECIFICATIONS OF MEASURING INSTRUMENTS (cont. . ) • Hysteresis Error: “ It is the difference b/w the reading taken from one dimension in both directions of movement of the measuring spindle”. – average expected in accuracy: • For single observation is, Fav = ± (2/3 e 1 +2σ) • For series of observation, Fav = ± (2/3 e 1 +2σ/√n) 14. Dimensions & Weight. 10/2/2012 lec no. 8 & 9 26
- Slides: 26