Precision Optical Alignment 3 D Measuring Coordinate Systems




- Slides: 10

Precision Optical Alignment 3 -D Measuring & Coordinate Systems Industrial Surveying 1. 2. 3. 4. 5. 6. Define. Applications. Expanding future needs. Tools of the trade. Right to work. Support structure.

Precision Optical Alignment Kern Optical Theodolite, Auto Level, and Standard Targetry. 1. Use of precision optical instruments to layout, place, level & align machinery accurately is essential for Millwrights. 2. Leveling and Aligning of machinery precisely once in place. (Primarily high-speed rotary) 3. Conduct optical diagnostic survey to reveal causes of misalignment and / or production issues related to alignment.

P. O. A. Applications 1. 2. 3. 4. 5. 6. 7. Footprints and Layouts of machinery prior to installation. Placement of floor monuments and control lines. High Speed Rotary machinery. Printing Presses, Web and Sheet fed. Packaging equipment – Coaters / Laminators, Metalizers, etc. Converting, paperboard, corrugated, cement, metal slitting, etc. Millwrights must be proficient in P. O. A. in order to qualify for working in these precision environments. 8. PMI experience – Contacting a converting company in NY state. 1. Multiple printing presses and coater / laminators. 2. In the process of bidding an optical alignment survey 15 x’s/yr. 2 men, 2 -10 hr weekend days. 3. Machinery needs to be kept in precise operating condition to avoid waste, long start up times, accurate printing for registration. 4. Work to be performed on press downtime. 5. Work for crew on regular basis with multiple clients.

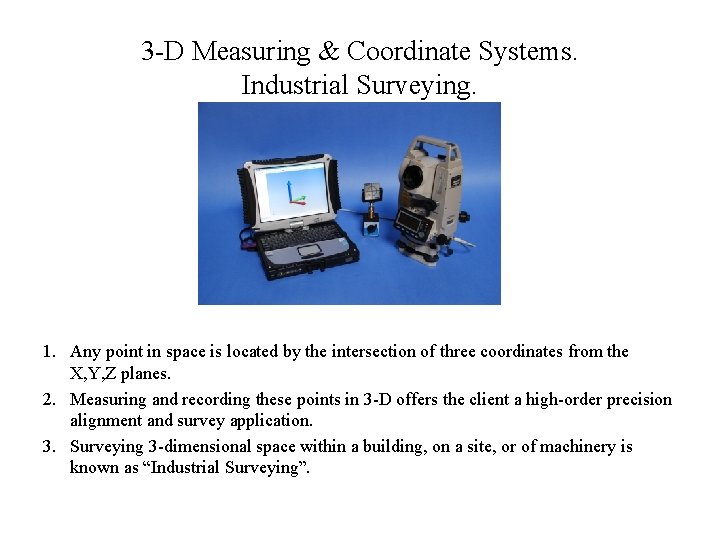
3 -D Measuring & Coordinate Systems. Industrial Surveying. 1. Any point in space is located by the intersection of three coordinates from the X, Y, Z planes. 2. Measuring and recording these points in 3 -D offers the client a high-order precision alignment and survey application. 3. Surveying 3 -dimensional space within a building, on a site, or of machinery is known as “Industrial Surveying”.

3 -D Applications 1. Precision Footprints and Layouts of machinery prior to installation. 2. Placement of floor monuments and control lines. 3. Precision warehouse racking systems. 1. Placement of magnets for AGV’s (automated guided vehicles ) 2. Racking systems for existing building. Is floor flat & level? Any variations? (age & past tenants) 3. Best fit analysis for systems going into existing building with obstructions. (Columns, sprinklers, etc) 4. Large scale metrology. (Science of measuring) 1. Pile of dirt for cubic volume. ( How much will fit? How much do we have? – Coal ) 2. Thickness of a sheet of paper, film, laminate, etc. 3. Check room for square footage or cubic volume capacity prior to install. ( Racking system ) 5. Facility Site Surveys – Recording the location of inside items: 1. 2. 3. 4. Column Lines, sprinkler systems, electrical conduits. Determine if new machinery will fit. Determine if existing machinery is within specs. Safety – check racking systems, check floor settlement under equipment or machinery. Safety – Check floor for level prior to installation of machinery and for pitch and run-off.

Expanding Future Needs 1. P. O. A. & 3 -D measuring / Industrial Surveying will continue to need well trained technicians. 2. Math, blue print reading, computers, Auto. Cad, Optical Instrument, Total Stations. 3. Apprentice schools need to maintain a current curriculum for apprentices and for existing journeyman that want to keep current on their skills and learn new skills for 3 -D & I. S. 4. Contractors can acquire more work by expanding their services to include optical alignment & 3 -D / I. S. in addition to machinery installation. 5. Contractors and employees need to project a professional image by appropriate uniforms and appearance. Creates a sense of security within the client when we look professional. 6. PMI experience – Acquisition of entire installation by being previously employed for alignment work within plant.

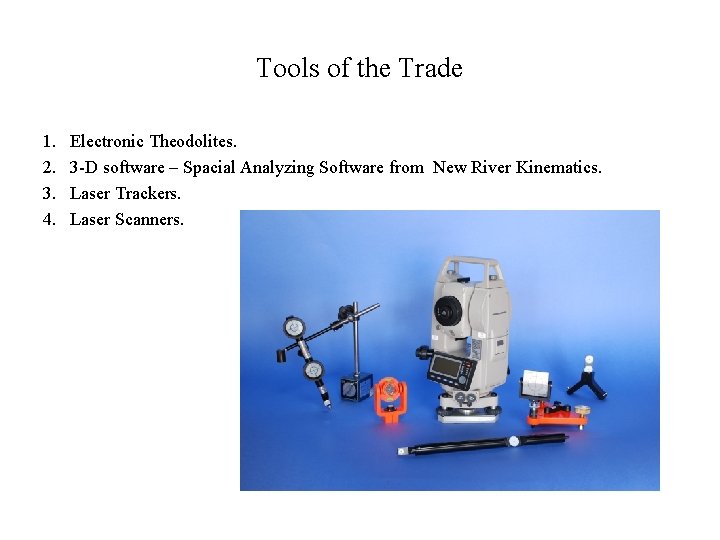
Tools of the Trade 1. 2. 3. 4. Electronic Theodolites. 3 -D software – Spacial Analyzing Software from New River Kinematics. Laser Trackers. Laser Scanners.

Right to Work. 1. 2. 3. 4. 5. 6. 7. 8. Description of work: Layout work of monuments, center lines, control points, base lines. Alignment & leveling of machinery prior to installation. 3 -D surveys of existing machinery. Leveling and aligning. Large scale machinery, power plants, refineries, production facilities, etc. Work directly related to machinery installation. Millwrights install, repair, dismantle, and move machinery. Floor Layouts are directly related to the installation process of new machinery. 9. Layouts for the relocation process of existing machinery either within an existing facility or to a new building.

Support Structure 1. Pre-installation layouts often go to non-union contractors or those connected with the plumbers union or “field engineers” who hire or sub-out to non-union contractors. 2. Millwrights often lose this work which we have a right to. 3. Need to raise awareness that layouts of machinery is Millwright work and should be conducted by Millwright Contractors. 4. Negotiations with others unions may ensure Millwrights get the work we are entitled to. 5. Expanding 3 -D & Industrial Surveying work that involves installation, dismantling, moving and refurbishing of machinery and related safety issues, needs to be supported by the local unions in order to acquire the work we are entitled to. 6. We need to be define the whose work is this’ issue with the emerging Industrial Surveying market. 7. If the Millwrights are entitled to the work they need to claim it and be supported by their local halls.

Where to Go for More Info www. convertingmagazine. com May 2007 July 2007 November 2007 – Case Study. www. kinematics. com Spacial Analyzing Software www. sokkia. com Net 1200 / Industrial Total Stations. www. pmiguys. com industrialsurveying@pmiguys. com