POS BPM Content 1 Introduction 2 POS Ideal

POS BPM

Content 1. Introduction 2. POS: Ideal POS 3. Integration with POS BPM ◦ User Management System ◦ Configuration ◦ Sales Integration ◦ ◦ STEP 1: Importing Data from Ideal POS. STEP 2: Reconcile Accounts STEP 3: Print Reports Step 4: Export to Attaché BI ◦ Suppliers Integration

1. Introduction POS-BPM provides a software solution to integrate a world class POS system with Attaché BI. - Users can process sales invoices, payments and supplier invoices from POS into Attaché BI. - Simple 4 step process allows all transactions to be reviewed, payments reconciled, additional journals created and finally a processing stage to update Attaché BI.

2. POS: Ideal POS

2. POS: Ideal POS

3. Integration with POS BPM User Management System - Add/ Edit Users - Login Screen - Maintain Profile

3. Integration with POS BPM Configuration ODBC DSN Setup Required to connect to the live data. Data Path: to export unattended KFI’s. Clearing Accounts Codes Configuration. Naming the File: If multi-locations, File must start with location id. Format POS File: Narration, Date, Description, Account. Code, Tax. Rate, Amount Example: Transferred from POS-SR 000009, 09/10/2015, Transferred from POS-CASH, 5201, 2, 1263 Note: Tax. Code 2 = Exclude from BAS; Tax. Code 3 = GST Inclusive; Tax. Code 4 = GST Free

3. Integration with POS BPM STEP 1: Importing Data Main objective: Import and validate the data from the Ideal POS into the POS BPM

3. Integration with POS BPM STEP 1: Importing Data Once the Files have been imported into the system, it validates the data against Attaché and other possible errors to ensure a clean import into the system and reduce the margin of error. If errors are found, the user has the ability to update the information and correct the errors or to reject the journal to be imported again with the required modifications. Error Validation: - Importing the same file twice - Invalid or wrong location - Non existing GL Account in Attaché - Sales does not balance - Sales Produces a negative payment

3. Integration with POS BPM STEP 1: Importing Data Checking and locking the files. Once the Files have been imported and the data validated (0 Errors), the user has the ability to lock the files confirming the data is correct. After Locking All the files, the user is ready to move to the STEP No 2.

3. Integration with POS BPM STEP 2: Reconcile Accounts

3. Integration with POS BPM STEP 3: Print Reports

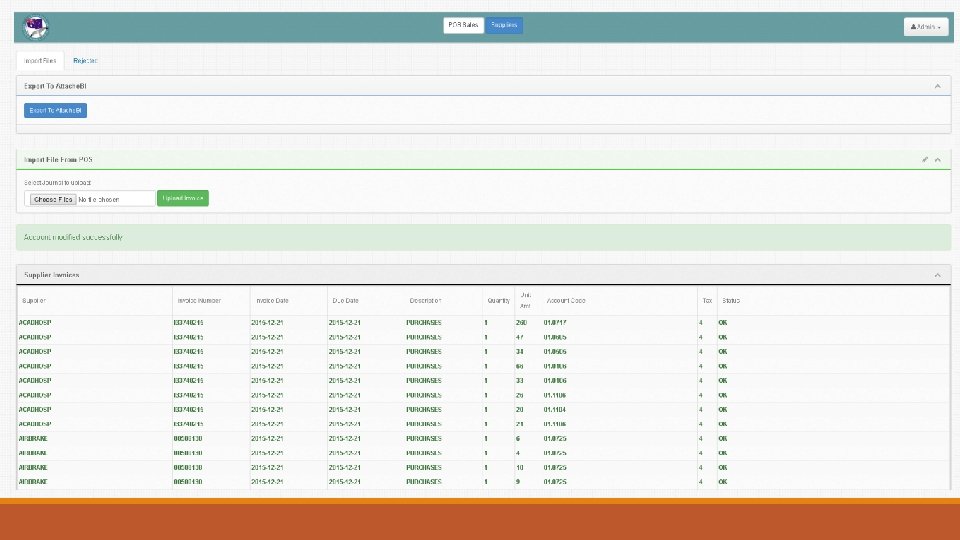
3. Integration with POS BPM STEP 4: Export to Attaché BI Final Step, allows user to modify all journal / Invoices Dates, and select the period to post the respective journals.

3. Integration with POS BPM STEP 4: Export to Attaché BI Once exported into Attaché, The POS BPM connects to the unattended KFI Location and check for the files being processed.

3. Integration with POS BPM STEP 4: Export to Attaché BI Once the Export process is completed, all the data gets stored locally for further references.
- Slides: 16