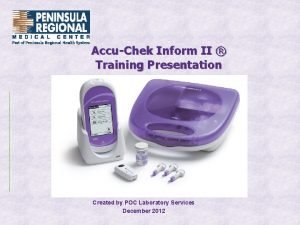
POCT Glucose AccuChek Inform II Point of Care


- Slides: 13

POCT Glucose Accu-Chek Inform II Point of Care Testing Education Regional Laboratory Services Rev. 05/2019

Objectives: • • • Accu-Chek Inform II Glucose meter and Components Principles of operation Specimen requirements Reagent/Supplies/Equipment Test Strip & Control Requirements Perform and document Quality Control Perform and document Patient Results Interpret Results/Documentation Troubleshooting Instrument Maintenance Competency requirements

Meter Components: Base Store the meter on the base unit to: • Recharge the battery pack • Upload new test strip and QC lot data • Upload new patient ADT and operator information • Download QC information • For department’s with wireless capabilities: If the wireless system is down, patient results will transmit when the meter is placed in the base unit.

Principles of Operation: • Testing methodology: – The meter combines whole blood with an enzyme in the test strip. – A small electrical current is produced and measured. This is proportional to the amount of glucose. • Regulatory class: The Clinical Laboratory Improvement Act (CLIA) classifies this test as waived. • Confirmatory testing requirements: – Repeat testing for unexpected results. – Send a specimen to the laboratory if: • Result(s) are within critical ranges and they have not been previously verified (unless provider deems results are consistent with clinical picture) • No results are obtained (instrument displays a code instead of a value) • Repeated results are confirmed, but inconsistent with the patient’s condition.

Competency Requirements for Operators • Completion of following tasks are required each year by each testing operator for continued access to the Inform II meter: – Completion of all related/assigned Health. Stream learning modules by the assigned due date. – Successful performance of both levels of quality control – 1 patient test performance – Note: All testing must be completed utilizing the employee badge barcode as the operator ID for electronic registration of testing events. • Failure to complete all of the above will result in the operator lock-out from the glucose meter.

Reagents / Supplies / Equipment: • Reagents: – Accu-Chek Inform II Test Strips • Test strips expire at manufacturers date on bottle when properly stored – Test strips are sensitive to light, heat and moisture – Store sealed in the original bottle at room temperature – Use test strips immediately after removing from the container – Accu-Chek Inform II Quality Control (2 levels) • Store at room temperature • Controls expire 3 months after opening – Document “Opened Date” and “Discard Date” – Discard any strips and/or controls that have expired • Supplies: – Routine finger-stick, heel-stick or phlebotomy supplies – Clorox Germicidal Wipe • Equipment: – Accu-Chek Inform II Test Meter & Accessory Tote – Accu-Chek Inform II Base Unit (docking station)

Quality Control: • Frequency: – – • Run 2 levels of quality control every 24 hours on each meter “QC Due: immediately” displays & meter locks out until QC is performed Procedure: — — Press the ON/OFF button to power on the meter Scan “Operator ID” by touching & releasing Select “Control Test” from the menu Scan QC vial barcode. — The level and lot number are entered automatically. — Scan “STRIP LOT” barcode on the selected test strip vial — If Control or Test Strips aren’t accepted: Contact POCT department – Insert test strip when prompted • Electrodes facing upward and inward – sample window outward – Apply gently mixed control solution when prompted • Touch drop of solution to the yellow area at the tip of test strip – Test begins automatically when adequate volume is applied – The test result displays “PASS” or “FAIL” when completed – QC Test Comments are required for all QC failures – Press COMMENT(S) to select up to 3 comments. – A minimum of one comment is required. – Press to record comments and save result – Remove the test strip and dispose of appropriately – Repeat the same steps for both control solutions

Specimen Requirements: • Acceptable specimens: – Capillary whole blood from a finger or heel-stick; test immediately. • • Clean the puncture site (either with alcohol or soap and water) and allow to dry Only use single-use, auto-disabling lancets Press lancet firmly to site and activate lancet Wipe away the first drop of blood with dry gauze or a cotton ball. Use the second drop of blood to perform the test. – Fresh venous or arterial whole blood collected using a plain syringe (without anticoagulant); test immediately – Venous or arterial whole blood collected in an EDTA or Heparin blood collection tube; test within 30 minutes. • Unacceptable Specimens: – Self-testing with POCT equipment is not permitted within the Providence Health System for any reason. • In the event that a Providence Caregiver experiences a health complication: – – – testing should be performed using their own personal device, as prescribed by their physician and/or notify the department supervisor. Clotted Specimens Neonatal cord blood Serum or plasma specimens When testing is not performed at the patient bedside, the specimen must be labeled. Unlabeled specimens are unacceptable.

Specimen Limitations: • It is NOT acceptable to obtain a capillary sample for glucose testing when the following conditions apply: – Impaired peripheral circulation due to: • • • Severe dehydration due to DKA or HHNK Hypotension Shock Peripheral Arterial Occlusive disease Decompensated Heart Failure NYHA Class IV – Venipuncture or line draws are the only acceptable samples when impaired peripheral circulation conditions are present. • It is NOT acceptable to use the Inform II glucose meter when the following conditions apply: – Samples must be sent to the laboratory if: • • • Specimens collected with anticoagulants other than EDTA or Heparin Specimens from patients with Hematocrit of <10% or >65% Specimens with marked lipemia (triglycerides >1800 mg/d. L) Blood concentrations of galactose >15 mg/d. L Intravenous administration of ascorbic acid that results in blood concentrations of Ascorbic acid >3 mg/d. L

Patient Testing: • Transport the meter and all accessories in the tote to the patient bedside. – • • Except into patient isolation rooms. (Strip vial should remain in the patient room and be discarded upon discharge. ) Press the ON/OFF button to power on the meter Scan your “Operator ID” by touching and releasing Select “Patient Test” from the menu Scan the “Patient ID” and confirm the identification is correct Scan the “Strip Lot” barcode from the test strip vial Insert test strip when prompted Obtain blood sample Apply sample when prompted (there will be an audible beep with a drop of blood displayed on the screen when the analyzer is ready for the sample to be applied) – Touch a drop of blood to the yellow area at the tip of the test strip – Test begins automatically when adequate sample volume is applied • • The test result displays and the meter beeps when test is complete Press to send the results wirelessly to the patient chart (for those departments with wireless transmission capabilities) and/or to return to the Main Menu. Remove and dispose of the test strip appropriately. Clean the meter and tote prior to use on another patient or placing the meter for storage – • Utilize a Clorox Germicidal Wipe ONLY (Wet time = 3 minutes) Transport the meter in the tote and place back onto the base

Interpretation and Critical Values • Reference Ranges: Normal Range Critical Values 0 -1 Day 36 mg/d. L – 110 mg/d. L 1 – 28 days 47 mg/d. L – 110 mg/d. L All values <35 mg/d. L or >200 mg/d. L Age Range 28 days to Adult • 65 mg/d. L- 99 mg/d. L All Values <50 mg/d. L or ≥ 400 mg/d. L Out of Reportable Range: Results outside the meter’s Reportable Range display as: – “LO” (result < 10 mg/d. L) or “HI” (result > 600 mg/d. L) – Treat results outside the reportable range as a critical value. • Actions for Critical Results: – Comment entry from the glucose meter is required for all critical values. • • 1 minimum – up to 3 permitted NOTE: Once the meter times out or the result is sent – It is not possible to edit the result to add a comment. – “Out of Range Critical” message will display on the screen and require acknowledgement to proceed. – Press to record comments. Press again to transmit the result. – Confirm result via repeat testing or with the laboratory if the result is: • Not previously verified • Inconsistent with the clinical picture.

Documentation: • For departments with Interface: – Press to send the results wirelessly to the patient chart and/or to return to the Main Menu. – CRITICALS: Action comments must be documented from the glucose meter. • For department without interface: – POCT Requirement: Result should be documented in the patient EMR via the ENTER/EDIT function in Epic. Other locations of charting are not considered acceptable. – “LO” error codes should be documented as <10 mg/d. L. – “HI” error codes should be documented as >600 mg/d. L. – All results, to include questionable results, MUST be documented. – CRITICALS: Action comments must be documented from the glucose meter.

Troubleshooting: • • Quality Control testing failure: – Repeat the QC using new control solutions and/or a new vial of strips – If repeat QC fails: • Sequester the meter and the original test strip vial and QC solutions • Contact the POCT department • Start over with a different meter, a new test strip vial and new QC solutions • Place an order for laboratory confirmation. Operator ID invalid: – Contact your Point of Care Coordinator: • Never borrow or share your badge. It is against Providence Policy and could lead to corrective action. Performing patient testing using another employee’s badge is falsifying patient records. • Possible reasons for invalid message: – – – • • • Expired certification. New employee badge. You are a new employee and have either not been trained or have not been entered into the glucose meter database. Patient Armband won’t scan: – Ensure that the barcode screen on the meter is clean – Obtain a new armband Meter won’t turn on: – Reset the meter by holding down the power button for 20 – 30 seconds. – Check the meter battery life • If battery life is insufficient, place meter in the docking station for a minimum of 2 hours. • A meter reset may be required once the meter has charged successfully Note: Contact your point of care coordinator or Bio-Med department for unresolved issues.
