PNF TECHNIQUE UPPER EXTREMITY LENNY A Upper Extremity

 Starting Position (Fig. 6.")
 Hand Placement: • Place the index and middle fingers of your (R) hand")
 Starting Position (Fig. 6. 34 A) • Begin as")
 Ending Position (Fig. 6. 34 B) • Finish the pattern in shoulder extension,")
 Starting Position (Fig. 6. 35 A) • Position the")
 Verbal Commands • As you apply a quick stretch to the wrist and")
 Starting Position (Fig. 6. 36 A) • Begin as")
 Verbal Commands • As you apply a quick stretch to the wrist and")
- Slides: 13
PNF TECHNIQUE UPPER EXTREMITY LENNY
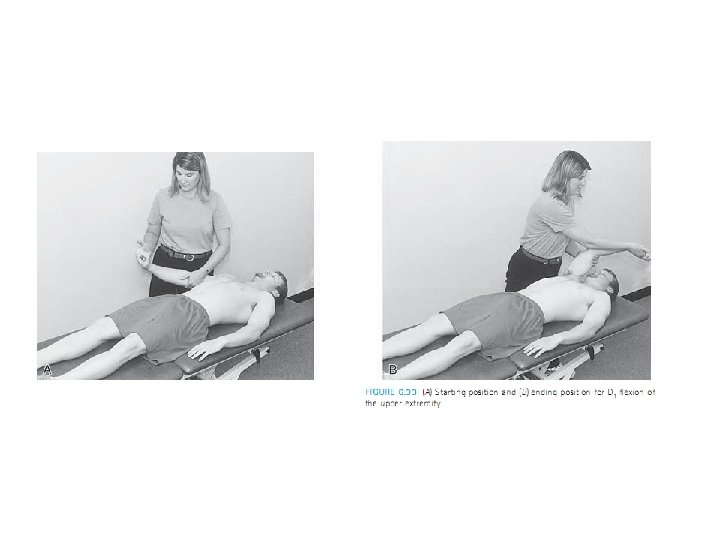
A. Upper Extremity Diagonal Patterns 1. D 1 Flexion: a) Starting Position (Fig. 6. 33 A) • shoulder extension, abduction, and internal rotation; • elbow extension; • forearm pronation; • wrist and finger extension with the hand about 8 to 12 inches from the hip.
b) Hand Placement: • Place the index and middle fingers of your (R) hand in the palm of the patient’s hand your left (L) hand on the volar surface of the distal forearm or at the cubital fossa of the elbow. c) Verbal Commands • As you apply a quick stretch to the wrist and finger flexors, tell the patient “Squeeze my fingers, turn your palm up; pull your arm up and across your face, ” as you resist the pattern. d) Ending Position (Fig. 6. 33 B) • Complete the pattern with the arm across the face in shoulder flexion, adduction, external rotation; partial elbow flexion; forearm supination; and wrist and finger flexion.
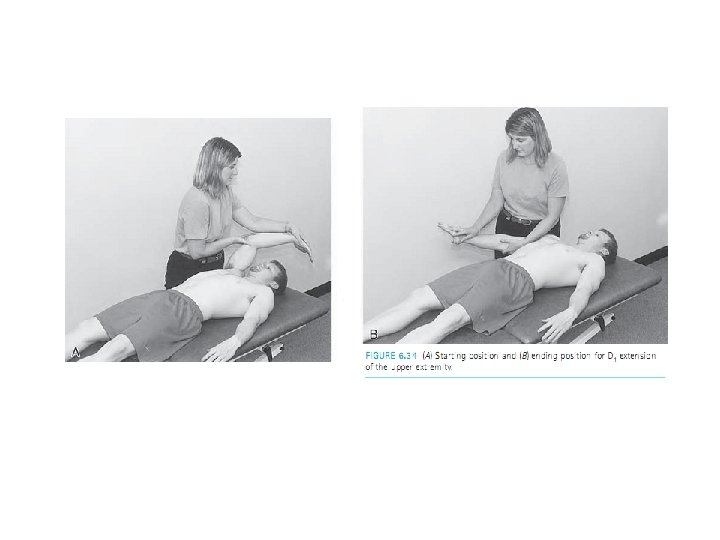
2. D 1 Extension a) Starting Position (Fig. 6. 34 A) • Begin as described for completion of D 1 Flexion. b) Hand Placements • Grasp the dorsal surface of the patient’s hand fingers with your (R) hand using a lumbrical grip. Place your (L) hand on the extensor surface of the arm just proximal to the elbow. c) Verbal Commands • As you apply a quick stretch to the wrist and finger extensors, tell the patient, “Open your hand” (or “Wrist and fingers up”); then “Push your arm down and out. ”
d) Ending Position (Fig. 6. 34 B) • Finish the pattern in shoulder extension, abduction, internal rotation; elbow extension; forearm pronation; and wrist and finger extension.
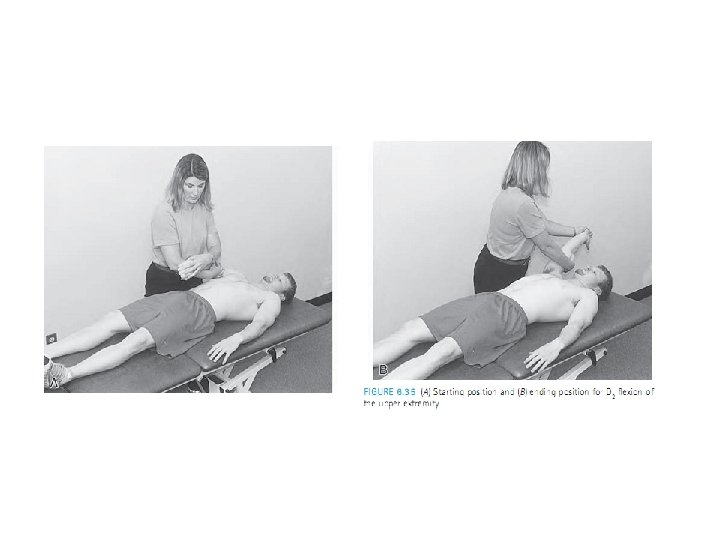
3. D 2 Flexion a) Starting Position (Fig. 6. 35 A) • Position the upper extremity in shoulder extension, adduction, and internal rotation; elbow extension; forearm pronation; and wrist and finger flexion. The forearm should lie across the umbilicus. b) Hand Placement • Grasp the dorsum of the patient’s hand with your (L) hand using a lumbrical grip. Grasp the dorsal surface of the patient’s forearm close to the elbow with your (R) hand.
c) Verbal Commands • As you apply a quick stretch to the wrist and finger extensors, tell the patient, “Open your hand turn it to your face”; “Lift your arm up and out”; “Point your thumb out. ” d) Ending Position (Fig. 6. 35 B) • Finish the pattern in shoulder flexion, abduction, and external rotation; elbow extension; forearm supination; and wrist and finger extension. The arm should be 8 to 10 inches from the ear; the thumb should be pointing to the floor.
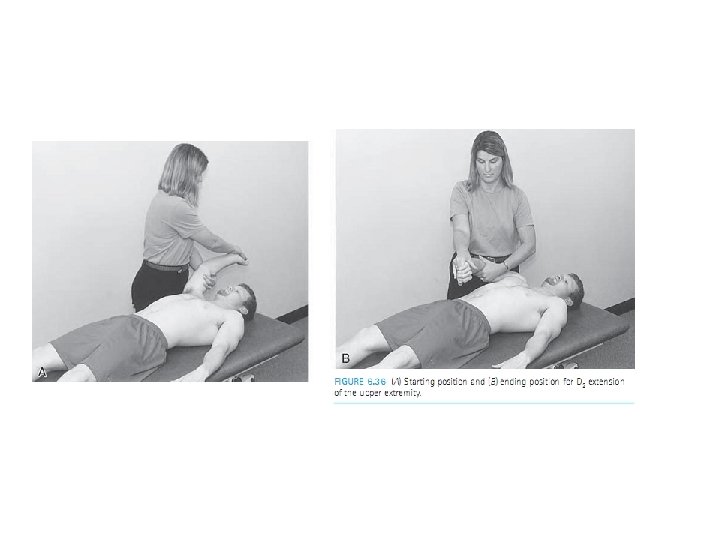
4. D 2 Extension a) Starting Position (Fig. 6. 36 A) • Begin as described for completion of D 2 Flexion. b) Hand Placement • Place the index and middle fingers of your (R) hand in the palm of the patient’s hand your (L) hand on the volar surface of the forearm or distal humerus.
c) Verbal Commands • As you apply a quick stretch to the wrist and finger flexors, tell the patient, “Squeeze my fingers and pull down and across your chest. ” d) Ending Position (Fig. 6. 36 B) • Complete the pattern in shoulder extension, adduction, and internal rotation; elbow extension; forearm pronation; and wrist and finger flexion. The forearm should cross the umbilicus.