PICC and Midline Catheters What is a PICC


- Slides: 50

PICC and Midline Catheters

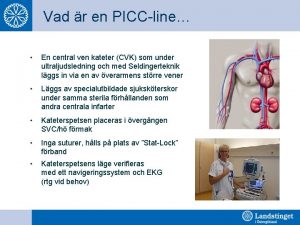
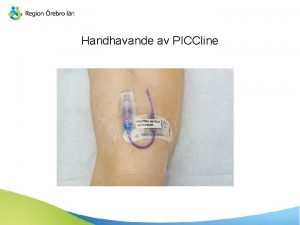
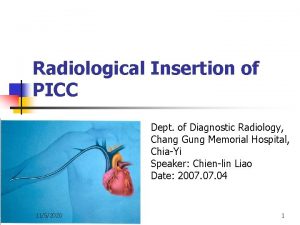
What is a PICC • Peripherally Inserted Central Catheter • Indications for PICC • TPN or other solutions requiring central placement such as certain chemotherapies. • Therapies that over time can cause chemical phlebitis such as Vancomycin and Nafcillin • Therapies lasting longer than 4 weeks • Can be used for blood draws

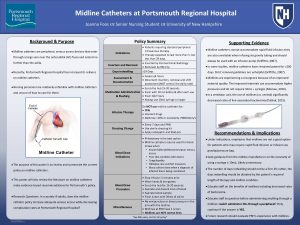
What is a Midline • Peripherally inserted catheter that tip is not centrally placed, such as a Groshong • May remain in for 30 days • Determine by measurement of line or CXR • Indications for use: poor venous access requiring multiple IV site changes and therapies lasting less than 30 days • May use for lab draws

What is an Implantable Port • A port (often referred to by brand names such as Medi. Port) is a central venous line that does not have an external connector; instead, it has a small reservoir implanted under the skin. • Medication is administered intermittently by placing a small needle through the skin into the reservoir. • Ports are used for patients needing long-term intermittent treatment.

PICC and Midline Flushing • Sodium Chloride- 5 cc before and after routine IV/medications • 10 cc NS before and after blood draws (PICC only-10 cc Sodium Chloride b/a TPN) • 20 cc NS after blood product administration • Heparin 100 units/cc 2. 5 cc final flush in absence of continuous infusion and daily when line not in use.

Sterile Dressing Change • • Change dressing 24 hours post insertion Every 7 days Hibiclens followed by Chloraprep Biopatch – an antimicrobial dressing Steri-strips to secure site Clear bio-occlusive dressing Change cap every 7 days or whenever removed

Hibiclens scrub

Chloraprep swab to remove soap

Biopatch around line at insertion site

Biopatch over line at insertion site

Steristrips from insertion site to hub

Bio-occlusive dressing to cover

Secured with K-lok over extension tubing

PICC Secured with Statlock

Line Repair • • • Clean site with Hibiclens and Chloraprep Clean segment of line to be trimmed Trim line above damaged portion Slide sleeve over line Grasp emerging line with sterile gloved fingers • Insert stylet tip fully into line and slide sleeve up to connect firmly

Line repair continued • Single lumen Groshong lines will click when securely fastened. • Dual lumen Groshong lines will have white stylet to remove after repair complete. • After repair complete tug gently to ensure secure connection • Apply sterile dressing and flush line

Hibiclens scrub (be sure to clean area of line to be cut)

Chloraprep swab (be sure to prep area of line to be cut)

Cut line above damaged portion

Slide sleeve over cut line

Grasp emerging end to prevent internal migration

Insert stylet into line up to hub

Stylet fully inserted up to hub

Slide sleeve up; align grooves with the wings and click together

Add extension and cap to repaired PICC; flush and dress

Lines that cannot be repaired • Dual lumen lines that are broken above the white y • Lines that are clear and have clamps attached to the line.

De-clotting Line • Mix solution according to pharmacy directions • Withdraw appropriate volume of solution into syringe • Remove injection cap, attach syringe with de-clotting agent to hub of occluded lumen • Inject de-clotting solution. (this may or may not infuse easily

De-clotting line continued • If it is difficult to instill de-clotting use a gentle push/pull action of the syringe to allow gradual mixing. TO PREVENT RUPTURE DO NOT FORCE. • Remove or tape syringe down to arm and let de-clotting solution work for 30 -60 minutes

De-clotting PICC continued • Attempt to aspirated after 30 -60 minutes • If blood cannot be aspirated, try to aspirate again in 15 minutes. • If blood aspiration success • Aspirate 5 cc of blood and discard • Irrigate catheter with 10 cc Sodium Chloride followed by 2. 5 cc Heparin 100 units/cc

Mix medication according to directions and draw into syringe

Attach syringe to hub and instill medication

De-clotting line waiting 30 -60 min

Attempt to aspirate and withdraw 4 -5 cc of blood to waste

Flush line with NS 10 cc followed by Heparin 100 u/cc 2. 5 cc

Migration • Movement of catheter from its original placement. • To prevent further migration, line should be adequately secured with securing device and occlusive dressing. • Repairable lines should be trimmed of excessive exterior length and repaired. • Assessment needs to be completed to determine if placement remains adequate for current IV therapy.

PICC migrated outward several inches

Measure migrated line

Phlebitis • Phlebitis shall be defined as an inflammation of the vein and is a potential complication • It will be rated according to a scale of 0 through +4

Phlebitis Scale 0 • No clinical symptoms

Phlebitis Scale 1+ • • • Erythema with or without pain Edema may or may not be present. No streak formation No palpable venous cord Moist heat may be applied if there is pain Patient may be asked to use the arm

Phlebitis Scale 2+ • • • Erythema with or without pain Edema may or may not be present Streak formation No palpable venous cord Low heat for 2 -3 days, elevate arm, mild exercise and follow up daily to see if decrease in symptoms

Phlebitis Scale 3+ • • • Erythema with or without pain. Edema may or may not be present. Streak formation. Palpable cord. Daily visual monitoring for any decrease in symptoms

Phlebitis Scale Grade 4 • • • Erythema with or without pain Edema may or may not be present Streak formation Palpable venous cord greater than 1 inch in length Purulent drainage Culture site, cleanse site, notify M. D. , blood cultures, may remove catheter and culture tip

PICC line removal • • • Gather supplies Remove dressing Gently retract line from arm Apply pressure to site Cover with gauze and apply occlusive dressing

Removing PICC line

Gently pull line out

Apply pressure with gauze when line removed

PICC line removed, dressing applied

Final measurement of removed PICC line

Questions • RN is available on call 24 hours /day • For questions call 383 -3099 • Adapted with permission from the Carle Infusion Department
 Midline vs picc
 Chapter 25 urinary catheters
 Paramedian incision
 Subhyoid bursitis
 How to find midline of sinusoidal function
 Superficial epigastric vein drains into
 Superior meaning anatomy
 Megacolin
 Mini-midline
 Sacrokolpopexi
 Anatomical position
 Caput
Caput Hipodens hiperdens
 Midline shift of brain
 How to find the midline of a graph
 Central ven
 What is a groshong catheter used for
 Broken picc line tip
 La mia vita con il picc
 Picc model problem solving
 Picc line inläggning
 Picc line surgical wound oasis
 Cateter yugular posterior
 Removal of hickman catheter
 Chg bath picc line
 Redorangeyellowgreenbluepurple
 And because i am happy and dance and sing
 West side story vs romeo and juliet
 Younger shorter older old
 How to write 1000 pesos
 Blue red orange blue green red
 One night a theater sold 548
 Young and dyslexic poem
 Albany movement
 West yorkshire health and care partnership
 Compression and rarefaction
 Compare and contrast spring and neap tides.
 Independent variable input output
 Action verbs and linking verbs
 Meaning of life role
 Importance of records and reports
 Transportation and assignment problems and solutions
 Compare and contrast cold wave and wind chill factor
 Trading account vertical format
 Lesson preparation siop
 Tomorrow and tomorrow shakespeare
 Mr biv ritz carlton
 Conglomerates and franchises 1950s
 Semi tendinosis
 The great gatsby chapter 3 analysis questions
 The giver chapter 3 and 4 questions and answers
