Physical Inventory Training Physical Inventory Training Updated 10122016


 • Once you have finished double checking your variance and")
 • Before you update your inventory counts you must receive")


- Slides: 45
Physical Inventory Training
Physical Inventory Training Updated 10/12/2016
Steps to Physical Inventory 1. 2. 3. 4. 5. Preparation Counting Entering Counts Researching Variance Post Physical Inventory Counts
Preparation-Two Weeks Before Inventory • Submit your petty cash voucher to accounting. • You will need money for supplies, lunch and possibly dinner. • This will be enough time to get a check back before inventory.
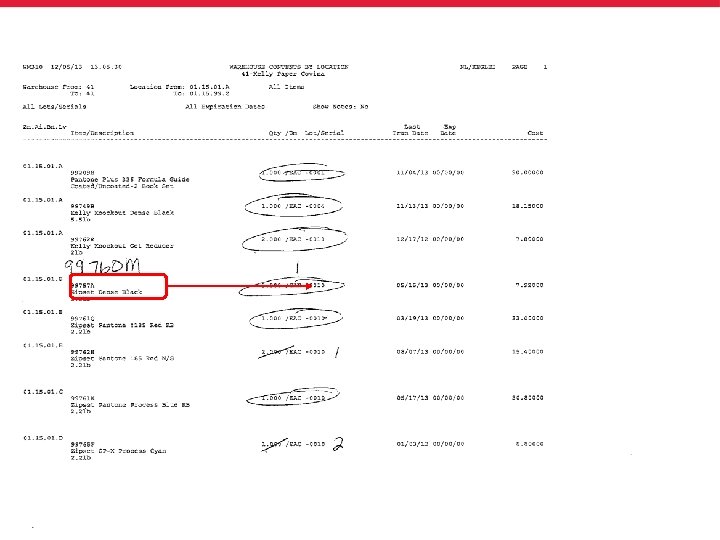
Preparation-Two Weeks Before Inventory • Contents by location report
Preparation-Two Weeks Before Inventory • Verify all your bin locations are correct. – Walk your floor checking each bin against your contents by location report. – If your report does not match the actual product in the bin you must do a bin move in the system to the correct bin and verify the override locations.
Preparation-Two Weeks Before Inventory • Check the bargain area. • Separate product labeled 44000 Z from product to count. • Make sure a bin location is listed for product to be counted.
Preparation-Two Weeks Before Inventory • Time permitting a second person should then walk the floor with a new contents report to double check for accuracy. • The result of physical inventory is 90% preparation and 10% of what you do on inventory day.
Preparation-One Week Before Inventory • Print the Location Audit Report. – Manage your negatives by bin. – You cannot have any negatives going in to inventory.
Preparation-One Week Before Inventory • Print Contents by Location Report for your 1’s. – Manage your 1’s.
Preparation-One Week Before Inventory Stocking Items Non-stock • All excess needs to be separated into 2 areas. • First area is non-stock. • Second area is stocking items. • All non-stock should be in your 1’s and counted on a count sheet. • All stocking items will be counted on an inventory count tag and with product in the aisle.
Preparation-One Week Before Inventory • Employees should be looking product in the wrong bin. • Tape up open packages. • Filling sample bins. • Adjusting any samples out of inventory. • Writing off damaged stock and usage items. • Make sure you have a back up toner cartridge for your printer.
Preparation-Day Before Inventory • Make sure all supplies are ready: ü ü ü Pencils Toner Count tags clipboards Colored Post It tags etc.
Preparation-Day Before Inventory • Inventory Count Tag – This is a 2 part form • The top is Pink • The bottom is Goldenrod – This tag is used to count items in back stock, surplus, dock area, will call and return area
Preparation-Day Before Inventory • All orders are to be placed in the usual manner. • The Distribution Centers will invoice all orders in status 3 (ship confirmed) with Monday’s date. • You must make sure all transfer orders are ship confirmed before you go home. • You must be up to date on all mill receiving for your location.
Preparation-Day Before Inventory • Put away all old must have and will call orders after closing. • Anytime throughout the day begin pre-counting graphics, retail and packaging with a contents by location report. • You may also run your count sheets and use the sections for areas that you will be pre-counting.
Preparation-Day Before Inventory • Pre-counting is a method of recording physical inventory counts for sections that are time consuming. • These counts are then transferred to count sheets for entry into A+ on the day of the physical count. • Pre-counting must be done using a pencil so that any changes to the count can be made easily. • Pre-counts may change due to an item being sold or a Must Have order coming in.
Preparation-Day Before Inventory • To pre-count using the Contents by Location Report do the following: – Print Contents by Location Report for the bin range to pre-count. – If inventory is correct circle the quantity listed. – If not put a line through the quantity listed and record actual count. • Note: If an item comes in on the day of inventory that item must be added to the precount.
Preparation-Day Before Inventory • To Use Count Sheets to precount – Count sheets do not show current inventory. – Record the count for the items on your count sheets. – Note: If an item comes in on the day of inventory that item will need to be added to the precount.
Preparation-Day of Inventory • Do not make any inventory adjustments. • Do not create any dispute P. O. ’s. • The physical counts will correct any shipment errors for this day.
Preparation-Day of Inventory • Do not check in stock replenishment. • Put stock away on Saturday before you begin counting. • If there is an Inventory Count Tag, Count Sheet or Contents by Location Report attached to an item, update the quantity for all pre-counted items received the day of your physical count.
Preparation-Day of Inventory • When updating precounts on the Contents by Location report for items that where not on the report initially. – Add the item to the report in the space on the report that it would have been in in relation to the other items on the initial report.
Preparation-Day of Inventory • Any two-day transfers must be counted by the receiving store. Make a copy of the put-away list or write up on an inventory count tag and attach to shelf count or count with your 1’s. • All P. O. receivers must be completed, – This is only for product you have received or are going to count. – P. O. ’s you have not physically received will remain open.
Preparation-Day of Inventory • All Company 1 and 99 open orders must be completed before 8: 30 am. – This means all orders must be invoiced or deleted. – There can be no open orders in PS Printed or Ready Invoice status.
Preparation-Day of Inventory • Print contents by location reports for locations: 55. 55. 55, 66. 66. 66, 77. 77. 77, 88. 88. 88, and 99. 99. • If you have inventory in any of these locations you must move it to your override location.
Preparation-Day of Inventory • Print your count sheets as soon as the previous steps are done.
Preparation-Day of Inventory • Create your inventory control sheet once the count sheets have printed. • This form is a required part of the inventory process. • This sheet is important for the tracking your progress during physical inventory. • It also provides a system of checks and balances to ensure that inventory counts are not missed.
Counting Procedures • Do not enter any counts before 9: 00 am. • Counting of inventory can be done individually or in teams. • All items are to be counted in the lowest unit of measure. • Be sure inventory is counted in proper quantities for all items. – Count sheet will show correct unit of measure for items.
Counting Procedures • Record actual count from back stock, dock area, will call or surplus on two-part inventory count tags. • Place top copy (Pink) of inventory count tag in bin to be counted • Leave second copy (Goldenrod) with product you have counted.
Counting Procedures • Record actual count from bin and any inventory count tags or contents reports to your count and record on count sheet. Counts must be written in pencil. • Tag each location as they are counted with a colored Post It; it is not necessary to tag each sku item, but each bin.
Counting Procedures • Count perimeter in to aisles: – Once perimeter is counted, walk entire perimeter making sure everything that is not a primary bin location has a gold inventory count tag attached. – Once all aisles are counted, walk entire perimeter and aisles making sure all product has a gold inventory count tag or inventory sticker/tag.
Counting Procedures • No one is allowed to work over 12 hours without approval from the Regional Manager. • Make sure employees take their time and count accurately, not fast. • The goal is not speed or how fast you can get done, but accuracy, accuracy. • Finally, all items are to be counted in the lowest unit of measure. Be sure inventory is counted in proper quantities for all items.
Entering Counts • Counts cannot be entered before 9: 00 am. No exceptions. • Take your time entering counts to minimize mistakes. • Do not enter 0 for products with no inventory. • To record no inventory for an item delete the item from the count. • See the EPAK topic Enter/Change Inventory Counts.
Entering Counts • After entering all counts you must run the Count Sheet Status Report. • The Count Sheet Status Report shows you the count sheets and/or locations not yet counted. • You can not update your physical inventory counts if you have not entered all sheets and locations.
Item Variance Report • The item variance report shows variances between the counted value and book value of your inventory. • Control your variance reports just as you would control your count sheets. • Only hand out one variance report sheet per employee at a time.
Item Variance Report 1 st Variance Report • The 1 st variance will be run by bin location and you must recount ALL variances for accuracy. • The variance report will show you variance for that bin only, not the on hand. • Only count the bin on the report, unless there is a pink tag (if it has a pink tag you can go count where that pink tag was counted only) – See the EPAK topic: Physical Inventory 1 st Variance Report.
Item Variance Report 2 nd and All Subsequent Variance Reports • The 2 nd all other variances will be run by item number and you must look for high dollar variances and are to look everywhere in your location to find it. • You can also use A+ transaction history to determine where the problem might be at. • Remember you cannot count product you do not physically have. – See the EPAK topic Physical Inventory 2 nd Variance Report.
Changing Counts • Change your counts in A+. – See the EPAK topic: Enter/Change Inventory Counts.
Changing Counts • Anytime you go back in to a count sheet you must re-run the Count Sheet Status Report. • You can not update your physical inventory counts if you have not entered all sheets and locations.
Update Inventory Counts (Post) • Once you have finished double checking your variance and entering your changes and only after you have received approval from your District Manager you will Update your Inventory Counts (Post).
Update Inventory Counts (Post) • Before you update your inventory counts you must receive approval from your District Manager. • When performing this option the system will make sure the Count Sheet Status Report has been run and is blank. • If you have not done this the system will not post your inventory counts. – See EPAK topic: Update Inventory Counts.
Count Sheets and Inventory Paperwork • Keep all count sheets from this inventory until next inventory. • Any hand written entries on your count sheets must be researched. – The override locations may need to be fixed – You may need to move the inventory in the system.
Questions ? • David Mount @ 225
Physical Inventory Training