Photovoltaic Cells Nanocrystalline Dye Sensitized Solar Cell Outline


- Slides: 27

Photovoltaic Cells

Nanocrystalline Dye Sensitized Solar Cell

Outline • • • Cell Schematic Useful Physics Construction Procedure • • Preparation and deposition of Ti. O 2 (10 -50 nm diameter) Preparation of dye and staining semi-conducter Carbon Coating counterelectrode Assemblage Electric Output Data Analysis Conclusion

Schematic of the Graetzel Cell

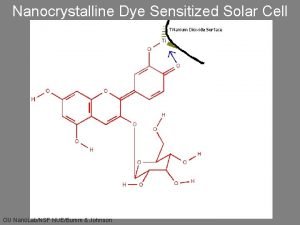
Theory and Physics • The adsorbed dye molecule absorbs a photon forming an excited state. [dye*] • The excited state of the dye can be thought of as an electron-hole pair (exciton). • The excited dye transfers an electron to the semiconducting Ti. O 2 (electron injection). This separates the electron-hole pair leaving the hole on the dye. [dye*+] • The hole is filled by an electron from an iodide ion. [2 dye*+ + 3 I- 2 dye + I 3 -] • Electrons are collected from the Ti. O 2 at the cathode. • Redox mediator is iodide/triiodide (I-/I 3 -) • The dashed line shows that some electrons are transferred from the Ti. O 2 to • Anode is covered with carbon catalyst and the triiodide and generate iodide. This reaction is an internal short circuit that injects electrons into the cell regenerating decreases the efficiency of the cell. the iodide.

Key Step – Charge Separation Charge must be rapidly separated to prevent back reaction. Dye sensitized solar cell, the excited dye transfers an electron to the Ti. O 2 and a hole to the electrolyte. In the PN junction in Si solar cell has a built-in electric field that tears apart the electron-hole pair formed when a photon is absorbed in the junction.

Chemical Note Triiodide (I 3 -) is the brown ionic species that forms when elemental iodine (I 2) is dissolved in water containing iodide (I-).

Construction Procedure • Ti. O 2 Suspension Preparation • Ti. O 2 Film Deposition • Anthrocyanin Dye Preparation and Ti. O 2 Staining • Counter Electrode Carbon Coating • Solar Cell Assembly

Preparing the Ti. O 2 Suspension • Begin with 6 g colloidal Degussa P 25 Ti. O 2 • Incrementaly add 1 m. L nitric or acetic acid solution (p. H 3 -4) nine times, while grinding in mortar and pestle • Add the 1 m. L addition of dilute acid solution only after previous mixing creates a uniform, lump-free paste • Process takes about 30 min and should be done in ventilated hood • Let equilibrate at room temperature for 15 minutes

Deposition of the Ti. O 2 Film • Align two conductive glass plates, placing one upside down while the one to be coated is right side up • Tape 1 mm wide strip along edges of both plates • Tape 4 -5 mm strip along top of plate to be coated • Uniformly apply Ti. O 2 suspension to edge of plate • 5 microliters per square centimeter • Distribute Ti. O 2 over plate surface with stirring rod • Dry covered plate for 1 minute in covered petri dish

Deposition of the Ti. O 2 Film (cont. ) • Anneal Ti. O 2 film on conductive glass • Tube furnace at 450 o. C • 30 minutes • Allow conductive glass to cool to room temperature; will take overnight • Store plate for later use

Preparation photos Mixing the Ti. O 2 Safety first! Applying the Ti. O 2 Working under the hood

Examples: Ti. O 2 Plate Good Coating: Bad Coating: Mostly even distribution Patchy and irregular The thicker the coating, the better the plate will perform

Preparing the Anthrocyanin Dye • Natural dye obtained from green chlorophyll • Red anthocyanin dye • Crush 5 -6 blackberries, raspberries, etc. in 2 m. L deionized H 2 O and filter (can use paper towel and squeeze filter)

Dye Preparation Dye comes from black berries Crushing the berries

Staining the Ti. O 2 Film • Soak Ti. O 2 plate for 10 minutes in anthocyanin dye • Insure no white Ti. O 2 can be seen on either side of glass, if it is, soak in dye for five more min • Wash film in H 2 O then ethanol or isopropanol • Wipe away any residue with a kimwipe • Dry and store in acidified (p. H 3 -4) deionized H 2 O in closed dark-colored bottle if not used immediately

Filter and Staining the Ti. O 2 Petri dish Ti. O 2 glass

Carbon Coating the Counter Electrode • Apply light carbon film to second Sn. O 2 coated glass plate on conductive side • Soft pencil lead, graphite rod, or exposure to candle flame • Can be performed while Ti. O 2 electrode is being stained Sn. O 2 pre-coated glass

Assembling the Solar Cell • Remove, rinse, and dry Ti. O 2 plate from storage or staining plate • Place Ti. O 2 electrode face up on flat surface • Position carbon-coated counter electrode on top of Ti. O 2 electrode • • Conductive side of counter electrode should face Ti. O 2 film Offset plates so all Ti. O 2 is covered by carbon-coated counter electrode • Uncoated 4 -5 mm strip of each plate left exposed

Assembling the Solar Cell • Place two binder clips on longer edges to hold plates together (DO NOT clip too tight) • Place 2 -3 drops of iodide electrolyte solution at one edge of plates • Alternately open and close each side of solar cell to draw electrolyte solution in and wet Ti. O 2 film • Ensure all of stained area is contacted by electrolyte • Remove excess electrolyte from exposed areas • Fasten alligator clips to exposed sides of solar cell

Measuring the Electrical Output • To measure solar cell under sunlight, the cell should be protected from UV exposure with a polycarbonate cover • Attach the black (-) wire to the Ti. O 2 coated glass • Attach the red (+) wire to the counter electrode • Measure open circuit voltage and short circuit current with the multimeter. • For indoor measurements, can use halogen lamp • Make sure light enters from the Ti. O 2 side Multimeter light solar cell

Testing Circuit Ammeter Voltmeter Photo Cell Potentiometer

Measuring the Electrical Output • Measure current-voltage using a 500 ohm potentiometer • The center tap and one lead of the potentiometer are both connected to the positive side of the current • Connect one multi-meter across the solar cell, and one lead of another meter to the negative side and the other lead to the load Voltage 0. 242 0. 21 0. 17 0. 13 0. 1 0. 08 0. 041 Current 0 0. 003 0. 004 0. 006 0. 008 0. 012 0. 016

Data Analysis • Plot point-by-point current/voltage data pairs at incremental resistance values, decrease increments once line begins to curve • Plot open circuit voltage and short circuit current values • Divide each output current by the measured dimensions of stained area to obtain m. A/cm 2 • Determine power output and conversion efficiency values Open circuit voltage 0. 242 m. V Excel generated plot of data

Data Analysis Continued • Max Power – 1. 025µW @ 0. 14 m. V • Max Power per unit area – Photocell area = 34. 2 cm 2 – 0. 003µW/cm 2

Nanocrystalline nanoparticle calculations Assumed size of 20 nm: r = 10 nm, density Ti. O 2 = 3. 84 g/cm 3 è Volume of spherical particle = 4. 19 * 10 -18 cm 3/particle è Amount of Ti. O 2=(4. 19*10 -18)cm 3 *3. 84 g/cm 3=1. 61 * 1017 g/particle è SA= 1. 26*10 -11 cm 2/particle è SA/g = 1. 26*10 -11/1. 61*10 -17 = 78 m 2/g è atoms on surface/atoms in volume = 1. 26*10 -11 cm 2 * 1015 cm 2 / 4. 19 * 10 -18 * 1022. 5 = 0. 095

Procedure Improvements • Filter dye • Don’t get light source too close to photocell while performing data acquisition • Be sure Ti. O 2 layer is uniform and not too thin
 Wholesalesolar.com
 Solar installation summit county
 Different photographic rays
 Photovoltaic effects
 Photoelectric transducers
 Photovoltaic video
 Photovoltaic
 Photovoltaic array maximum power point tracking array
 Paranasal sinus development
 Loop of henle
 Pineal gland
 Haploid vs diploid venn diagram
 Somatic cells vs germ cells
 Chlorocruorin
 Prokaryotic vs eukaryotic cells
 Plant vs animal cell venn diagram
 Prokaryotes vs eukaryotes venn diagram
 Why did robert hooke name cells “cells”?
 Masses of cells form and steal nutrients from healthy cells
 Pseudostratified vs simple columnar
 Prokaryotic cells vs eukaryotic cells
 Are red blood cells prokaryotic
 Chapter 8 cellular reproduction cells from cells
 Cell substance
 Plasmonic solar cells
 An inexhaustible source of energy
 Red dye penetrant
 Bianca dye

