PHOTOSHOP TRICKS PRESENTS CARTOON EFFECT Steps to cartoon


- Slides: 15
PHOTOSHOP TRICKS PRESENTS CARTOON EFFECT:
Steps to cartoon yourself through photoshop
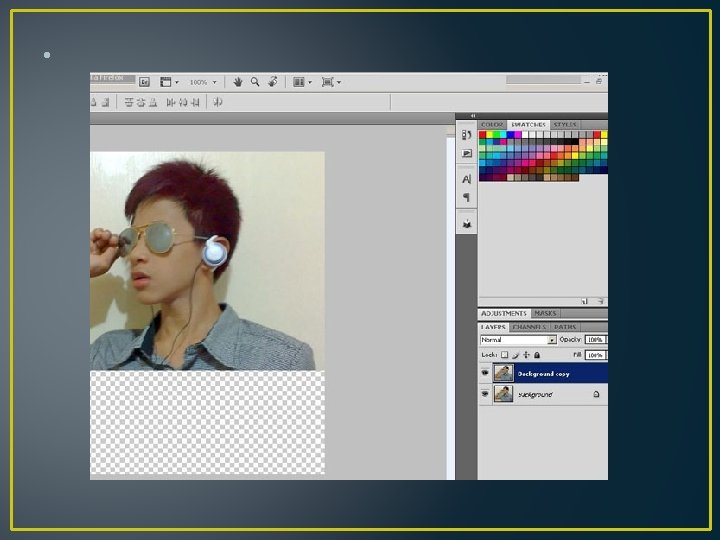
• Step 1: Select a photo to apply the effect to and open it in Photoshop • Step 2: Duplicate the background layer (The effect is applied to this layer) • Duplicating the background layer enables us to apply filters and effects to the image. To do this from the menu select Layer > Duplicate Layer. In the dialogue box that appears rename the layer from ‘Background Copy’ to ‘Cartoon Effect’. Select OK. Photoshop will then create and select the duplicate layer.
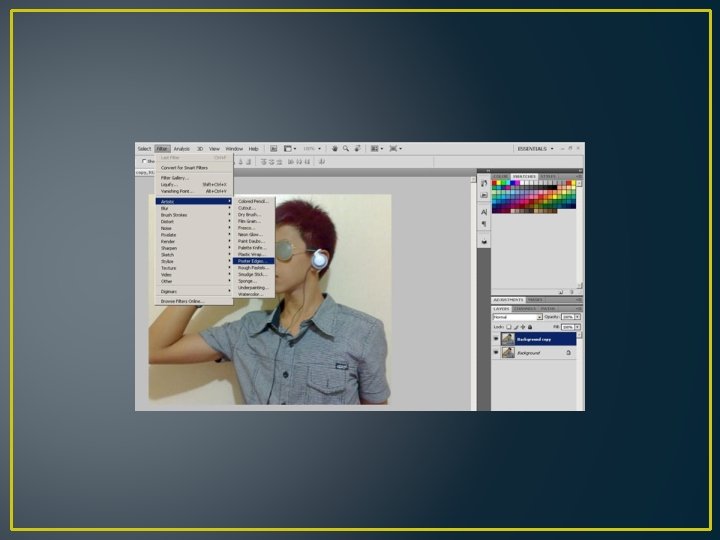
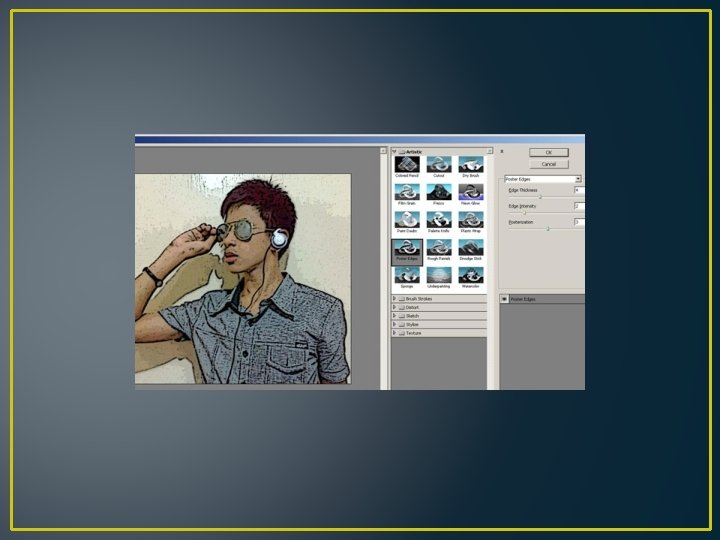
• Step 3: Apply the ‘Poster Edges’ filter • To apply the ‘Poster Edges’ filter select Filter > Artistic > Poster Edges from the menu. This will open the filter dialog box with the ‘Poster Edges’ options selected. For this image I left the settings as I found them: • Edge Thickness : 3 • Edge Intensity: 1 • Posterization: 2 • TIP: If your image is larger than the filter dialog preview window use the ‘Fit to View’ option to resize it • Select OK to apply the filter. The filter dialog will
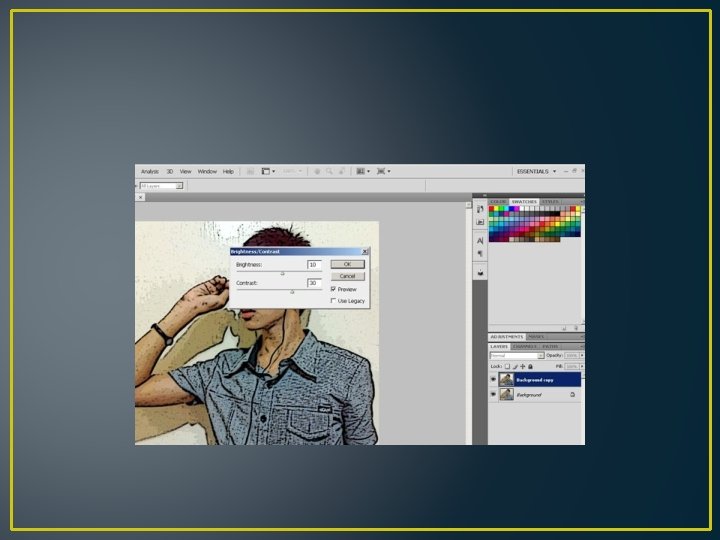
• Step 4: Adjust the Brightness and Contrast of the image. • Once the ‘Poster Edges’ filter is applied the image becomes a bit darker. Therefore before we apply the ‘Cutout’ filter we will brighten up the image and adjust the contrast. • To update these values ensure the ‘Cartoon Effect’ layer is selected. From the menu select Image > Adjustments > Brightness/Contrast. The Brightness/Contrast dialog box will appear. • I used the following settings for this image: • Brightness : 10 • Contrast : 30
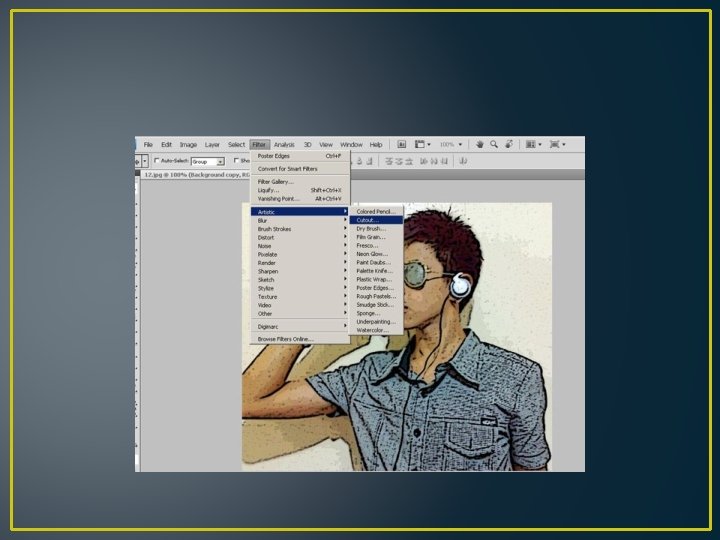
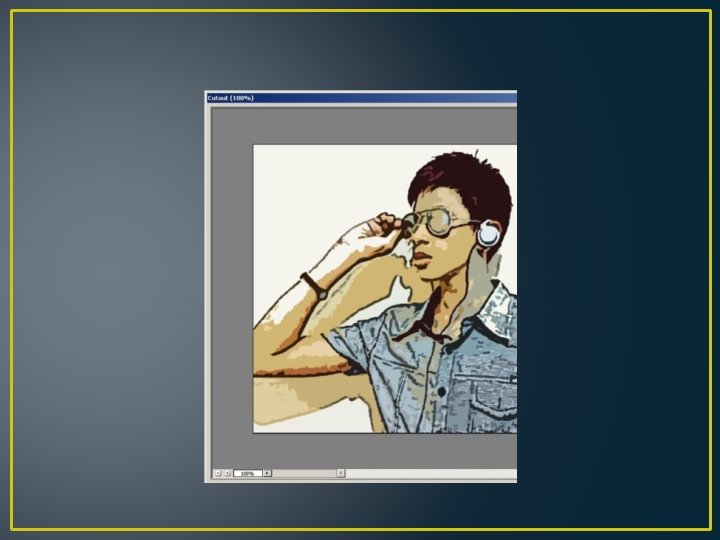
• Step 5: Apply the ‘Cutout’ filter • The final step in creating this effect is to apply the ‘Cutout’ filter. • To do this select Filter > Artistic > Cutout from the menu. This will launch the filter dialog again. This time the ‘Cutout’ options will be visible. Once again I left these settings as I found them. • The settings I used were: • Number of Levels : 4 • Edge Simplicity : 4 • Edge Fidelity : 2 • Select OK. The filter dialog will close and apply the filter to the image. • The result of applying the filter completes the cartoon effect:
• You may wish to try different settings when applying the filters and adjustments. Depending on the size and the original brightness/contrast of the image you will get differing results – experimenting can often result in a better result.
Steps for P. S Trick: Cartoon Effect Step 1: Open the program Photoshop Step 2: Select a photo to apply the effect to and open it in Photoshop Step 3: Duplicate the background layer Step 4: Apply the ‘Poster Edges’ filter Step 5: Adjust the Brightness and Contrast of the image. Step 6: Apply the ‘Cutout’ filter