Pengantar LFS Linux From Scratch Praktikum Sistem Operasi
 Praktikum Sistem Operasi Tahun 2012 Teknik Informatika - D")


 Masuk root dahulu mke 2 fs -jv /dev/<xxx> Inisialisasi")
 Buat directory untuk tempat LFS anda, dan masuk sebagai")
 Mengecek apakah variabel LFS sudah sesuai ketentuan dengan cara mengetikkan")
 Langkah selanjutnya yang dilakukan adalah menambahkan user baru untuk LFS")

 Binutils-2. 22 – Instalisasi Tahap 1 1. Buat")
 GCC-4. 6. 2 – Instalasi tahap 1 Linux-3.")
`/specs $LFS_TGT-gcc -dumpspecs | sed -e 's@/lib(64)? /ld@/tools&@g'")

 Creating directories onto which the file systems will")
 Entering the Chroot Environment chroot \"$LFS\" /tools/bin/env -i")
 Creating Essential Files and Symlinks ln -sv /tools/bin/{bash,")
 To work user name and group name exec")

{}' > dummy. c cc dummy. c -v")


 Creating stable names for network interfaces for NIC")
 Creating the /etc/resolv. conf File cat > /etc/resolv.")

 Install LFS-Bootscripts-20120229 Configuring the setclock Script cat >")
 Configuring the Linux Console cat > /etc/sysconfig/console <<")

 Creating the /etc/fstab File Isi file system")
 Linux-3. 2. 6 (Kernel) make mrproper make")


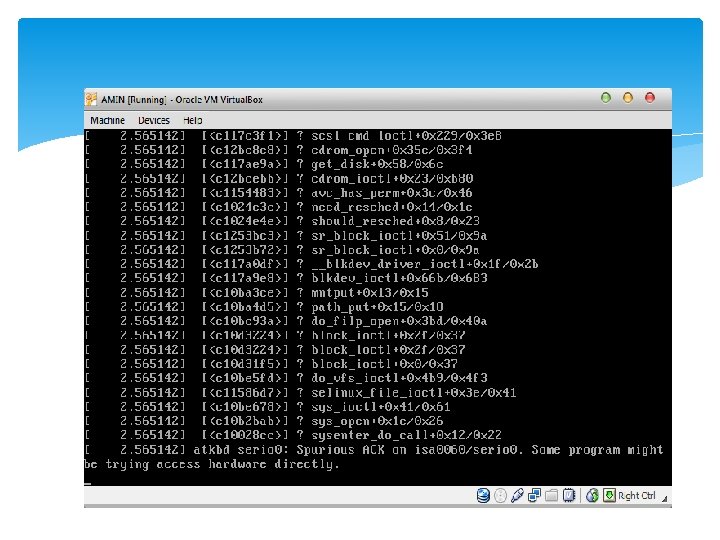
 WARNING…!!!!!!! Hati – hati pada saat akan tahap reboot. .")
 Unmount the LFS file system itself : umount -v $LFS")


- Slides: 39
Pengantar LFS (Linux From Scratch) Praktikum Sistem Operasi Tahun 2012 Teknik Informatika - D By. Fauzi Dwi Susanto
Panduan LFS Tentukan versi Linux Ubuntu yang dipakai. Karena versi ubuntu yang dipakai adalah versi 11. 10, maka panduan LFS yang dipakai adalah : LFS-BOOK 7. 1
Persiapan Awal Install Linux Ubuntu 11. 10 pada VB anda Membuat partisi baru dengan ketentuan : A. Partisi root yang diberi mount point / dan tipe file ext 3 dengan kapasitas sesuai kebutuhan anda. B. Partisi swap yang diberi mount point /swap dan tipe file swap dengan kapasitas sesuai kebutuhan anda. Siapkan kopi dan sedikit hiburan agar tidak bosan serta ajak curhat teman disampingmu…!
Setelah partisi baru telah dibuat, maka langkah selanjutnya adalah mengkopi file LFS ke sistem operasi Linux (paket-paket dan data-data LFS yang diperlukan). Setelah dikopi, lakukan proses version-check untuk melihat versi sistem host nya, jika ada paket yang butuh diinstal dahulu maka install paket 2 tersebut. -- Merujuk LFS-BOOK 7. 1 hal. xvii-hal.
Persiapan Partisi Baru (Chap. 2) Masuk root dahulu mke 2 fs -jv /dev/<xxx> Inisialisasi partisi swap cd /tmp rm -rfv e 2 fsprogs-1. 42 mkswap /dev/<yyy> Mounting partisi baru export LFS=/mnt/lfs mkdir -pv $LFS mount -v -t ext 3 /dev/<xxx> $LFS -- Merujuk LFS-BOOK 7. 1 hal. 12, 13 dan 14 -hal.
Packages and Patches (Chap. 3) Buat directory untuk tempat LFS anda, dan masuk sebagai root mkdir -v $LFS/sources chmod -v a+wt $LFS/sources Setelah itu pindahkan paket-paket LFS anda pada directory tersebut melalui terminal atau secara manual. -- Merujuk LFS-BOOK 7. 1 hal. 15 -23 -hal.
Persiapan Final (Chap. 4) Mengecek apakah variabel LFS sudah sesuai ketentuan dengan cara mengetikkan perintah seperti di bawah ini : echo $LFS Mengeset path dari variabel LFS dengan cara mengetikkan perintah seperti di bawah ini : export LFS=/mnt/lfs Langkah selanjutnya yang dilakukan adalah membuat direktori LFS/tools dengan cara menggunakan perintah seperti di bawah ini : mkdir -v $LFS/tools Langkah selanjutnya adalah dengan membuat simlink /tools ke host system dengan cara menggunakan perintah seperti di bawah ini : ln -sv $LFS/tools /
Persiapan Final (Chap. 4) Langkah selanjutnya yang dilakukan adalah menambahkan user baru untuk LFS dengan cara menggunakan perintah seperti di bawah ini : groupadd lfs useradd -s /bin/bash -g lfs -m -k /dev/null lfs Untuk mengganti password dilakukan dengan menggunakan perintah seperti di bawah ini : passwd lfs Setelah itu diberikan full akses ke user baru tersebut dengan menggunakan perintah seperti di bawah ini : chown -v lfs $LFS/tools chown -v lfs $LFS/sources Kemudian login sebagai user baru tersebut dengan menggunakan perintah seperti di bawah ini : su – lfs
Setting Environment Membuat profil bash baru dengan cara menggunakan perintah di bawah ini : cat > ~/. bash_profile << "EOF" exec env -i HOME=$HOME TERM=$TERM PS 1='u: w$ ' /bin/bash EOF Membuat Bashrc file dengan cara menggunakan perintah di bawah ini : cat > ~/. bashrc << "EOF" set +h umask 022. . . . . Membuat user profil dengan cara menggunakan perintah seperti di bawah ini : source ~/. bash_profile
Constructing a Temporary System (Chap. 5) Binutils-2. 22 – Instalisasi Tahap 1 1. Buat folder untuk build mkdir -v. . /binutils-build cd. . /binutils-build 2. Persiapkan Binutils untuk dikompilasi. . /binutils-2. 22/configure --target=$LFS_TGT --prefix=/tools --disable-nls --disable-werror lalu make 3. Jika akan di build untuk x 86_64, buat symlink ke tool chain case $(uname -m) in x 86_64) mkdir -v /tools/lib &&ln -sv lib /tools/lib 64 ; ; esac 4. Install paket make install
Constructing a Temporary System (Chap. 5) GCC-4. 6. 2 – Instalasi tahap 1 Linux-3. 2. 6 API Headers Glibc-2. 14. 1
Adjusting the Toolchain SPECS=`dirname $($LFS_TGT-gcc -print-libgcc-file-name)`/specs $LFS_TGT-gcc -dumpspecs | sed -e 's@/lib(64)? /ld@/tools&@g' -e "/^*cpp: $/{n; s, $, -isystem /tools/include, }" > $SPECS echo "New specs file is: $SPECS" unset SPECS Binutils-2. 22 - Pass 2 GCC-4. 6. 2 - Pass 2 Tcl-8. 5. 11 Expect-5. 45 Dan seterusnya. . , , Lakukan compile dan install paket secara urut, jangan sampai ada yang terlewatkan.
Stripping Remove symbols : strip --strip-debug /tools/lib/* strip --strip-unneeded /tools/{, s}bin/* Remove the documentation rm -rf /tools/{, share}/{info, man, doc} -- Next slide to Chapter 6 --
Installing Basic System Software (Chap. 6) Creating directories onto which the file systems will be mounted mkdir -v $LFS/{dev, proc, sys} Creating Initial Device Nodes mknod -m 600 $LFS/dev/console c 5 1 mknod -m 666 $LFS/dev/null c 1 3 Mounting and Populating /dev mount -v --bind /dev $LFS/dev Mounting Virtual Kernel File Systems mount -vt devpts $LFS/dev/pts mount -vt tmpfs shm $LFS/dev/shm mount -vt proc $LFS/proc mount -vt sysfs $LFS/sys
Installing Basic System Software (Chap. 6) Entering the Chroot Environment chroot "$LFS" /tools/bin/env -i HOME=/root TERM="$TERM" PS 1='u: w$ ' PATH=/bin: /usr/bin: /sbin: /usr/sbin: /tools/bin /tools/bin/bash --login +h Creating Directories mkdir -pv /{bin, boot, etc/{opt, sysconfig}, home, lib, mnt, opt, run} mkdir -pv /{media/{floppy, cdrom}, sbin, srv, var} install -dv -m 0750 /root install -dv -m 1777 /tmp /var/tmp mkdir -pv /usr/{, local/}{bin, include, lib, sbin, src} mkdir -pv /usr/{, local/}share/{doc, info, locale, man} mkdir -v /usr/{, local/}share/{misc, terminfo, zoneinfo} mkdir -pv /usr/{, local/}share/man{1. . 8} for dir in /usr/local; do ln -sv share/{man, doc, info} $dir done case $(uname -m) in x 86_64) ln -sv lib /lib 64 && ln -sv lib /usr/lib 64 ; ; esac mkdir -v /var/{log, mail, spool} ln -sv /run /var/run ln -sv /run/lock /var/lock mkdir -pv /var/{opt, cache, lib/{misc, locate}, local}
Installing Basic System Software (Chap. 6) Creating Essential Files and Symlinks ln -sv /tools/bin/{bash, cat, echo, pwd, stty} /bin ln -sv /tools/bin/perl /usr/bin ln -sv /tools/libgcc_s. so{, . 1} /usr/lib ln -sv /tools/libstdc++. so{, . 6} /usr/lib sed 's/tools/usr/' /tools/libstdc++. la > /usr/libstdc++. la ln -sv bash /bin/sh Presence of /etc/mtab touch /etc/mtab Create the /etc/passwd Create the /etc/group --- merujuk LFS-BOOK 7. 1 hal 80 ----- merujuk LFS-BOOK 7. 1 hal 81 ---
Installing Basic System Software (Chap. 6) To work user name and group name exec /tools/bin/bash --login +h Initialize the log files and give them proper permissions touch /var/run/utmp /var/log/{btmp, lastlog, wtmp} chgrp -v utmp /var/run/utmp /var/log/lastlog chmod -v 664 /var/run/utmp /var/log/lastlog chmod -v 600 /var/log/btmp Next, Linux-3. 2. 6 API Headers Man-pages-3. 35 Glibc-2. 14. 1
Re-adjusting the Toolchain Create link to its counterpart in / tools/ $ (gcc - dumpmachine)/ bin mv mv mv ln -v /tools/bin/{ld, ld-old} -v /tools/$(gcc -dumpmachine)/bin/{ld, ld-old} -v /tools/bin/{ld-new, ld} -sv /tools/bin/ld /tools/$(gcc -dumpmachine)/bin/ld A sed command gcc -dumpspecs | sed -e 's@/tools@@g' -e '/*startfile_prefix_spec: /{n; s@. *@/usr/lib/ @}' -e '/*cpp: /{n; s@$@ -isystem /usr/include@}' > `dirname $(gcc --print-libgcc-file-name)`/specs
Re-adjusting the Toolchain Sanity checks echo 'main(){}' > dummy. c cc dummy. c -v -Wl, --verbose &> dummy. log readelf -l a. out | grep ': /lib‘ Make sure that we're setup to use the correct startfiles dll grep grep -o '/usr/lib. */crt[1 in]. *succeeded' dummy. log -B 1 '^ /usr/include' dummy. log 'SEARCH. */usr/lib' dummy. log |sed 's|; |n|g‘ "/lib. */libc. so. 6 " dummy. log found dummy. log Clean up the test files rm -v dummy. c a. out dummy. log
Next Install Paket Zlib-1. 2. 6 File-5. 10 Binutils-2. 22 GMP-5. 0. 4 MPFR-3. 1. 0 MPC-0. 9 GCC-4. 6. 2 Sed-4. 2. 1 Bzip 2 -1. 0. 6 Ncurses-5. 9 …………. . . …catat paket yg sudah terinstall bila perlu Vim-7. 3
Stripping Again Exit from chroot logout Entering the Chroot Environment chroot $LFS /tools/bin/env -i HOME=/root TERM=$TERM PS 1='u: w$ ' PATH=/bin: /usr/bin: /sbin: /usr/sbin /tools/bin/bash –login The binaries and libraries can be safely stripped /tools/bin/find /{, usr/}{bin, lib, sbin} -type f -exec /tools/bin/strip --strip-debug '{}' '; '
Cleaning Up When reentering the chroot environment after exiting, use the following modified chroot command chroot "$LFS" /usr/bin/env -i HOME=/root TERM="$TERM" PS 1='u: w$ ' PATH=/bin: /usr/bin: /sbin: /usr/sbin /bin/bash –login
Setting Up System Bootscripts (Chap. 7) Creating stable names for network interfaces for NIC in /sys/class/net/* ; do INTERFACE=${NIC##*/} udevadm test --action=add $NIC done cat /etc/udev/rules. d/70 -persistent-net. rules Creating Network Interface Configuration Files cd /etc/sysconfig/ cat > ifconfig. eth 0 << "EOF" ONBOOT=yes IFACE=eth 0 ……………
Setting Up System Bootscripts (Chap. 7) Creating the /etc/resolv. conf File cat > /etc/resolv. conf << "EOF" # Begin /etc/resolv. conf domain <Your Domain Name> nameserver <IP address of your primary nameserver> nameserver <IP address of your secondary nameserver> # End /etc/resolv. conf EOF Create the /etc/hosts cat > /etc/hosts << "EOF" # Begin /etc/hosts (no network card version) 127. 0. 0. 1 <HOSTNAME. example. org> <HOSTNAME> localhost # End /etc/hosts (no network card version) EOF
Creating Custom Symlinks to Devices CD-ROM symlinks udevadm test /sys/block/hdd sed -i -e 's/"write_cd_rules"/"write_cd_rules mode"/' /lib/udev/rules. d/75 -cd-aliases-generator. rules Dealing with duplicate devices udevadm info -a -p /sys/class/video 4 linux/video 0
Setting Up System Bootscripts (Chap. 7) Install LFS-Bootscripts-20120229 Configuring the setclock Script cat > /etc/sysconfig/clock << "EOF" # Begin /etc/sysconfig/clock UTC=1 # Set this to any options you might need to give to hwclock, # such as machine hardware clock type for Alphas. CLOCKPARAMS= # End /etc/sysconfig/clock EOF
Setting Up System Bootscripts (Chap. 7) Configuring the Linux Console cat > /etc/sysconfig/console << "EOF" # Begin /etc/sysconfig/console UNICODE="1" KEYMAP="de-latin 1" KEYMAP_CORRECTIONS="euro 2" LEGACY_CHARSET="iso-8859 -15" FONT="Lat. Ar. Cyr. Heb-16 -m 8859 -15" # End /etc/sysconfig/console EOF
The Bash Shell Startup Files List of all locales supported by Glibc locale –a This results in a final locale setting of “en_GB. ISO-8859 -1” LC_ALL=<locale LC_ALL=<locale name> name> locale locale charmap language charmap int_curr_symbol int_prefix Once the proper locale settings have been determined, create the / etc/ profile : -- merujuk hal 215 – Creating the /etc/inputrc File : -- merujuk hal 216 –
Making the LFS System Bootable (Chap. 8) Creating the /etc/fstab File Isi file system dan type sesuai dengan partisi laptop anda. hdparm -I /dev/sda | grep NCQ
Making the LFS System Bootable (Chap. 8) Linux-3. 2. 6 (Kernel) make mrproper make LANG=<host_LANG_value> LC_ALL= menuconfig make modules_install cp -v arch/x 86/boot/bz. Image /boot/vmlinuz-3. 2. 6 lfs-7. 1 cp -v System. map /boot/System. map-3. 2. 6 cp -v. config /boot/config-3. 2. 6 install -d /usr/share/doc/linux-3. 2. 6 cp -r Documentation/* /usr/share/doc/linux-3. 2. 6
Using GRUB to Set Up the Boot Process Creating a GRUB boot floppy diskette as a backup cd /tmp && grub-mkrescue --output=grub-img. iso && xorriso -as cdrecord -v dev=/dev/cdrw blank=as_needed grub-img. iso GRUB Naming Conventions grub-mkdevicemap --device-map=device. map cat device. map
Setting Up the Configuration Install the GRUB files into / boot/ grub: grub-install /dev/sda Creating the Configuration File cat > /boot/grub. cfg << "EOF" # Begin /boot/grub. cfg set default=0 set timeout=5 insmod ext 2 set root=(hd 0, 2) menuentry "GNU/Linux, Linux 3. 2. 6 -lfs-7. 1" { linux /boot/vmlinuz-3. 2. 6 -lfs-7. 1 root=/dev/sda 2 ro } EOF
The End (Chap. 9) WARNING…!!!!!!! Hati – hati pada saat akan tahap reboot. . !!! Rebooting the System logout Then unmount the virtual file systems umount umount -v -v -v $LFS/dev/pts $LFS/dev/shm $LFS/dev $LFS/proc $LFS/sys
The End (Chap. 9) Unmount the LFS file system itself : umount -v $LFS If multiple partitions were created, unmount the other partitions before unmounting the main one, like this umount -v $LFS/usr umount -v $LFS/home umount -v $LFS Now, reboot the system with : shutdown -r now
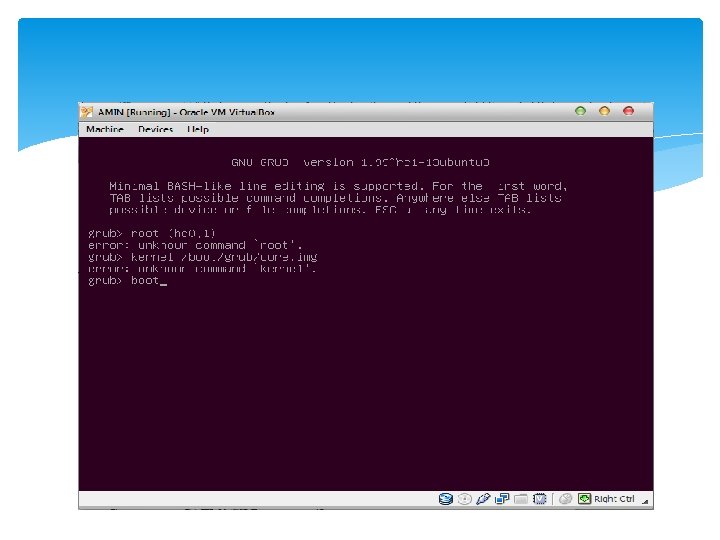
Contoh Hasil Grub After Reboot
Mohon Diperhatikan. . !!!! Dear Praktikan SO TIF-D : 1. Project LFS ini waktu pengumpulannya diperpanjang sampai dengan akhir UAS 2. Hasil akhir project LFS ini didemokan setelah UAS secara kelompok ke masing-masing dosen pengampu 3. Untuk dokumentasinya adalah masing-masing anggota kelompok (individu) 4. Sebelum demo ke dosen kpp harus sudah di ttd oleh koas SO dan laporan lengkap yang sudah disusun secara urut sesuai dengan ketentuan penjilidan 5. Ketentuan dan format penjilidan akan diupload minggu depan
Terima Kasih …. Selamat Mengerjakan !!!!