Paint and Retouch Tools Cloning Stamp Tool Healing


- Slides: 14
Paint and Retouch Tools
Cloning Stamp Tool Healing Brush Tool Patch Tool Burn Tool Dodge Tool In your Handbooks: • What are they used for? • How do they work?
Things to know about Retouch Tools • They are a destructive editing technique. That means the changes are applied directly to the image. If you are going to be using these tools, don’t work on an original; duplicate layers as you move through the process. This way if something goes wrong you can toss the layer. • These tools are brushes. You paint with them and you can make the brush larger or smaller by pressing the ]-key to make the brush bigger or [-key to reduce the brush size.
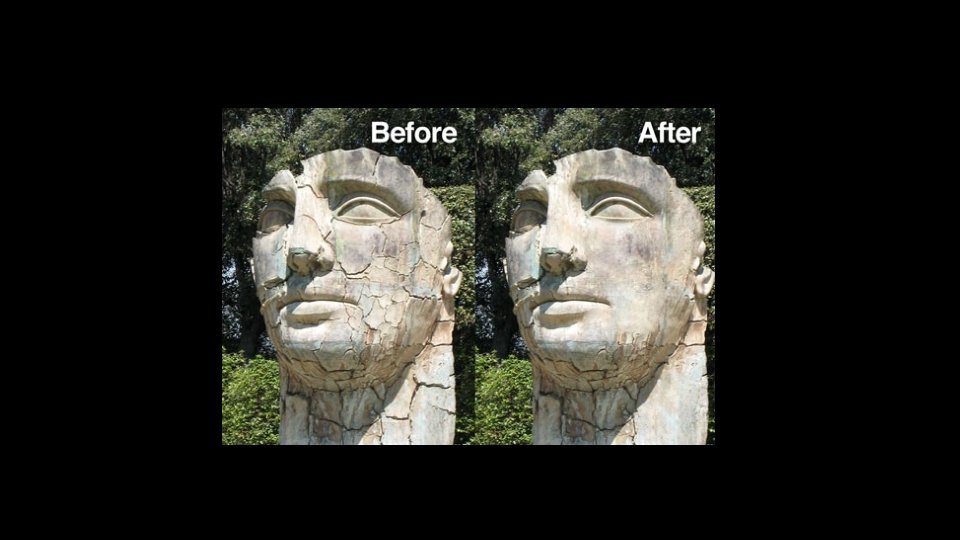
Cloning Stamp • Photoshop's clone stamp tool allows you to duplicate part of an image. • The process involves setting a sampling point in the image which will be used as a reference to create a new cloned area. • Select the Clone Stamp tool , then check the settings in the options bar. Make sure you have a brush size appropriate for the job. The following settings are fairly typical:
Cloning Stamp
Spot Healing Brush Tool • The Spot Healing Brush tool quickly removes blemishes and other imperfections in your photos. It automatically samples from around the retouched area.
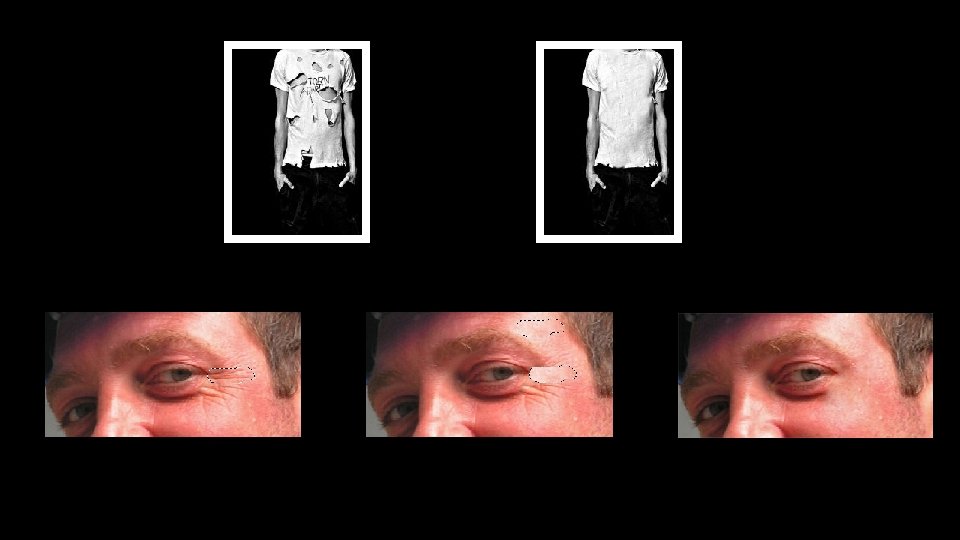
Healing Brush Tool • The Healing Brush is similar to the Spot Healing Brush, but you must first select a Source before using the brush. In other words, you must first tell Photoshop the texture with which you want to ‘heal’ the problem area. • The Healing Brush Tool is great for stray hairs, longer scratches, and other irregularly-shaped areas where you want to replicate texture from another part of your image.
Why is the Healing Brush better than the Spot Healing Brush? 1. You can only use the Spot Healing Brush on one layer--meaning the layer you are editing. So if you want to go back and make a change you must UNDO. 2. You can use the Healing Brush on multiple layers--meaning you can make your retouch edits on a separate layer so that if you want to change something you can do it on the layer you are editing and not mess up the original layer. 3. When you use the Healing Brush on a separate layer you can then adjust the Layer's Opacity to "tweak" your retouching edits. That is if you eliminate all wrinkles and imperfections, you can then sequentially bring some of the imperfections back to make the face look more natural.
Patch Tool • This tool is what you would want to use if your image has torn clothes, or stains, or holes in walls, or blemishes etc. This is very similar to the Healing Brush tool except with the patch tool you can define a selection where you want the effects applied. • The Healing Brush Tool acted like a brush where as the Patch tool acts like one of the Lasso Tools.
The Burn and Dodge Tool • The Dodge tool is used to lighten areas of the image. • The Burn tool is used to darken areas of the image. • The more you paint over an area with the Dodge or Burn tool, the lighter or darker it becomes.
Liquify Tool • The Liquify filter lets you push, pull, rotate, reflect, pucker, and bloat any area of an image. The distortions you create can be subtle or drastic, which makes the Liquify command a powerful tool for retouching images as well as creating artistic effects.
Smart Object • What does it mean to convert to smart object? • Smart Objects are layers that contain image data from raster/bitmap or vector images. • You can perform nondestructive transforms. You can scale, rotate, skew, distort, perspective transform, or warp a layer without losing original image data or quality because the transforms don't affect the original data