
P 15590 Low Cost Fundus Camera Presented by
P 15590 Low Cost Fundus Camera Presented by: Daniel Sui, Ian Morency, Kevin Labourdette, Kyle Burden, Thomas Casero, Quang Huynh October 28 th, 2014
Overview ● High Risk in Optical Systems ○ Outside Help ● Alignment Designed, but needs testing ● Overarching Design Improved ● Microcontroller ● Stepper Motors ● System Power
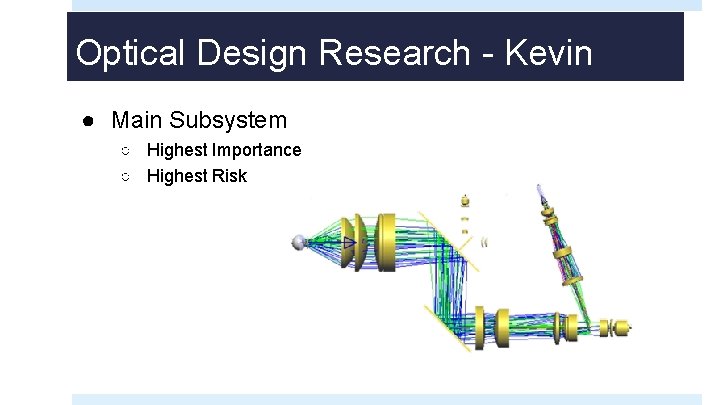
Optical Design Research - Kevin ● Main Subsystem ○ Highest Importance ○ Highest Risk
Subsystems - Kevin ● Three Main Subsystems ○ Imaging ■ Create image of cornea ■ Create image of pupil ■ Adjust for magnification and focus ○ Illumination ■ IR illumination for video feed ■ LED flash for photos ■ Needs to be collimated, perfectly on axis, and adjustable ○ Targeting
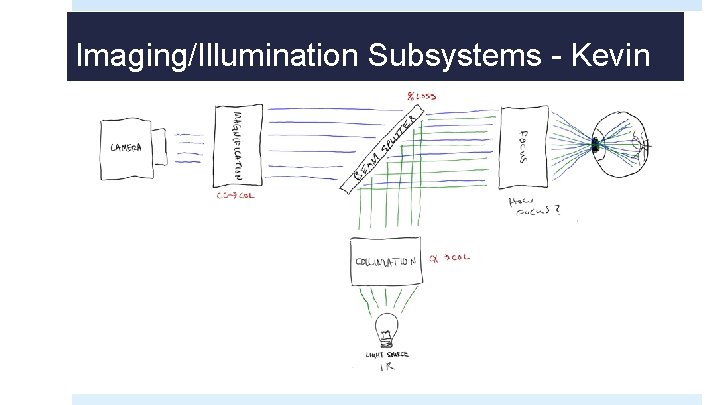
Imaging/Illumination Subsystems - Kevin
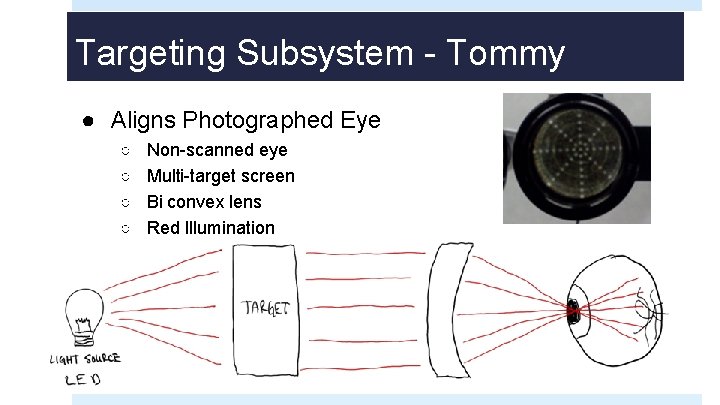
Targeting Subsystem - Tommy ● Aligns Photographed Eye ○ ○ Non-scanned eye Multi-target screen Bi convex lens Red Illumination
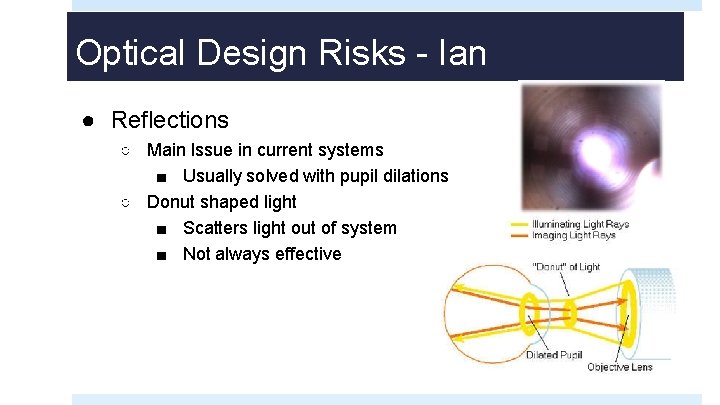
Optical Design Risks - Ian ● Reflections ○ Main Issue in current systems ■ Usually solved with pupil dilations ○ Donut shaped light ■ Scatters light out of system ■ Not always effective
Optical Design Risks - Tommy ● Cost ○ Most likely will require multiple revisions ○ Need access to optical design software ○ Access to optical bench and opto-mechanical mounting components
Meeting with Expert 1 - Kevin ● Nicholas Lovullo ○ Optical Designer at Raytheon ○ U of R grad in Optical Engineering ○ Discussed current research via Phone
Meeting with Expert 1 - Kevin ● Takeaways ○ Will need to fully research and understand optical properties of the eye ○ Basic system layout is correct ○ Not a simple system to design ■ Will require a lot more than a few calculations
Meeting with Expert 2 - Kevin ● Josh Cobb ○ ○ Senior Optical Engineer at Corning Tropel Ph. D in Optical Engineering Has experience designing an ocular fundus camera Discussed best ways to begin optical design - in person mtg
Meeting with Expert 2 - Kevin ● Takeaways ○ The optical design is extremely complicated - even for experts in the field ○ Optical design and testing is impossible on current budget ○ We will need to copy an existing design or partner with optical engineers ○ Julie Bentley
Meeting with Expert 3 - Tommy ● Julie Bentley ○ Professor at U of R ○ Ph. D in Optical Engineering ○ Discussed possibility of partnering - in person meeting
Meeting with Expert 3 - Tommy ● Takeaways ○ ○ ○ Many of the same concerns including budget and complexity Already assigned senior design projects ~3 weeks prior Will be hard to design to only use off the shelf optics Alternative would take years, over $50, 000 Introduced us to Pedro Ramirez
Meeting with Pedro Ramirez - Ian ● Optical Design Student at U of R ● Experience imaging retina and cornea ○ Retinal Topography ○ Corneal Aberrations ● Excited to help with project ○ Will help create optical design ● Follow up meeting with entire team - 10/30
Optical Design - Next Steps - Ian ● Catch Pedro up on project in detail ● Develop detailed list of specifications for optical system ○ Camera ○ Quality ○ Wavelengths ○ Etc ● Work to receive more funding ○ Design Center ○ Client
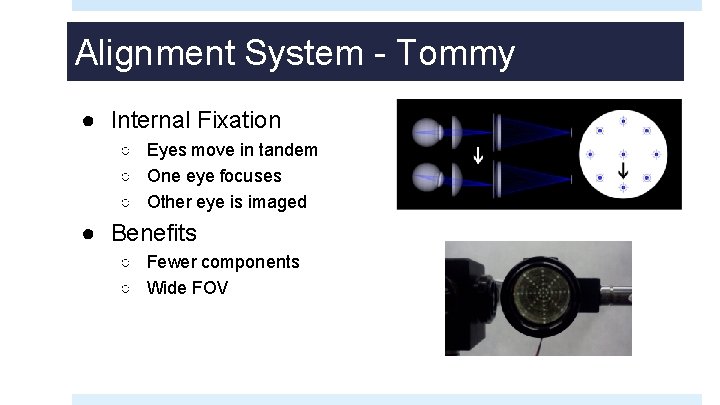
Alignment System - Tommy ● Internal Fixation ○ Eyes move in tandem ○ One eye focuses ○ Other eye is imaged ● Benefits ○ Fewer components ○ Wide FOV
Internal Fixation Needs - Tommy ● X-axis movement ○ Compensate for introduced angles ○ Small movements needed, millimeters ○ Manual hand knob controls ● 2 Lens Sets ○ Larger lens that can drop away for full eye imaging ○ Optics set for retinal imaging ○ Camera is z-axis stationary ○ Lenses must focus and magnify in z-axis
Internal Fixation Notes - Tommy ● Lens/Camera ○ Lens must NOT be coated ○ No camera hot mirror ○ These reflect IR light ● Focus ○ IR and natural light focus differently ○ Differential is well-known
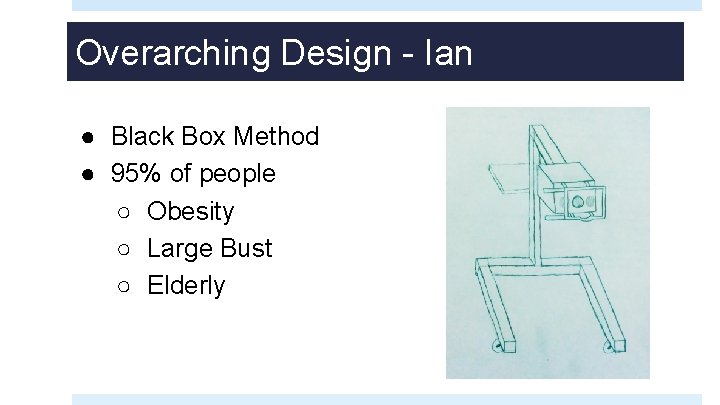
Overarching Design - Ian ● Black Box Method ● 95% of people ○ Obesity ○ Large Bust ○ Elderly
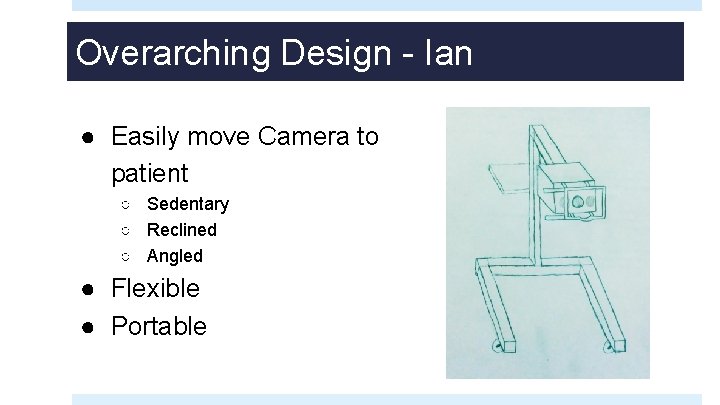
Overarching Design - Ian ● Easily move Camera to patient ○ Sedentary ○ Reclined ○ Angled ● Flexible ● Portable
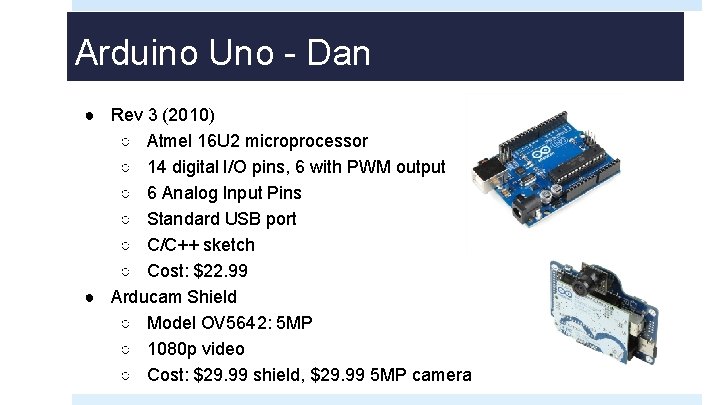
Arduino Uno - Dan ● Rev 3 (2010) ○ Atmel 16 U 2 microprocessor ○ 14 digital I/O pins, 6 with PWM output ○ 6 Analog Input Pins ○ Standard USB port ○ C/C++ sketch ○ Cost: $22. 99 ● Arducam Shield ○ Model OV 5642: 5 MP ○ 1080 p video ○ Cost: $29. 99 shield, $29. 99 5 MP camera
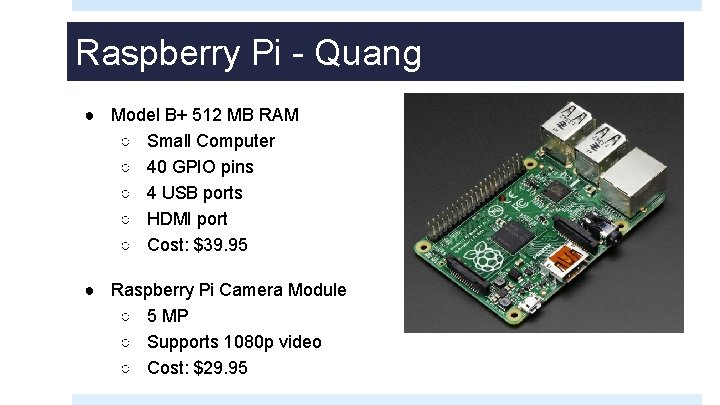
Raspberry Pi - Quang ● Model B+ 512 MB RAM ○ Small Computer ○ 40 GPIO pins ○ 4 USB ports ○ HDMI port ○ Cost: $39. 95 ● Raspberry Pi Camera Module ○ 5 MP ○ Supports 1080 p video ○ Cost: $29. 95
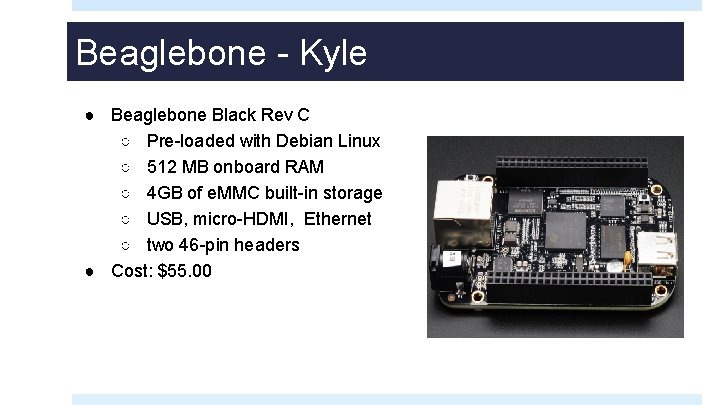
Beaglebone - Kyle ● Beaglebone Black Rev C ○ Pre-loaded with Debian Linux ○ 512 MB onboard RAM ○ 4 GB of e. MMC built-in storage ○ USB, micro-HDMI, Ethernet ○ two 46 -pin headers ● Cost: $55. 00
Which Microcontroller? - Kyle ● Raspberry Pi B+ ○ Decent price! ○ Lots of I/O pins and USB ports! ○ Cheaper Camera Module ○ More options ● Can test out Raspberry Pi, possibly w/ camera module, and Beaglebone in CE Labs before purchasing ● Cost: ○ MCU - $39. 95 ○ Camera Module - $29. 95 ○ Pi TFT - $34. 95 ○ Total - $104. 85
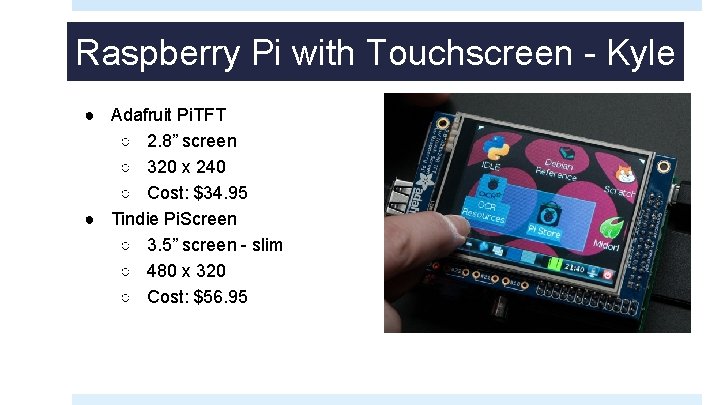
Raspberry Pi with Touchscreen - Kyle ● Adafruit Pi. TFT ○ 2. 8” screen ○ 320 x 240 ○ Cost: $34. 95 ● Tindie Pi. Screen ○ 3. 5” screen - slim ○ 480 x 320 ○ Cost: $56. 95
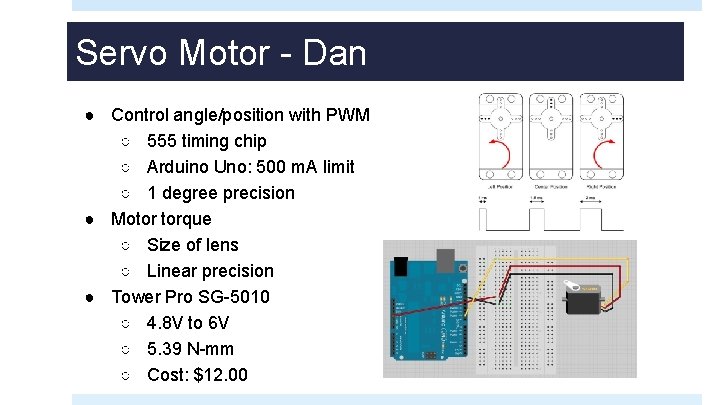
Servo Motor - Dan ● Control angle/position with PWM ○ 555 timing chip ○ Arduino Uno: 500 m. A limit ○ 1 degree precision ● Motor torque ○ Size of lens ○ Linear precision ● Tower Pro SG-5010 ○ 4. 8 V to 6 V ○ 5. 39 N-mm ○ Cost: $12. 00
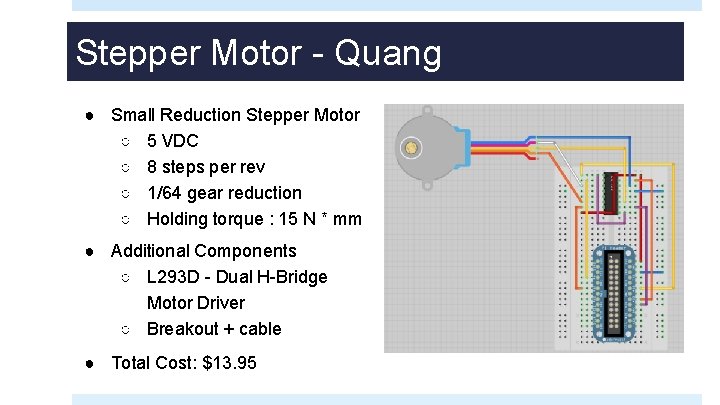
Stepper Motor - Quang ● Small Reduction Stepper Motor ○ 5 VDC ○ 8 steps per rev ○ 1/64 gear reduction ○ Holding torque : 15 N * mm ● Additional Components ○ L 293 D - Dual H-Bridge Motor Driver ○ Breakout + cable ● Total Cost: $13. 95
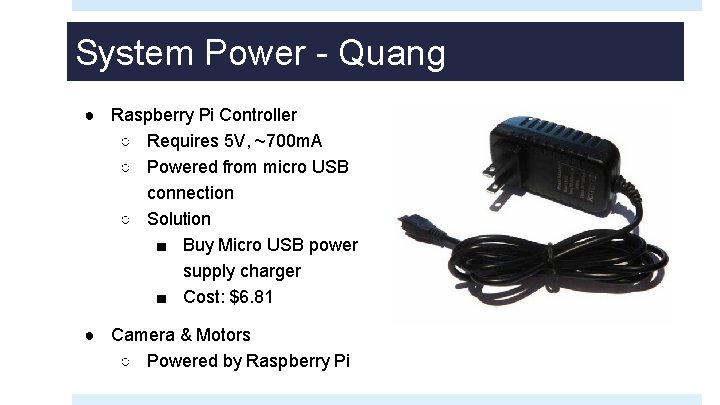
System Power - Quang ● Raspberry Pi Controller ○ Requires 5 V, ~700 m. A ○ Powered from micro USB connection ○ Solution ■ Buy Micro USB power supply charger ■ Cost: $6. 81 ● Camera & Motors ○ Powered by Raspberry Pi
Summary ● High Risk in Optical Systems ○ Outside Help ● Alignment Designed, but needs testing ● Overarching Design Improved ● Microcontroller ● Stepper Motors ● System Power

Questions
- Slides: 31