
Oxygen therapy Prepared by Miss Aisha Supervised by

Oxygen therapy Prepared by Miss Aisha Supervised by Dr. Gehan
Before administering oxygen: -Check (a) order for oxygen including the administering device and liter flow rate (L/min) or the percentage of oxygen. -Check (b) level of PO 2 and PCO 2 in the client arterial blood gas ( normally PO 2=80 to 100 mm. Hg , PCO 2 =35 to 45 mm. Hg ). -Check what ether the client has COPD.
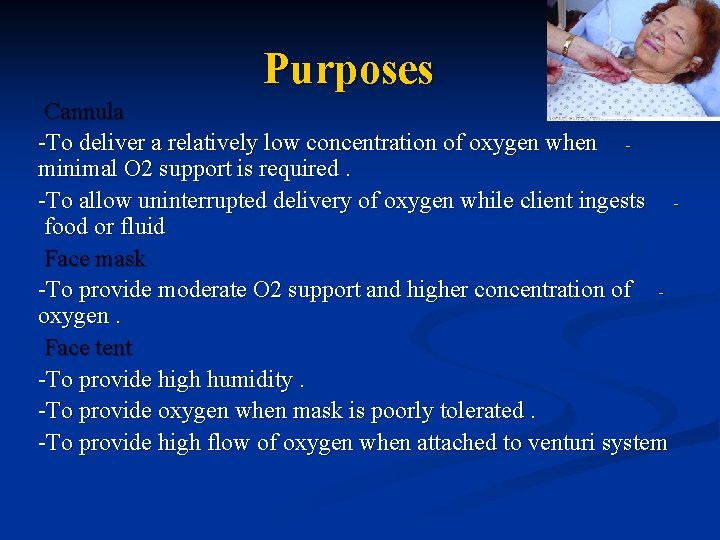
Purposes Cannula -To deliver a relatively low concentration of oxygen when minimal O 2 support is required. -To allow uninterrupted delivery of oxygen while client ingests food or fluid Face mask -To provide moderate O 2 support and higher concentration of oxygen. Face tent -To provide high humidity. -To provide oxygen when mask is poorly tolerated. -To provide high flow of oxygen when attached to venturi system
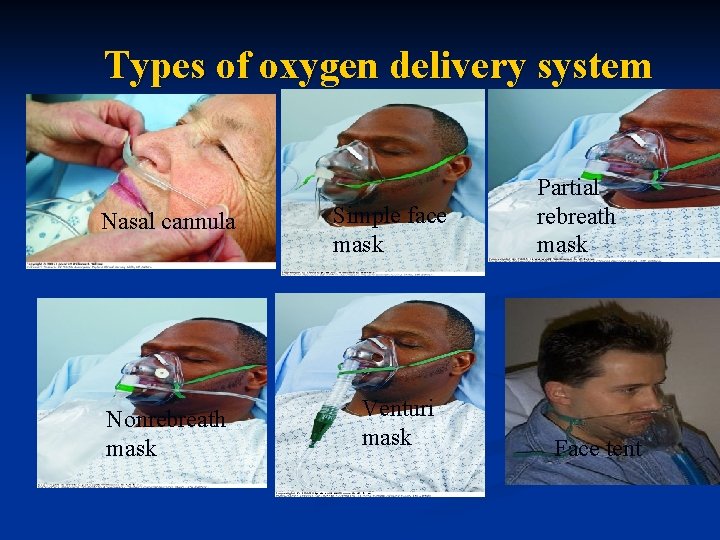
Types of oxygen delivery system Nasal cannula Nonrebreath mask Simple face mask Venturi mask Partial rebreath mask Face tent

Delivery system O 2 concentration Flow rate Special issues Nasal cannula 24 to 45 % 2 to 6 L/m Deliver low conc. Of O 2. Simple face mask 40 to 60 % 5 to 8 L/m Cover client nose and mouth. Partial rebreath mask 60 to 90 % 6 to 10 L/m Bag allow client to rebreath first third of exhale air. Nonrebreath mask 95 to 100 % 10 to 15 L/m Prevent room air and client exhale air from entering the bag. Venturi mask 24 to 40 % 4 to 10 L/m Has wide bore tubing. Face tent 30 to 50 % 4 to 8 L/m Replace oxygen mask when client

Equipment CANNULA Oxygen supply with flow meter and adapter. Humidifier with distal water and tap water according to agency. Nasal cannula and tubing. Tape. Padding for elastic band. FACE MASK - Prescribed face mask of appropriate size. -Padding for elastic band. Face TENT - Face tent of appropriate size.

Preparation -Determine the need for oxygen therapy and vertify the order for therapy. -Assess the respiratory system. -Put the client in semi-fowlers position. -Explain the oxygen therapy not dangerous when safety precautions are observed ( no Smoking or electric devices such as razors , hearing aids , radio, television and heating pads ……)
Performance -Explain to the client what you are going to do. -Wash hands. -Provide for client privacy.
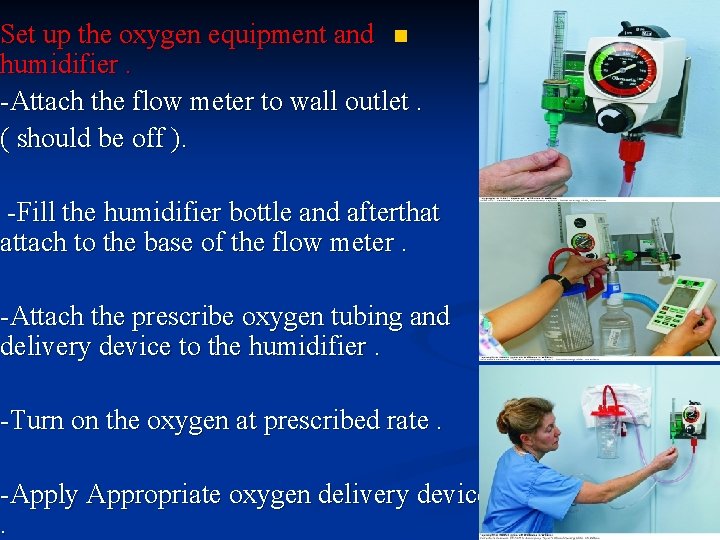
Set up the oxygen equipment and n humidifier. -Attach the flow meter to wall outlet. ( should be off ). -Fill the humidifier bottle and afterthat attach to the base of the flow meter. -Attach the prescribe oxygen tubing and delivery device to the humidifier. -Turn on the oxygen at prescribed rate. -Apply Appropriate oxygen delivery device.
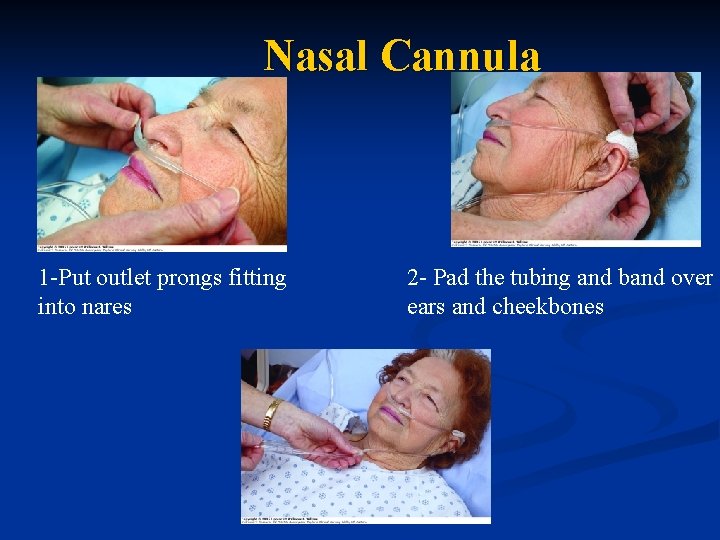
Nasal Cannula 1 -Put outlet prongs fitting into nares 2 - Pad the tubing and band over ears and cheekbones
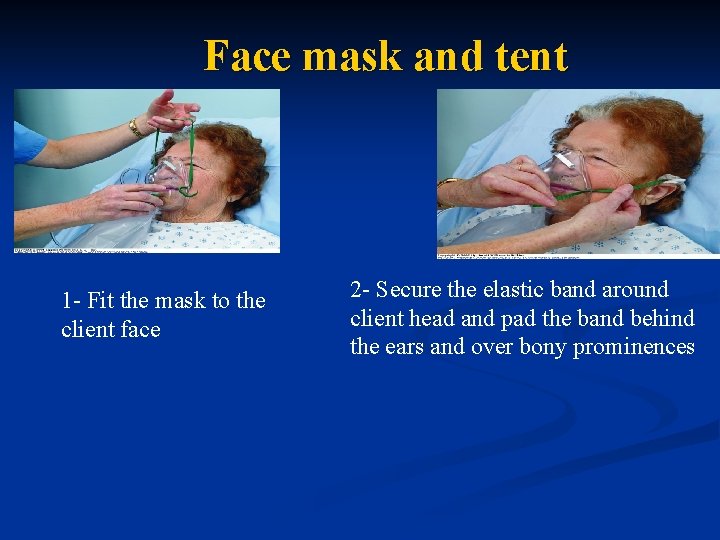
Face mask and tent 1 - Fit the mask to the client face 2 - Secure the elastic band around client head and pad the band behind the ears and over bony prominences

Cont. . -Assess the client regularly for the following : Vital signs , level of anxiety , color , ease of respiration , clinical signs of hypoxia , tachycardia , confusion , dyspnea , restlessness , cyanosis, client nares , facial skin. -Check the liter flow and level of water in the humidifier in the 30 minutes. DOCUMENT FINDINGS.
Teaching leg exercises, Deep Breathing , and coughing
Purposes LEG EXERCISES - To stimulate blood circulation , to prevent thrombus formation. DEEP BREATHING AND COUGHING - To facilitate lung aeration , to prevent atelectasis and pneumonia
Assessment Vital signs Discomfort Temperature and color of feet and legs Breath sounds Presence of dyspnea or cough Learning needs of client Anxiety level of the client Client experience with previous surgeries and anesthesia

Performance Explain to the client what you are going to do. Provide for client privacy
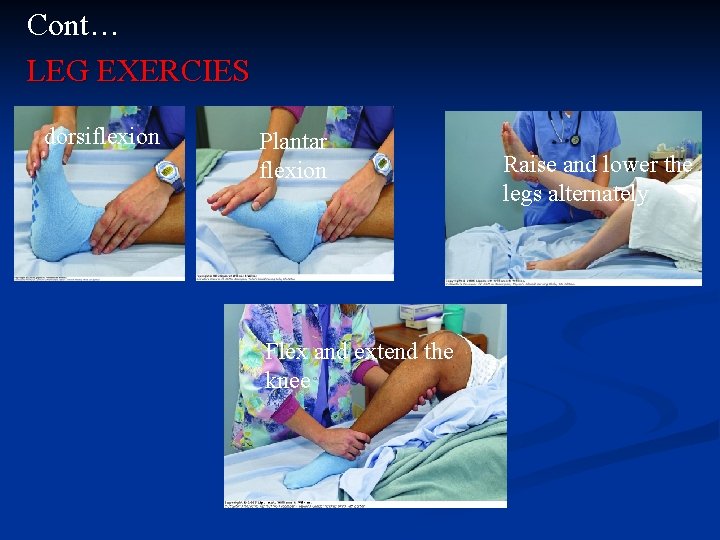
Cont… LEG EXERCIES dorsiflexion Plantar flexion Flex and extend the knee Raise and lower the legs alternately
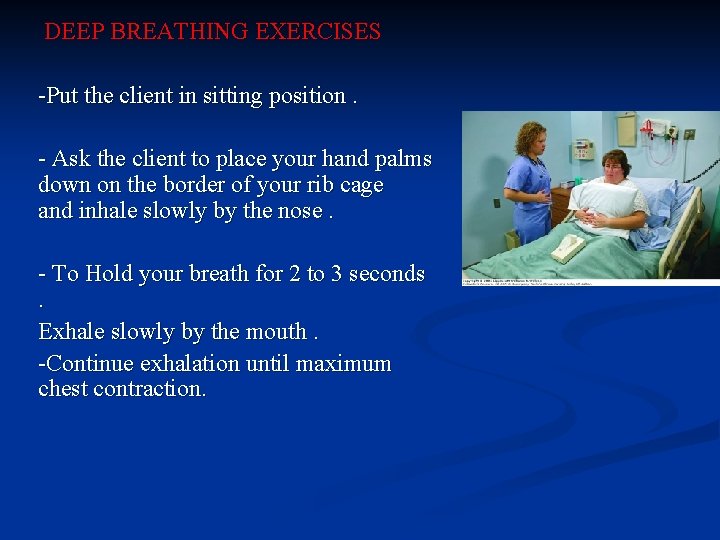
DEEP BREATHING EXERCISES -Put the client in sitting position. - Ask the client to place your hand palms down on the border of your rib cage and inhale slowly by the nose. - To Hold your breath for 2 to 3 seconds. Exhale slowly by the mouth. -Continue exhalation until maximum chest contraction.

Abdominal ( Diaphragmatic ) and pursed lip breathing 1 - Put the patient in semi-sitting position. 2 - Flex patient knee. 3 - Place one or both hands on abdomen. 4 - Ask the patient to take deep breath from the nose and close the mouth by this concentrate on feeling of abdomen rise. 5 - Purse the lip and breath out slowly and gentle and making slow whooshing sound without puffing the cheeks by this concentrate on feeling of abdomen fall. Note : Tell the patient to do this exercise whenever feeling short breath.
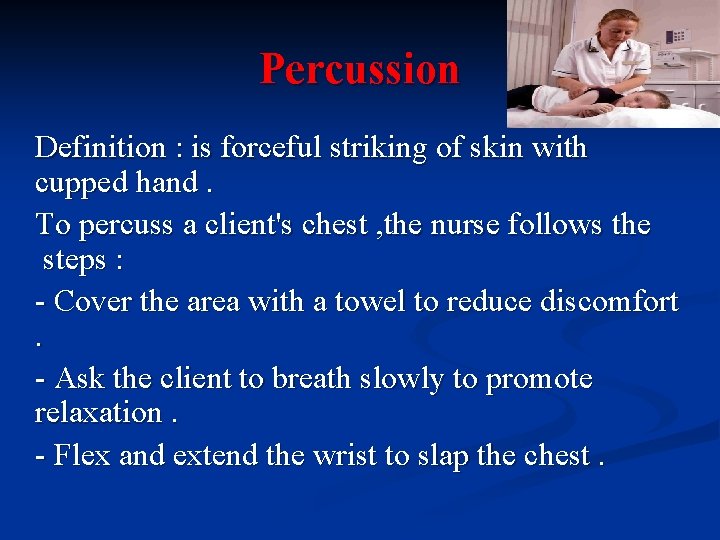
Percussion Definition : is forceful striking of skin with cupped hand. To percuss a client's chest , the nurse follows the steps : - Cover the area with a towel to reduce discomfort. - Ask the client to breath slowly to promote relaxation. - Flex and extend the wrist to slap the chest.

Vibration Definition : is a series of vigorous quivering produced by hands that are placed flat against the client's chest wall. Vibration is used after percussion to increase the turbulence of exhaled air and loosen thick secretion.
To vibrate client chest , the nurse follows these steps : - Place hand , palms down on the chest area to be drained , one hand over other with fingers together and extended. - Ask the client to inhale deeply and to exhale slowly through the nose. - During exhalation , shake ( vibrate ) the hand moving downward , stop vibrating when client inhale. - Do vibrating during 5 exhalation over one affected lung segment.
Postural drainage Definition : is drainage by the gravity of the secretion from various lung segments schedule 2 to 3 times daily. Wide variety of the position is necessary to drain all segment of the lung. Before postural drainage , patient must give bronchiodilator medication or nebulization therapy to loosen secretion.

The sequence for percussion, vibration , postural drainage is usually as follows: positioning , percussion , vibration and removal of secretions by coughing. Following PVD, the nurse auscultate the client lung.
COUGHING EXERCISES Instruct the client to cough voluntarily after few deep inhalation : Ask the client to inhale deeply , hold the breath for few seconds and cough once or twice. DOCUMENT THE TEACHING AND ALL ASSESSMENT
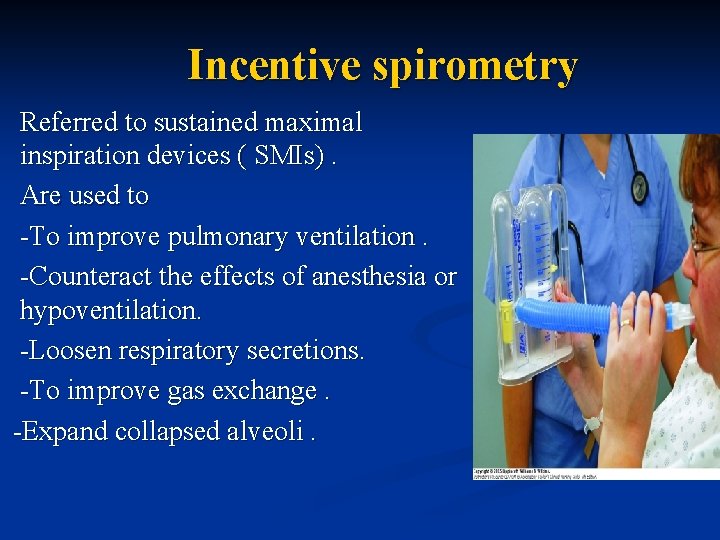
Incentive spirometry Referred to sustained maximal inspiration devices ( SMIs). Are used to -To improve pulmonary ventilation. -Counteract the effects of anesthesia or hypoventilation. -Loosen respiratory secretions. -To improve gas exchange. -Expand collapsed alveoli.
Teaching 1 -Put the patient in upright sitting position in the bed or chair. 2 -Ask the patient to exhale normally. 3 -Seal the lips tightly around the mouthpiece. 4 -Take in slow , deep breath to elevate the balls or cylinder and then hold the breath for 2 seconds to keep ball elevated.
NOTE -Instruct the client to start the exercises after surgery. -Encourage clients with abdominal or chest surgery to carry out deep breathing and coughing at least every 2 hours , taking 5 breath at each session.

Applying antiemboli stocking
Purpose - To facilitate venous return from lower extremities. - To prevent venous stasis and venous thrombosis. - To reduce peripheral edema.

Assessment Assess both lower extremities for : - Rate , volume , and rhythms of posterior tibial and dorsalis pedis pulses. - Skin color , skin temp and condition. - Presence of distend veins or edema. - Homans signs ( pain calf with passive dorsiflexion of foot ).
Planning -Before applying antiemboli stocking , determine any potential or present of circulatory problems and surgeon's orders involving lower extermities. - As part of morning and evening hygiene care
Equipment Tape measure Clean antiemboli stocking appropriate size Talcum powder
Preparation - Take measurements 1 - Measure the length of both legs from heel to gluteal fold for thigh length stocking or from heel to popliteal space for knee length stocking. 2 - Measure circumference of each calf and each thigh at the widest point. 3 - Compare the measurement to the size chart to obtain stocking of correct size.
Performance - Explain procedure to the client. -Wash your hands. - Provide for client privacy. - Select an appropriate time to apply the stockings : Apply stocking in the morning, if possible before the client arises. Assist the client who has been ambulating to lie down and elevate the legs for 15 to 30 minutes before applying the stockings. - Prepare the client. Assist the client to lying position in bed. Wash and dry the legs as needed. Dust the ankles with talcum powder or cornstarch.
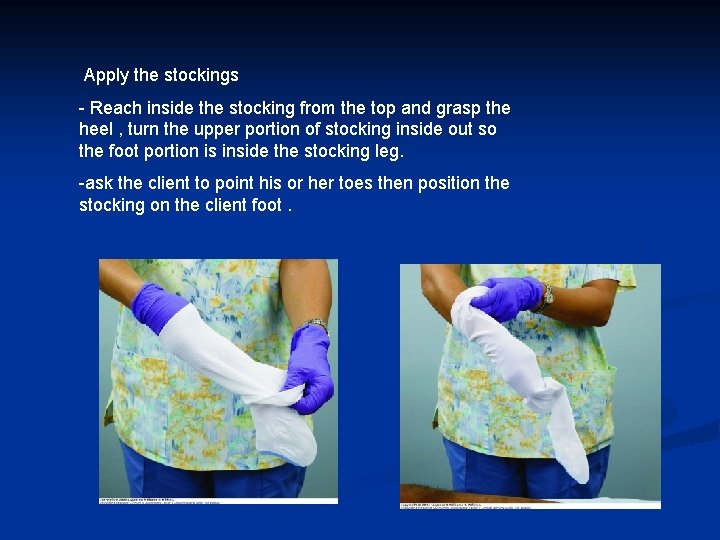
Apply the stockings - Reach inside the stocking from the top and grasp the heel , turn the upper portion of stocking inside out so the foot portion is inside the stocking leg. -ask the client to point his or her toes then position the stocking on the client foot.
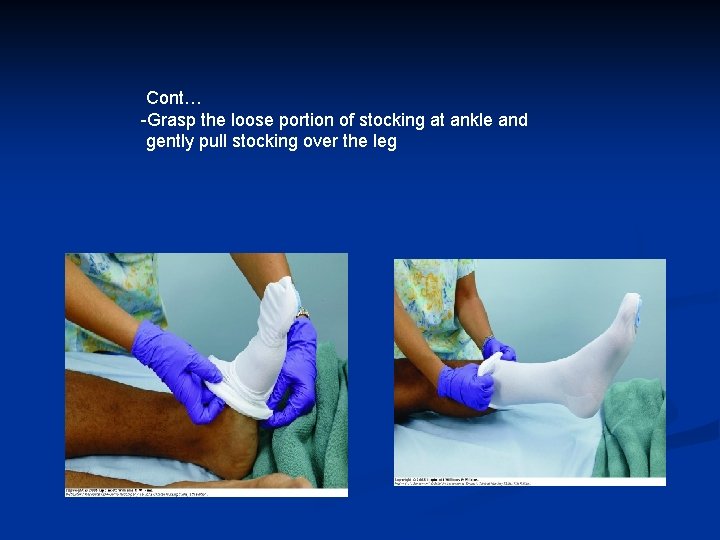
Cont… -Grasp the loose portion of stocking at ankle and gently pull stocking over the leg

Cont… -Inspect the client's leg and stocking smoothing any folds, ensure that stocking not rolled down or bunched at the top or ankle. -Remove stockings for 30 minutes every 8 hours. -Soiled stockings may be laundered by hand with warm water and mild soap, hang to dry. -Document the procedure.
- Slides: 38