Optical Illusions Perspective What do you see Points


 Trace")


 Using a ruler and pencil, mark the left and")


- Slides: 24
Optical Illusions Perspective
What do you see?
Points of View This Photo by Unknown Author is licensed under CC BY
Sides? Legs? Wait… what?
Movement?
M. C. Escher
Light vs Dark This Photo by Unknown Author is licensed under CC BY-SA This Photo by Unknown Author is licensed under CC BY
Direction? This Photo by Unknown Author is licensed under CC BY-SA
Gator Invasion…
What can we create? Projects in illusion
3 d Handprint
Optical Illusion 1 • • Choose several complimentary colors for this project. 1) Trace your hand in the middle of the page. • 2) Using a ruler, draw several straight lines skipping the tracing of your hand. • 3) Connect the straight lines with curved lines on the hand fingers. • 4) Using alternating colors, color in each set of line.
Spiral
Optical Illusion 2 • Choose two complimentary colors OR black & white for this project. 1) Locate the center of the page - draw a dot with a pencil. 2) Still using the pencil, draw 6 straight lines through the center. 3) Still using the pencil, draw "happy face" curved lines in alternate sections. 4) Color in the sections with marker, alternating one colored, one blank (ex: the pink sections). Use a colored pencil (in the same pink color) to shade the edges of the blank sections. 5) Using the pencil again, draw "sad face" curved lines in the left over sections. 6) Color in these sections with marker, alternating one colored, one blank (ex : the green sections). Use a green colored pencil to shade the edges. 7) Trace over all pencil lines (straight and curved) with a black marker.
Symmetric and Asymmetric Circles
Optical Illusion 3 • 1) Using a ruler and pencil, mark the left and right side of your paper with the same number of marks. If making a symmetrical grid, make sure your marks are evenly spaced at 1 -inch intervals. Connect your marks with horizontal lines. • 2) Using a ruler and pencil, mark the top and bottom of your paper with the same number of marks. If making a symmetrical grid, make sure your marks are evenly spaced at 1 -inch intervals. Connect your marks with vertical lines. • 3) You now have a grid, which is your background. • 4) Trace a circular object on several places of your background. • 5) Mark every other square on your background with an "x" to know where to color. It is easiest to color in the background first. • 6) Mark the opposite squares in your circle to create contrast. You can make the circles appear to be more 3 -dimensional by using curved lines as shown below.
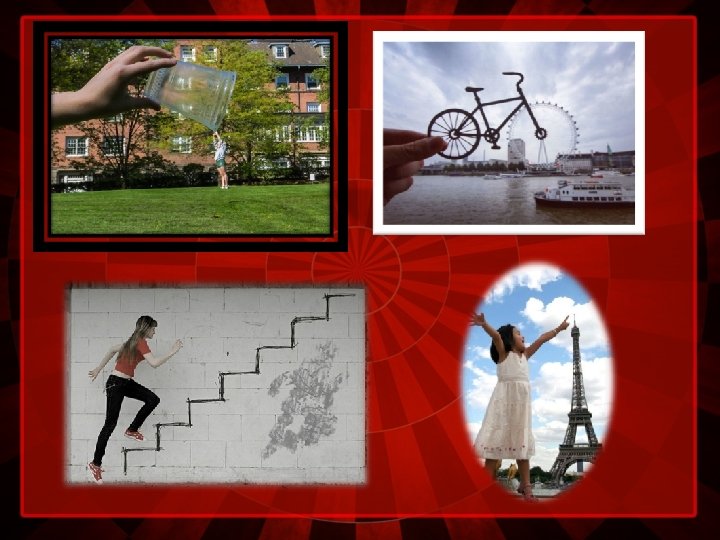
Illusions in photography FORCED PERSPECTIVE
How?
Movie
How they did that…
Placement and camera angle
How to….
Let’s get started… What will YOU create?