Nondestructive testing NDT Engineering Why use NDT Engineering



- Slides: 18

Non-destructive testing (NDT) Engineering

Why use NDT? Engineering • • Components are not destroyed Can test for internal flaws Useful for valuable components Can test components that are in use

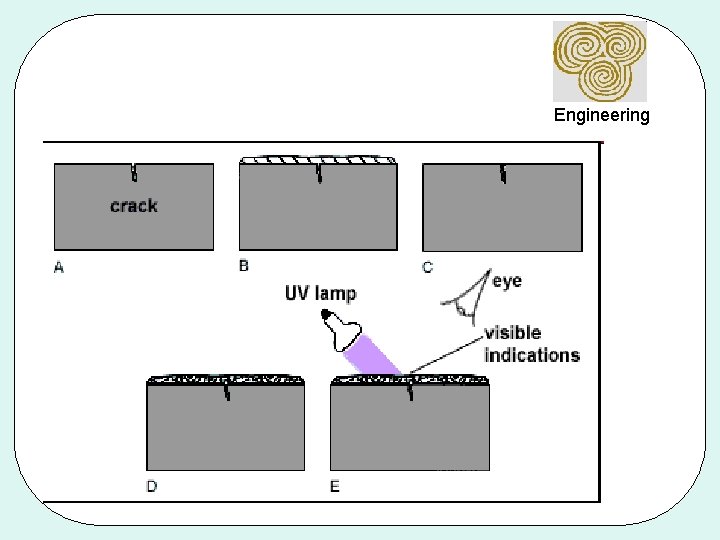
Penetrant testing Engineering • Used for surface flaws. • The oil and chalk test is a traditional version of this type of testing. Coloured dyes are now used.

Engineering

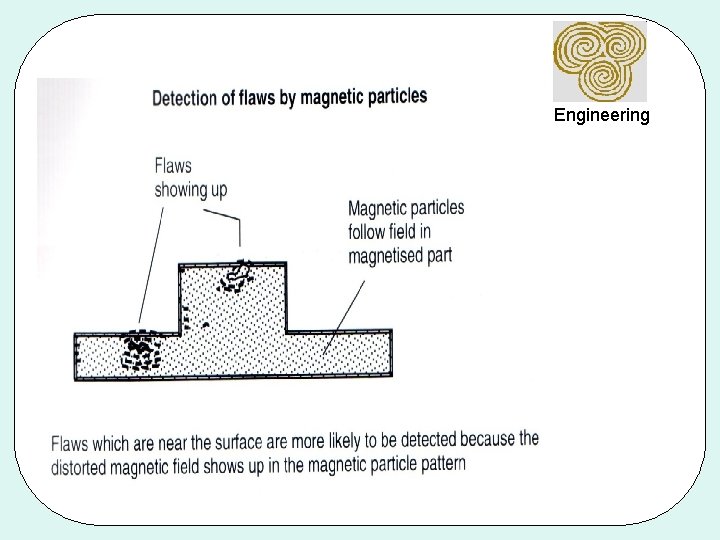
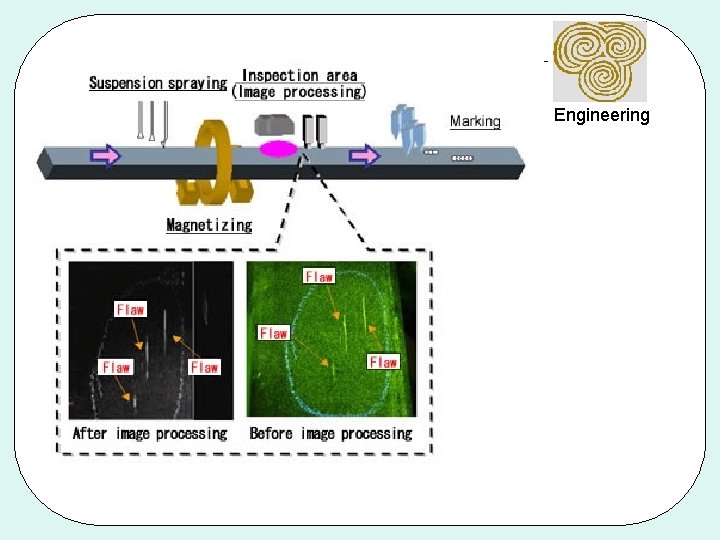
Magnetic particle testing Engineering • • • Used for ferrous metals. Detects flaws close to the surface of the material. The component to be tested must first be magnetized. Magnetic particles which can be dry or in solution are sprinkled onto the test piece. The particles stick to the magnetic field and flaws can be inspected visually by examining the pattern to see if it has been distorted. The component must be demagnetized after testing.

Engineering

Engineering

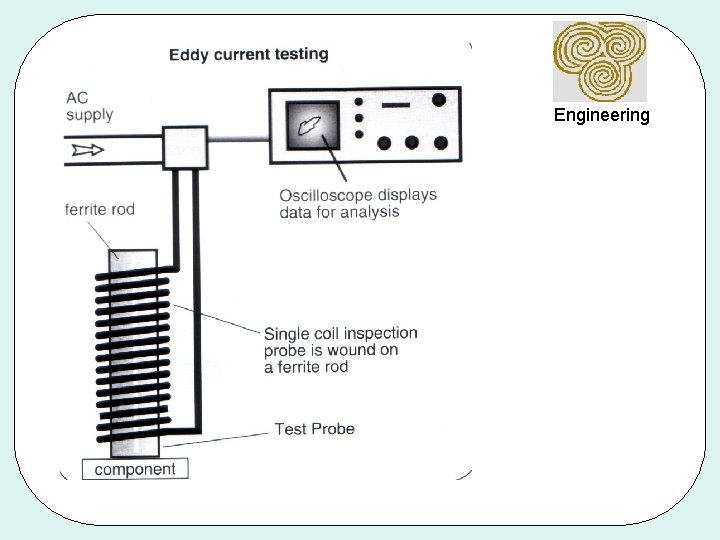
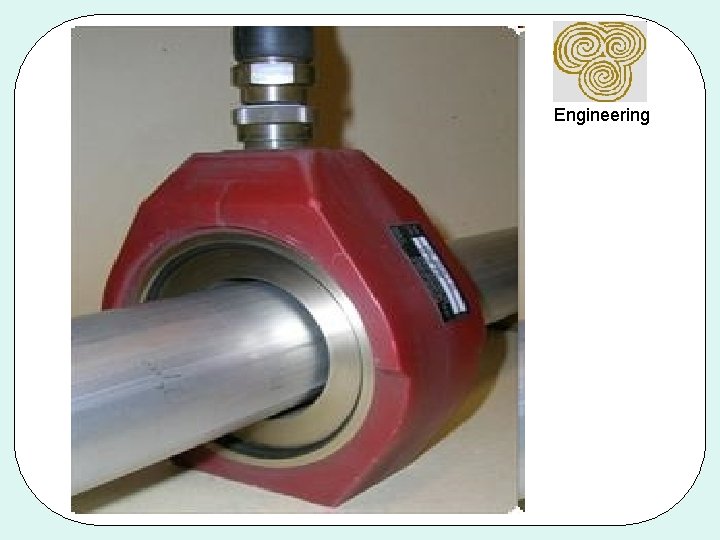
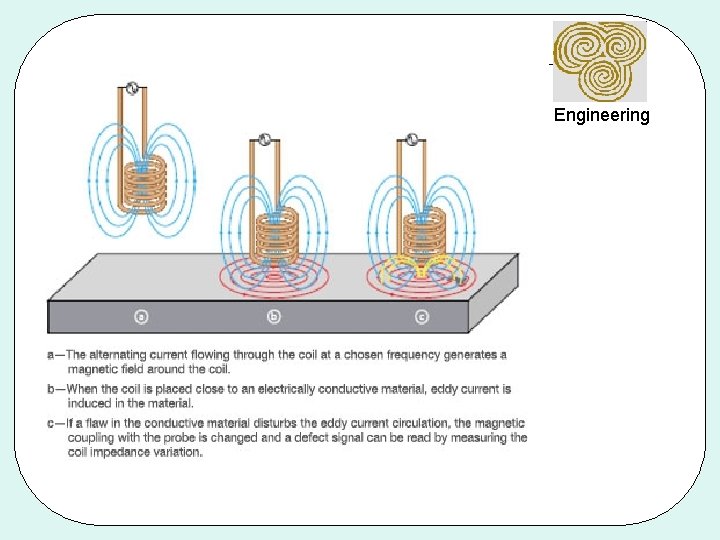
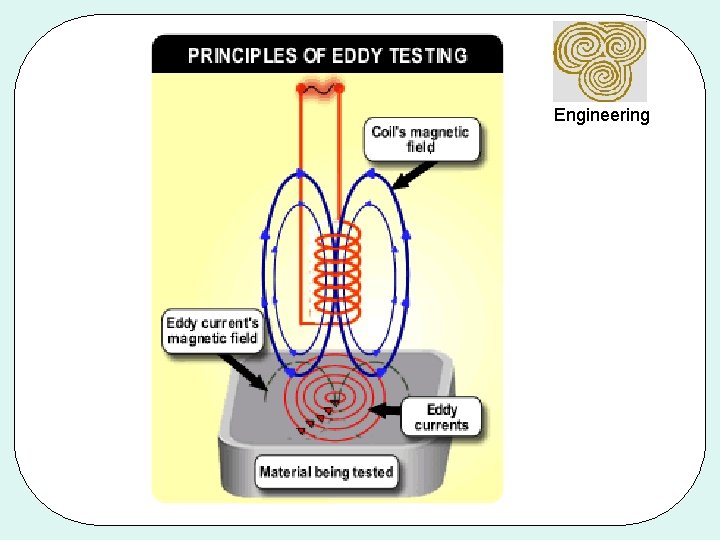
Eddy current testing Engineering • • Used for non-ferrous metals A. C. current is passed through the coil. The test piece is passed under the coil causing secondary currents called eddy currents to flow through the test piece. This causes a magnetic field to flow in the test piece. The flaws are detected on an oscilloscope by measuring a change in the magnetic field.

Engineering

Engineering

Engineering

Engineering

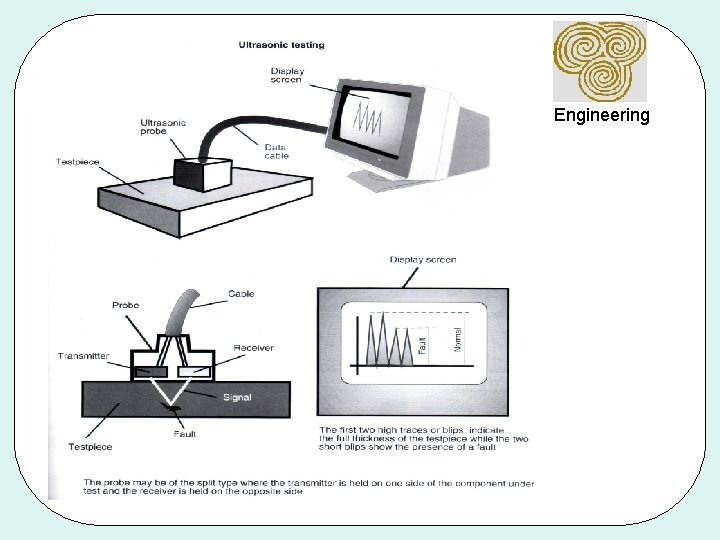
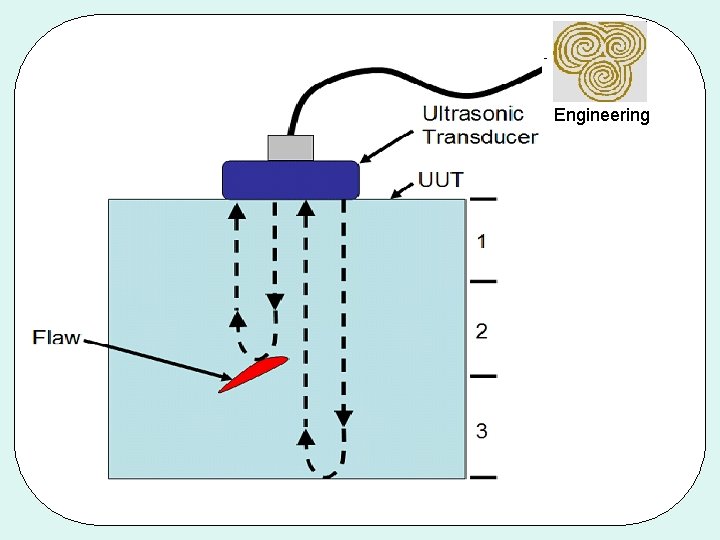
Ultrasonic testing Engineering Ultrasonic Sound waves are bounced off the component and back to a receiver. If there is a change in the time taken for the wave to return this will show a flaw. This is similar to the operation of a sonar on a ship. Operation. 1. The ultrasonic probe sends the sound wave through the piece. 2. The sound wave bounces of the piece and returns. 3. The results are then placed on the display screen in the form of peaks. 4. Where the peaks fluctuate this will show a fault in the piece. Uses. • This is generally used to find internal flaws in large forgings, castings and in weld inspections.

Engineering

Engineering

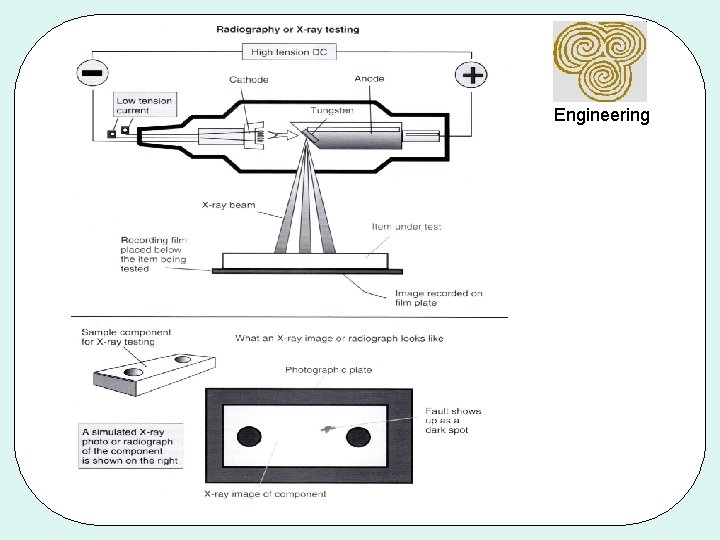
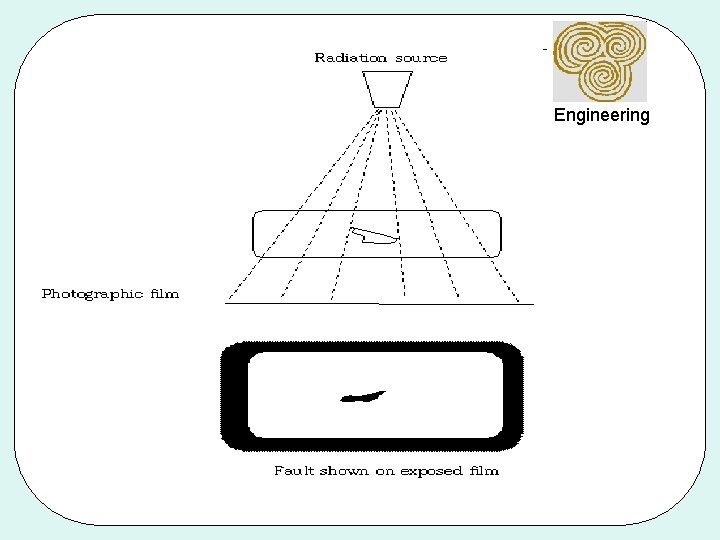
Radiography (X-ray) Testing Engineering 1. The x-ray are released by heating the cathode. 2. They are then accelerated by the D. C. current and directed onto the piece by the tungsten anode. 3. The x-rays then pass through the test piece onto an x-ray film which displays the results. 4. The x-rays cannot pass through the faults as easily making them visible on the x-ray film. Uses. • This is a test generally used to find internal flaws in materials. It is used to check the quality of welds, for example, to find voids or cracks.

Engineering

Engineering