NON DESTRUCTIVE TESTING NDT EQUIPMENTS FOR EVALUATION OF




























- Slides: 70

NON DESTRUCTIVE TESTING (NDT) EQUIPMENTS FOR EVALUATION OF CONCRETE STRUCTURES 1

References w RDSO has published lots of reports on theory/ methodology of NDT tests w RDSO also has published the reports of actual tests done for various railways n Available in the members’ area in IRICEN website w These will give very good guidance as to which tests to employ and how to interpret the results w Mobile bridge testing laboratories equipped with NDT equipment being procured for the railways for the bridge testing 2

Inspection of Concrete Bridges The average life span of bridges is about 70 years and the majority of bridges currently in use were built after 1970 s. However, significant environmental damage requiring repair, which typically occurs after the average bridge reaches mid-life. 3

Inspection of Concrete Bridges Corrosion, cracking and other damages affect a bridge's load carrying capacity. Therefore, all of the elements that directly affect performance of the bridge including the footing, substructure , deck, and superstructure must be periodically inspected or monitored. Can lead to failures Instances of major bridge collapse are rare, but the results are truly catastrophic. 4

Inspection of Concrete Bridges Ø Fatigue cracking and corrosion will become increasingly important considerations as we go beyond the 50 year life expectancy Ø Current visual inspection techniques will not suffice. Ø The life extension approach will require increased use of NDT in a coordinated effort to obtain reliability assurance for these structures. 5

ADVANTAGES OF NDT w Portable, handy, battery operated and easy to use available in different capacities, w Less time consuming and more realistic as tests are conducted on actual structures. w Test can be performed at several locations and at various ages of concrete. w Confirmation of locations of suspected distress or deterioration 6

LIMITATIONS OF NDT ØThe equipment and technique are relatively new. Many of them are yet to be standardized and accepted. ØMost of the equipment are not available locally and need imports. However, some of the Indian firms have started their marketing and after sale service. ØMuch experience and expertise is required for analysis and proper interpretation of data to get satisfactory results. 7

LIMITATIONS OF NDT Contd…. . Ø It is desirable to develop own calibration curves for different equipments for getting good results. Ø The results of single NDT equipment, normally can not be totally relied upon. It is desirable to use combination of two or more equipment for getting reliable results. 8

Deterioration of Concrete Bridges – Potential Causes § § Chloride-induced corrosion of the reinforcing steel. Poor Quality Construction Accidental damage from collision or fire Design practices that fail to properly consider drainage requirements, stresses due to live and dead loads, shrinkage, or expansion §Evolution of concrete theory 9

NDT METHODS 1 Strength Assessment of concrete i. Rebound Hammer ii. Ultrasonic Tester iii. Pull-off Tester iv. Windsor Probe 2 Corrosion Assessment of Reinforcing Steel i. Resistivity Meter ii. Half Cell Potentiometer 10

NDT METHODS 3 Contd…. . Mapping of Reinforcing Steel i. Micro-Cover Meter ii. Profometer 4 Crack Size and Its Growth i. Crack Detection Microscope ii. Acoustic Emission Equipments iii. Boroscope 11

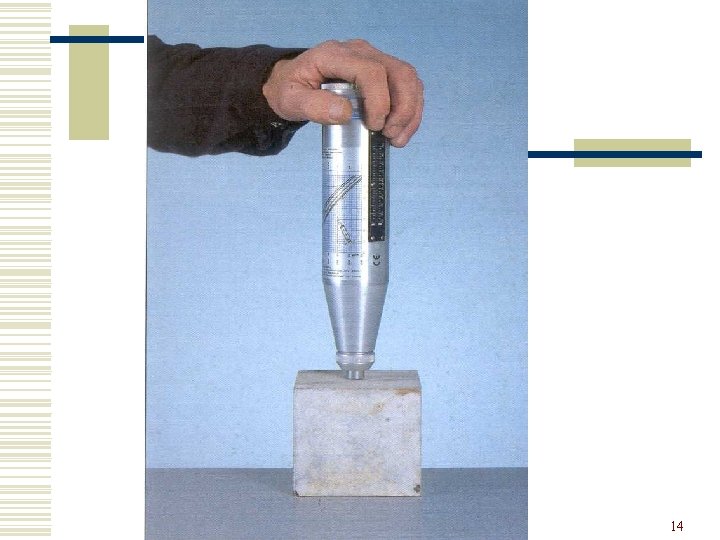
1(i) Rebound Hammer ØIt is handy, portable mechanical equipment not requiring any consumable Ø It consists of a spring controlled mass that slides on a plunger within a tubular housing. Ø When the plunger is pressed against the surface of the concrete, the spring controlled mass rebounds. The extant of such rebound depends upon the surface hardness of the concrete and is taken to be related to the compressive strength of the concrete. 12

1(i) Rebound Hammer Contd…. . Ø Based on the principle that the rebound of an elastic mass depends on the hardness of the surface against which the mass impinges. Ø It provides a convenient rapid indication of the compressive strength of concrete. Ø The surface to be tested should be dry, smooth and clean Ø The point of impact should be atleast 20 mm away from any edge or shape discontinuity Ø Should be held at right angles to the surface of the concrete member 13

14

LIMITATIONS w Gives the strength of concrete at surface only w Internal micro cracking, flaws etc. cannot be detected. w Probable accuracy of prediction of concrete strength is ± 25% w On carbonated concrete surface results will not be accurate 15

FACTORS AFFECTING REBOUND VALUE w Wetness of the surface w Surface finish of the concrete w Inclination of the rebound hammer w Rigidity of the member w Type of aggregate w Age of concrete w Carbonation of concrete 16

1(II) ULTRASONIC PULSE VELOCITY METER Ø The velocity of Ultra sonic pulse in a material depends on its density and elastic properties, which in turn are related to the quality and the strength of the material. Comparatively higher values is obtained when concrete quality is good. Ø Ultrasonic pulse is produced and transmitted by a transducer held in contact with concrete surface, which travels through a known length in concrete and received by second transducer held in contact with another or same surface of concrete member. 17

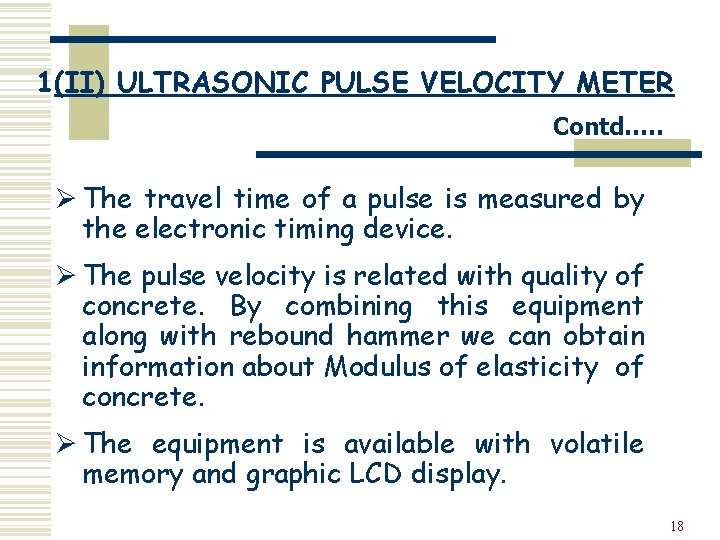
1(II) ULTRASONIC PULSE VELOCITY METER Contd…. . Ø The travel time of a pulse is measured by the electronic timing device. Ø The pulse velocity is related with quality of concrete. By combining this equipment along with rebound hammer we can obtain information about Modulus of elasticity of concrete. Ø The equipment is available with volatile memory and graphic LCD display. 18

1(II) ULTRASONIC PULSE VELOCITY METER Contd…. . Ø The natural frequency of transducer should be between 20 to 150 MHz. Ø High frequency transducer for short path lengths and low frequency transducers for long path length Ø Provision of adequate acoustical coupling between transducer and concrete surface Ø Min. path length 100 mm. If max. size of aggregate is 20 mm. Ø Min. path length 150 mm. If max. size of aggregate is bet. 20 to 40 mm. 19

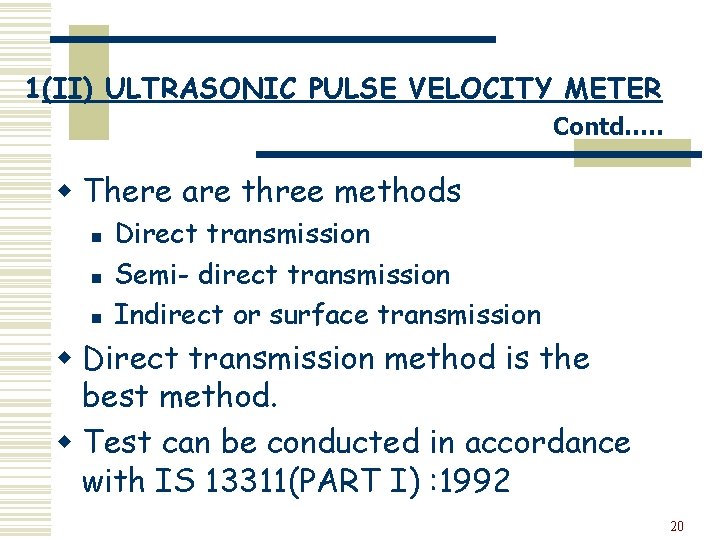
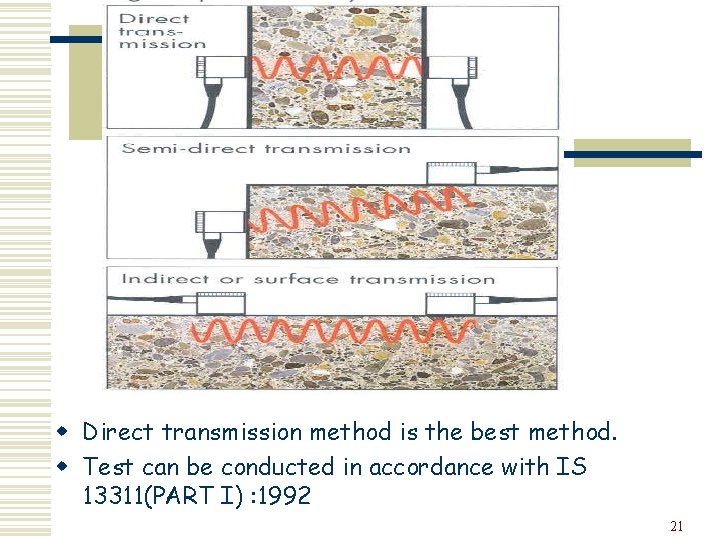
1(II) ULTRASONIC PULSE VELOCITY METER Contd…. . w There are three methods n n n Direct transmission Semi- direct transmission Indirect or surface transmission w Direct transmission method is the best method. w Test can be conducted in accordance with IS 13311(PART I) : 1992 20

w Direct transmission method is the best method. w Test can be conducted in accordance with IS 13311(PART I) : 1992 21

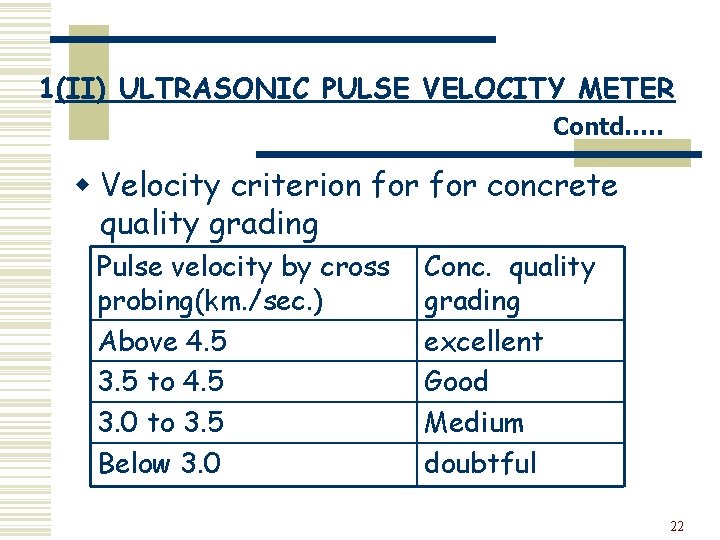
1(II) ULTRASONIC PULSE VELOCITY METER Contd…. . w Velocity criterion for concrete quality grading Pulse velocity by cross probing(km. /sec. ) Above 4. 5 3. 5 to 4. 5 3. 0 to 3. 5 Below 3. 0 Conc. quality grading excellent Good Medium doubtful 22

1(II) ULTRASONIC PULSE VELOCITY METER Contd…. . w The method is more effectively used for comparison amongst different part of the structures w The dynamic Young’s Modulus of elasticity E= d(1+µ)(1 -2µ) V 2 (1 - µ) Where, d= density in kg. /m. 3 V= velocity in m/sec. µ= dynamic poisson’s ratio 23

FACTORS AFFECTING PULSE VELOCITY w Moisture content w Degree of coupling w Presence of reinforcement w Mix proportion w Age of concrete w Stress level in concrete w Concrete temperature 24

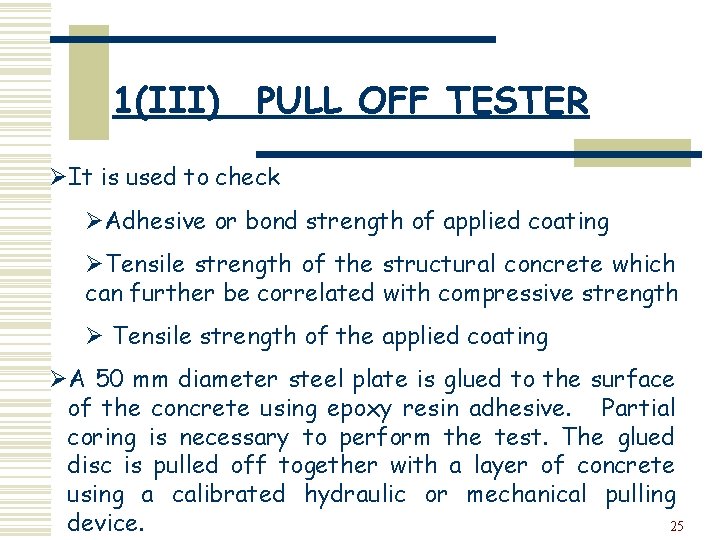
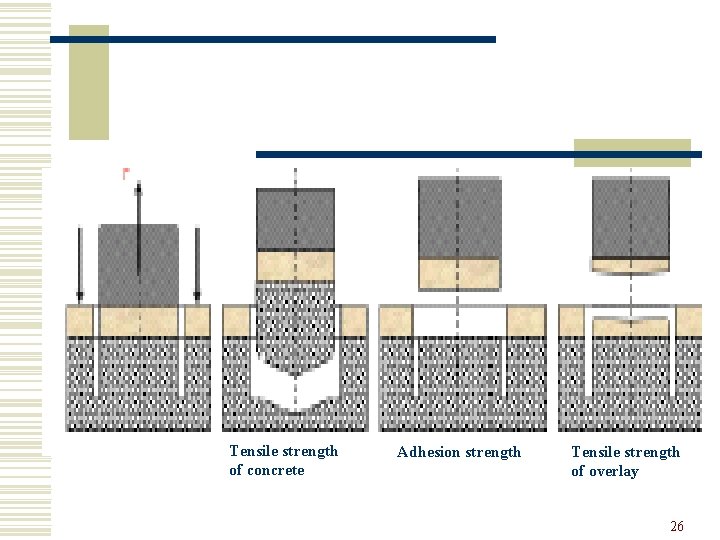
1(III) PULL OFF TESTER ØIt is used to check ØAdhesive or bond strength of applied coating ØTensile strength of the structural concrete which can further be correlated with compressive strength Ø Tensile strength of the applied coating ØA 50 mm diameter steel plate is glued to the surface of the concrete using epoxy resin adhesive. Partial coring is necessary to perform the test. The glued disc is pulled off together with a layer of concrete using a calibrated hydraulic or mechanical pulling device. 25

Tensile strength of concrete Adhesion strength Tensile strength of overlay 26

1(III) PULL OFF TESTER Contd…. . Ø The instrument confirms to BS and ASTM standards and available in different capacities with volatile memory and graphic LCD display 27

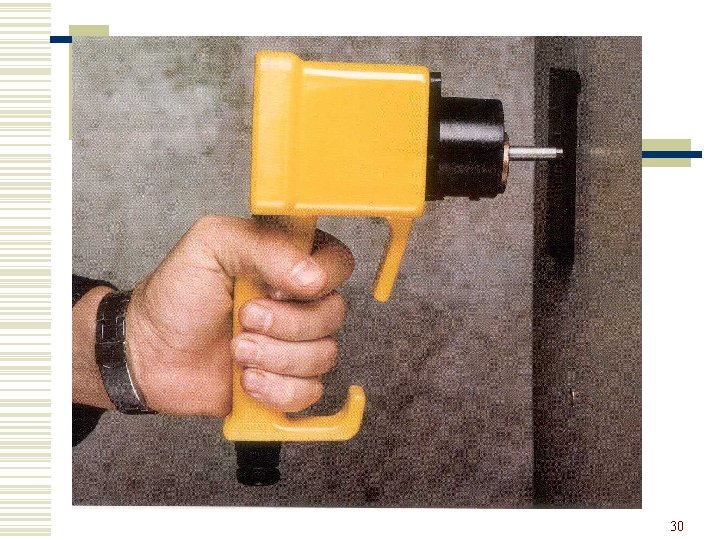
1(IV) WINDSOR PROBE ØThis test is based on the principle of penetration resistance technique for standard test condition i. e. the penetration of probe into concrete is inversely proportional to the compressive strength of concrete. ØThe equipment consist of a power activated gun or driver unit, hardened alloy probes, loaded cartridges and a measuring instrument such as depth gauge 28

1(IV) WINDSOR PROBE Contd…. . Ø The probes are generally 6. 35 mm in diameter and 79. 5 mm in length. The driver is used to fire a probe into the concrete at the test locations by a standardised power cartridge and the penetration of the probe is directly related to the compressive strength of the concrete. 29

30

31

LIMITATIONS w Can be used to determine relative strength w Does not give absolute values of strength w Gives strength upto 75 mm below the surface w Damage the structure locally w Requirement of min. edge distance, probe spacing and member thickness to be followed. 32

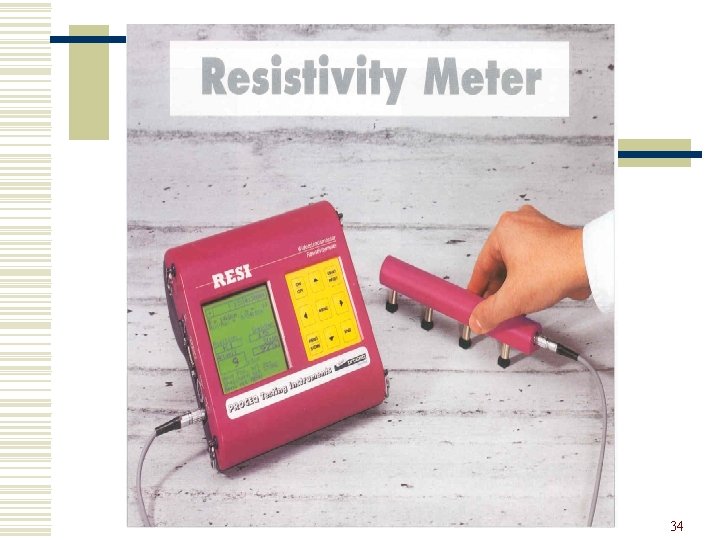
2(I) RESISTIVITY METER ØIt is used to measure the electrical resistance of the cover concrete. Ø The lower the electric resistance, the more readily the corrosion current flows through the concrete and greater is the probability of corrosion. ØThe corrosion of steel in concrete is an electro chemical process which generates a flow of current which can dissolve the embedded reinforcement, ØThe investigation with equipment and the graphical display of the measured values permits the determination of spots where risk of corrosion 33 activities is expected.

34

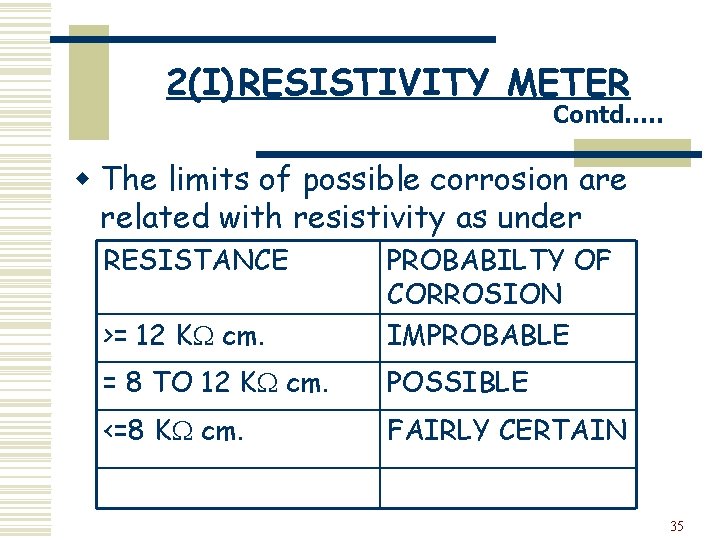
2(I) RESISTIVITY METER Contd…. . w The limits of possible corrosion are related with resistivity as under RESISTANCE >= 12 K cm. PROBABILTY OF CORROSION IMPROBABLE = 8 TO 12 K cm. POSSIBLE <=8 K cm. FAIRLY CERTAIN 35

2(II) Half Cell Potentiometer Ø The method is measurement. based on half cell potential Ø By measuring the corrosion potential of rebars using corrosion analysing instrument, it is possible to differentiate between corroding and passive areas of the concrete structures Ø Corrosion analysing instrument is used to measure corrosion potential of the embedded reinforcement on the surface of the concrete. 36

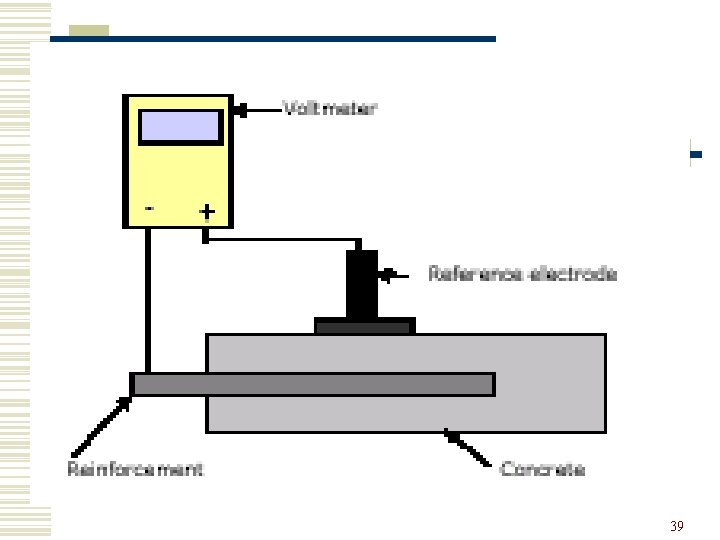
2(II) Half Cell Potentiometer Contd…. . w Used for detecting the likelihood of corrosion of steel but cannot indicate the rate of corrosion w Normally copper – copper sulphate / silver – silver nitrate refrence electrodes( HALF CELL)are used for measuring the potential gradient. w The rein. act as electrode and surrounding concrete acts as electrolyte and together these two works as HALF CELL. 37

2(II) Half Cell Potentiometer Contd…. . w The equipment consists of a half cell, voltmeter and electrical lead wires. w One terminal of the voltmeter is connected to rein. and other terminal is connected to ref. Electrode (connected to surface) w The higher the potential gradient , more is the probability of corrosion. 38

39

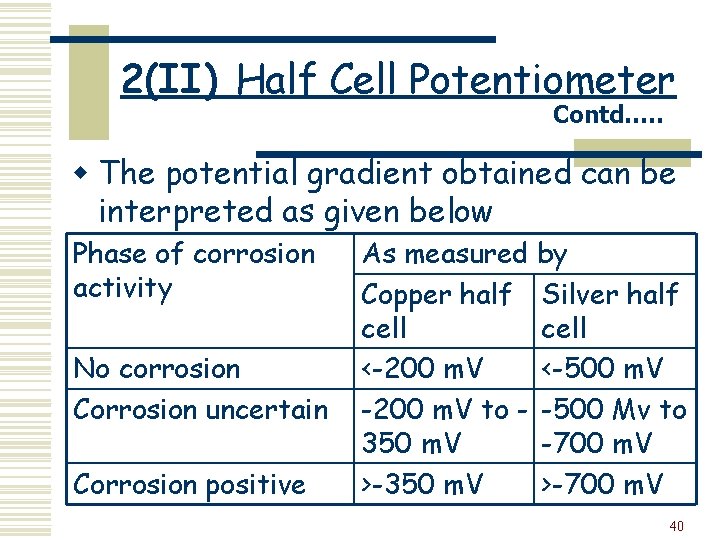
2(II) Half Cell Potentiometer Contd…. . w The potential gradient obtained can be interpreted as given below Phase of corrosion activity No corrosion Corrosion uncertain Corrosion positive As measured by Copper half Silver half cell <-200 m. V <-500 m. V -200 m. V to - -500 Mv to 350 m. V -700 m. V >-350 m. V >-700 m. V 40

41

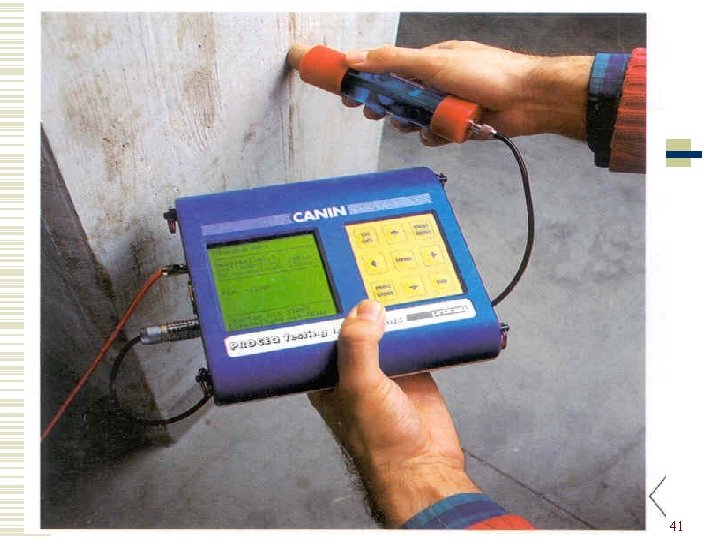
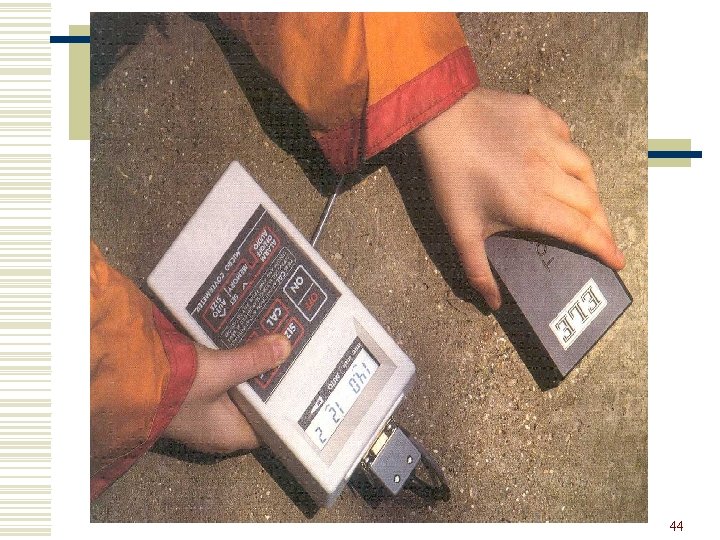
3(I) MICRO-COVERMETER Ø It is a portable, battery operated equipment used for measuring the concrete cover and location of the steel reinforcement embedded in concrete. ØThe equipment is based on the principle that the presence of steel affects the electromagnetic field. ØThe equipment consists of U-shape magnetic core on which two coils are mounted. 42

3(I) MICRO-COVERMETER Contd…. . Ø The equipment is also available with sufficient memory to store the test data. Ø Guide lines on use of Micro-covermeter (Report No BS– 42) is already issued by RDSO 43

44

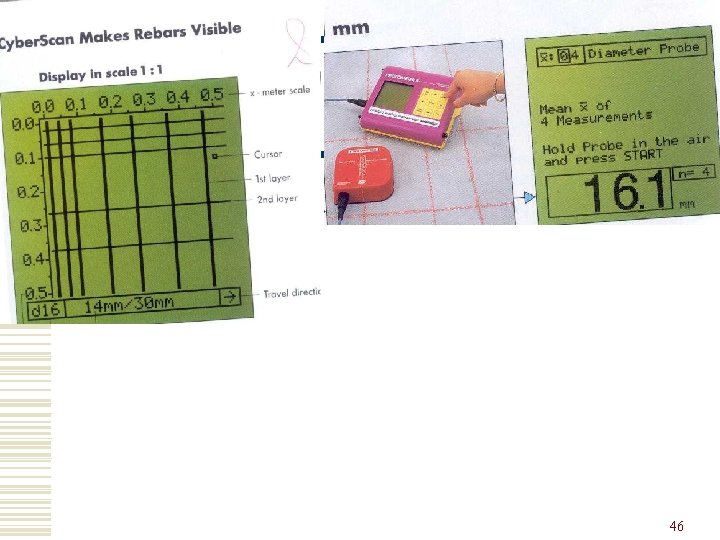
3(II) PROFOMETER Ø It is a portable, battery operated equipment having graphical display used for measuring the depth of cover concrete, location and size of the steel reinforcement embedded in concrete. Ø The equipment is based on the principle that the presence of steel affects the electromagnetic field. Ø It consists of data logger, diameter probe and depth probe and calibration rod. Ø The equipment is available with sufficient memory to store the scanned data. The equipment is useful for investigating the structures where drawings are not 45 available.

46

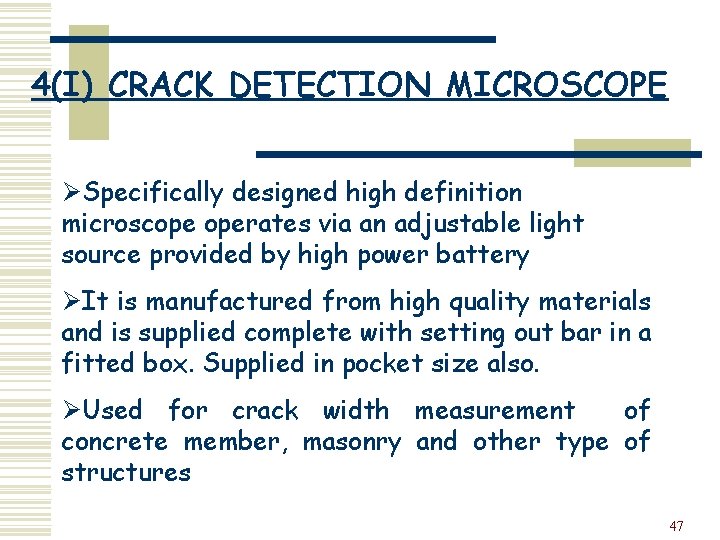
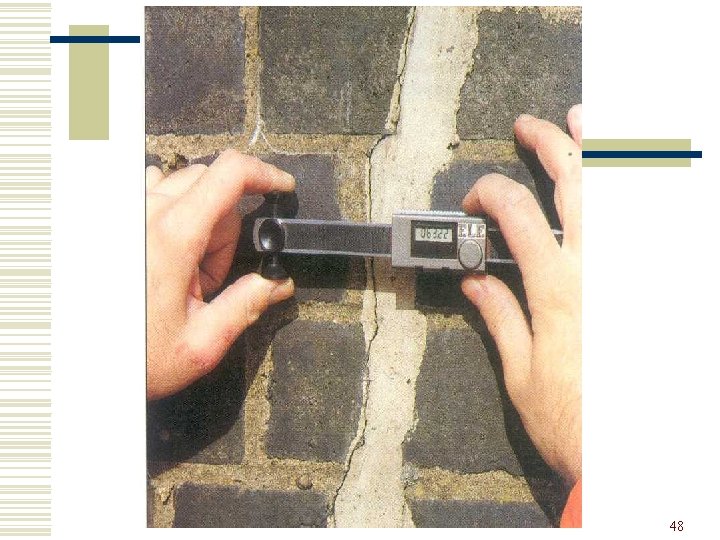
4(I) CRACK DETECTION MICROSCOPE ØSpecifically designed high definition microscope operates via an adjustable light source provided by high power battery ØIt is manufactured from high quality materials and is supplied complete with setting out bar in a fitted box. Supplied in pocket size also. ØUsed for crack width measurement of concrete member, masonry and other type of structures 47

48

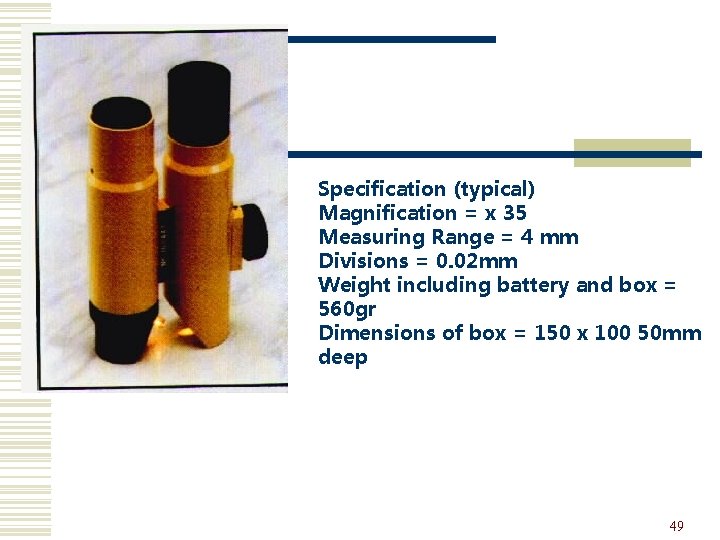
Specification (typical) Magnification = x 35 Measuring Range = 4 mm Divisions = 0. 02 mm Weight including battery and box = 560 gr Dimensions of box = 150 x 100 50 mm deep 49

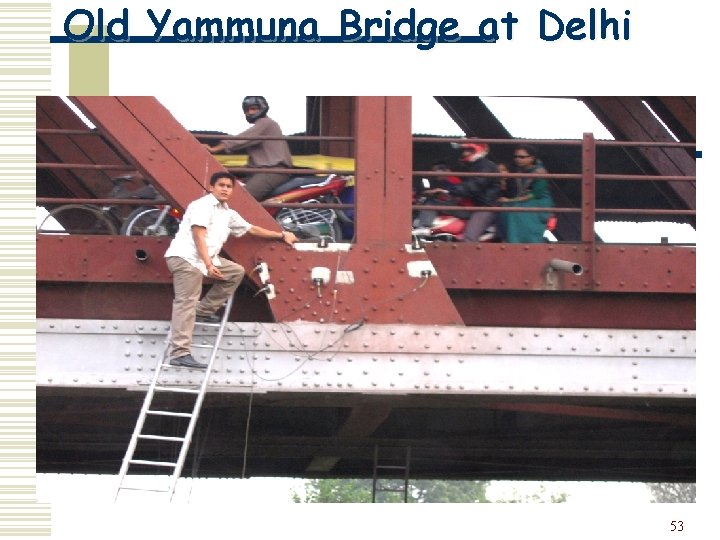
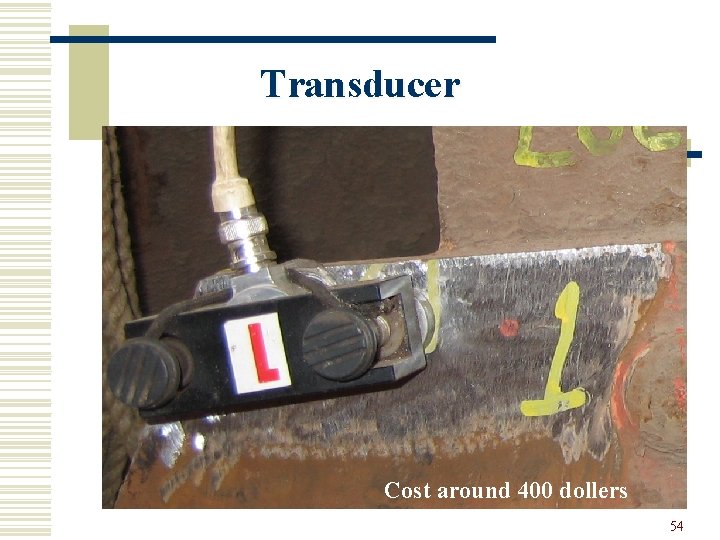
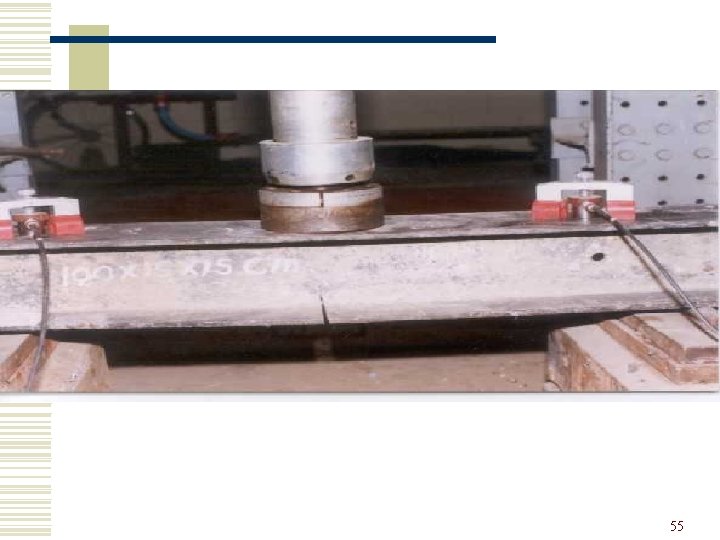
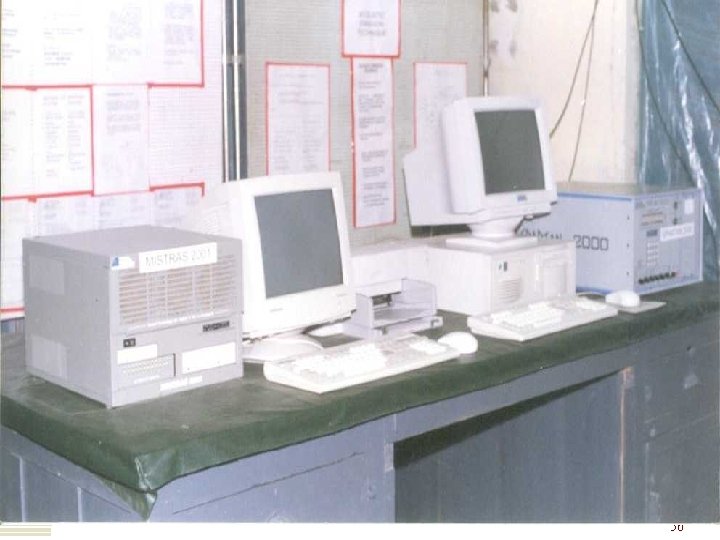
4(II) ACOUSTIC EMISSION EQUIPMENTS ØAcoustic emission technique is a recent development to monitor the health of bridges. ØIt can detect location of cracks at an early stage and can monitor the crack growth. ØEffective method for steel, development stage for concrete in 50

What Is Acoustic Emission ? w Elastic waves are generated inside the material, whenever there is breakage of atomic bonds. w Elastic waves are also generated due to rubbing / clattering of two surfaces or rattling of loose bolts / rivets. w All these types of waves are called acoustic emission. w The emission intensity is approx. equal to the energy released in a pencil lead break. w Ferrous materials, Brittle materials generate AE w But all materials do not generate AE like copper 51

Why Material Emit AE ? w When a micro crack in a material elongates, work hardening of the crack tip takes place w This work hardening increases the strength at tip and material takes more load without further cracking (Kaizer effect) w When load further increases, work hardened brittle tip ruptures, This sudden rupture generates AE. This AE frequency in steel is between 250 KHz to 500 KHz with pre-dominance at around 375 KHz. w This AE is different than AE generated due to other sources like rattling/rubbing w AE testing is basically to filter out this emission from other emissions called noises 52

Old Yammuna Bridge at Delhi 53

Transducer Cost around 400 dollers 54

55

56

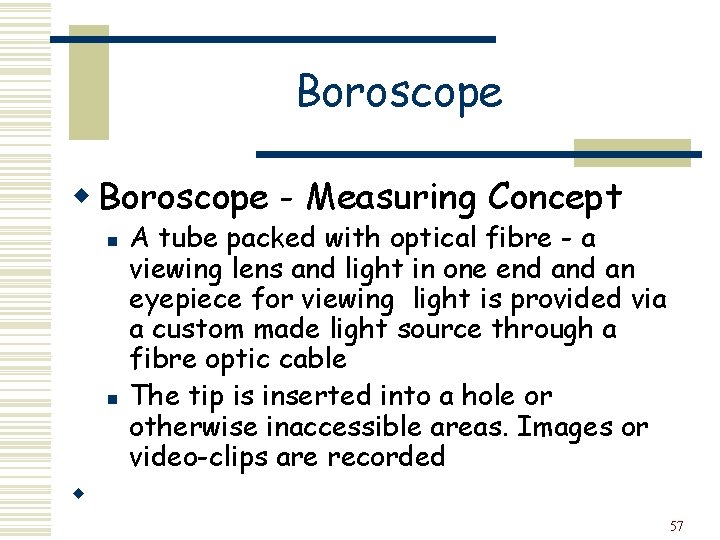
Boroscope w Boroscope - Measuring Concept n n A tube packed with optical fibre - a viewing lens and light in one end an eyepiece for viewing light is provided via a custom made light source through a fibre optic cable The tip is inserted into a hole or otherwise inaccessible areas. Images or video-clips are recorded w 57

Boroscope w Typical Applications n Investigation of the inside of closed box girders n Detection of corrosion 58

AVAILABILITY OF EQUIPMENTS Most of the NDT equipments are manufactured and supplied by the foreign firms based in different countries. However, some of the Indian firms are doing marketing of various NDT equipments and providing after sales service. They can be contacted for getting information about these equipments. 59

AVAILABILITY OF EQUIPMENTS • Some of the firms dealing with supply of NDT equipments are as under: • • M/s AIMIL LTD. , A-8, MOHAN COOPERATIVIE INDUSTRIAL ESTATE, MATHURA ROAD, NEW DELHI. M/s HILTI INDIA PVT. LTD. 8 LSC PUSHP VIHAR COMMUNITY CENTRE, NEW DELHI M/s ULTRA TECHNOLOGIES PVT. LTD, NEW DELHI. M/S ENCARDIO RITES, LUCKNOW 60

OTHER NDT EQUIPMENTS FOR CONCRETE STRUCTURES w NON DESTRUCTIVE n n Concrete premeability Carbonation 61

NDT EQUIPMENTS FOR STEEL STRUCTURES w NON DESTRUCTIVE n n Accoustic Emission Ultrasonic Pulse Velocity Dye Penetrant Radiographic Testing 62

NDT EQUIPMENTS FOR STEEL STRUCTURES w DESTRUCTIVE n n Brinell Hardness Test Charpy Impact Test Chemical Analysis Tensile strength Testing 63

NDT EQUIPMENTS FOR MASONRY STRUCTURES n Impact Echo System, n Specially designed Schmidt Hammer n Push Test Set up for shear strength of masonry 64

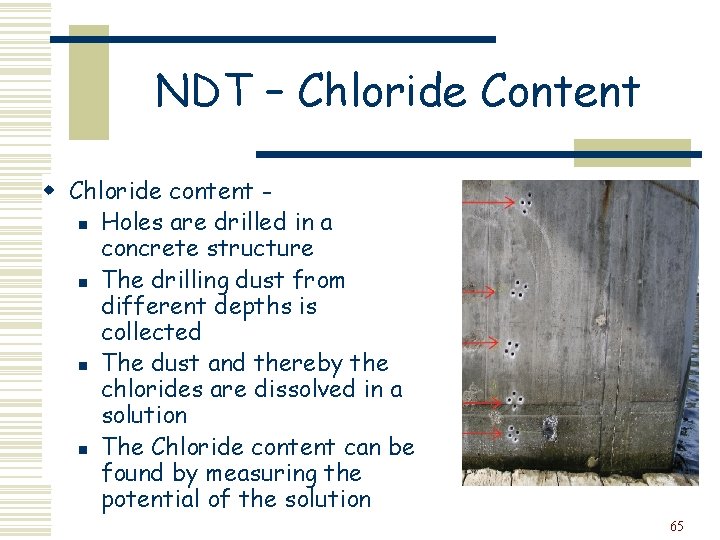
NDT – Chloride Content w Chloride content n Holes are drilled in a concrete structure n The drilling dust from different depths is collected n The dust and thereby the chlorides are dissolved in a solution n The Chloride content can be found by measuring the potential of the solution 65

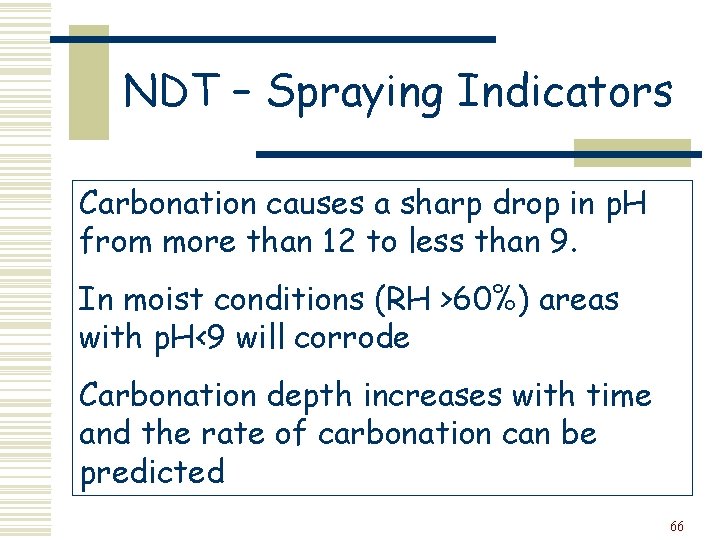
NDT – Spraying Indicators Carbonation causes a sharp drop in p. H from more than 12 to less than 9. In moist conditions (RH >60%) areas with p. H<9 will corrode Carbonation depth increases with time and the rate of carbonation can be predicted 66

NDT – Spraying Indicators w Cheap and very fast method w On-site evaluation of concrete quality 67

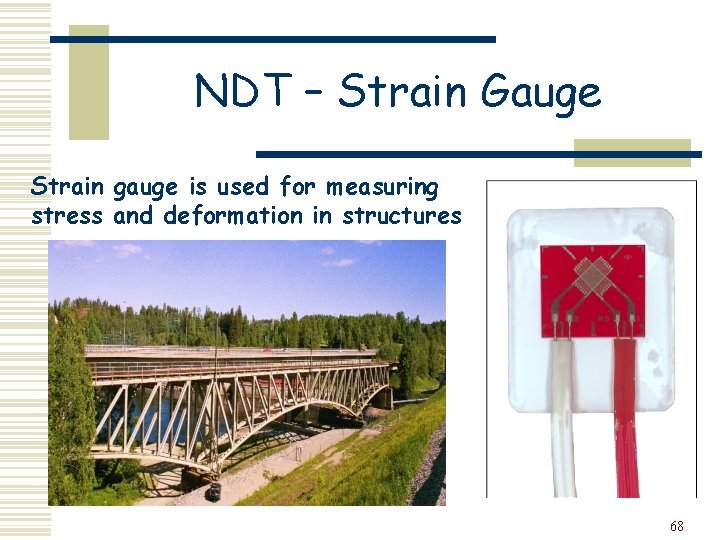
NDT – Strain Gauge Strain gauge is used for measuring stress and deformation in structures 68

GUIDELINES ISSUED w BS – 42 : Guidelines for use of micro cover meter w BS – 50 : Guidelines on use of Profometer w BS – 51 : Guidelines on use of Acoustic Emission Technique w BS – 52 : Guidelines for use of Corrosion Monitoring Equipments w BS – 53 : Guidelines on use of Ultrasonic Instruments for monitoring of Concrete Structures 69

70