Node js 5 wget http nodearm herokuapp comnodelatestarmhf


 16")
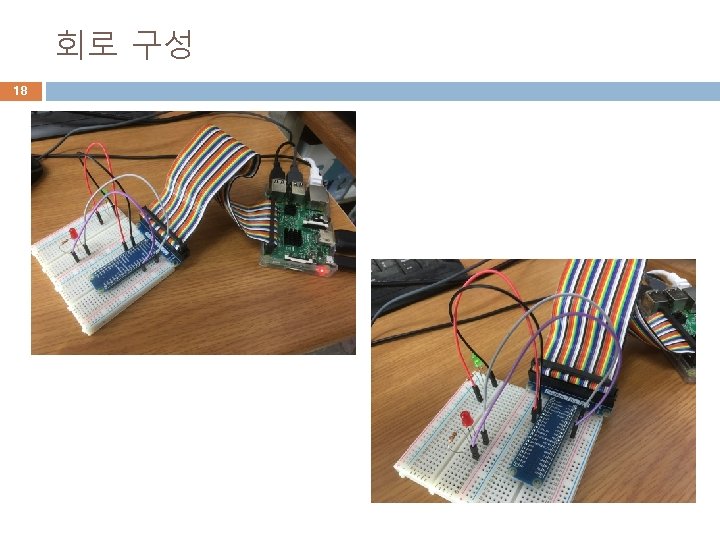
 GND (+) GPIO 3 (-) GND (+) GPIO 4")

- Slides: 20
Node. js 최신 버전 설치 5 최신버전 패키지 다운로드 � 설치 � � $ wget http: //node-arm. herokuapp. com/node_latest_armhf. deb $ sudo dpkg -i node_latest_armhf. deb 설치 후 로그아웃 후 다시 로그인 버전 확인 � � $ node –v (v 4. 2. 1) $ npm –v (2. 14. 7)
Node. js 웹서버 테스트 6 Express 를 이용한 간단한 웹서버 � � https: //github. com/scotch-io/mean-machinecode/tree/master/06 -node-server/express-server 새로운 폴더 생성 및 이동: md test 프로젝트 초기화: npm init # index. html Express 설치 : npm install express <!DOCTYPE html> # Server. js // load the express package and create our app var express = require('express'); var app = express(); // set the port based on environment (more on environments later) var port = 1337; // send our index. html file to the user for the home page app. get('/', function(req, res) { res. send. File(__dirname + '/index. html'); }); // start the server app. listen(1337); console. log('1337 is the magic port!'); <html lang="en"> <head> <meta charset="UTF-8"> <title>Super Cool Site</title> <style> body { text-align: center; background: #EFEFEF; padding-top: 50 px; } </style> </head> <body> <h 1>Hello Universe!</h 1> </body> </html>
Node. js 웹서버 테스트 7 Mean machine code 참조 � https: //github. com/scotch-io/mean-machine-code 07 -node-routing 테스트 � � � 프로젝트 폴더 만들기: node/07 -node-routing 프로젝트 폴더로 이동 $ npm init 명령 실행 Index. html 카피 Server. js 카피 express 패키지 설치 � 서버 실행 � $ npm install express --save $ node server. js 웹브라우저로 테스트 http: //localhost: 1337/users/
Mongo. DB 설치 8 mongo. DB는 문서 기반의 No. SQL 데이터베이스 � 설치 � $ sudo apt-get install mongodb-server 서버 시작 � https: //www. mongodb. com/ $ sudo service mongod start 클라이언트로 서버에 연결 � $ mongo
Node. js로 라즈베리파이 다루기 9 Npm을 이용한 관련 패키지 설치 � � Npm (node package manager) https: //www. npmjs. com/ Raspberry pi 관련 패키지 � � � Wiring-pi gpio pi-gpio raspberry
라즈베리파이+node. js Io. T 프로젝트 10 Circulus 프로젝트 http: //circul. us/view/common/index. html � � � Opensource H/W Introduction Opensource H/W + Node JS Io. T 따라잡기 Lesson 1 + + Node JS JS Io. T 따라잡기 Lesson 2 3 4 5 - Linux Node. JS Sensor Project
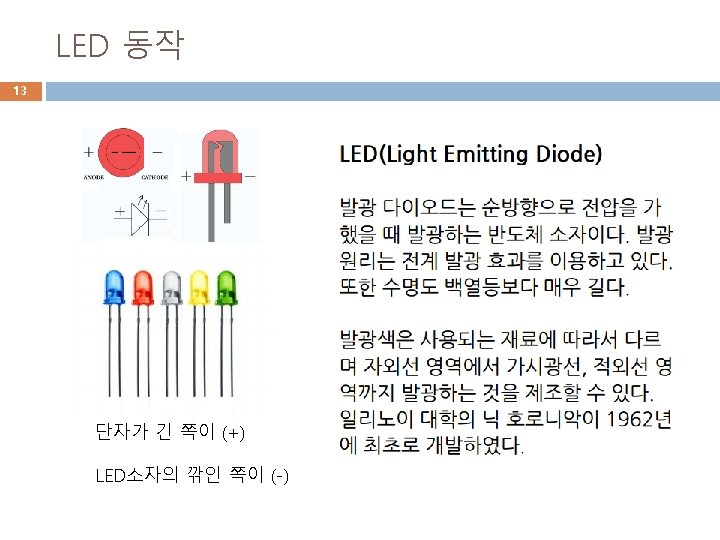
Wiring-pi를 이용한 GPIO 제어 11 Wiring-pi 설치 � Wiring-pi의 활용 � � Node. js 프로그램에서 활용 var wpi = require('wiring-pi'); API 문서 참조 � $ npm install wiring-pi https: //github. com/Wiring. Pi. Node/blob/master/DOCUMENTATION. md 도전 과제 � GPIO를 이용한 LED 제어 프로그래밍
GPIO 12
저항 (register) 16
회로 구성 17 (-) GND (+) GPIO 3 (-) GND (+) GPIO 4
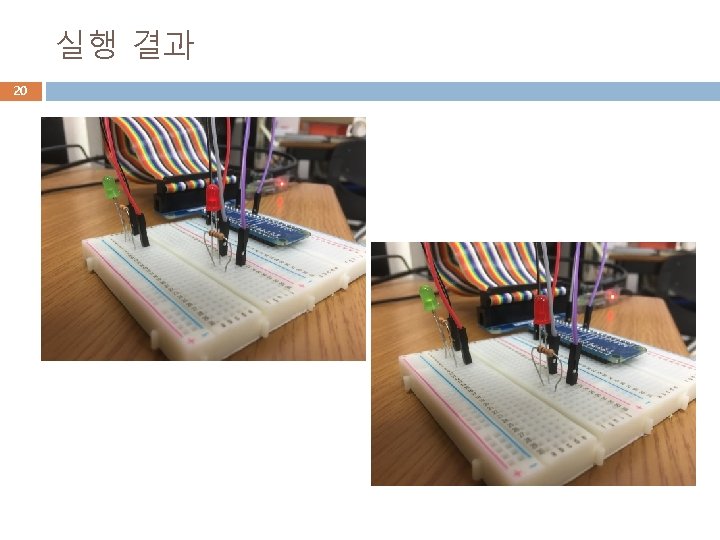
LED 제어 프로그래밍 19 LED 제어 프로그램 � 패키지 설치 � � $ npm install wiring-pi $ npm install sleep 소스 작성 � 두개의 LED를 번갈아 켜고 끄기 $ vi led. js 실행 � � $ sudo node led. js 루트 권한이어야 실행 가능 var wpi = require('wiring-pi'); var sleep = require('sleep'); wpi. setup('gpio'); wpi. wiring. Pi. Setup(); wpi. pin. Mode(3, wpi. OUTPUT); wpi. pin. Mode(4, wpi. OUTPUT); while(true) { wpi. digital. Write(3, wpi. LOW); wpi. digital. Write(4, wpi. HIGH); sleep(1); wpi. digital. Write(4, wpi. LOW); wpi. digital. Write(3, wpi. HIGH); sleep(1); }