New Developments in Surface Profile and Roughness Measurement




- Slides: 34

New Developments in Surface Profile and Roughness Measurement Techniques Craig Woolhouse Elcometer

Contents Ø Why do we measure the blasted profile? Ø Part 1 Ø What is Profile and what is Roughness? Ø Measuring Surface Profile Ø Measuring Surface Roughness Ø Part 2 Ø Limitations of current methods Ø New Gauge Developments Ø Conclusions

Introduction Why do we measure the Surface Profile? Ø Blasting removes old coating and corrosion and produces a ‘rough’ surface Ø The rough surface provides a ‘key’ for the coating to adhere to the surface Ø The ‘rough’ surface increases the surface area providing better adhesion Ø Paint is designed to benefit from this surface characteristic Ø The surface profile affects coating performance

Profile v Roughness Part 1 Explaining the current methods

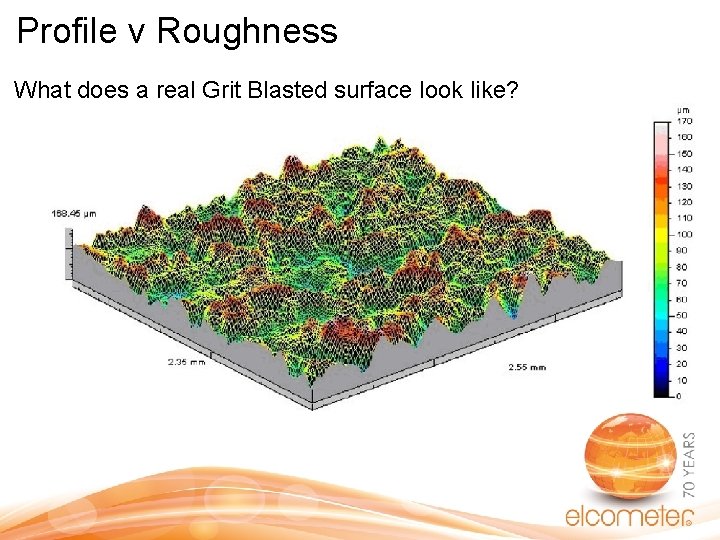
Profile v Roughness What does a real Grit Blasted surface look like?

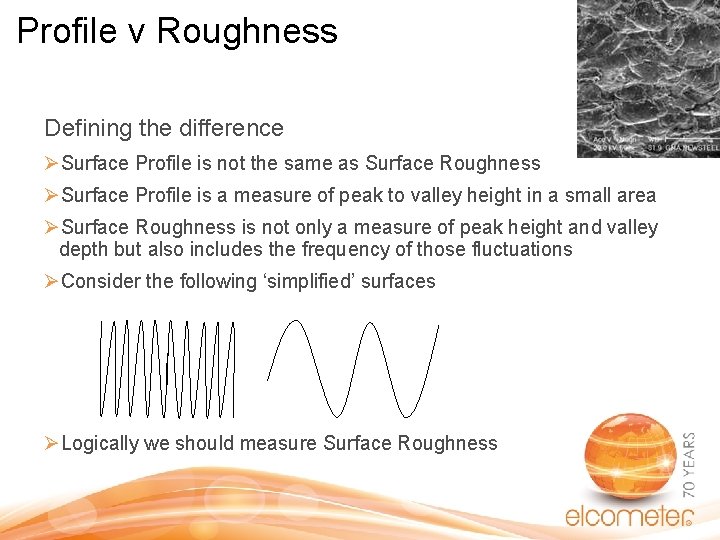
Profile v Roughness Defining the difference ØSurface Profile is not the same as Surface Roughness ØSurface Profile is a measure of peak to valley height in a small area ØSurface Roughness is not only a measure of peak height and valley depth but also includes the frequency of those fluctuations ØConsider the following ‘simplified’ surfaces ØLogically we should measure Surface Roughness

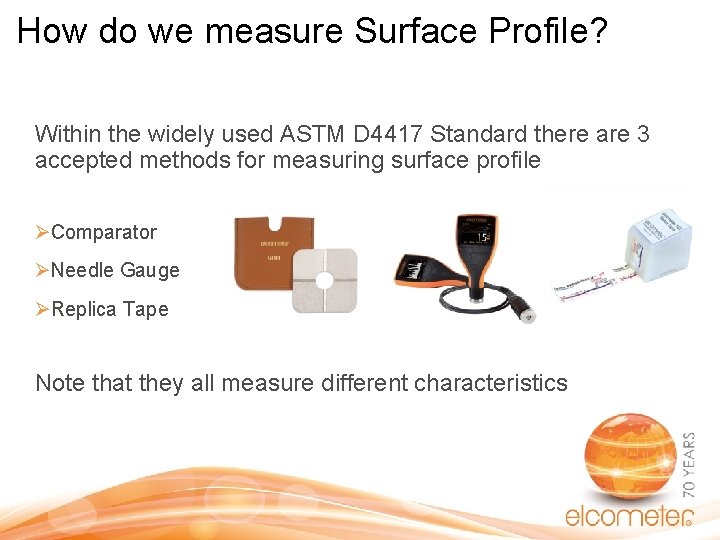
How do we measure Surface Profile? Within the widely used ASTM D 4417 Standard there are 3 accepted methods for measuring surface profile ØComparator ØNeedle Gauge ØReplica Tape Note that they all measure different characteristics

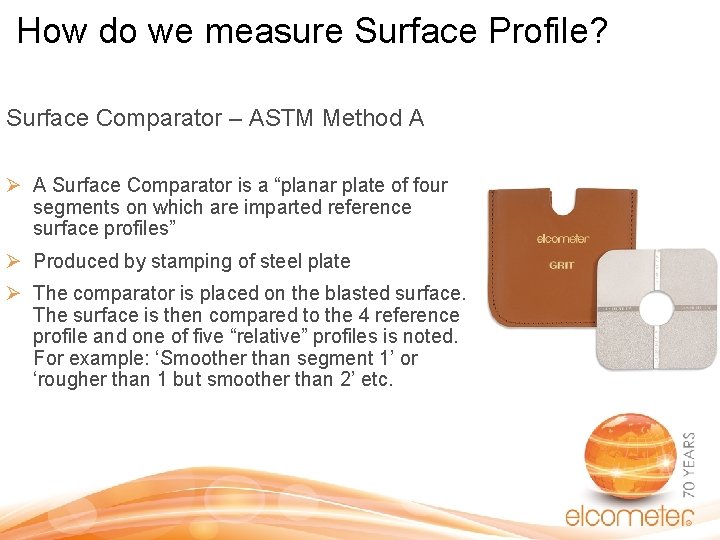
How do we measure Surface Profile? Surface Comparator – ASTM Method A Ø A Surface Comparator is a “planar plate of four segments on which are imparted reference surface profiles” Ø Produced by stamping of steel plate Ø The comparator is placed on the blasted surface. The surface is then compared to the 4 reference profile and one of five “relative” profiles is noted. For example: ‘Smoother than segment 1’ or ‘rougher than 1 but smoother than 2’ etc.

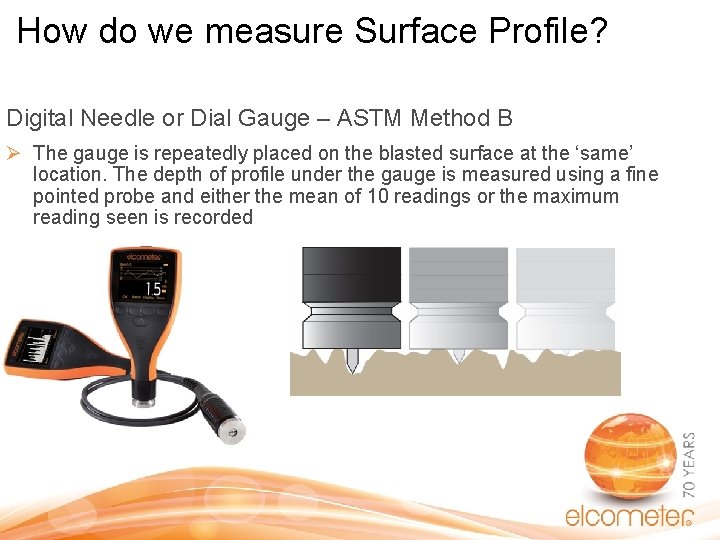
How do we measure Surface Profile? Digital Needle or Dial Gauge – ASTM Method B Ø The gauge is repeatedly placed on the blasted surface at the ‘same’ location. The depth of profile under the gauge is measured using a fine pointed probe and either the mean of 10 readings or the maximum reading seen is recorded

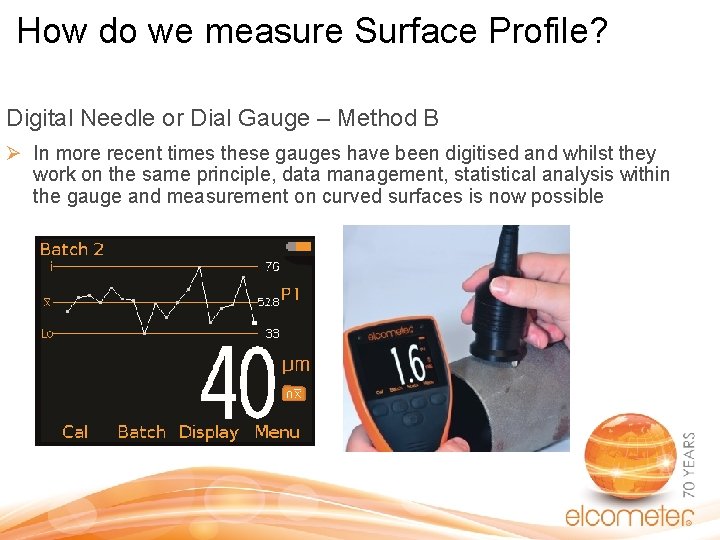
How do we measure Surface Profile? Digital Needle or Dial Gauge – Method B Ø In more recent times these gauges have been digitised and whilst they work on the same principle, data management, statistical analysis within the gauge and measurement on curved surfaces is now possible

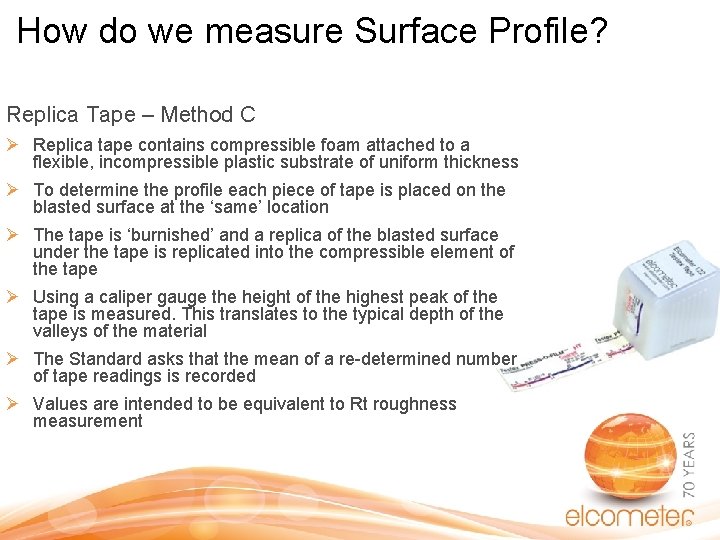
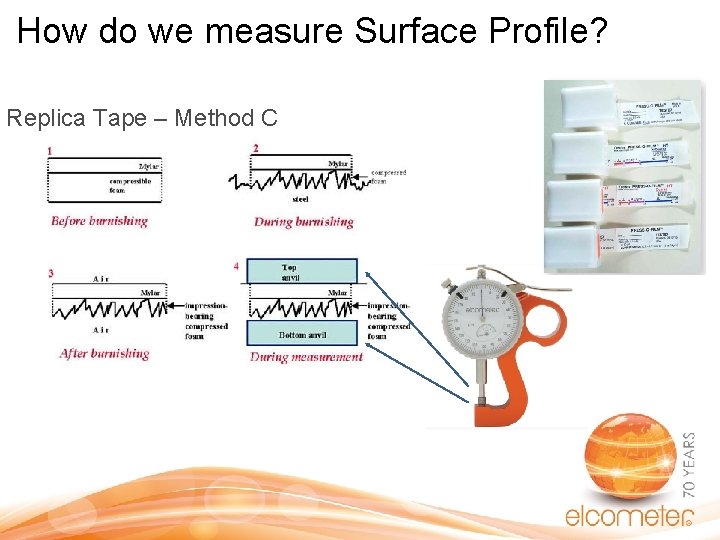
How do we measure Surface Profile? Replica Tape – Method C Ø Replica tape contains compressible foam attached to a flexible, incompressible plastic substrate of uniform thickness Ø To determine the profile each piece of tape is placed on the blasted surface at the ‘same’ location Ø The tape is ‘burnished’ and a replica of the blasted surface under the tape is replicated into the compressible element of the tape Ø Using a caliper gauge the height of the highest peak of the tape is measured. This translates to the typical depth of the valleys of the material Ø The Standard asks that the mean of a re-determined number of tape readings is recorded Ø Values are intended to be equivalent to Rt roughness measurement

How do we measure Surface Profile? Replica Tape – Method C

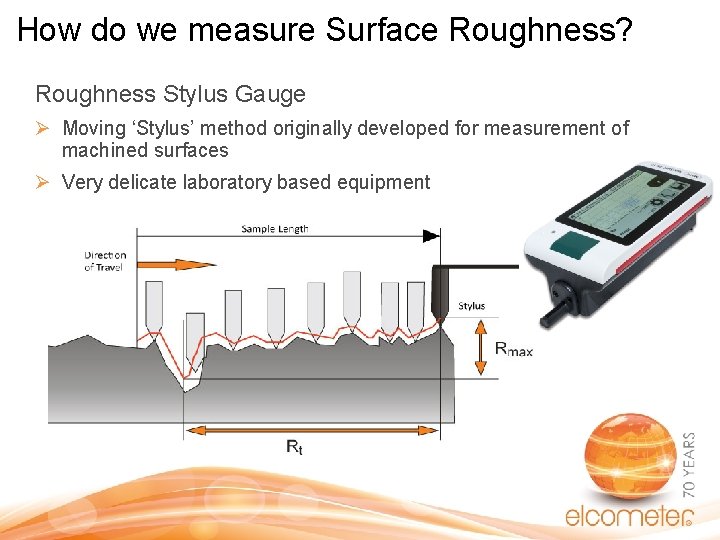
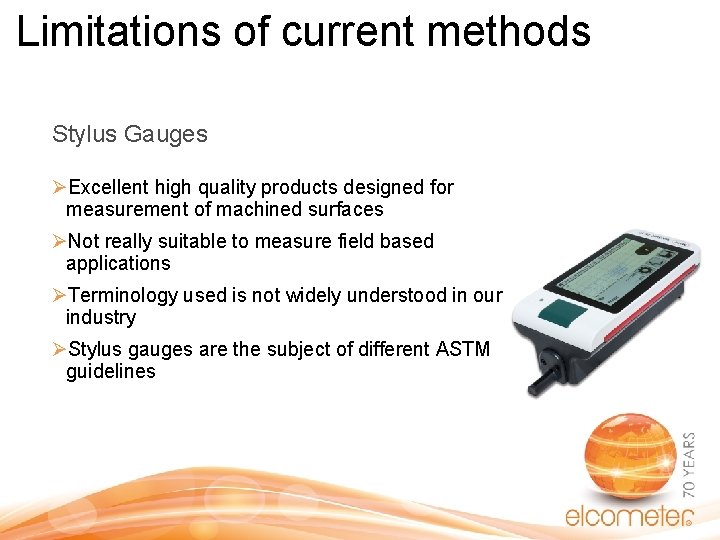
How do we measure Surface Roughness? Roughness Stylus Gauge Ø Moving ‘Stylus’ method originally developed for measurement of machined surfaces Ø Very delicate laboratory based equipment

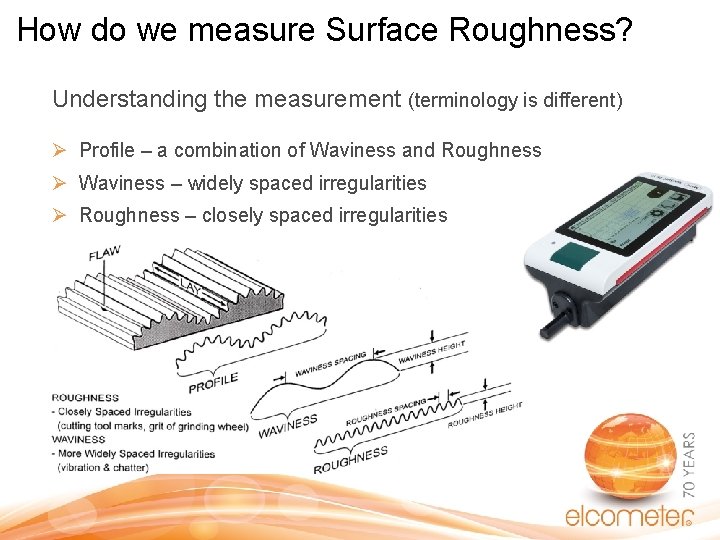
How do we measure Surface Roughness? Understanding the measurement (terminology is different) Ø Profile – a combination of Waviness and Roughness Ø Waviness – widely spaced irregularities Ø Roughness – closely spaced irregularities

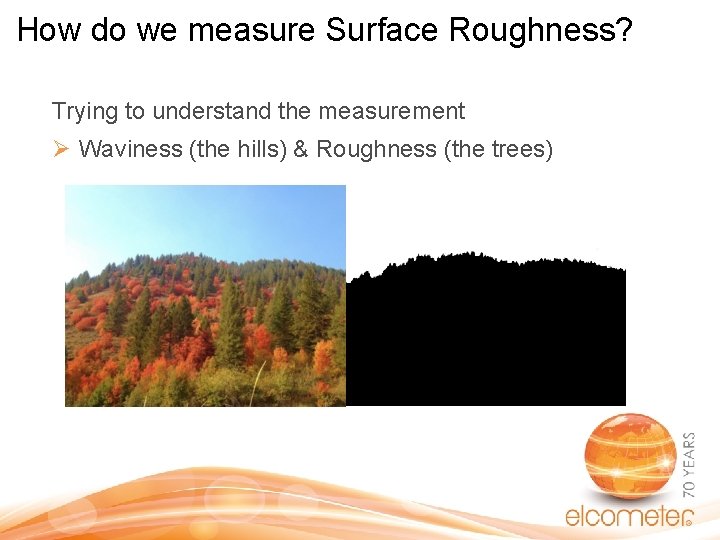
How do we measure Surface Roughness? Trying to understand the measurement Ø Waviness (the hills) & Roughness (the trees)

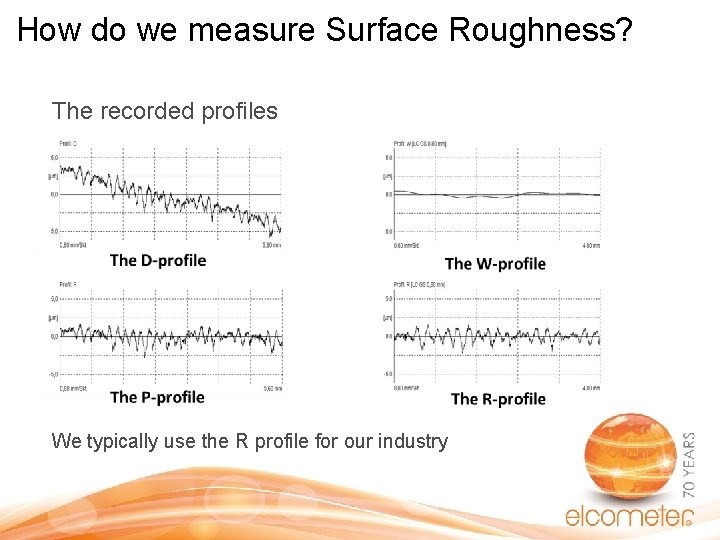
How do we measure Surface Roughness? The recorded profiles We typically use the R profile for our industry

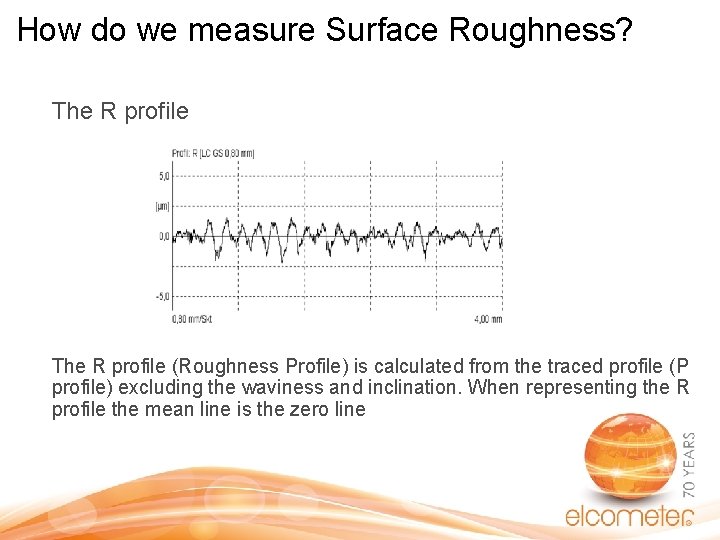
How do we measure Surface Roughness? The R profile (Roughness Profile) is calculated from the traced profile (P profile) excluding the waviness and inclination. When representing the R profile the mean line is the zero line

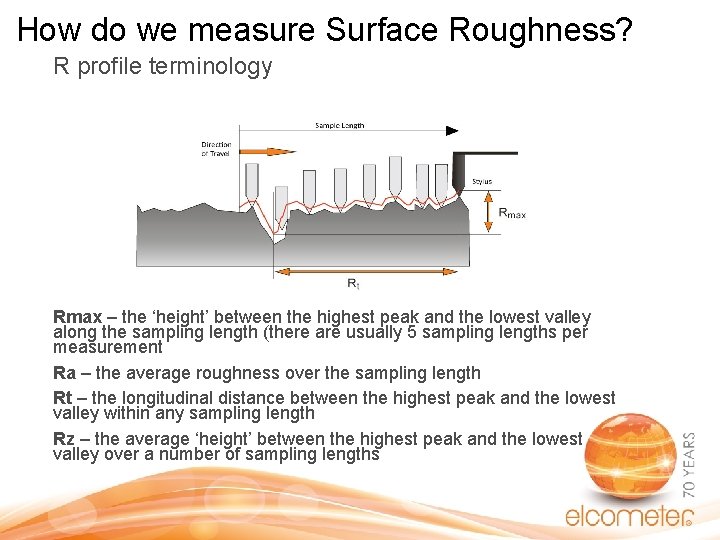
How do we measure Surface Roughness? R profile terminology Rmax – the ‘height’ between the highest peak and the lowest valley along the sampling length (there are usually 5 sampling lengths per measurement Ra – the average roughness over the sampling length Rt – the longitudinal distance between the highest peak and the lowest valley within any sampling length Rz – the average ‘height’ between the highest peak and the lowest valley over a number of sampling lengths

Profile v Roughness Part 2 How to solve the problem

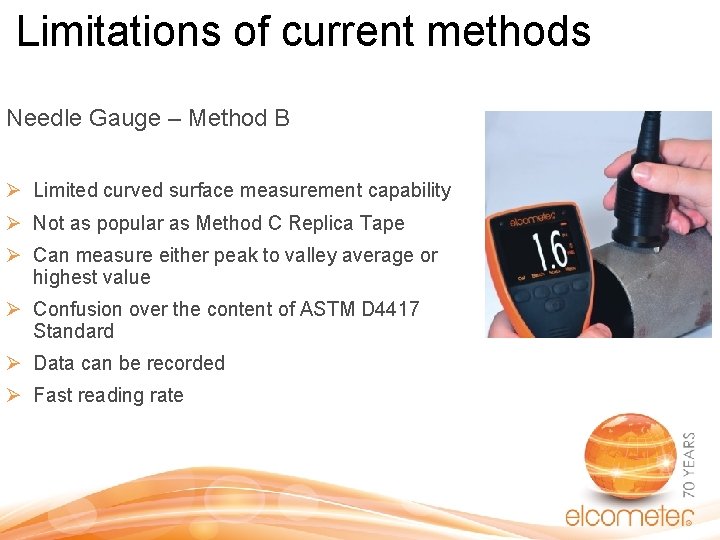
Limitations of current methods Needle Gauge – Method B Ø Limited curved surface measurement capability Ø Not as popular as Method C Replica Tape Ø Can measure either peak to valley average or highest value Ø Confusion over the content of ASTM D 4417 Standard Ø Data can be recorded Ø Fast reading rate

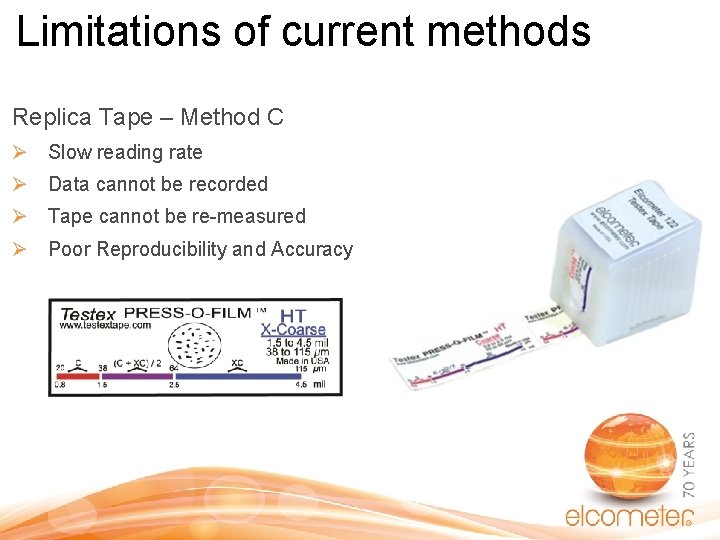
Limitations of current methods Replica Tape – Method C Ø Slow reading rate Ø Data cannot be recorded Ø Tape cannot be re-measured Ø Poor Reproducibility and Accuracy

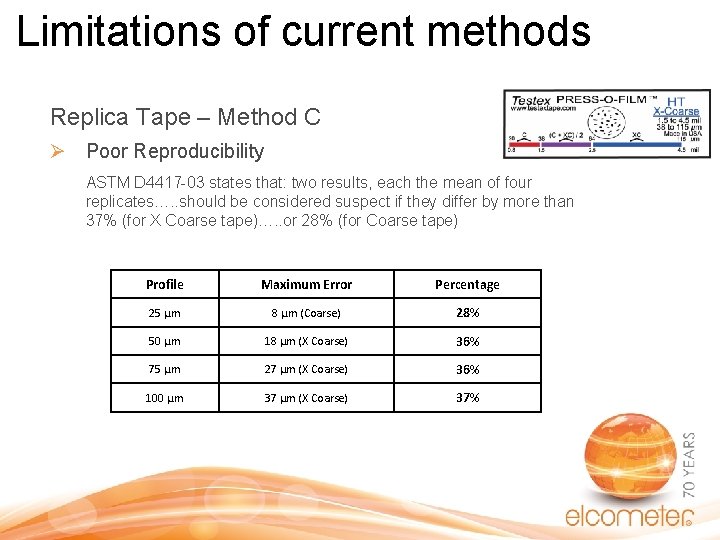
Limitations of current methods Replica Tape – Method C Ø Poor Reproducibility ASTM D 4417 -03 states that: two results, each the mean of four replicates…. . should be considered suspect if they differ by more than 37% (for X Coarse tape)…. . or 28% (for Coarse tape) Profile Maximum Error Percentage 25 µm 8 µm (Coarse) 28% 50 µm 18 µm (X Coarse) 36% 75 µm 27 µm (X Coarse) 36% 100 µm 37 µm (X Coarse) 37%

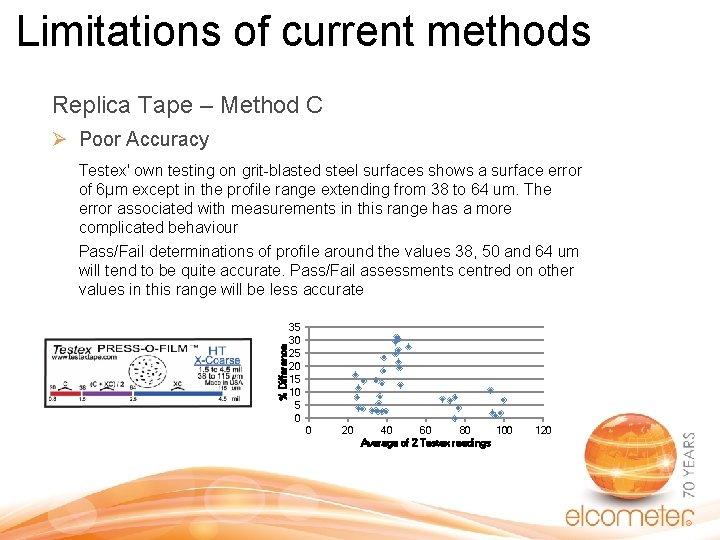
Limitations of current methods Replica Tape – Method C Ø Poor Accuracy % Difference Testex' own testing on grit-blasted steel surfaces shows a surface error of 6µm except in the profile range extending from 38 to 64 um. The error associated with measurements in this range has a more complicated behaviour Pass/Fail determinations of profile around the values 38, 50 and 64 um will tend to be quite accurate. Pass/Fail assessments centred on other values in this range will be less accurate 35 30 25 20 15 10 5 0 0 20 40 60 80 100 Average of 2 Testex readings 120

Limitations of current methods Stylus Gauges ØExcellent high quality products designed for measurement of machined surfaces ØNot really suitable to measure field based applications ØTerminology used is not widely understood in our industry ØStylus gauges are the subject of different ASTM guidelines

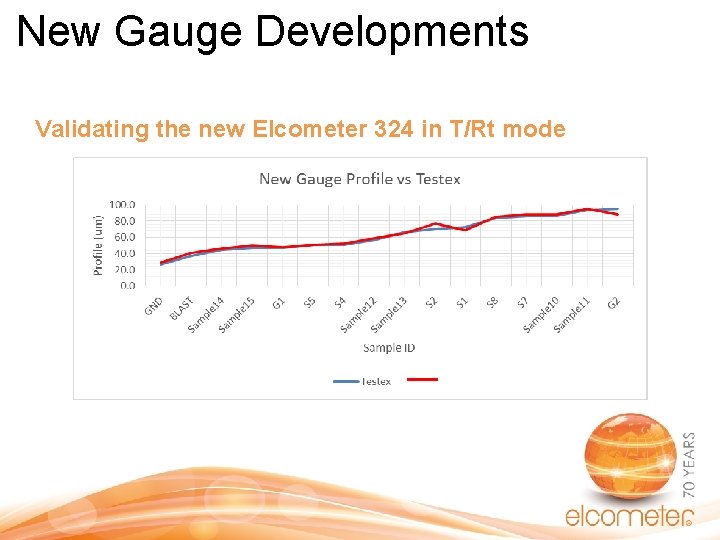
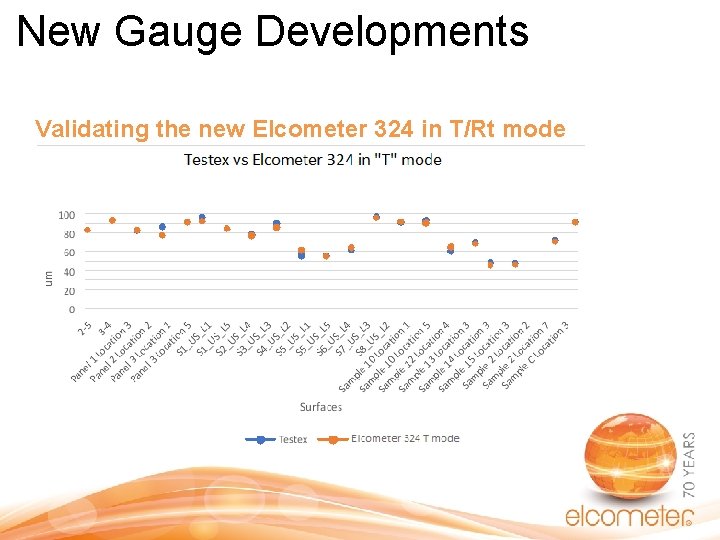
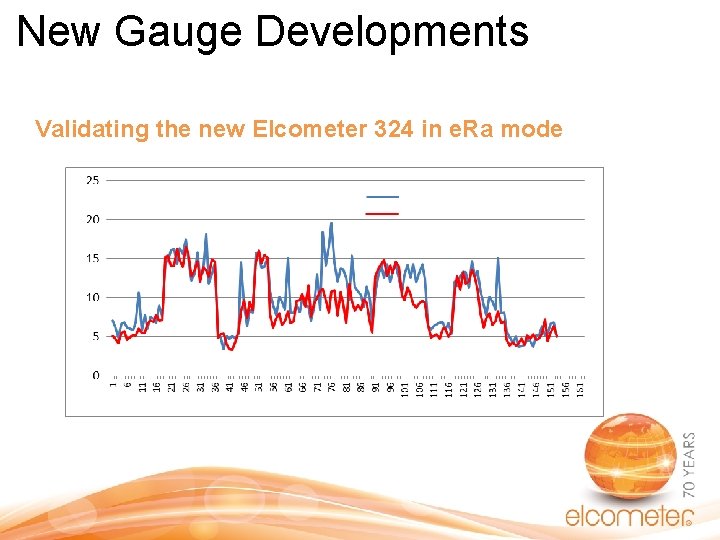
New Gauge Developments Introducing the new Elcometer 324 Surface Measurement Gauge Ø Measures P, Pmax, T/Rt, e. Ra and e. Rz where: Ø P – Method B average peak to valley profile Ø Pmax – Highest Method B value seen Ø T/Rt – Method C Testex and Rt equivalence Ø e. Ra – equivalent Ra value Ø e. Rz – equivalent Rz value Ø Uses Magnetic Induction principle (rather than replica tape or needle method) to asses surface condition Ø Available late 2018

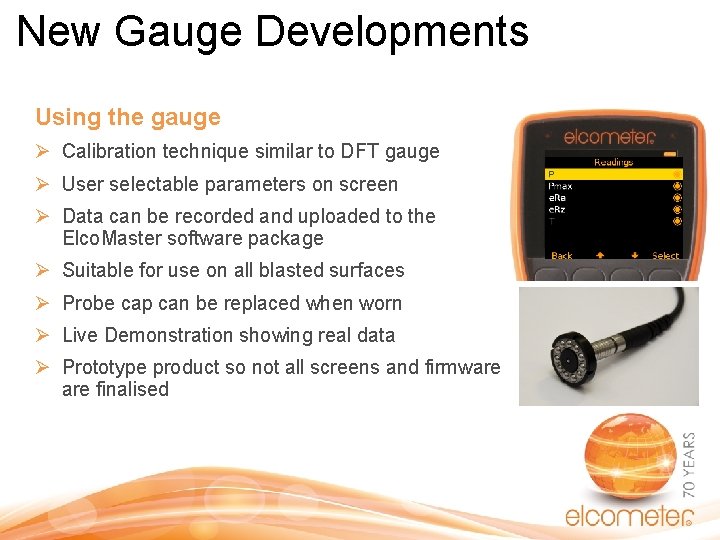
New Gauge Developments Using the gauge Ø Calibration technique similar to DFT gauge Ø User selectable parameters on screen Ø Data can be recorded and uploaded to the Elco. Master software package Ø Suitable for use on all blasted surfaces Ø Probe cap can be replaced when worn Ø Live Demonstration showing real data Ø Prototype product so not all screens and firmware finalised

New Gauge Developments Elcometer 324 screenshots

New Gauge Developments Validating the new Elcometer 324 in T/Rt mode

New Gauge Developments Validating the new Elcometer 324 in T/Rt mode

New Gauge Developments Validating the new Elcometer 324 in e. Ra mode

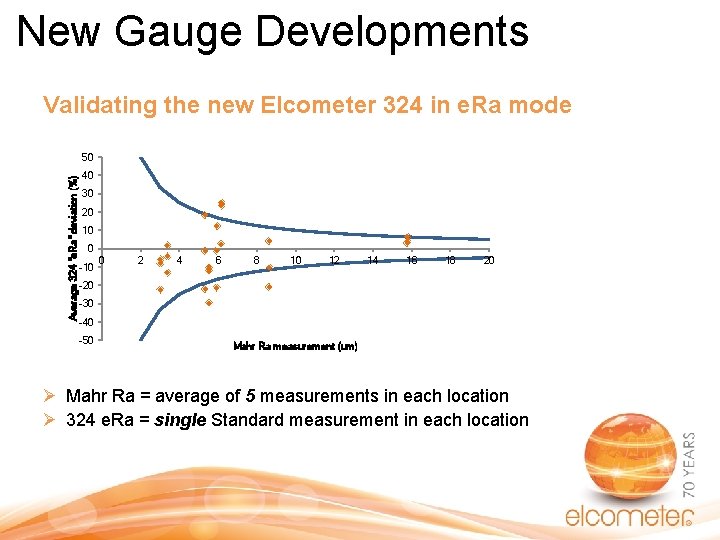
New Gauge Developments Validating the new Elcometer 324 in e. Ra mode Average 324 "e. Ra" deviation (%) 50 40 30 20 10 0 -10 0 2 4 6 8 10 12 14 16 18 20 -30 -40 -50 Mahr Ra measurement (um) Ø Mahr Ra = average of 5 measurements in each location Ø 324 e. Ra = single Standard measurement in each location

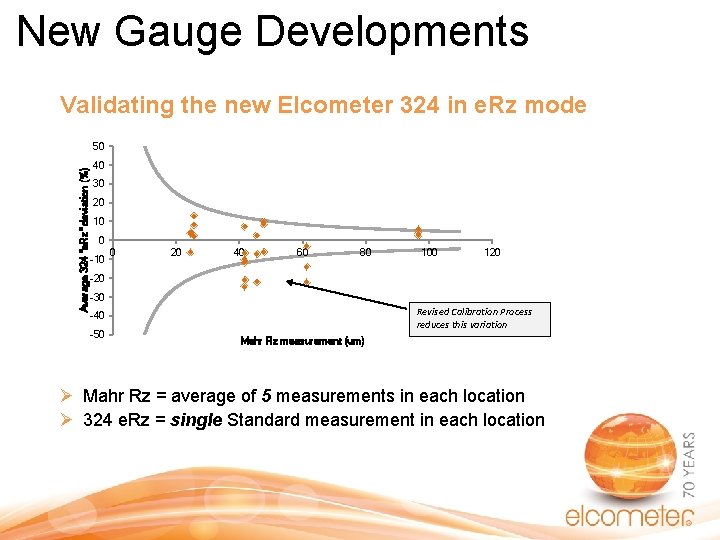
New Gauge Developments Validating the new Elcometer 324 in e. Rz mode Average 324 "e. Rz" deviation (%) 50 40 30 20 10 0 -10 0 20 40 60 80 100 120 -30 Revised Calibration Process reduces this variation -40 -50 Mahr Rz measurement (um) Ø Mahr Rz = average of 5 measurements in each location Ø 324 e. Rz = single Standard measurement in each location

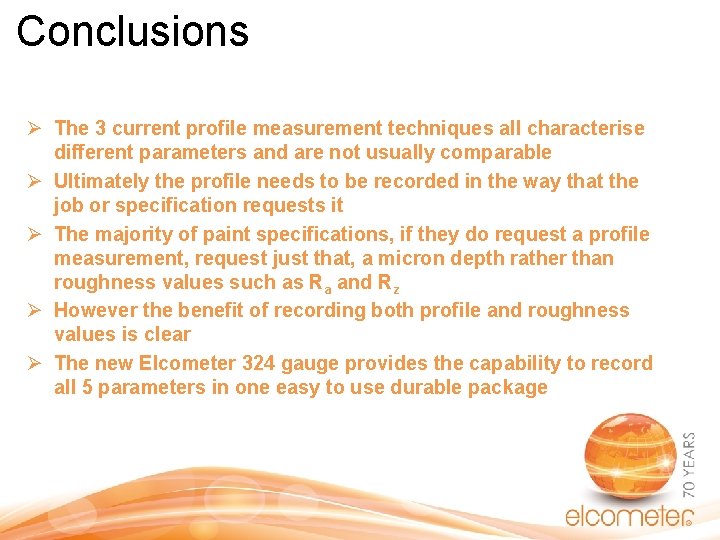
Conclusions Ø The 3 current profile measurement techniques all characterise different parameters and are not usually comparable Ø Ultimately the profile needs to be recorded in the way that the job or specification requests it Ø The majority of paint specifications, if they do request a profile measurement, request just that, a micron depth rather than roughness values such as Ra and Rz Ø However the benefit of recording both profile and roughness values is clear Ø The new Elcometer 324 gauge provides the capability to record all 5 parameters in one easy to use durable package

Thank you for you attention Questions?