Microsoft Powerpoint 2013 Lesson 1 Powerpoint Essentials 2014


- Slides: 35
Microsoft Powerpoint 2013 Lesson 1 Powerpoint Essentials © 2014, John Wiley & Sons, Inc. Microsoft Official Academic Course, Microsoft Word 2013 1
Power. Point Window • Being able to navigate around the Power. Point Window is extremely helpful as well as knowing what the areas are called. • There are different views in Power. Point but Normal View is the most common view and the one where you will do most of your work. © 2014, John Wiley & Sons, Inc. Microsoft Official Academic Course, Microsoft Word 2013 2
Ribbon The Ribbon for Power. Point appears below. Note that each tab contains several groups of related commands. By default, the Home tab is active when Power. Point is first opened. © 2014, John Wiley & Sons, Inc. Microsoft Official Academic Course, Microsoft Word 2013 3
Ribbon In the lower-right corner of some of the groups, there is a dialog box launcher (the small box with a diagonal, downward-pointing arrow, right). © 2014, John Wiley & Sons, Inc. Microsoft Official Academic Course, Microsoft Word 2013 4
Mini Toolbar This toolbar appears when you point To text that has been selected. This toolbar displays tools for Formatting text appearance And alignment. It is faint and semi-transparent Until you point to it and then it Becomes bright and opaque Showing that the toolbar is active. © 2014, John Wiley & Sons, Inc. Microsoft Official Academic Course, Microsoft Word 2013 5
Quick Access Toolbar • Quick Access Toolbar is located in the upper-left corner of the Power. Point window. • These are commands that are used frequently. • By default the save, undo and redo commands appear. • You can add any commands you need © 2014, John Wiley & Sons, Inc. Microsoft Official Academic Course, Microsoft Word 2013 6
Key. Tips By pressing the Alt. key, Letters and numbers appear on the Ribbon and the Quick Access Toolbar (below). These characters show you which keyboard keys you can press to access the tabs or the items on the Quick Access Toolbar. Keytips are one type of a keyboard shortcut. They allow you to issue commands without using the mouse. © 2014, John Wiley & Sons, Inc. Microsoft Official Academic Course, Microsoft Word 2013 7
Use Backstage View If you click the File tab on the Ribbon, Backstage view opens. © 2014, John Wiley & Sons, Inc. Microsoft Official Academic Course, Microsoft Word 2013 8
Backstage View • Info = shows info about the active presentation and provides commands that control permissions, sharing and version management • New = lists available templates that you can create a new presentation • Open = opens an existing presentation • Save = saves the presentation in your choice of locations • Save As = Lets you re-save a previously saved presentation with a different name, type, or location than before. • Print = provides settings and options for printing • Share = options for sending a presentation via email, inviting others to view it online and publishing slides to a library 11/29/2020 9
Backstage View Continued • Export = offers options for saving a presentation in different formats, and publishing it to video, CD or other media • Close = closes the currently open presentation • Account = allows you to choose which account you are signed into • Options = opens the Power. Point Options dialog box where you can configure many aspects of program operation **In 2010 and previous there was an Exit command on the File menu. 11/29/2020 10
Help System • The Help System is rich in information, illustrations and tips that can help you complete any task. Some of the info is stored on your Computer and some is located on the Web the Microsoft Office The Power. Point Help button is in the upper right corner of the Power. Point window. © 2014, John Wiley & Sons, Inc. Microsoft Official Academic Course, Microsoft Word 2013 11
Close a Presentation When you close a presentation, Power. Point removes it from the screen. Power. Point continues running so you can work with other files. You should always save and close any open presentations before you exit Power. Point or shut down your computer. Click the File tab; Backstage view appears. Click Close. Power. Point clears the presentation from the screen. © 2014, John Wiley & Sons, Inc. Microsoft Official Academic Course, Microsoft Word 2013 12
Open an Existing Presentation • You can save a PPT On your computer or Other device like a flash Drive. Also, can use Sky. Drive Which is a free online Cloud storage location Provided by Microsoft. © 2014, John Wiley & Sons, Inc. Microsoft Official Academic Course, Microsoft Word 2013 13
Power. Point Views Change views on the View tab. Normal View is default and lets you focus on the current slide. The left pane is called the Slides pane and you can click the thumbnail images of the slides to jump from slide to slide. © 2014, John Wiley & Sons, Inc. Microsoft Official Academic Course, Microsoft Word 2013 14
Outline View • Same as normal view except instead of thumbnail images of the slides, a text outline of the presentation appears in the left pane. • Only text from placeholders appears in the outline • Graphical objects like Smart. Art does NOT appear in the outline. 11/29/2020 15
Slide sorter view Displays a lot of Slides on a single Screen. You can Reorganize a Slide by dragging It to a new Location in your Presentation. © 2014, John Wiley & Sons, Inc. Microsoft Official Academic Course, Microsoft Word 2013 16
Notes Page View Shows one slide At a time along with Any notes that are Associated with the Slide. This view Allows you to edit and Create notes. You May find it easier to Work with notes while In this view. © 2014, John Wiley & Sons, Inc. Microsoft Official Academic Course, Microsoft Word 2013 17
Slide Show View • Lets you preview your presentation on the screen so you can see it the way our audience will see it. 11/29/2020 18
Reading View • Is like slide show view except it is in a Window rather than filling the entire screen. • Displaying the presentation in a window allows you to work with other windows at the same time. 11/29/2020 19
Power. Point Views Some of the Power. Point Views are available on the Status bar. All of the views can be Accessed on the View Ribbon. © 2014, John Wiley & Sons, Inc. Microsoft Official Academic Course, Microsoft Word 2013 20
Zoom • Zoom allows you to change the magnification of slides on the screen. • Zooming out – you can see an entire slide • Zooming in – you can inspect one area of the slide. • On the View Ribbon, you can use the Fit to Window option…Power. Point zooms out to fit the entire slide in the Slide pane. • The magnifying glass icon on the View Ribbon allows you to select from one of the 7 preset magnification levels or type in an exact magnification by using the Zoom Dialog Box. © 2014, John Wiley & Sons, Inc. Microsoft Official Academic Course, Microsoft Word 2013 21
Color and Grayscale Modes • Grayscale – is a viewing mode where there are no colors, only shades of gray. • It is sometimes useful to look at your slides in Grayscale mode on the screen so you can identify any potential problems that might occur when slides are printed without color. • There is also a Black and White viewing mode that can check how slides will look with only black and white (no gray shades). • Some fax machines only transmit in black and white so you might want to see how your slides would look if you transmitted them. • These commands are located on the View Ribbon in the Color/Grayscale group. © 2014, John Wiley & Sons, Inc. Microsoft Official Academic Course, Microsoft Word 2013 22
Arrange Multiple Presentation Windows • • Click the View tab. Click Arrange All in the Window group. The presentations appear side-by-side © 2014, John Wiley & Sons, Inc. Microsoft Official Academic Course, Microsoft Word 2013 23
Moving Between Slides • You have a number of methods for moving through a presentation. • You can move from one slide to another by the mouse or the keyboard. 11/29/2020 24
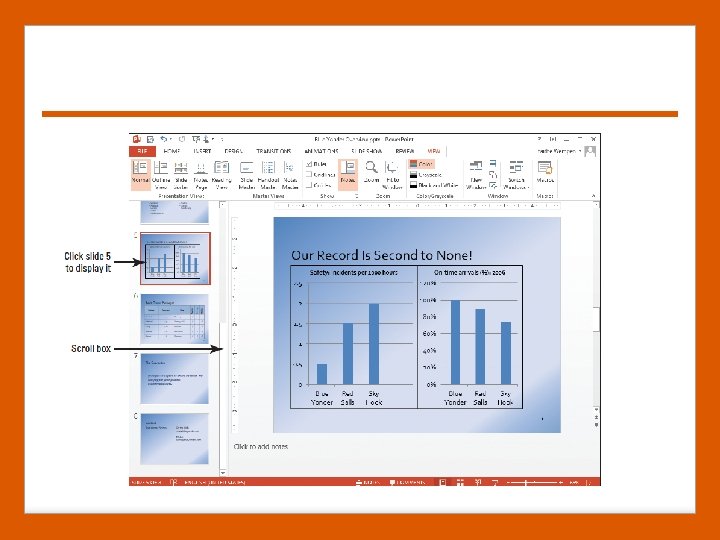
Using the Mouse to Scroll Through a Presentation • Power. Point’s scroll bars let you move up and down through your presentation. • When you drag the scroll Box in the Slide pane, PPT Displays a Screen. Tip with The slide number and slide Title to show you which Slide will appear on screen When you release the Mouse. • Click the scroll buttons to move up or down one slide at a time. © 2014, John Wiley & Sons, Inc. Microsoft Official Academic Course, Microsoft Word 2013 25
• • • The current slide number always appears in the lower-left corner of the status bar. In normal view, both the slide pane and the slides pane have scroll bars, buttons and boxes. If there is text in the notes pane, scroll tools will appear there to let you move up and down through the text. In slide sorter view and notes page view, scroll tools will appear on the right side of the window if they are needed. In normal view, you can click the previous slide button to move up to the previous slide and click the next slide button to move to the following slide. © 2014, John Wiley & Sons, Inc. Microsoft Official Academic Course, Microsoft Word 2013 26
Move Through a Presentation Using the Keyboard • • • Your keyboard’s cursor control keys let you jump from one slide to another as long as no text or object is selected on a slide. Page up Page down End Home © 2014, John Wiley & Sons, Inc. Microsoft Official Academic Course, Microsoft Word 2013 28
Add Text to a Text Placeholder • Text is not typed directly onto a slide in PPT but is placed in text boxes. • Text can be placed on a slide either by typing it directly or by typing in the Outline pane in Normal View. • A textbox can also hold a graphical image. © 2014, John Wiley & Sons, Inc. Microsoft Official Academic Course, Microsoft Word 2013 29
Add Text in Outline View • • Working in Outline view is like working in a word processor. PPT displays the text from each slide on the Outline pane – without any backgrounds, placeholders or anything else that might distract you from your writing. • You can navigate a presentation in the Outline pane the same way you use the Slides pane – scroll to the desired slide outline and then click it. © 2014, John Wiley & Sons, Inc. Microsoft Official Academic Course, Microsoft Word 2013 30
Select, Replace, and Delete Text • You can edit, replace and delete text directly on a slide. • First, select the text to let PPT know what you want to edit. • When text is Selected and you Begin typing, the Text is replaced. • Whenever you Select text it is Highlighted with a Colored background. © 2014, John Wiley & Sons, Inc. Microsoft Official Academic Course, Microsoft Word 2013 31
Copy and Move Text from One Slide to Another • Using the cut, copy and paste commands allows you to move text from one slide To another. You can use these Commands on many Kinds of objects in PPT including: pictures charts placeholders © 2014, John Wiley & Sons, Inc. Microsoft Official Academic Course, Microsoft Word 2013 32
Print a Presentation with the Default Settings • PPT print command sends the currently open presentation to the printer. • The default settings produce a printout of the entire presentation, one slide per page. © 2014, John Wiley & Sons, Inc. Microsoft Official Academic Course, Microsoft Word 2013 33
Save an Edited Presentation • Whenever you work on a presentation you should save it often. • You can also change The location of where the Presentation is saved. Steps: file save as Just as we saw in Word, if You want to save it as a New file name, extension, Or location you must use Save as. Power. Point 2013 file Extension is. pptx © 2014, John Wiley & Sons, Inc. Microsoft Official Academic Course, Microsoft Word 2013 34
Exit Power. Point • When you exit Power. Point by clicking on the X in the upper right side of the PPT Window, the program closes as does your current presentation. • If you go to the backstage view by clicking File and then Close, you will close your current presentation but PPT will still be running. © 2014, John Wiley & Sons, Inc. Microsoft Official Academic Course, Microsoft Word 2013 35