Microscopy The Microscope History Types Parts UseCare 9909


 Used to view the surface of an object. ► Object")

 ► Electrons are shot through the specimen ► An image")


- Slides: 27
Microscopy The Microscope History Types Parts Use/Care 9/9/09
Microscope History The Main Players ► Anton § § Van Leeuwenhoek Father of Microscopy He used magnifying glasses to count the thread in clothe He invented one of the first microscopes He was the first to see and describe bacteria, yeast plants, the teeming life in a drop of water ► Robert Hooke § The English father of Microscopy § He looked at a sliver of cork through a microscope lens and noticed some "pores" or "cells" in it. § He improved upon Leeuwenhoek’s microscope design. § He wrote “Micrographia”. It was the first book describing observations made through a microscope.
Types of Microscopes ► Simple Microscope ► Compound Microscope ► Binocular Microscope ► Scanning Electron Microscope (SEM) ► Transmission Electron Microscope (TEM)
Simple Microscope ► First microscopes ► The first was made by Anton van Leeuwenhoek (top) ► The first Compound Microscope was made by Robert Hooke (bottom)
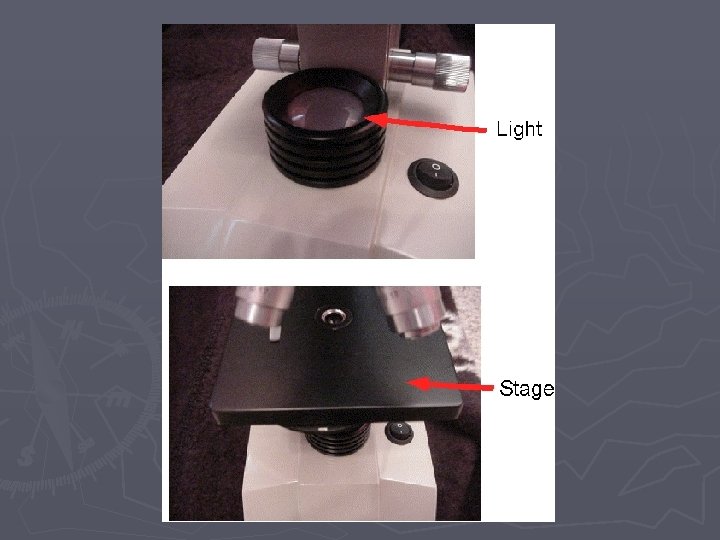
Compound Microscope ► The illumination source ► The stage - a platform below the objective which supports the specimen being viewed ► The objective lens - a cylinder containing one or more lenses ► The eyepiece or ocular
Binocular Microscope ► Same as compound microscope but with two oculars
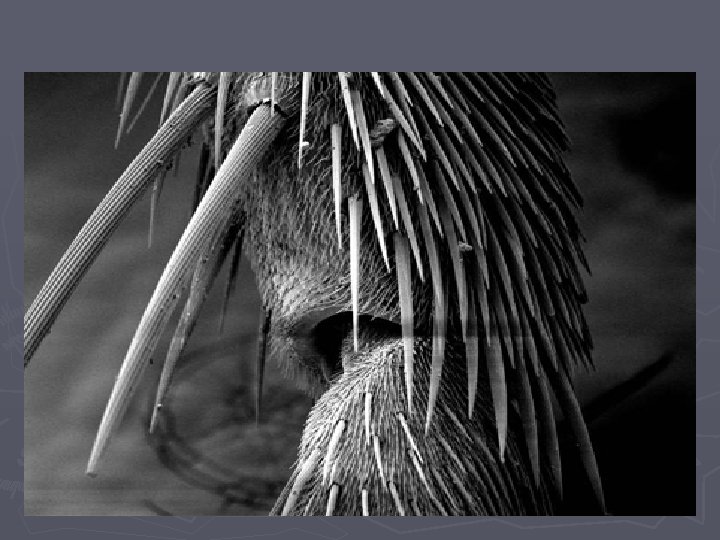
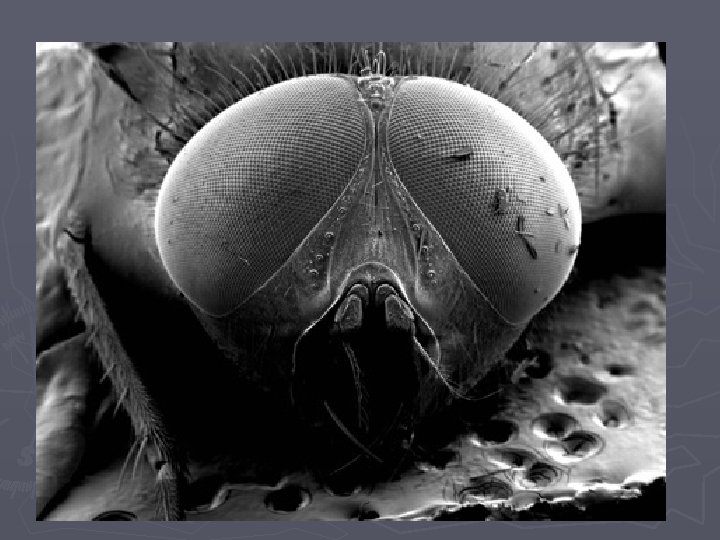
Scanning Electron Microscope (SEM) Used to view the surface of an object. ► Object is coated with gold ► Electrons are shot at the object. ► The emission of electrons and electromagnetic radiation, which can be detected to produce an image. ►
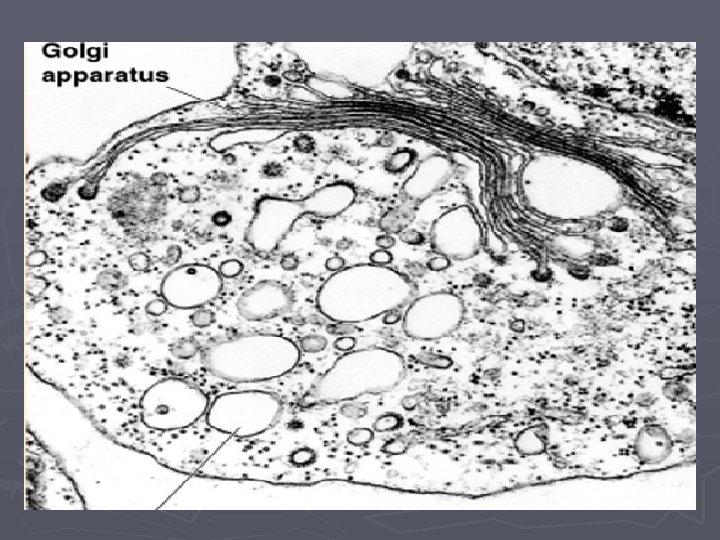
Transmission Electron Microscope (TEM) ► Electrons are shot through the specimen ► An image is formed, magnified and directed to appear either on a fluorescent screen or layer of photographic film.
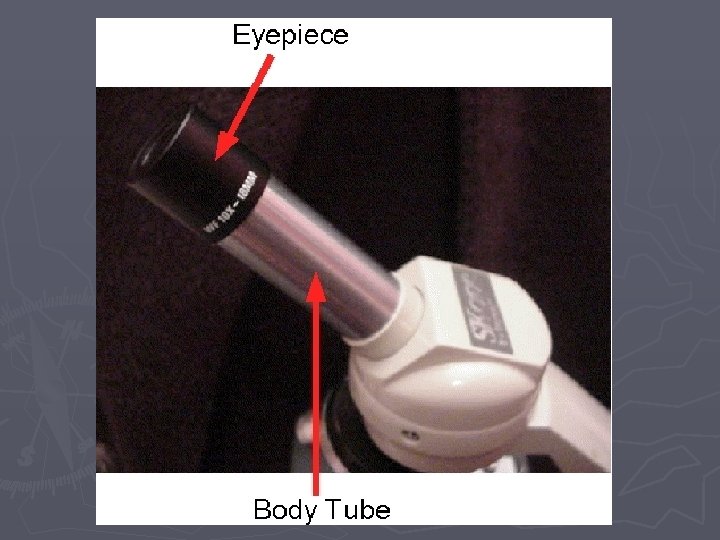
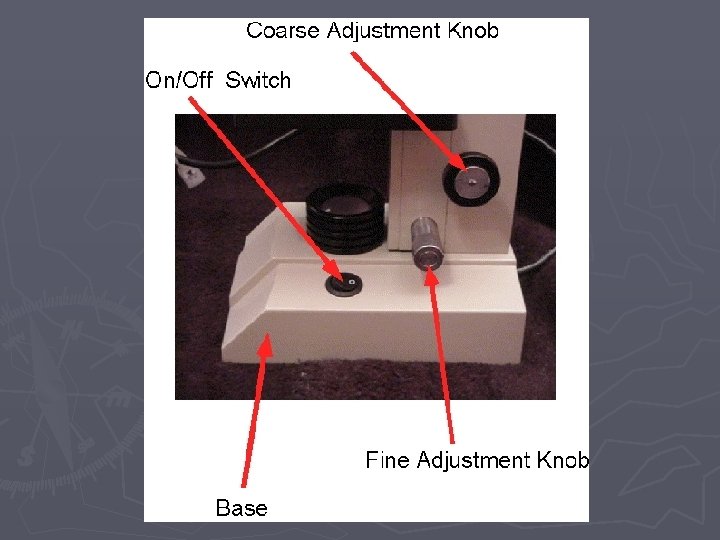
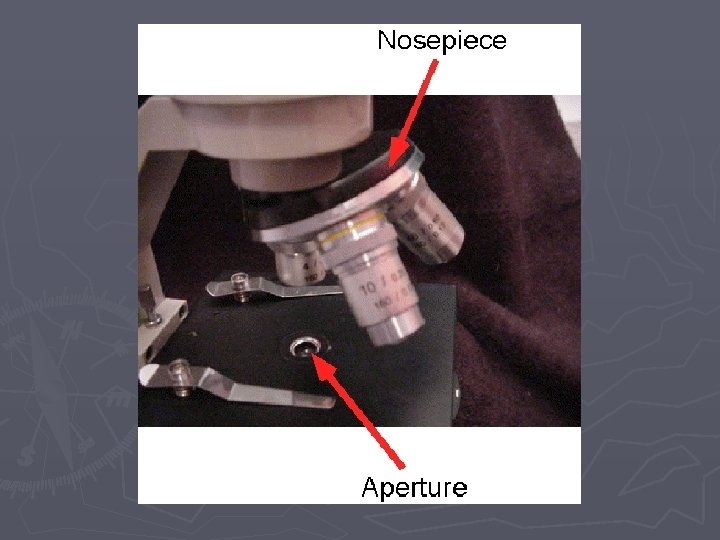
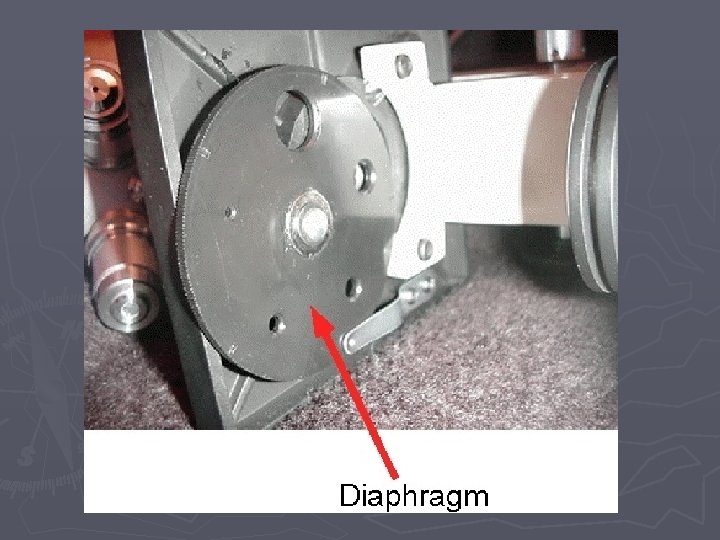
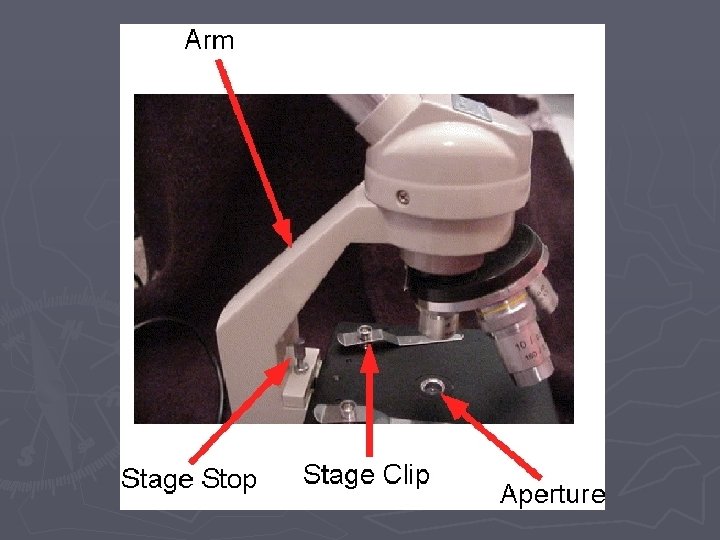
Microscope Parts Eyepiece Body Tube Nosepiece Arm Objective Lens Stage Opening _________ Stage Clips Diaphragm Stage Course Adjustment Fine Adjustment Light Source Base
Use of the Microscope ► Always carry it with two hands ► Grasp the arm with one hand place your other hand under the base for support. ► Turn the nosepiece so that the lowest power objective lens is "clicked" into position and make sure stage is lowered ► Place a microscope slide onto the stage and fasten it with the stage clips. Carefully move the specimen to the center of the stage (above the aperture).
Use of the Microscope Cont’d Look through the eyepiece and adjust the light intensity by turning the diaphragm to allow the greatest amount of light to shine through. ► Looking from the side slowly turn the coarse adjustment knob so that the stage comes up almost to the lens. (DO NOT ALLOW THE MICROSCOPE LENS TO TOUCH THE SLIDE!) ► Use the coarse adjustment knob to focus the image as you move the stage down and away from the lens. Stop when the image is clear. ► Readjust the microscope slide so that the image is in the center of the aperture and readjust the diaphragm for the clearest image. ►
Use of the Microscope Cont’d ► Change to the next objective lens by “clicking” it into position. Use ONLY the fine adjustment knob to bring it back into focus. ► When finished, lower the stage, “click” the lowest objective lens into position, remove the slide, wrap up the power cord, and carry it safely to the shelf.
Magnification To determine how much larger an object appears: (Multiply the eyepiece lens times objective lens. ) Eyepiece x Objective = Total Mag.
Magnification Cont’d Eyepiece = 10 X Objectives: Low power = 4 X Medium power = 10 X High power = 40 X
Sample Problem ► If the ocular is 10 X and the objective is 43 X, what is the total magnification? ► (Eyepiece 10 X) X (Objective 43 X) = ______
Resolution Low power medium power high power ► ► ► Size of the field of view decreases Field of view is darker Size of the image increases Resolution increases Working distance decreases