Microscopy Chapter 4 CHE 113 Forensic Science Microscopy


, Janssens, discovered that nearby objects appeared greatly enlarged")

 Pacino, 1870 9")
. Two sets")


: – Ex. crystal violet, methylene blue")
 • Types – Simple – Differential – Special 20")


: Thin sections (or layers) (2 -D)")

: 3 -D views of the surfaces")


")
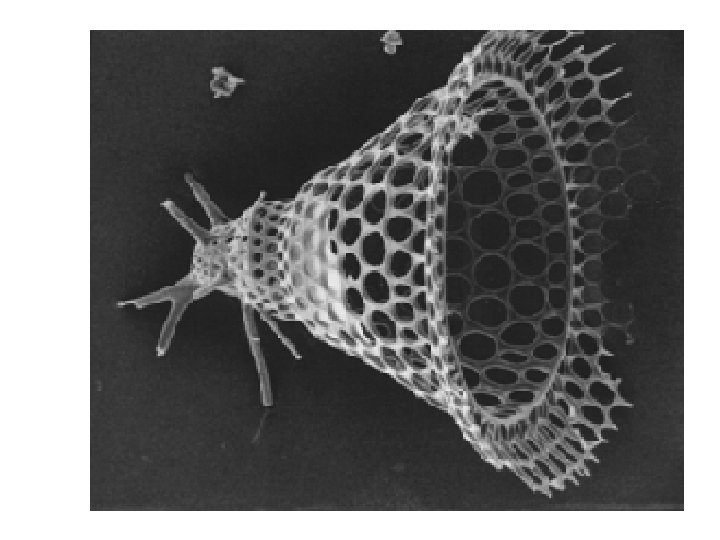
 Diatom 66")


- Slides: 68
Microscopy Chapter 4 CHE 113 Forensic Science
Microscopy and Stains Micro=“small” Skopein= “to see” Microscopes Preparation of specimens for light microscopy 2
Microscope Types • Brightfield Microscope – Compound – Comparison – Stereoscopic – Polarizing – Microspectrophotometer • Darkfield Microscope • Phase-contrast Microscope • Fluorescence Microscope • Electron Microscope – Transmission – Scanning 3
How do microscopes make things look bigger? 4
Simple Magnifier • Object O is placed close to the lens – rays converge but do not intersect – real image not formed • The observer’s eye follows rays back to the point of apparent origin (I) • (I) bigger than object
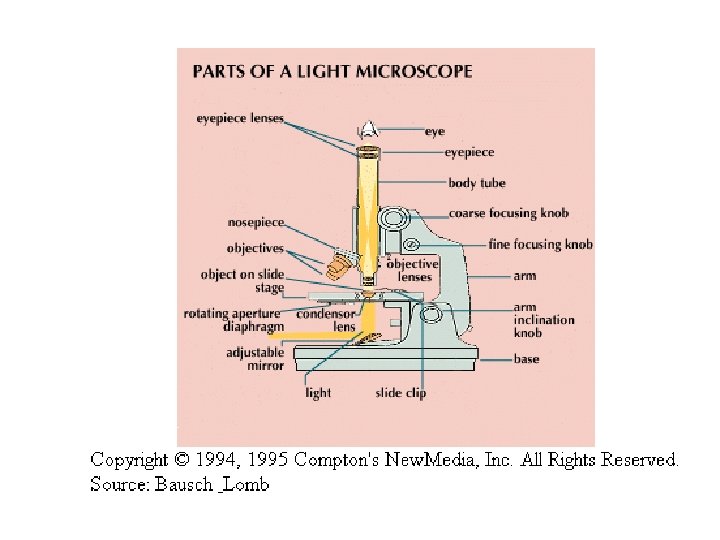
The Compound Microscope • Rays pass first through the objective lens forming a real, slightly enlarged, inverted image • The second lens (eyepiece) acts as a simple magnifier Remember Letter e lab?
Microscopy History • Dutch spectacle-makers (1590), Janssens, discovered that nearby objects appeared greatly enlarged with lenses. • Galileo (late 1600 s), based on the Janssens experiments, worked out a much better instrument with a focusing device. Janssen Galileo 7
Microscopy History Late 1600’s • Other Early Microscopes Leeuwenhoek Microscope Hooke Microscope 1670 8
Microscopy History • Later Microscopes Olympus (modern) Pacino, 1870 9
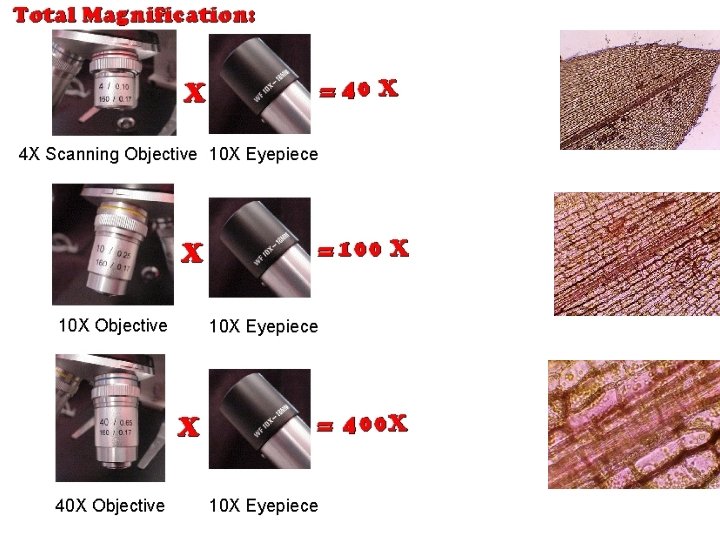
Compound Light Microscope • The most common microscope compound light microscope (LM). Two sets of lenses: ocular and objective. Brightfield Mic. • The total magnification: multiply magnification of the objective lens with the ocular lens. – e. g. , ocular is 10 x and the objectives is 100, total mag. will be 1000 x. • Optical system comprised of condenser, objective lens, eyepiece lens and illuminator. • The compound light microscope uses visible light. ( = 400 - 700). • Virtual image is any specimen viewed through a lens. 10
13
Limitations of Light Microscope • Radiation of a given wavelength can’t be used to probe structural details much smaller than its own wavelength • Light Microscope – limited to range of visible light • 0. 4 mm (violet) to 0. 7 mm (deep red) – bacteria & mitochondria (~0. 5 mm wide) smallest objects that can be seen clearly
Tissue Prep Center Microtome Water bath with sliced wax/tissue Embedding Area
Tissue prep-Mount onto slides
Stains • Help visualize details of specimen – Vital Stains=Don’t harm living specimens (ex. Methyl Blue) – Lethal Stains=Kills Specimen (ex. Iodine)
Staining Samples • “Fixing”- Chemically make tissue permanent and attached to the slide • “Smearing” - When a specimen is fixed, a thin film of material containing the sample is spread over the surface of the slide. This film (smear) is allowed to air dry or by flame. • Staining= color for emphasizing certain structures or components. 18
Dyes: Acids and Bases • Basic dyes (cation): – Ex. crystal violet, methylene blue and safranin – commonly used for bacterial cells. • Acidic dyes (anion) – are not attracted to most bacterial cells – the stain colors the background. This preparation of colorless bacteria against the colored background is called negative staining. – Great for cell shapes, sizes & capsules. – Ex. eosin, nigrosin & India ink. 19
Stains (Microscopy) • Types – Simple – Differential – Special 20
Simple Stains • Aqueous or alcohol solution of a single basic dye. – highlight microorganisms to determine cellular shapes and arrangements. – Ex. methylene blue, carbolfuchsin, crystal violet, & safranin. 21
Differential Stains • Differential Stains React differently with different kinds of bacteria in order to distinguish them. • Gram Stain Divides bacteria into two large groups, gram-positive & gram-negative. 22
Special Staining • Negative Staining for Capsules. Since most capsules do not accept stains, the capsules appear as halos around bacterial cells & stand out against a dark background. • Endospore (Spore) Staining. Used to detect the presence of endospores in bacteria. When stain (malachite green) is applied to a heat-fixed smear of bacterial cells, the stain penetrates the endospores and stains them green. • Flagella Staining Used to demonstrate the presence of flagella. 23
Darkfield Microscopy • Shows a light silhouette of an organism against a dark background. The light reaches the specimen from an angle with the help of an opaque disk. • Most useful for extremely small living organisms that are invisible in the light microscopes. 24
Comparison Microscope • Important tool for firearms examiner • Two compound microscopes combined into one unit • When viewer looks through the eyepiece, a field divided into two equal parts is observed • Bullet comparisonsrequires reflective light • Hair & Fiber comparisons • Questioned documents 25
Comparison Microscope Split-image comparison of firing pin imprints in coaxial incident light 26
Comparison Microscope Real Forgery Split-image comparison of banknotes: 27
Phase-Contrast Microscope • Splits a beam of light into 2 types of light, direct and refracted (reflected) and brings them together to form an image of the specimen. • It allows the detailed observation of living organisms, especially the internal structures. 28
Bright field vs Phase Contrast
Polarizing Microscope • Based upon the rotation of polarized light. 30
Polarizing Potato Starch
Fluorescence Microscope • Specimens are first stained with fluorochromes and then viewed through a compound microscope by using an ultraviolet (or nearultraviolet) light source. • The microorganisms appear as bright objects against a dark background. • Used primarily in a diagnostic procedure called fluorescentantibody (FA) technique, or immunofluorescence. 32
Hand section of sugarcane vascular bundle viewed with fluorescence microscope Sugarcane vascular bundle viewed with traditional staining and transmitted light (Bright Field) microscopy Hand-section of Sugarcane stem with a vascular bundle Stained with Toluidine Blue & Viewed with Bright Field microscopy 33
Stereomicroscope • Also called the dissecting microscope • Working distance below objective lens & specimen. Image is 3 D. • Doesn’t reverse or invert the image, so examiner can manipulate the specimen 34
Electron Microscope • A beam of electrons, instead of light, is used with an electron microscope. • magnify greater because the wavelengths of electrons are much smaller than those of visible light = 0. 005 nm as opposed to 500 nm (one hundred thousand times smaller) • The best compound light microscopes can magnify 2000 x, electron microscopes can magnify up to 100, 000 x • 2 types: TEM & SEM 35
36
Transmission Elec. Microsc. • Transmission electron microscopes (TEM): Thin sections (or layers) (2 -D) can be seen in a transmission electron micrograph. • Electrons pass directly through the specimen. Magnification: 10, 000 -100, 000 x Resolving power: 2. 5 nm. • The specimens must be fixed, dehydrated and viewed under a high vacuum. These treatments not only kill the specimens but may cause shrinkage and distortion. 37
TEM Pictures Silver Nanoprisms Gold Nanoparticle 38
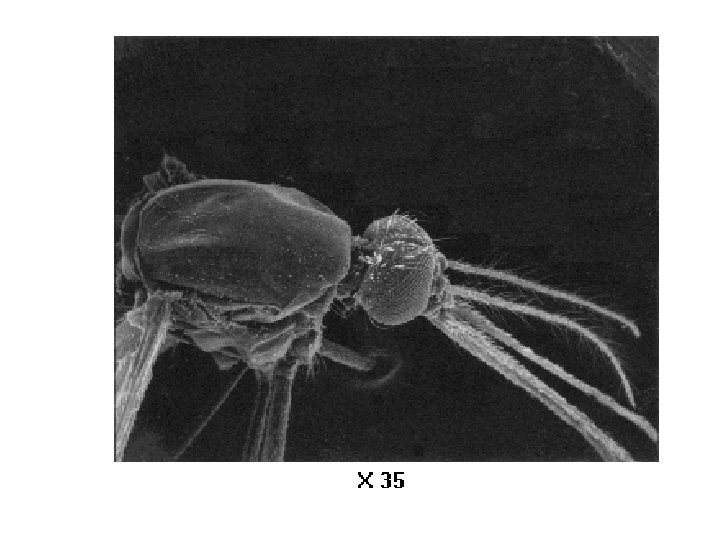
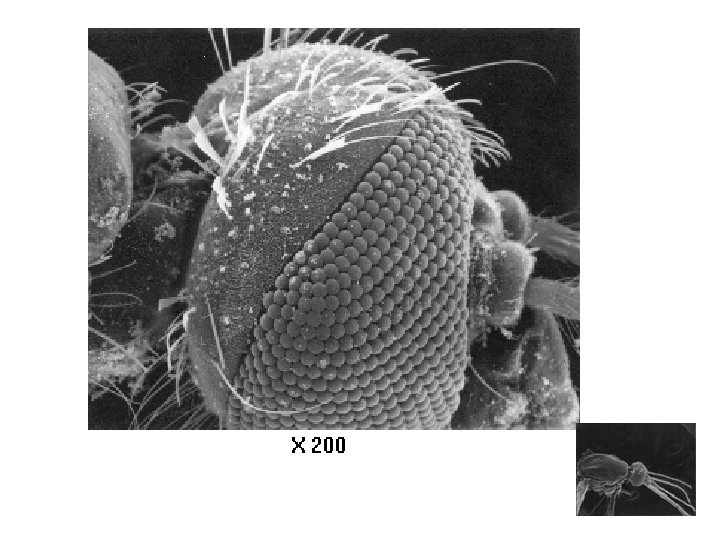
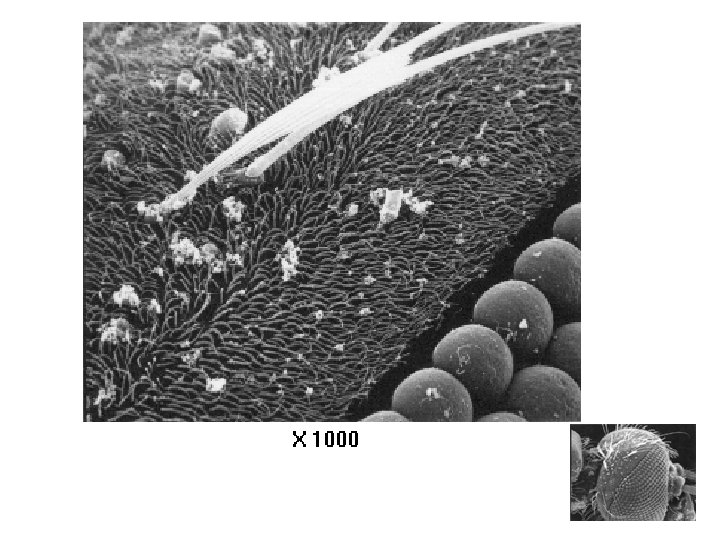
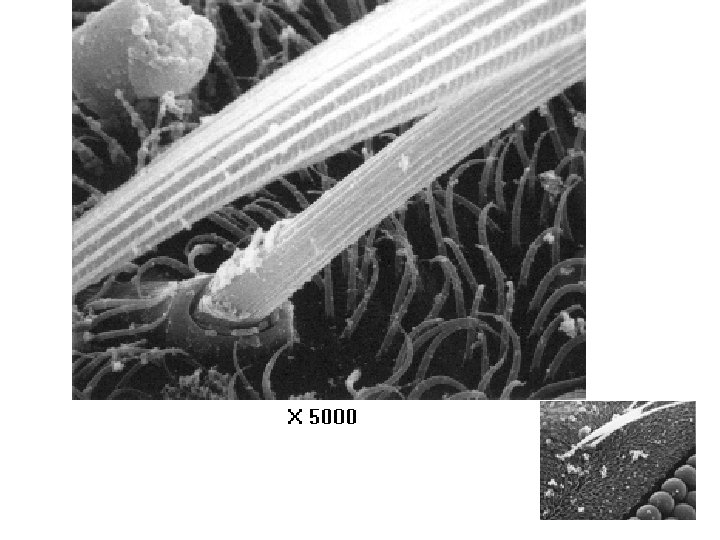
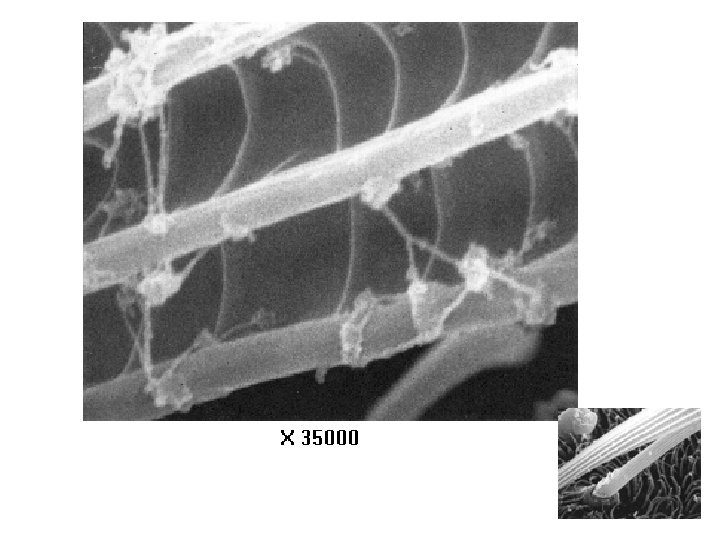
Scanning Elec. Microscopy • Scanning electron microscopes (SEM): 3 -D views of the surfaces by aiming a beam of electrons onto the specimen. – Electrons are bounced off the surface of the specimen and form a 3 D image that is stereoscopic in appearance. – Magnification: 1000 -10, 000 x and Depth of Field very high. – Can be used to identify the elements present in the specimen under examination. 39
Scanning Electron Microscope • This scanning electron microscope has a magnification range from 15 x to 200, 000 x and a resolution of 5 nanometers
Range of Readily Resolvable Objects
How the SEM Works
Conventional light microscopes use a series of glass lenses to bend light waves and create a magnified image.
• The Scanning Electron Microscope creates the magnified images by using electrons instead of light waves
The SEM shows very detailed 3 -dimensional images at much higher magnifications than is possible with a light microscope. The images created without light waves are rendered black and white
Samples have to be prepared carefully to withstand the vacuum inside the microscope
• Biological specimens are dried in a special manner that prevents them from shriveling. • Because the SEM illuminates them with electrons, they also have to be made to conduct electricity
• How do you make a mosquito conductive? • SEM samples are coated with a very thin layer of gold by a machine called a sputter coater
The specimen is now prepared
The sample is placed inside the microscope's vacuum column through an air-tight door
• Air is pumped out of the column • An electron gun [at the top] emits a beam of high energy electrons. – travels downward through a series of magnetic lenses designed to focus the electrons to a very fine spot
• Near the bottom, a set of scanning coils moves the focused beam back and forth across the specimen, row by row
• As the electron beam hits each spot on the sample, secondary electrons are knocked loose from its surface. • A detector counts these electrons and sends the signals to an amplifier
• The final image is built up from the number of electrons emitted from each spot on the sample
TEM Pictures Silver Nanoprisms Gold Nanoparticle
Fiber Analysis
Who am I?
Who am I? I’m a louse fly of a wallglider (an alpine bird)
SEM Images Human Hair (1100 X) Diatom 66
FT-IR Microspectrophotometer
Photocopier Toner Analysis • important for establishing corroborative evidence linking documents to specific locations in forensic investigations of corporate crime • Must be performed non-destructively – can’t remove toner from paper – physical size of specimen is very small • microscope to find sample • FT-IR to analyze the sample