MICROPROCESSOR Lab time OBJECTIVES After this lab you

MICROPROCESSOR Lab time

OBJECTIVES After this lab you will be able to: Identifying CPU sockets. Choose the right processor for your computer Installing and removing your CPU. Installing and removing a CPU fan assembly safely and correctly. Exploring your CPU specification Identifying different kind of CPU tools

THE RIGHT CPU Consult your motherboard manual You need a CPU that will fit in the socket or slot on your motherboard Buying a CPU Most stores will not accept returns Retail-boxed CPUs are genuine and come with a fan Lots of illegal CPUs on the market

WRIST STRAPS An antistatic wrist strap, ESD wrist strap, or ground bracelet is a device used to prevent electrostatic discharge (ESD) by safely grounding a person working on electronic equipment.

INSTALLING CPU Locate the processor socket on the Motherboard. Lift the lever on the side to open the socket.

Carefully remove the CPU from the antistastic bag, holding it by its edge.

ALIGN THE PROCESSOR Turn the CPU until you see the pins. Verify that none of the pins are bent. Locate the single diagonal corner on the CPU. Line up the pins and the diagonal corner with their counterparts on the processor socket.

INSERT THE PROCESSOR Gently lower the CPU onto the socket, keeping the pins aligned so that they insert into the holes in the socket. Verify that the CPU is correctly aligned and positioned firmly in the socket.

LOCK THE PROCESSOR IN THE SOCKET Push the lever on the side of the socket back to the locked position.

COOLING Faster CPUs run hotter than slower ones. If you replace your old CPU with a new one, a new fan is needed. Your case fan may not be sufficient, causing CPU to overheat and system lock up. Adding improved cooling can be done but may require a new case.

THE ART OF COOLING Modern CPUs need to be kept cool OEM fans are included in retail-boxed CPUs Specialized fans usually exceed OEM fans Liquid cooling works by running a liquid (usually water) through a metal block that sits on top of your CPU to absorb heat

LIQUID COOLING

CPU COOLING FANS

APPLY THERMAL COMPOUND Thermal grease is primarily used in the electronics and computer industries to assist a heatsink to draw heat away from a semiconductor component such as an integrated circuit or transistor.

INSTALLING THE HEAT SINK FAN Locate the tube of thermal compound. Open the tube and apply drops of the compound to the top of the CPU. Cover your finger with a clean piece of plastic and rub the compound smoothly onto the CPU. Locate the heat sink fan. Align the heat sink or cooling solution above the processor so that the clamps are in line with the mounting points around the processor.

ATTACH OR MOUNT THE HEATSINK Clamp the heat sink in place using the proper mounting technique required by the solution. This may be lifting a tab over a mounting clip or screwing down the heat sink to the board. Please refer to the documentation for the heat sink to ensure proper installation.

PLUGGING IN THE CPU FAN

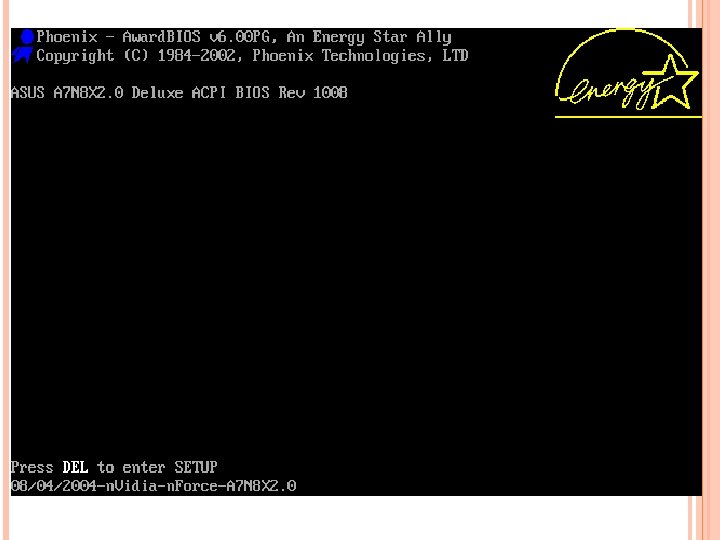
TESTING THE INSTALLATION Leave the access panel off of the PC. Place the PC in an upright position. Verify the monitor, keyboard…. Power up the computer. Verify that the heat sink fan is working. Allow the machine to boot while you are looking at the monitor. Verify that the BIOS setup screen is displayed on the monitor.

BIOS The BIOS is boot firmware, designed to be the first code run by a PC when powered on. The initial function of the BIOS is to identify, test, and initialize system devices such as the video display card, hard disk, and floppy disk and other hardware. This is to prepare the machine into a known state, so that software stored on compatible media can be loaded, executed, and given control of the PC. This process is known as booting, or booting up, which is short for bootstrapping.

HOW TO ACCESS THE BIOS The method for accessing the BIOS is going to be dependent upon the manufacturer of the motherboard and the BIOS vender they have selected. The first step is to look up what key needs to be pressed to enter the BIOS. Some of the common keys used to access the BIOS are F 1, F 2 and the Del key.
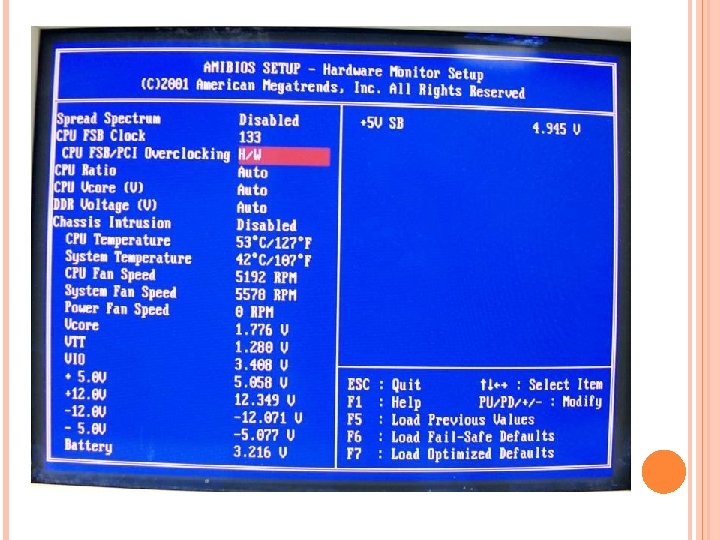
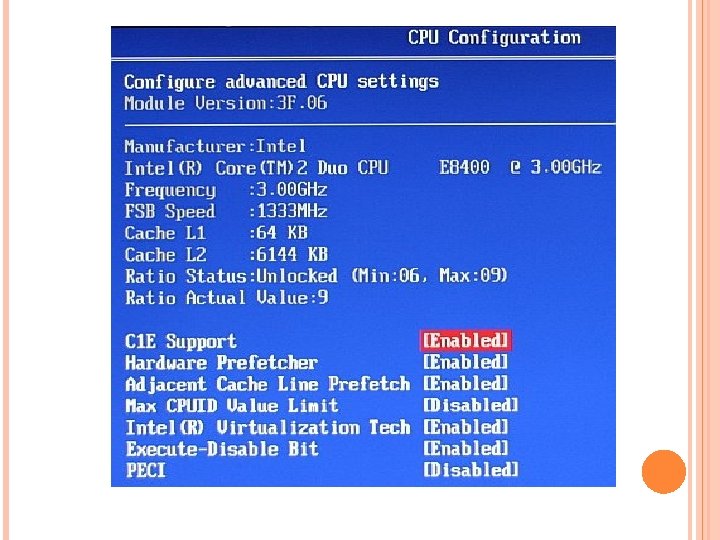
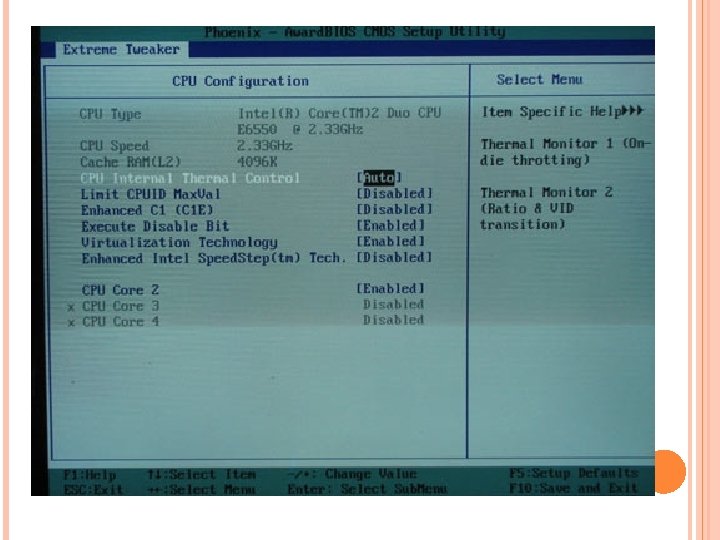

EXPLORING YOUR CPU SPECIFICATION There are several way to explore your CPU specification: By BIOS but some BIOS is not suitable. Use Software tools such as CPU-Z.
- Slides: 25