media cyanotypes Created by Sir John Hershel in

media cyanotypes

Created by Sir John Hershel in 1842 Originally, cyanotypes were used in conjunction with scientific recordings of mathematical tables, a divers range of plant specimens and architectural plans

Anna Atkins British scientist She brought cyanotypes into the realm of photography Cyanotype books with ferns and other plane life

Using mixed media can be such a beautiful way to remanence.
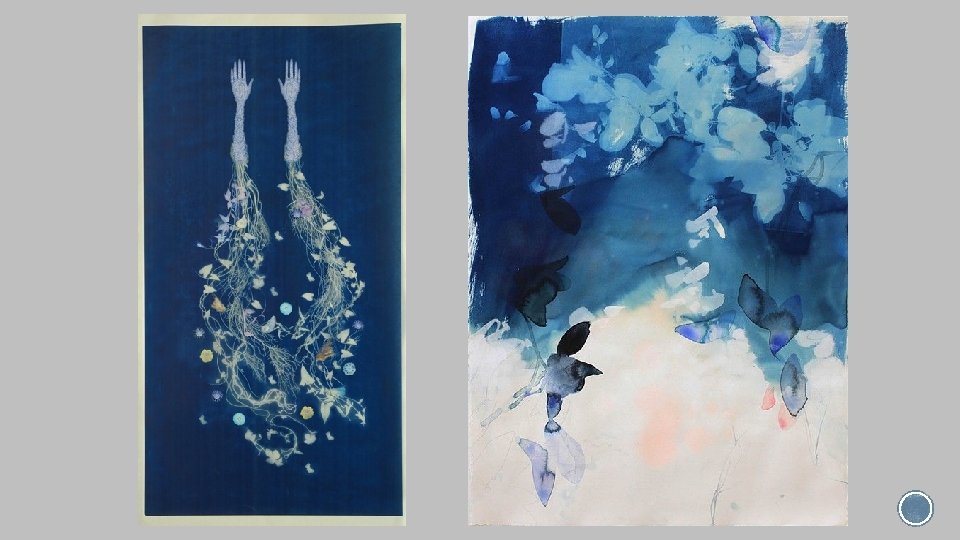

These are photograms too. However, they are not cyanotypes. Let’s look at them for their composition. Both images demonstrate strong rhythm and repetition.

Can you figure out themes?

What about these themes? Can you figure out how they were made?

Her are interesting examples of combining digital art into this photographic process.
")
Supplies 1. Scale lace 2. Distilled Water plant material 3. Light tight glass (non-porous) glitter bottles 4. Potassium Ferricyanide> 8% of solution part A 5. Ferric Ammonium Iron Citrate> 20% of solution part B snake skin translucent fabric nail polish printed transparencies textured thread 6. Hydrogen Peroxide flat or small beads 7. Any surface that is capable of negatives; including digital soaking up the iron solution 8. Objects of interesting shape and translucence, for example: Negatives Cotton Plastic GO BEYOND WHAT IS READYILY AVAILBLE ON HAND YOU ARE REQUIRED TO BRING IN ITEMS TO CREATE YOUR PHOTOGRAMS

1. Create a plan using your sketchbook. 2. Set up a workspace for treating the watercolor paper. A dark room lit with a safe light is ideal. In any event, the room should be as dim as possible and away from direct sunlight. room. Try to create a wide range of values, a focal point and a dominant principle of art when creating your composition. 9. Consider placing the negative and paper in a secure-backed picture frame or a glass easel (contact printer) to hold the photogram objects in place. Once everything is in place, cover with a light-protective cloth and carry outside. 3. Put on the safety gloves, and proceed with mixing the chemical solutions. A common recipe calls for 25 g ferric ammonium citrate and 100 ml water in one bottle, 10 g potassium ferricyanide and 100 ml of water in the other bottle. Mix until the chemicals are fully dissolved. Important note: the 2 chemical solutions need to remain separate until the paper is to be treated. 4. Place equal amounts of the 2 chemical solutions into the mixing cup. Cyanotype 10. If you are using transparencies, negatives or digital negatives, be sure that the printed side is the side touching the coated paper and remember to print font backwards. 11. Carefully sandwich the easel closed and clip the sides to make a strong contact. Place the frame under UV light (sunlight) or direct sunlight for about 10 to 15 minutes (denser negatives might take longer). chemicals are short-lived once mixed together, so mix only what you think you will 12. When the solution looks dark grey, it is ready to be developed. need for your project. You can always mix a little more, but unused cyanotype 13. Once the paper has been exposed, bring inside and place it into the first plastic mixture must be discarded. Solution works best if it sits over night. tray. To develop the paper, carefully remove it from the frame and wash the print Coat solution on paper or fabric. Decide if you want to mask the coating or paint in three wash baths of fresh cool water. Allow it to in the first bath under running it. water for about 5 minutes. Agitate the print in the second bath for five minutes. In 6. Dry with a hair dryer, place by a fan or lay flat to dry. the third bath, pour two small drops amount of hydrogen peroxide on top the 7. Allow the treated paper to dry thoroughly in a dark area. It is important to keep the print. The Prussian blue created by the cyanotype solution will appear even treated paper out of light until it is time for printing. Using a light tight bag is ideal stronger from the addition of the peroxide. 5. for storage of coated paper. 8. Carefully arrange the objects for photograms applying the Rule of Thirds to strengthen your dynamic composition onto the treated paper in the darkened 14. Hang print on clothesline or dry flat on screens

Finishing 1. When print is dry it may be the finished product or you can draw, paint, collage on the print, etc 2. Use UV protectant glass when framing the work and avoid pacing work near direct sunligh 3. Complete Self Reflection and reference the Visual Arts Rubric (Self-Assessment) Tips & Warnings It can be tricky getting the chemicals mixed just right. Some formulary sites actually offer bottles of pre-mixed cyanotype chemicals, which removes the guesswork and leaves more time for the fun stuff. Cyanotypes can also be printed on other fibrous surfaces such as cloth. Resources: Freestyle photo. biz www. photoformulary. com Lab Chemicals & Reagents Acids, Bases, Solvents, Stains. Since 1951 - Ships Same Day! www. rmreagents. com Slides Converted to Disc Keep them, Protect Them, Share Them Larsen Digital - Since 1995 www. Slide. Scanning. com filmoutput High Quality Positive-Negatives No Rush Charges www. Film. Output. com HABS HAER HALS Historic Documentation Professional Photographer www. park-photo. com

Things to consider… Have you created a dynamic composition? Did you consider your borders when coating your paper with solution? What is theme of your work? Does your photogram evoke a specific mood or feeling? Did you explore a variety of objects to create a unique photogram? Did you properly expose your photogram? Does it show a wide tonal range including white and deep rich prussian blue? Has your photogram been properly developed? Be sure there are no stains on your work. Dynamic Composition Voice Value/Tonal Range Craftsmanship Planning/Reflection Timing
- Slides: 13