Mechanical Properties of Metals Part 2 Plastic Deformation
- Slides: 7

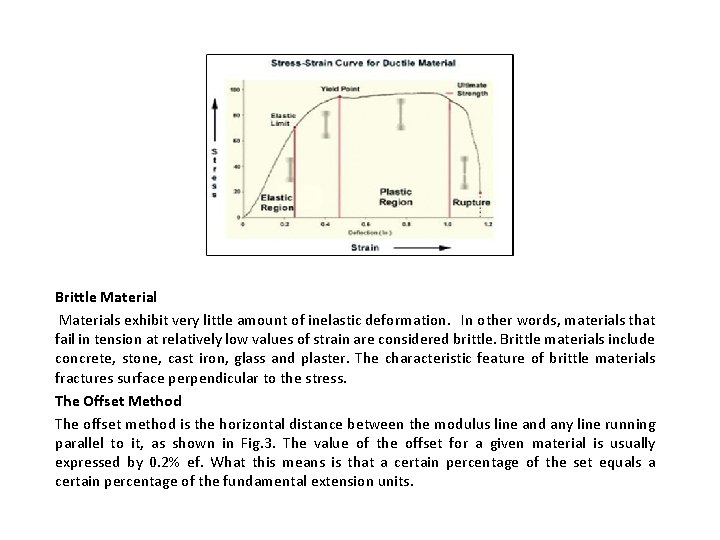
Mechanical Properties of Metals (Part 2) Plastic Deformation The product shapes are normally produced by plastic deformation in the metal forming processes. Hence, it is important to identify the plastic flow properties of metals and alloys for optimizing the processes. Plastic deformation is defined as a process in which permanent deformation is caused by a sufficient load. It produces a permanent change in the shape or size of a solid body without fracture. Hence, the resulting plastic deformation is permanent and cannot be recovered by simply removing the stress that caused the deformation. In fact, plastic deformation involves atomic-level breaking of bonds and reforming of new ones, it is irreversible. Plastic deformation occurs when a material is stressed above its elastic limit, i. e. beyond the yield point, as illustrated in Fig. 1. Engineering Stress-Strain Curve Mechanical behavior for any marital is normally characterized by Stress-Strain Curve, which is an extremely important graphical measure of a material’s mechanical properties. The engineering tension test is commonly used to provide basic design information on the strength characteristics of a material.

The ratio of the force to the initial area is called the engineering stress. If the ratio is in the actual area (that changes with stress) one obtains the true stress. The engineering measures of stress and strain, represented in this module as σ and e respectively, are determined from the measured the load and deflection using the original specimen cross-sectional area A 0 and length L 0. Engineering strain actually indicates an average change in length in a particular direction. According to definition, σ and e are given as: σ=Load/(Original Area )=P/A_0 …………… (1) e=∆L/L_0 …………………. . . . … (2) Where P is the applied force (N), A 0 is the original area (mm 2) and L 0 (mm) is the original length. When the stress σ is plotted against the strain e, an engineering stress-strain curve will be obtained, as shown in Fig. 1.

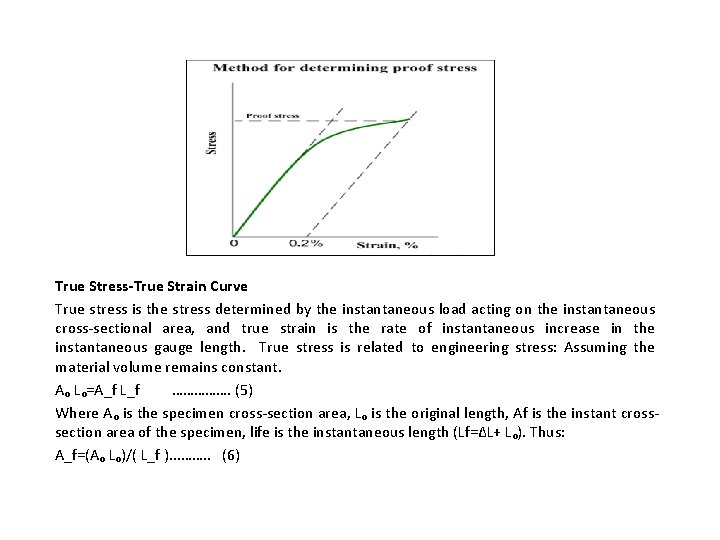
In the early stage of the curve(low strain), many materials obey Hooke’s law to a reasonable approximation, so that stress is proportional to strain with the constant of proportionality being the modulus of elasticity or Young’s modulus E. As the strain is increased, the behavior of the metal eventually deviates from this linear proportionality, the point of departure being termed the proportional limit. This nonlinearity is usually associated with stress-induced “plastic” flow in the specimen. Accordingly, the relationship between stress and strain is nonlinear up to a point B which is very near to A. Also up to the point B the deformations are largely elastic and on unloading the specimen retains the original dimensions. But beyond the point B the metal yields, it suffers plastic deformation. The value of stress at C is called upper yield strength and stress at Cˋ is called lower yield strength. After the point Cˋ the stress-strain curve moves upwards, however, with further deformation, its slope gradually decreases to zero at the point D which is the highest point on the curve. After D the curve goes down. The stress at the point D is known as ultimate tensile strength. After some elongation in the neck, the specimen fractures at the point E. Tensile Test Properties Yield Stress. If the stress is too large, the strain deviates from being proportional to the stress, and therefore yield stress could be defined as the stress at which a material exhibits a specified permanent deformation and is a practical approximation of the elastic limit. It is an important measure of the mechanical properties of materials. The point at which this happens is the yield point because there the material yields, deforming permanently. Hooke's law is not valid beyond the yield point. In practice, the yield stress is measured by 0. 2% ef offset strain method.

Ultimate Tensile strength When stress continues in the plastic regime, the stress-strain passes through a maximum, called the maximum tensile strength, and then falls as the material starts to develop a neck and it finally breaks at the fracture point. Accordingly ultimate tensile strength could be defined as the maximum stress the material can withstand (based on the original area). Ductility Load and can be measured by either a length change or an area change. It is the opposite of brittleness. The percent elongation, which is the percent strain to fracture, is given by: %EL=100% ε_T=100% ((L_f-L_O)/L_O )=100%(L_f/L_o -1)………………. (3) Where, Lf is the length between gage marks a fracture. The percent reduction in area is a cross-sectional area measurement of ductility defined as: %RA=100%((A_O-A_f)/A_O )=100%(1 -A_f/A_o )…………. . (4) Where Af is the cross-sectional area at fracture. Ductile Materials those are capable of undergoing large strains (at normal temperature) before failure. An advantage of ductile materials is that visible distortions may occur if the loads before too large. Ductile materials are also capable of absorbing large amounts of energy prior to failure. Ductile materials include mild steel, aluminum and some of its alloys, copper, magnesium, nickel, brass, bronze and many others (Significant plastic deformation and energy absorption (toughness) before fracture). The characteristic feature of ductile material is necking, as seen in Fig. 2.

Brittle Materials exhibit very little amount of inelastic deformation. In other words, materials that fail in tension at relatively low values of strain are considered brittle. Brittle materials include concrete, stone, cast iron, glass and plaster. The characteristic feature of brittle materials fractures surface perpendicular to the stress. The Offset Method The offset method is the horizontal distance between the modulus line and any line running parallel to it, as shown in Fig. 3. The value of the offset for a given material is usually expressed by 0. 2% ef. What this means is that a certain percentage of the set equals a certain percentage of the fundamental extension units.

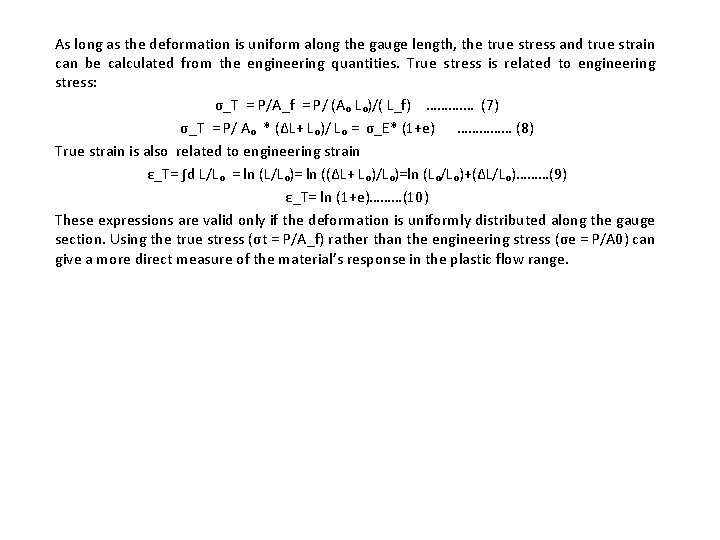
True Stress-True Strain Curve True stress is the stress determined by the instantaneous load acting on the instantaneous cross-sectional area, and true strain is the rate of instantaneous increase in the instantaneous gauge length. True stress is related to engineering stress: Assuming the material volume remains constant. Aₒ Lₒ=A_f L_f ……………. (5) Where Aₒ is the specimen cross-section area, Lₒ is the original length, Af is the instant crosssection area of the specimen, life is the instantaneous length (Lf=ΔL+ Lₒ). Thus: A_f=(Aₒ Lₒ)/( L_f ). . . ……. . (6)

As long as the deformation is uniform along the gauge length, the true stress and true strain can be calculated from the engineering quantities. True stress is related to engineering stress: σ_T = P/A_f = P/ (Aₒ Lₒ)/( L_f) ………. … (7) σ_T = P/ Aₒ * (ΔL+ Lₒ)/ Lₒ = σ_E* (1+e) …………… (8) True strain is also related to engineering strain ε_T= ∫d L/Lₒ = ln (L/Lₒ)= ln ((ΔL+ Lₒ)/Lₒ)=ln (Lₒ/Lₒ)+(ΔL/Lₒ)………(9) ε_T= ln (1+e)………(10) These expressions are valid only if the deformation is uniformly distributed along the gauge section. Using the true stress (σt = P/A_f) rather than the engineering stress (σe = P/A 0) can give a more direct measure of the material’s response in the plastic flow range.