Mechanical Measurements and Metrology Subject Code 10 ME
Mechanical Measurements and Metrology Subject Code: 10 ME 32 B Prepared By: Nikita Department: Aeronautical Engineering September 10, 2014 1
UNIT 4 Screw Thread and Gear Measurements September 10, 2014 2
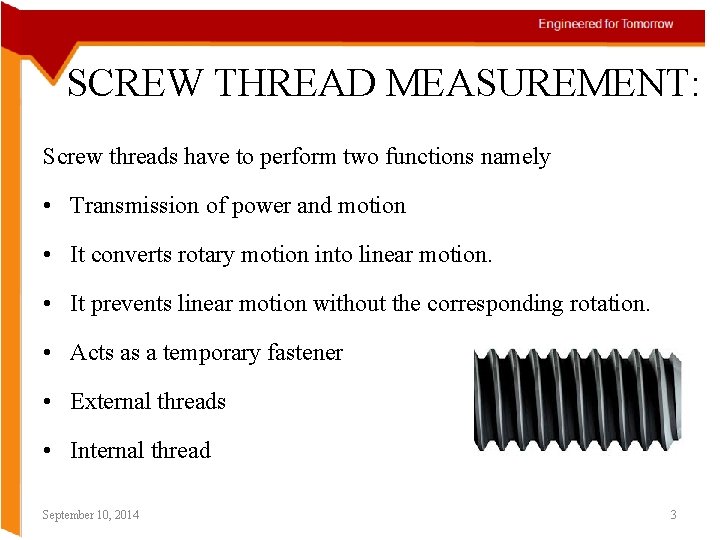
SCREW THREAD MEASUREMENT: Screw threads have to perform two functions namely • Transmission of power and motion • It converts rotary motion into linear motion. • It prevents linear motion without the corresponding rotation. • Acts as a temporary fastener • External threads • Internal thread September 10, 2014 3
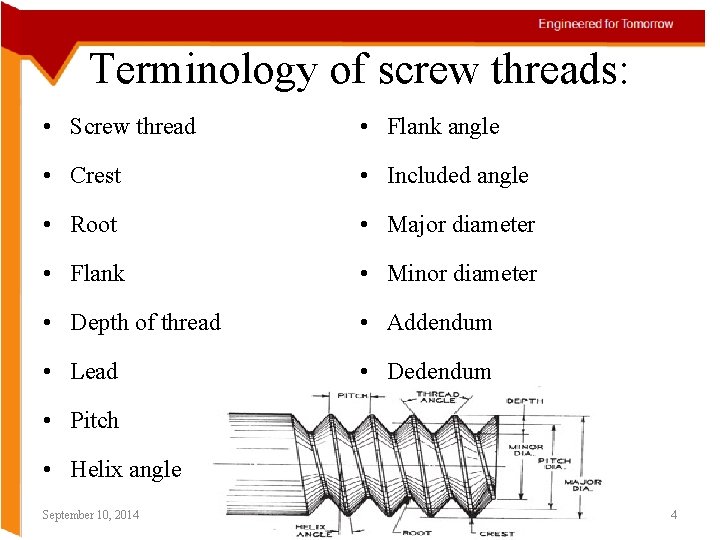
Terminology of screw threads: • Screw thread • Flank angle • Crest • Included angle • Root • Major diameter • Flank • Minor diameter • Depth of thread • Addendum • Lead • Dedendum • Pitch • Helix angle September 10, 2014 4
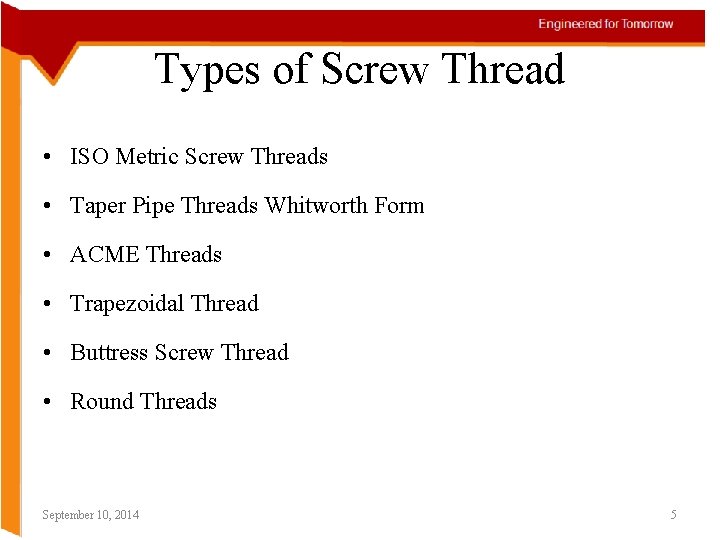
Types of Screw Thread • ISO Metric Screw Threads • Taper Pipe Threads Whitworth Form • ACME Threads • Trapezoidal Thread • Buttress Screw Thread • Round Threads September 10, 2014 5
Measurement of Major diameter • Major diameter is a measurement used to identify the size of a screw or bolt. • The major diameter of these fasteners represents the distance around the outer portion of the threads, which is the widest portion of the shank. • This measurement should be taken around the male threads, and can not be taken using the female portion of the threads or the head of the fastener. • Major diameter plays a key role in most common screw identification systems, including both metric and non-metric systems. September 10, 2014 6
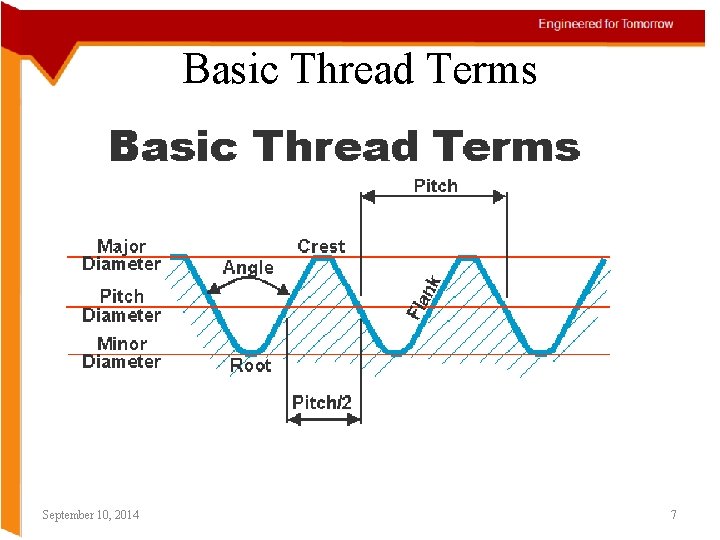
Basic Thread Terms September 10, 2014 7
Basic Thread Terms • The major diameter of a thread is the diameter of the imaginary co -axial cylinder that just touches the crest of an external thread. • The minor diameter is the diameter of an imaginary cylinder that just touches the roots of an external thread. • The crest of a thread is the prominent part of a thread, whether internal or external. September 10, 2014 8
Basic Thread Terms • The pitch diameter (often called the effective diameter) of a parallel thread is the diameter of the imaginary co-axial cylinder • which intersects the surface of the thread in such a manner that the intercept on a generator of the cylinder • The root is the bottom of the groove between the two flanking surfaces of the thread whether internal or external. September 10, 2014 9
Basic Thread Terms • The flanks of a thread are the straight sides that connect the crest and the root. • The angle of a thread is the angle between the flanks, measured in an axial plane section. • The pitch of a thread is the distance, measured parallel to its axis, between corresponding points on adjacent surfaces, in the same axial plane. September 10, 2014 10
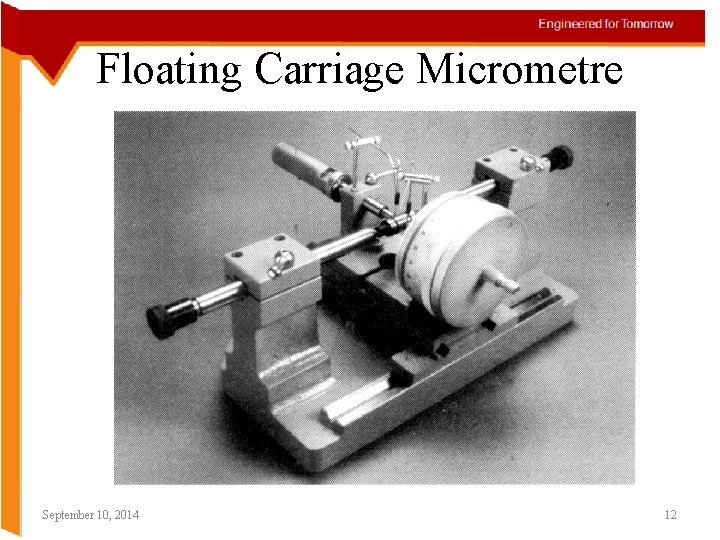
Floating Carriage Micrometre v This instrument is used for accurate measurement of “Thread Plug Gauges”. v Gauges dimensions such as Outside diameter, Pitch diameter and Root diameter are measured with the help of this instrument. v since the accuracy and interchangeability of the component depends on the gauges used. v To reduce the effect of slight errors in the micrometer screws and measuring faces, this micrometer is basically used as comparator. September 10, 2014 11
Floating Carriage Micrometre September 10, 2014 12
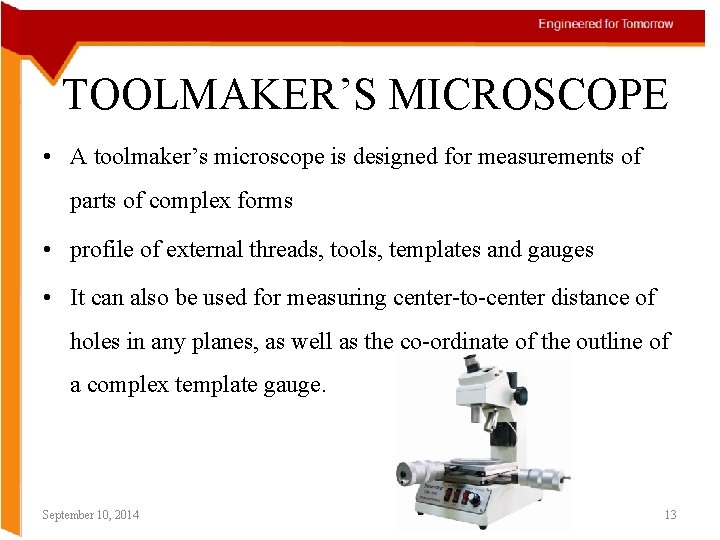
TOOLMAKER’S MICROSCOPE • A toolmaker’s microscope is designed for measurements of parts of complex forms • profile of external threads, tools, templates and gauges • It can also be used for measuring center-to-center distance of holes in any planes, as well as the co-ordinate of the outline of a complex template gauge. September 10, 2014 13
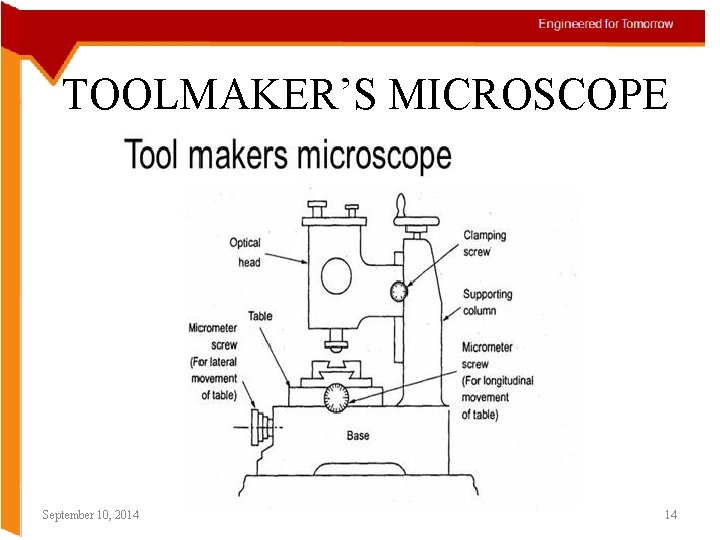
TOOLMAKER’S MICROSCOPE September 10, 2014 14
TOOLMAKER’S MICROSCOPE • Light from lamp at the extreme right is collimated in the tube connecting the lamp to the center of instrument and is reflected as a parallel beam by the prism at the end of the tube. • On its way up, this beam collects the image of the object to be inspected and this enters the microscope. Before the rays reach the eyepiece, it is turned by another prism. • For the most effective manipulation, the magnified image of the work is viewed through the eyepiece September 10, 2014 15
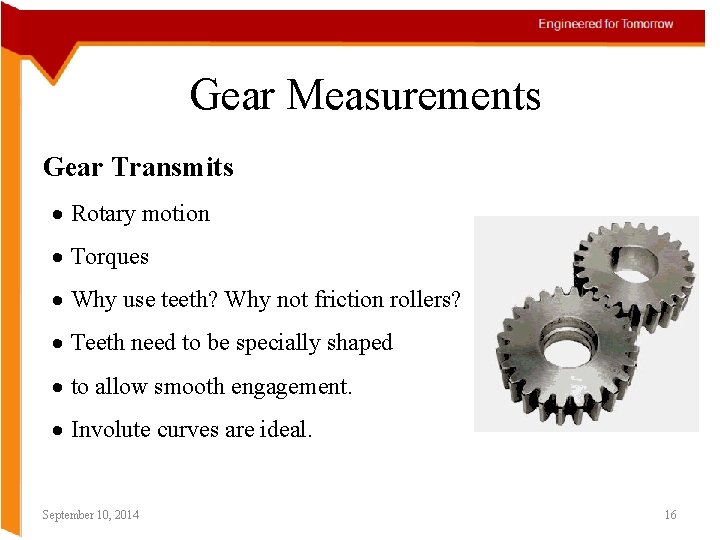
Gear Measurements Gear Transmits · Rotary motion · Torques · Why use teeth? Why not friction rollers? · Teeth need to be specially shaped · to allow smooth engagement. · Involute curves are ideal. September 10, 2014 16
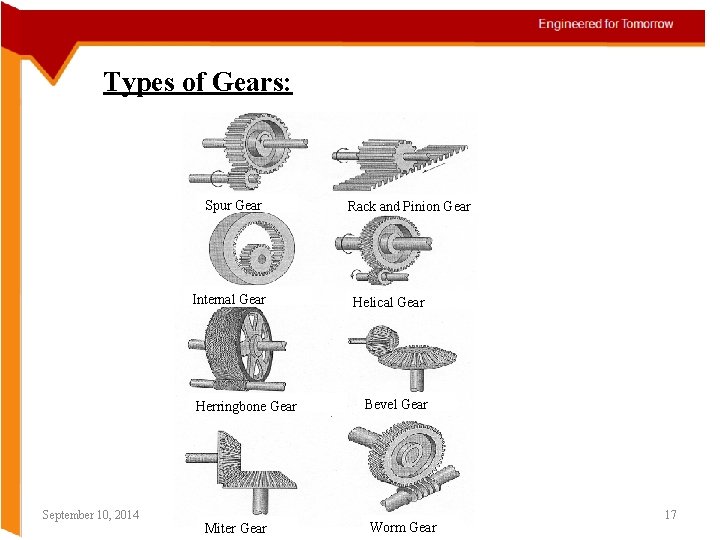
Types of Gears: Spur Gear Internal Gear Herringbone Gear September 10, 2014 Miter Gear Rack and Pinion Gear Helical Gear Bevel Gear Worm Gear 17
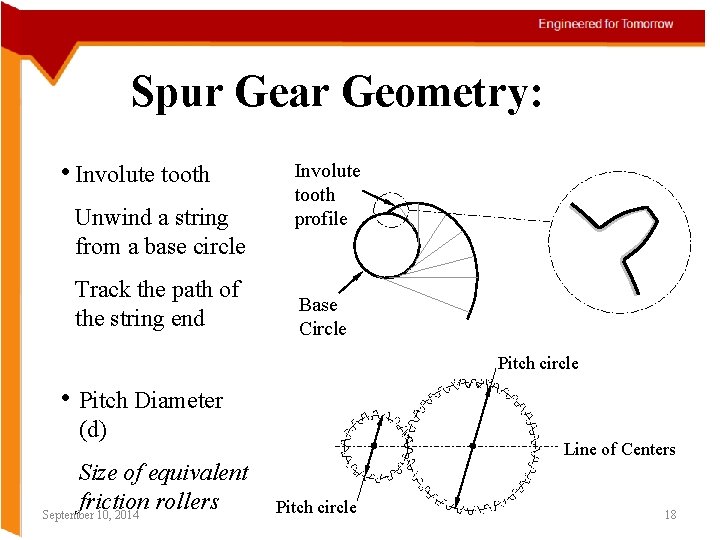
Spur Gear Geometry: • Involute tooth Unwind a string from a base circle Track the path of the string end Involute tooth profile Base Circle Pitch circle • Pitch Diameter (d) Size of equivalent friction rollers September 10, 2014 Line of Centers Pitch circle 18
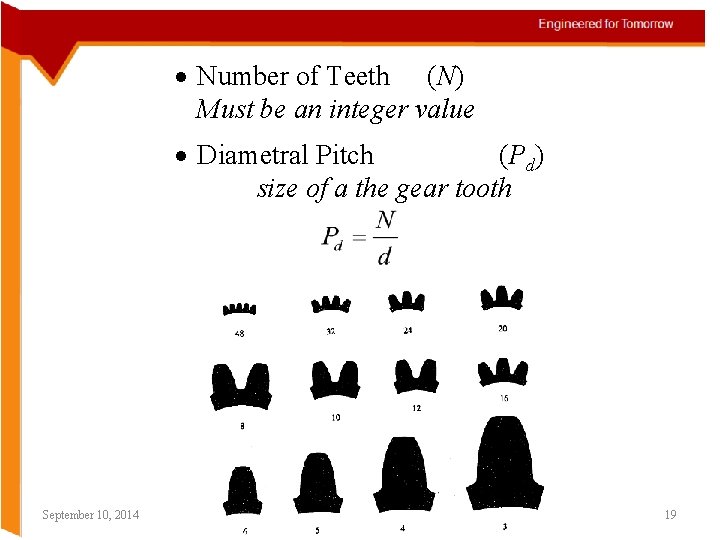
· Number of Teeth (N) Must be an integer value · Diametral Pitch (Pd) size of a the gear tooth September 10, 2014 19
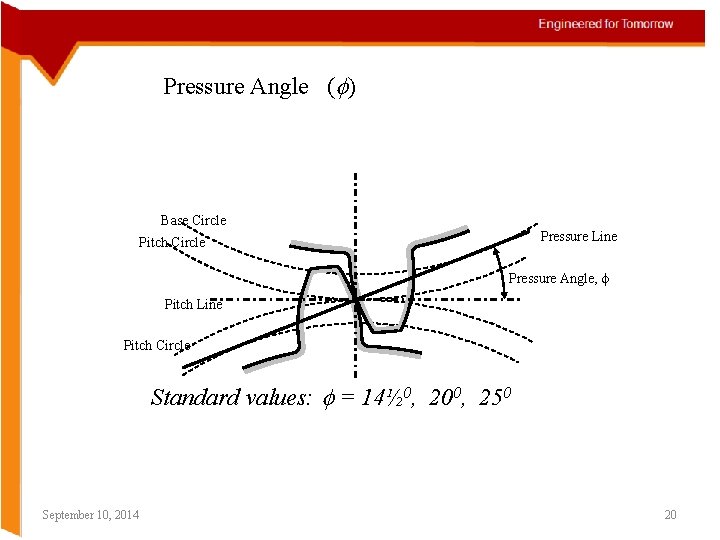
Pressure Angle (f) Base Circle Pressure Line Pitch Circle Pressure Angle, f Pitch Line Pitch Circle Base Circle of 0 Centers Standard values: f = Line 14½ , 200, 250 September 10, 2014 20
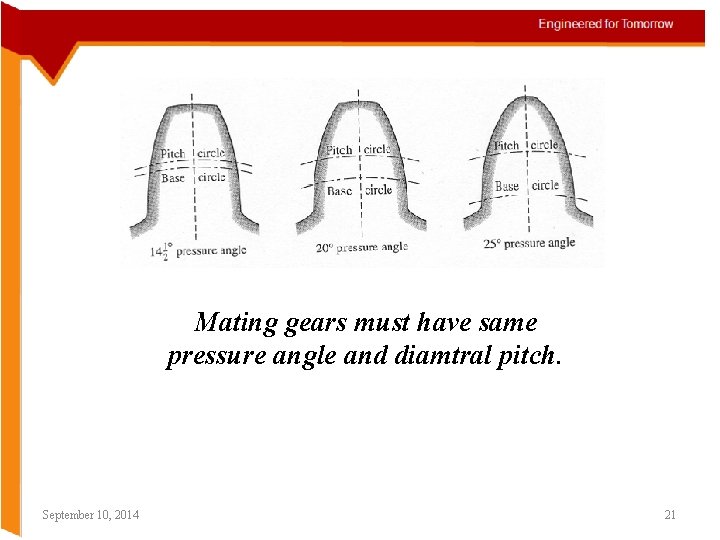
Mating gears must have same pressure angle and diamtral pitch. September 10, 2014 21
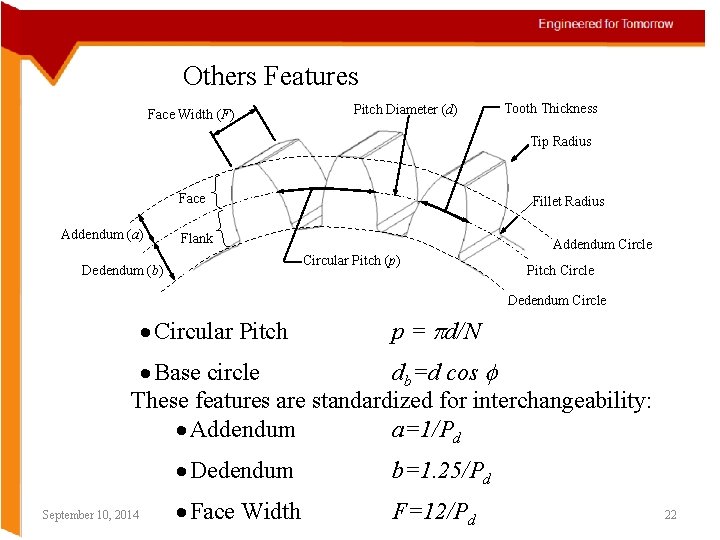
Others Features Face Width (F) Pitch Diameter (d) Tooth Thickness Tip Radius Face Addendum (a) Fillet Radius Flank Addendum Circle Circular Pitch (p) Dedendum (b) Pitch Circle Dedendum Circle · Circular Pitch p = pd/N · Base circle db=d cos f These features are standardized for interchangeability: · Addendum a=1/Pd September 10, 2014 · Dedendum b=1. 25/Pd · Face Width F=12/Pd 22
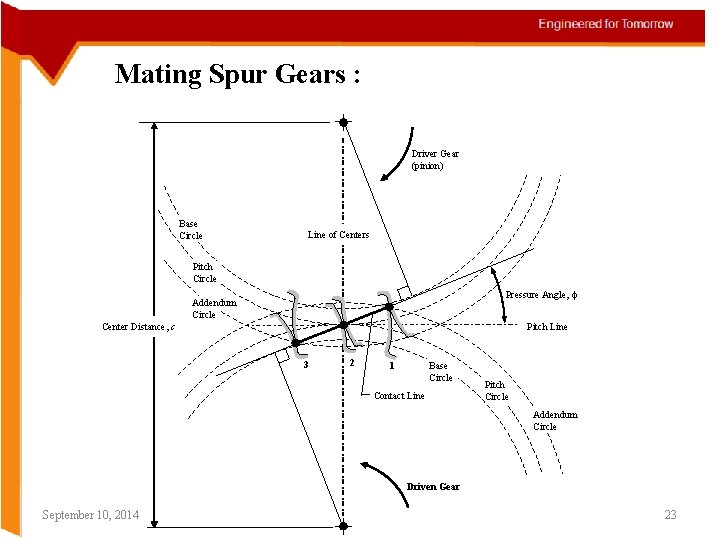
Mating Spur Gears : Driver Gear (pinion) Base Circle Line of Centers Pitch Circle Pressure Angle, f Addendum Circle Center Distance, c Pitch Line 3 2 Base Circle 1 Contact Line Pitch Circle Addendum Circle Driven Gear September 10, 2014 23
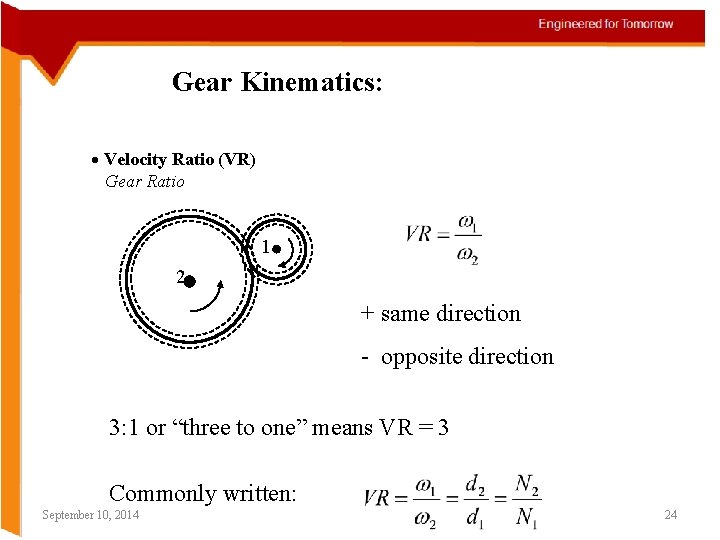
Gear Kinematics: · Velocity Ratio (VR) Gear Ratio 1 2 + same direction - opposite direction 3: 1 or “three to one” means VR = 3 Commonly written: September 10, 2014 24
- Slides: 24