Mechanical Engineering Drawing MECH 211M Lecture 6 Chapter
- Slides: 24

Mechanical Engineering Drawing MECH 211/M • Lecture #6; Chapter 20 • Dr. John Cheung

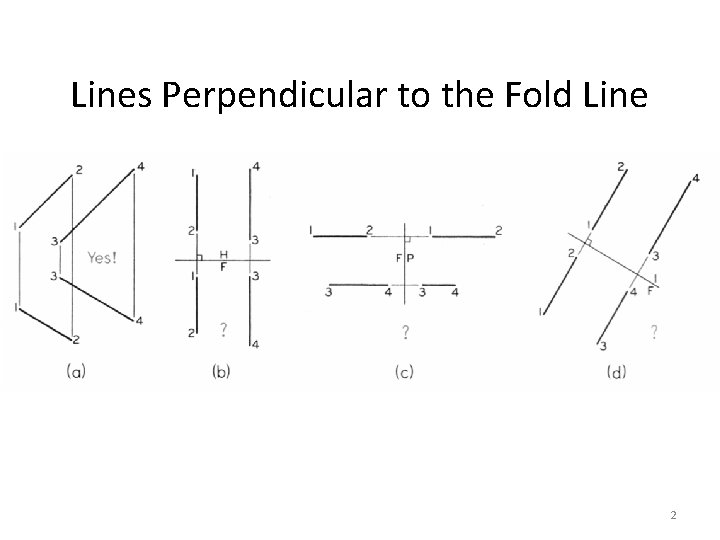
Lines Perpendicular to the Fold Line 2

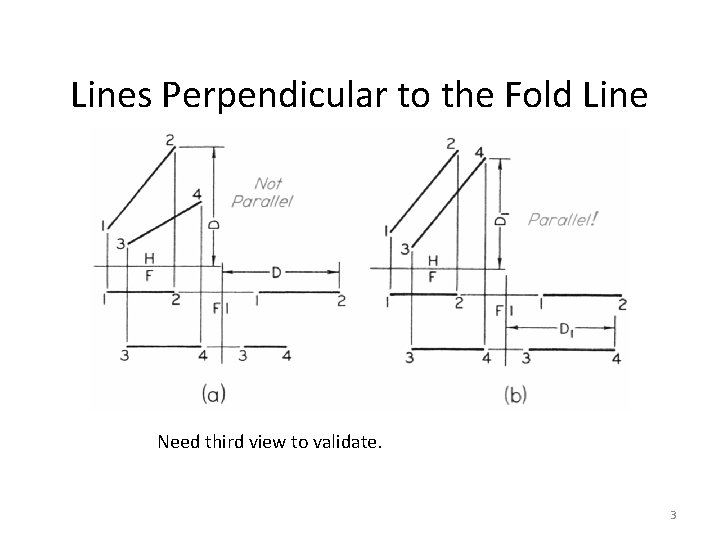
Lines Perpendicular to the Fold Line Need third view to validate. 3

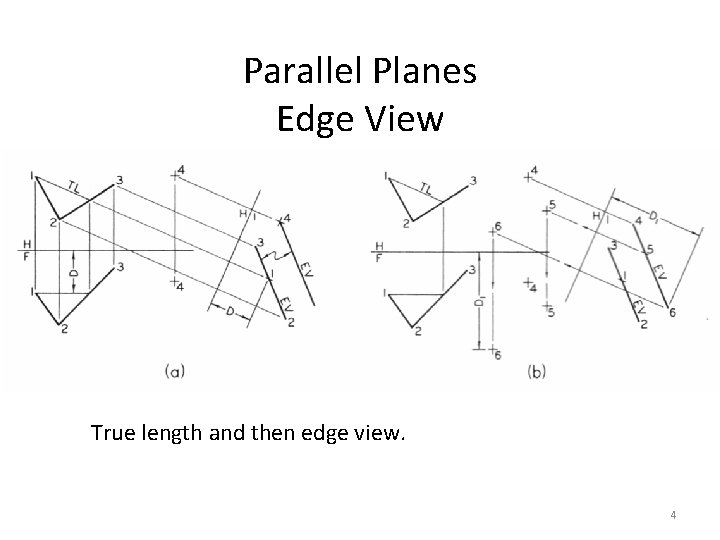
Parallel Planes Edge View True length and then edge view. 4

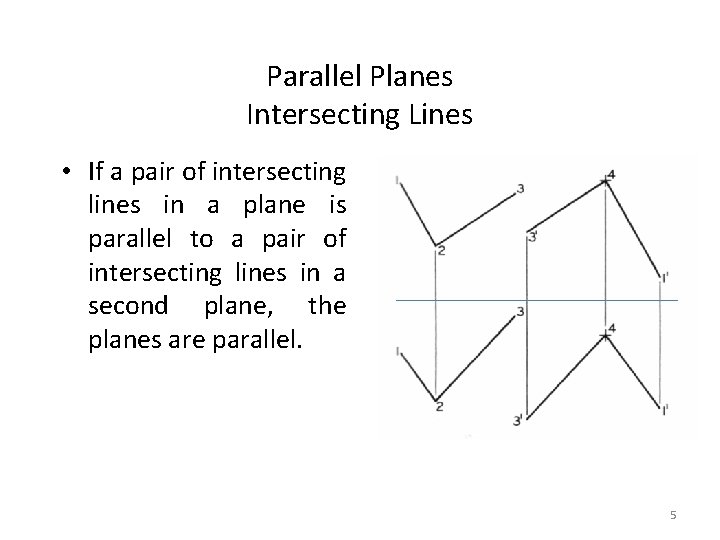
Parallel Planes Intersecting Lines • If a pair of intersecting lines in a plane is parallel to a pair of intersecting lines in a second plane, the planes are parallel. 5

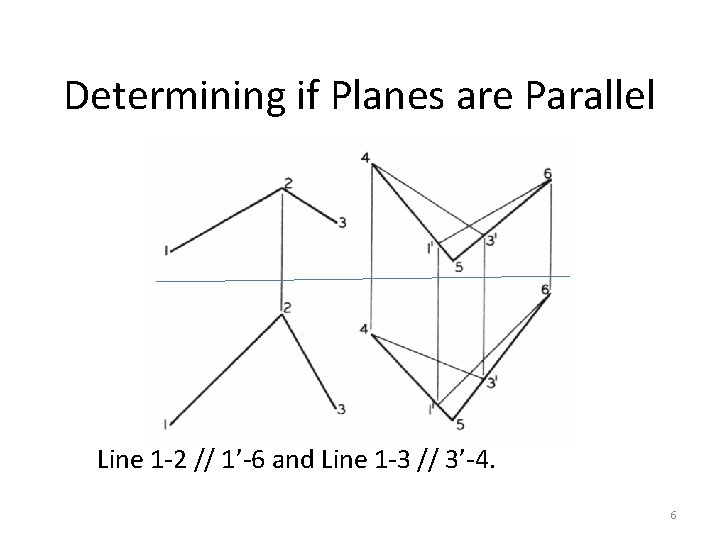
Determining if Planes are Parallel Line 1 -2 // 1’-6 and Line 1 -3 // 3’-4. 6

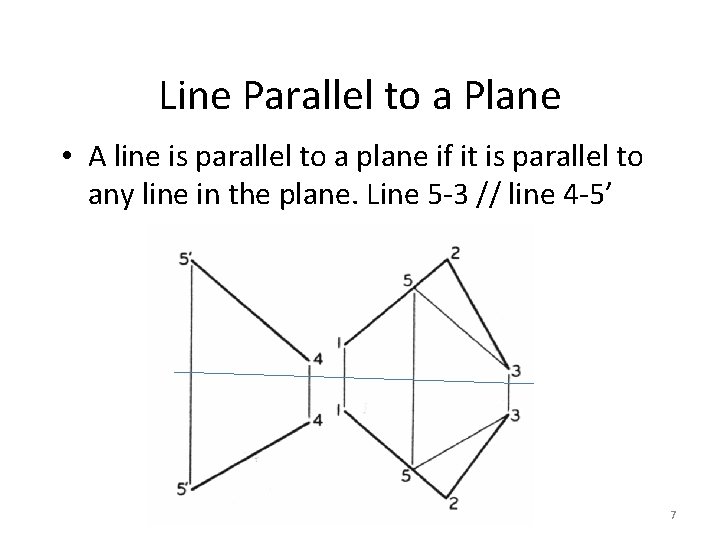
Line Parallel to a Plane • A line is parallel to a plane if it is parallel to any line in the plane. Line 5 -3 // line 4 -5’ 7

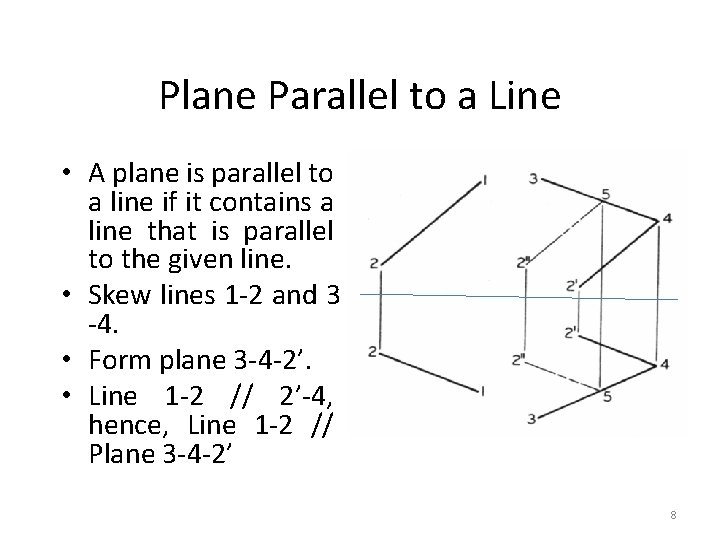
Plane Parallel to a Line • A plane is parallel to a line if it contains a line that is parallel to the given line. • Skew lines 1 -2 and 3 -4. • Form plane 3 -4 -2’. • Line 1 -2 // 2’-4, hence, Line 1 -2 // Plane 3 -4 -2’ 8

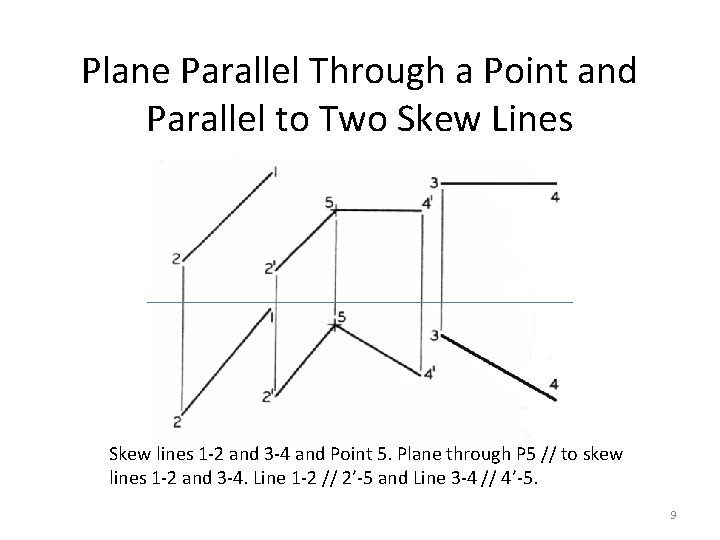
Plane Parallel Through a Point and Parallel to Two Skew Lines Skew lines 1 -2 and 3 -4 and Point 5. Plane through P 5 // to skew lines 1 -2 and 3 -4. Line 1 -2 // 2’-5 and Line 3 -4 // 4’-5. 9

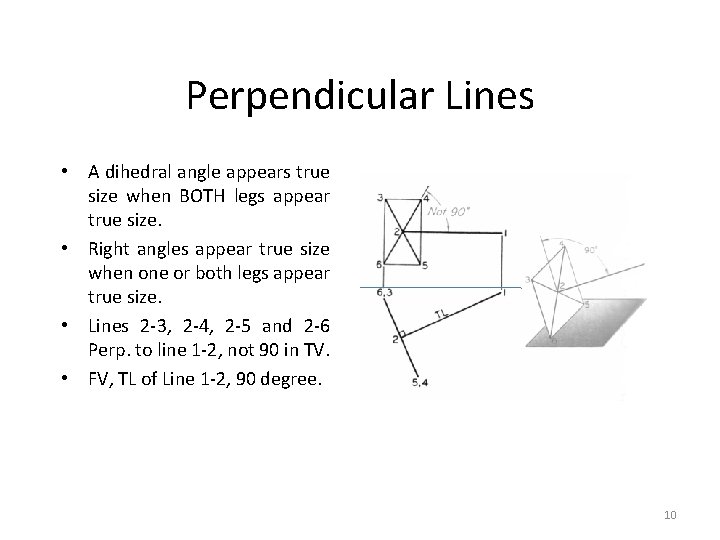
Perpendicular Lines • A dihedral angle appears true size when BOTH legs appear true size. • Right angles appear true size when one or both legs appear true size. • Lines 2 -3, 2 -4, 2 -5 and 2 -6 Perp. to line 1 -2, not 90 in TV. • FV, TL of Line 1 -2, 90 degree. 10

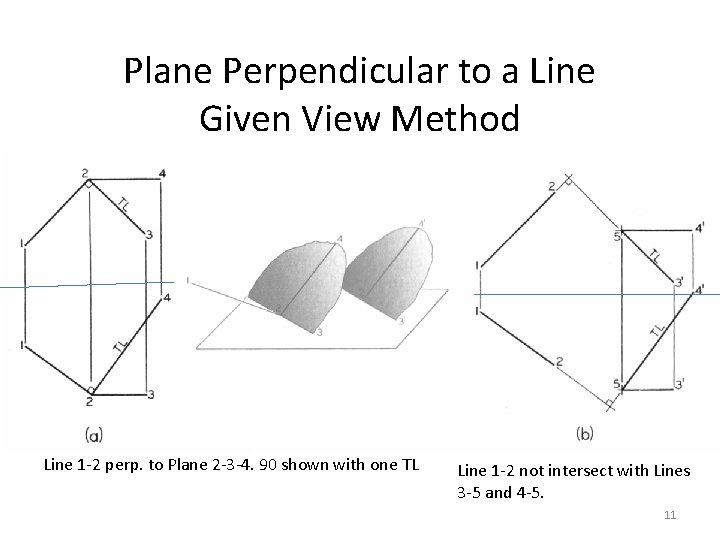
Plane Perpendicular to a Line Given View Method Line 1 -2 perp. to Plane 2 -3 -4. 90 shown with one TL Line 1 -2 not intersect with Lines 3 -5 and 4 -5. 11

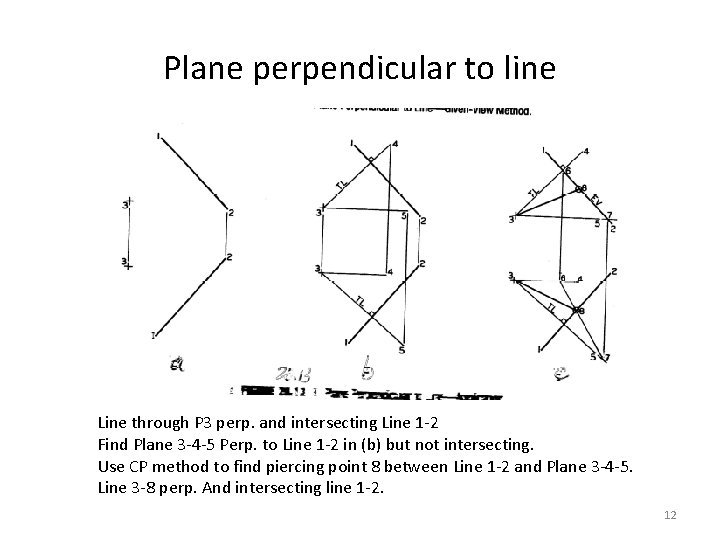
Plane perpendicular to line Line through P 3 perp. and intersecting Line 1 -2 Find Plane 3 -4 -5 Perp. to Line 1 -2 in (b) but not intersecting. Use CP method to find piercing point 8 between Line 1 -2 and Plane 3 -4 -5. Line 3 -8 perp. And intersecting line 1 -2. 12

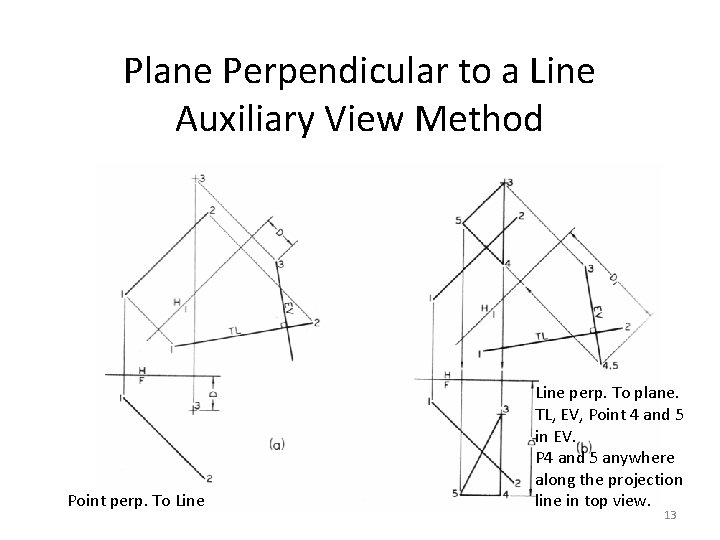
Plane Perpendicular to a Line Auxiliary View Method Point perp. To Line perp. To plane. TL, EV, Point 4 and 5 in EV. P 4 and 5 anywhere along the projection line in top view. 13

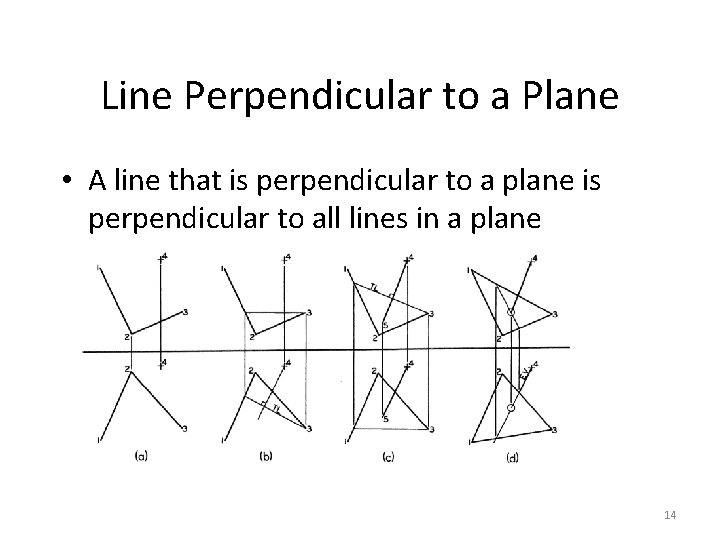
Line Perpendicular to a Plane • A line that is perpendicular to a plane is perpendicular to all lines in a plane 14

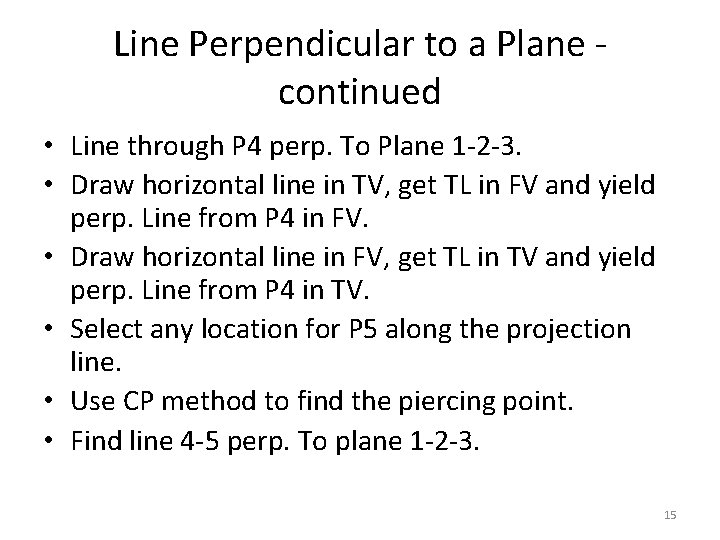
Line Perpendicular to a Plane continued • Line through P 4 perp. To Plane 1 -2 -3. • Draw horizontal line in TV, get TL in FV and yield perp. Line from P 4 in FV. • Draw horizontal line in FV, get TL in TV and yield perp. Line from P 4 in TV. • Select any location for P 5 along the projection line. • Use CP method to find the piercing point. • Find line 4 -5 perp. To plane 1 -2 -3. 15

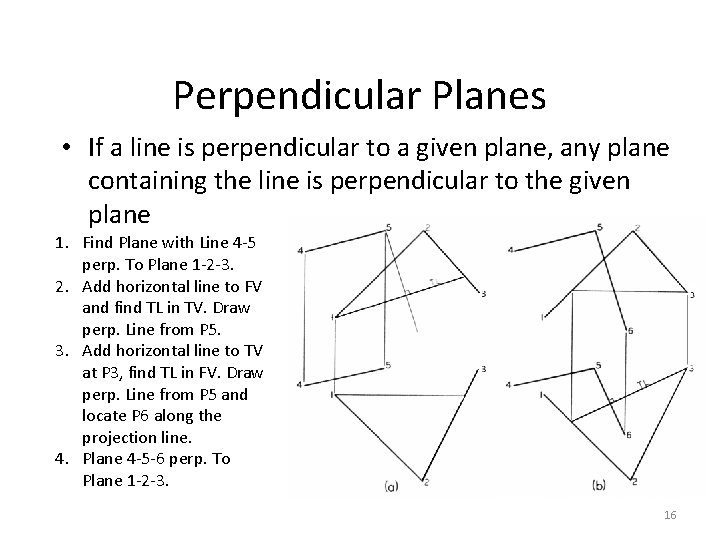
Perpendicular Planes • If a line is perpendicular to a given plane, any plane containing the line is perpendicular to the given plane 1. Find Plane with Line 4 -5 perp. To Plane 1 -2 -3. 2. Add horizontal line to FV and find TL in TV. Draw perp. Line from P 5. 3. Add horizontal line to TV at P 3, find TL in FV. Draw perp. Line from P 5 and locate P 6 along the projection line. 4. Plane 4 -5 -6 perp. To Plane 1 -2 -3. 16

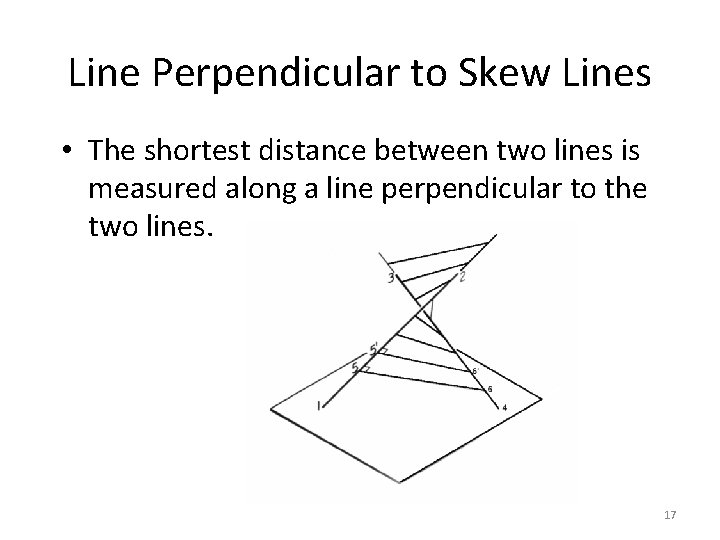
Line Perpendicular to Skew Lines • The shortest distance between two lines is measured along a line perpendicular to the two lines. 17

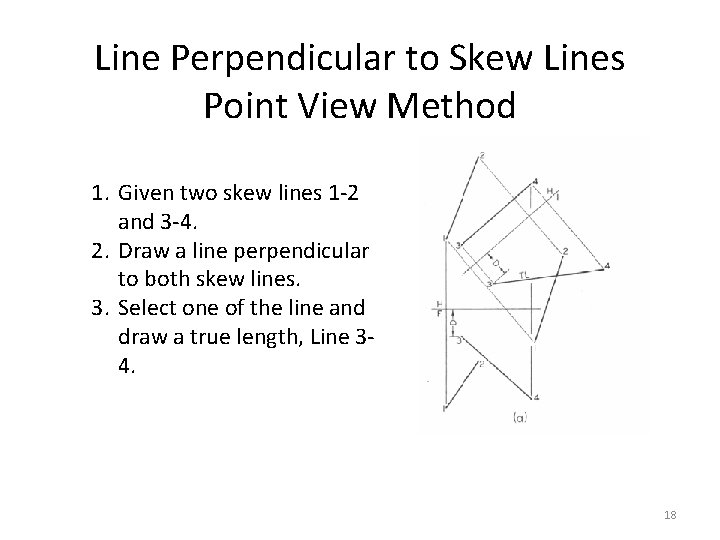
Line Perpendicular to Skew Lines Point View Method 1. Given two skew lines 1 -2 and 3 -4. 2. Draw a line perpendicular to both skew lines. 3. Select one of the line and draw a true length, Line 34. 18

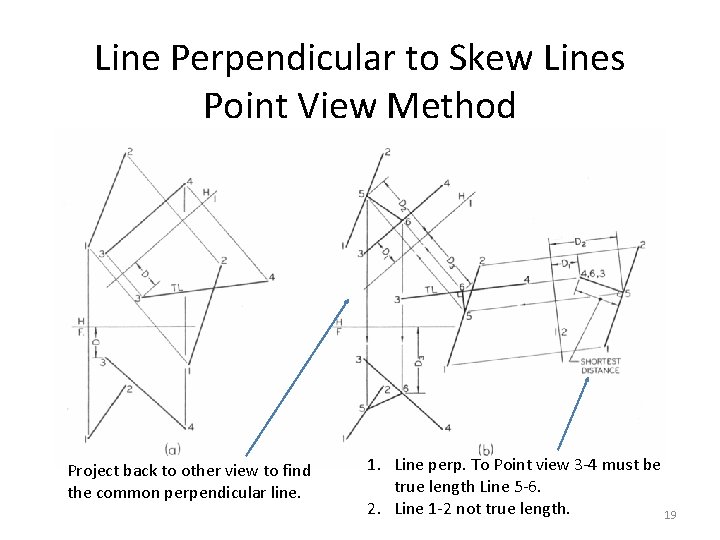
Line Perpendicular to Skew Lines Point View Method Project back to other view to find the common perpendicular line. 1. Line perp. To Point view 3 -4 must be true length Line 5 -6. 2. Line 1 -2 not true length. 19

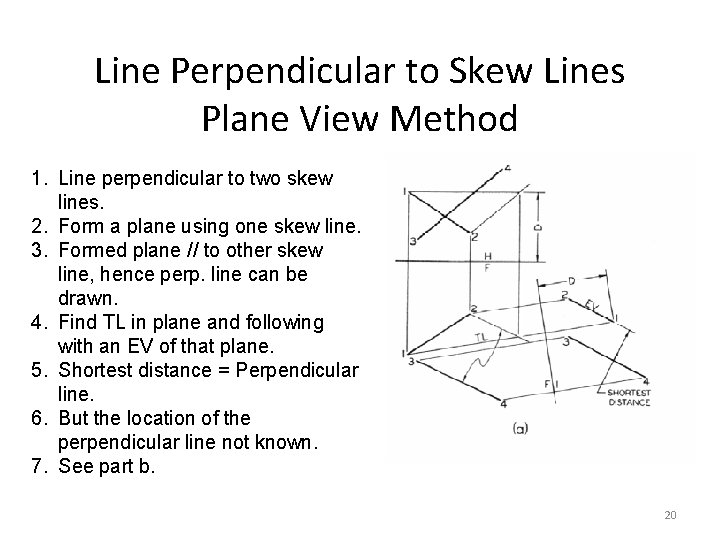
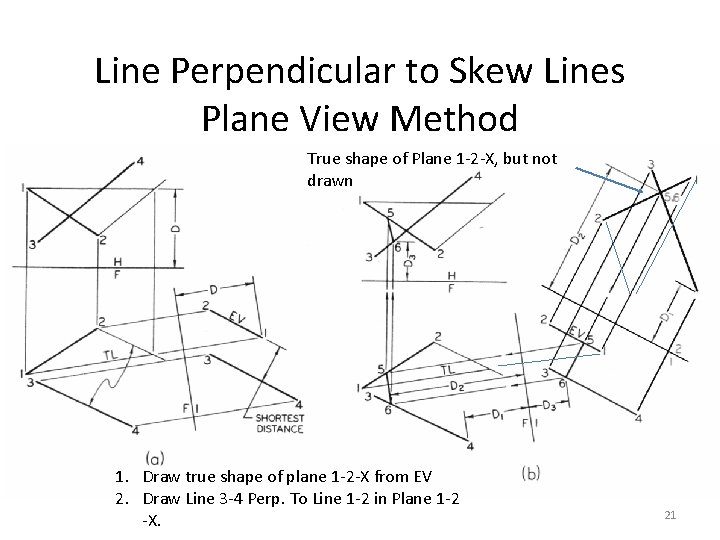
Line Perpendicular to Skew Lines Plane View Method 1. Line perpendicular to two skew lines. 2. Form a plane using one skew line. 3. Formed plane // to other skew line, hence perp. line can be drawn. 4. Find TL in plane and following with an EV of that plane. 5. Shortest distance = Perpendicular line. 6. But the location of the perpendicular line not known. 7. See part b. 20

Line Perpendicular to Skew Lines Plane View Method True shape of Plane 1 -2 -X, but not drawn 1. Draw true shape of plane 1 -2 -X from EV 2. Draw Line 3 -4 Perp. To Line 1 -2 in Plane 1 -2 -X. 21

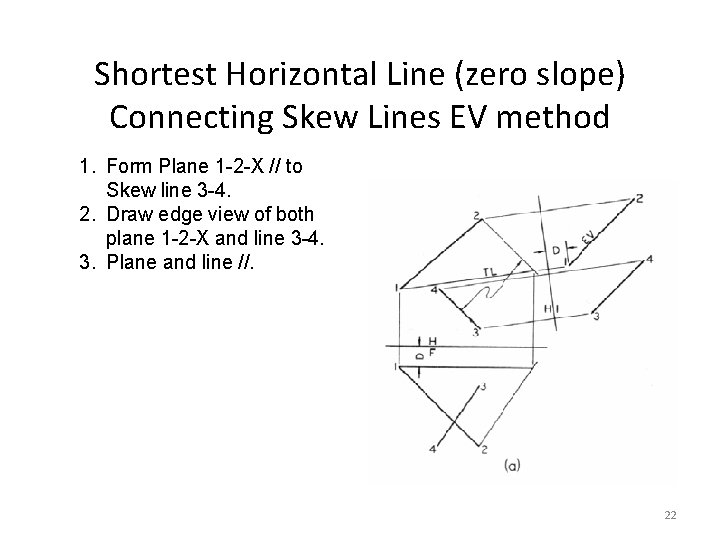
Shortest Horizontal Line (zero slope) Connecting Skew Lines EV method 1. Form Plane 1 -2 -X // to Skew line 3 -4. 2. Draw edge view of both plane 1 -2 -X and line 3 -4. 3. Plane and line //. 22

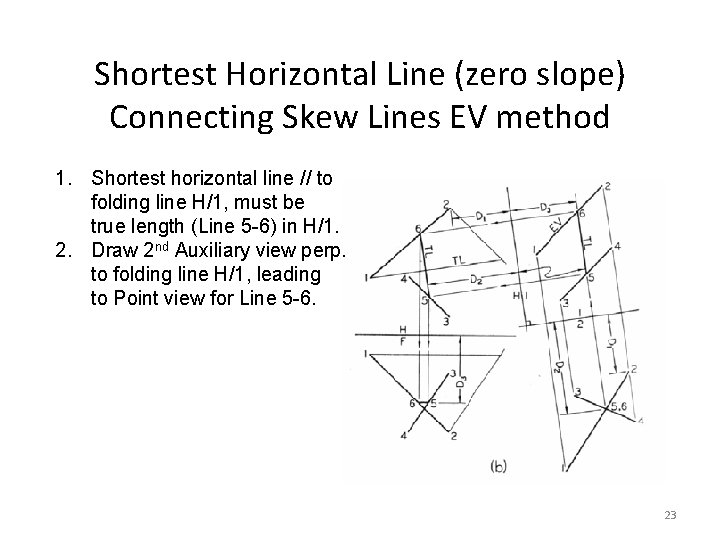
Shortest Horizontal Line (zero slope) Connecting Skew Lines EV method 1. Shortest horizontal line // to folding line H/1, must be true length (Line 5 -6) in H/1. 2. Draw 2 nd Auxiliary view perp. to folding line H/1, leading to Point view for Line 5 -6. 23

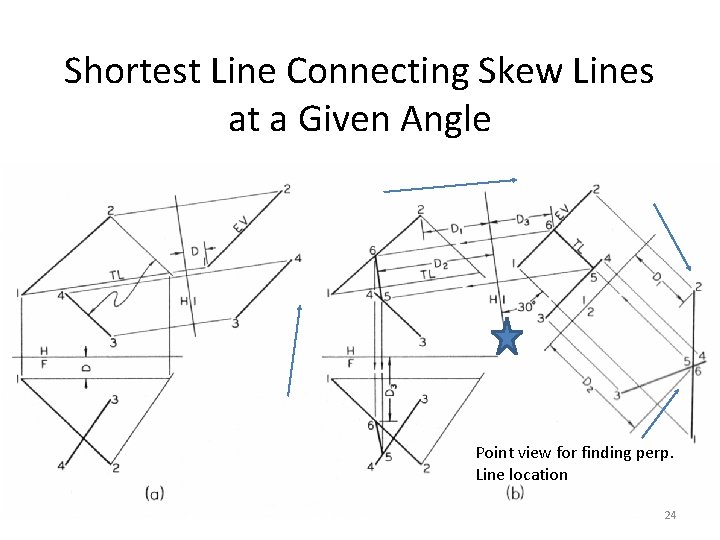
Shortest Line Connecting Skew Lines at a Given Angle Point view for finding perp. Line location 24